Servicing Hydraulic Oil
WARNING: SHUT OFF ALL ELECTRICAL POWER TO THE MACHINE
1.Remove hydraulic oil reservoir access panel.
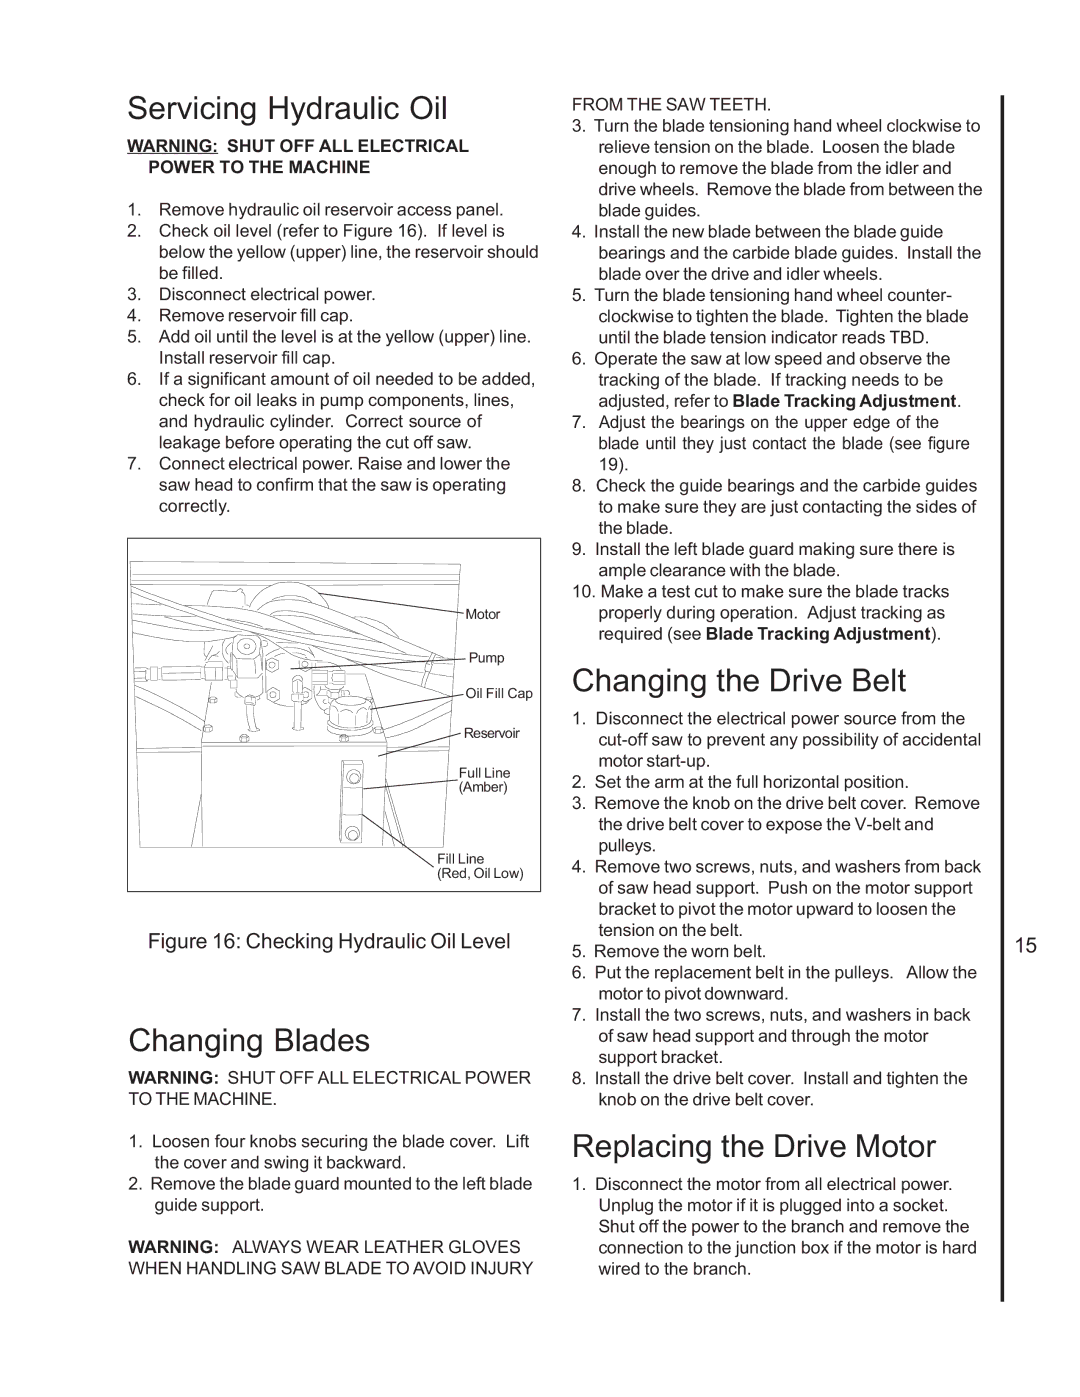
2.Check oil level (refer to Figure 16). If level is below the yellow (upper) line, the reservoir should be filled.
3.Disconnect electrical power.
4.Remove reservoir fill cap.
5.Add oil until the level is at the yellow (upper) line. Install reservoir fill cap.
6.If a significant amount of oil needed to be added, check for oil leaks in pump components, lines, and hydraulic cylinder. Correct source of leakage before operating the cut off saw.
7.Connect electrical power. Raise and lower the saw head to confirm that the saw is operating correctly.
Motor |
Pump |
Oil Fill Cap |
Reservoir |
Full Line |
(Amber) |
Fill Line |
(Red, Oil Low) |
Figure 16: Checking Hydraulic Oil Level
Changing Blades
WARNING: SHUT OFF ALL ELECTRICAL POWER TO THE MACHINE.
1.Loosen four knobs securing the blade cover. Lift the cover and swing it backward.
2.Remove the blade guard mounted to the left blade guide support.
WARNING: ALWAYS WEAR LEATHER GLOVES WHEN HANDLING SAW BLADE TO AVOID INJURY
FROM THE SAW TEETH.
3.Turn the blade tensioning hand wheel clockwise to relieve tension on the blade. Loosen the blade enough to remove the blade from the idler and drive wheels. Remove the blade from between the blade guides.
4.Install the new blade between the blade guide bearings and the carbide blade guides. Install the blade over the drive and idler wheels.
5.Turn the blade tensioning hand wheel counter- clockwise to tighten the blade. Tighten the blade until the blade tension indicator reads TBD.
6.Operate the saw at low speed and observe the tracking of the blade. If tracking needs to be adjusted, refer to Blade Tracking Adjustment.
7.Adjust the bearings on the upper edge of the blade until they just contact the blade (see figure 19).
8.Check the guide bearings and the carbide guides to make sure they are just contacting the sides of the blade.
9.Install the left blade guard making sure there is ample clearance with the blade.
10.Make a test cut to make sure the blade tracks properly during operation. Adjust tracking as required (see Blade Tracking Adjustment).
Changing the Drive Belt
1.Disconnect the electrical power source from the
2.Set the arm at the full horizontal position.
3.Remove the knob on the drive belt cover. Remove the drive belt cover to expose the
4.Remove two screws, nuts, and washers from back of saw head support. Push on the motor support bracket to pivot the motor upward to loosen the tension on the belt.
5.Remove the worn belt.
6.Put the replacement belt in the pulleys. Allow the motor to pivot downward.
7.Install the two screws, nuts, and washers in back of saw head support and through the motor support bracket.
8.Install the drive belt cover. Install and tighten the knob on the drive belt cover.
Replacing the Drive Motor
1.Disconnect the motor from all electrical power. Unplug the motor if it is plugged into a socket. Shut off the power to the branch and remove the connection to the junction box if the motor is hard wired to the branch.
15