ASSEMBLY/OPERATION
ASSEMBLY
Please read all instructions before

 !
! using this machine.
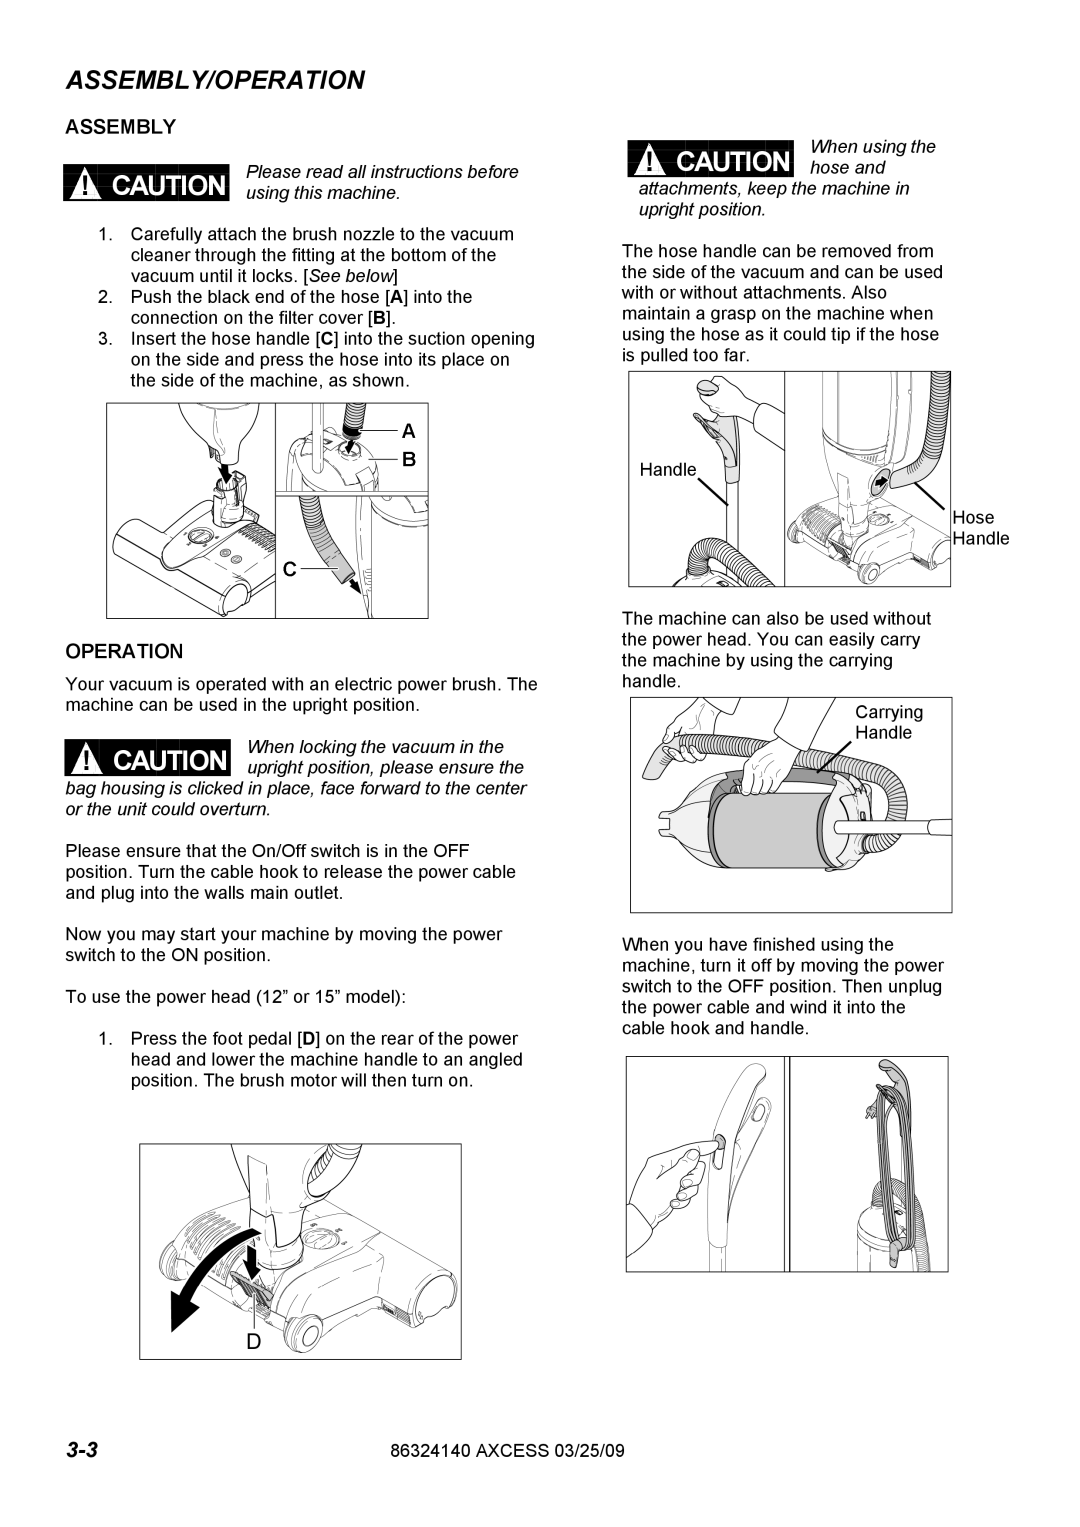
1.Carefully attach the brush nozzle to the vacuum cleaner through the fitting at the bottom of the vacuum until it locks. [See below]
2.Push the black end of the hose [A] into the connection on the filter cover [B].
3.Insert the hose handle [C] into the suction opening on the side and press the hose into its place on the side of the machine, as shown.
OPERATION
Your vacuum is operated with an electric power brush. The machine can be used in the upright position.
! | When locking the vacuum in the |
upright position, please ensure the |
bag housing is clicked in place, face forward to the center or the unit could overturn.
Please ensure that the On/Off switch is in the OFF position. Turn the cable hook to release the power cable and plug into the walls main outlet.
Now you may start your machine by moving the power switch to the ON position.
To use the power head (12” or 15” model):
1.Press the foot pedal [D] on the rear of the power head and lower the machine handle to an angled position. The brush motor will then turn on.
When using the
![]()
![]() !
!![]() hose and attachments, keep the machine in upright position.
hose and attachments, keep the machine in upright position.
The hose handle can be removed from the side of the vacuum and can be used with or without attachments. Also maintain a grasp on the machine when using the hose as it could tip if the hose is pulled too far.
Handle
Hose
Handle
The machine can also be used without the power head. You can easily carry the machine by using the carrying handle.
Carrying
Handle
When you have finished using the machine, turn it off by moving the power switch to the OFF position. Then unplug the power cable and wind it into the cable hook and handle.
86324140 AXCESS 03/25/09 |