5.Replace the battery caps, and leave them in place while charging.
6.Unplug the battery connector from the machine.
FOR SAFETY: When charging, connect the charger to the batteries before connecting the charger to the AC wall outlet. Never connect the charger to the AC wall outlet first. Hazardous sparks may result.
7.Plug the charger connector into the battery connector. Connect the charger AC plug to a wall outlet. The charger gauge should indicate that the batteries are charging.
8.When the batteries are fully charged, disconnect the charger from the AC wall outlet, then disconnect the charger from the batteries.
9.Connect the batteries to the machine connector.
10.Check the electrolyte level. It should be up to the indicator ring. If necessary, add distilled water.
11.Lower the battery cover.
Machines equipped with Onboard Charger:
1.Connect charger’s AC power cord to AC mains. The charger’s YELLOW “AC” LED will light.
MAINTENANCE
CHANGING BATTERIES
Stop the machine in a clean area next to the charger. Turn off machine.
FOR SAFETY: Before leaving or servicing the machine; stop on level surface, turn off machine and remove key.
1.Raise the battery cover.
2.Disconnect battery pack from machine.
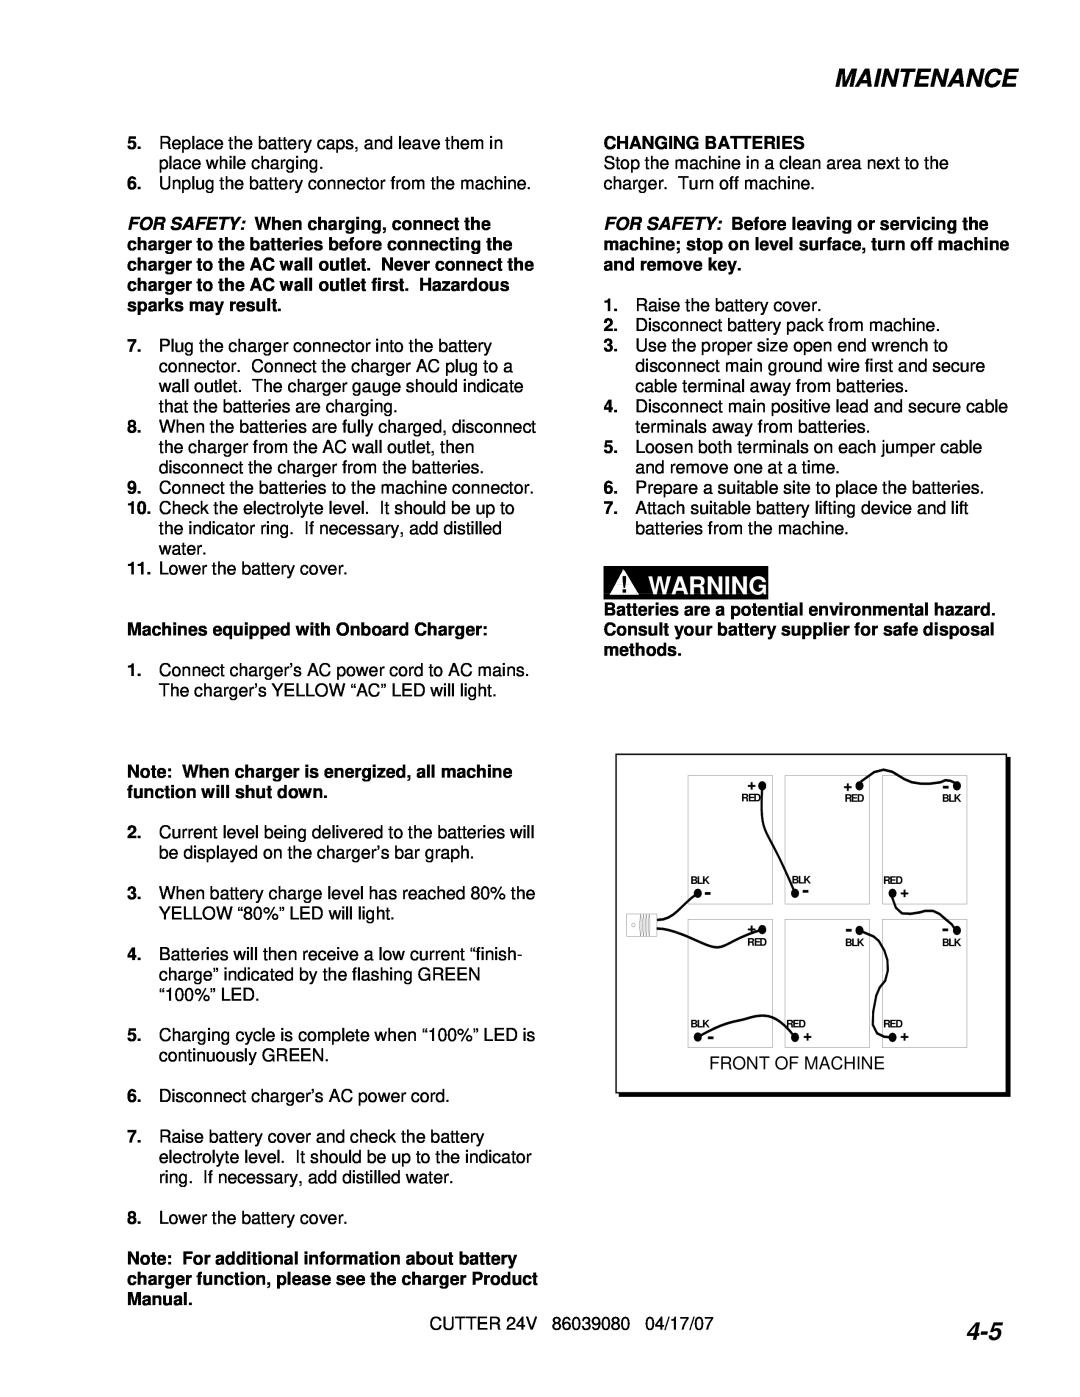
3.Use the proper size open end wrench to disconnect main ground wire first and secure cable terminal away from batteries.
4.Disconnect main positive lead and secure cable terminals away from batteries.
5.Loosen both terminals on each jumper cable and remove one at a time.
6.Prepare a suitable site to place the batteries.
7.Attach suitable battery lifting device and lift batteries from the machine.
![]()
![]() !
!![]()
![]()
Batteries are a potential environmental hazard. Consult your battery supplier for safe disposal methods.
Note: When charger is energized, all machine function will shut down.
2.Current level being delivered to the batteries will be displayed on the charger’s bar graph.
3.When battery charge level has reached 80% the YELLOW “80%” LED will light.
4.Batteries will then receive a low current “finish- charge” indicated by the flashing GREEN “100%” LED.
5.Charging cycle is complete when “100%” LED is continuously GREEN.
6.Disconnect charger’s AC power cord.
+ | + | - |
RED | RED | BLK |
BLK | BLK | RED |
- | - | + |
+ | - | - |
RED | BLK | BLK |
BLK- | RED+ | RED+ |
FRONT OF MACHINE | ||
7. Raise battery cover and check the battery electrolyte level. It should be up to the indicator ring. If necessary, add distilled water.
8. Lower the battery cover.
Note: For additional information about battery charger function, please see the charger Product Manual.
CUTTER 24V 86039080 04/17/07 | |
|