
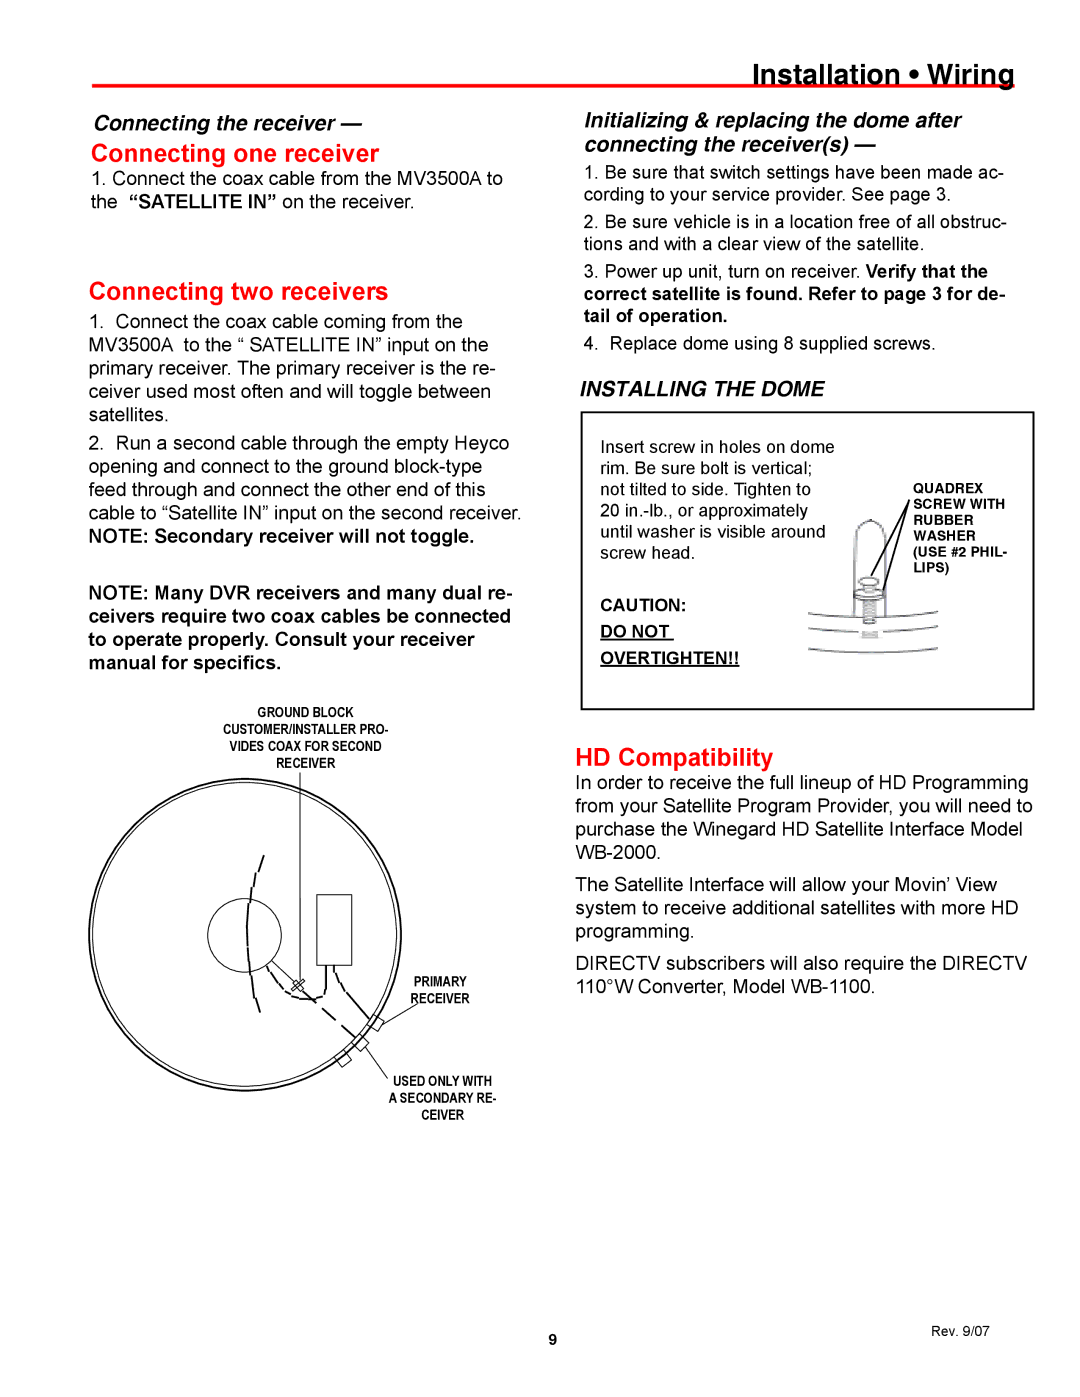
MV3535A, MV3500A specifications
The Winegard MV3535A and MV3500A are high-performance outdoor HDTV antennas designed to provide users with exceptional reception and signal quality, making them ideal choices for both urban and rural installations. These antennas are engineered to capture over-the-air digital television signals, allowing users to access local channels in HD without a cable subscription.One of the standout features of the MV3535A is its advanced multi-directional reception capability, which enables it to receive signals from multiple directions. This is particularly beneficial for users located in areas with broadcasting towers situated in various locations. The MV3535A’s design incorporates a combination of elements, including a powerful preamplifier that amplifies weak signals, ensuring clearer picture quality even in challenging reception environments.
Similarly, the MV3500A also boasts a multi-directional design along with a robust construction that withstands various weather conditions. This model is built with a die-cast aluminum housing and UV-resistant materials to ensure durability against sun exposure, rain, and snow. Both models come equipped with low-noise amplifiers, minimizing interference and enhancing signal clarity, which is essential for receiving HD channels.
In terms of installation, the Winegard MV3535A and MV3500A are designed for user convenience. They come with a mounting kit that makes it easy to attach the antenna to roofs and poles, providing flexibility in installation height for optimal signal reception. The antennas are lightweight yet sturdy, making them manageable for DIY enthusiasts.
One of the key technologies integrated into both the MV3535A and MV3500A is the patented Wing and Reflector design. This innovative feature maximizes signal capture by focusing on the broadcast signals while reducing interference from other sources, which can be particularly beneficial in areas with overlapping signals.
Overall, the Winegard MV3535A and MV3500A are excellent choices for anyone seeking reliable over-the-air television reception. Their advanced technologies, durable construction, and user-friendly installation make them valuable additions for cord-cutters looking to enhance their viewing experience with high-quality HD channels. Whether enjoying local news, sports, or favorite shows, these antennas deliver impressive performance suited for diverse environments.