RMFLDM4, RM-DM46, RMDM04, RM-DM00 specifications
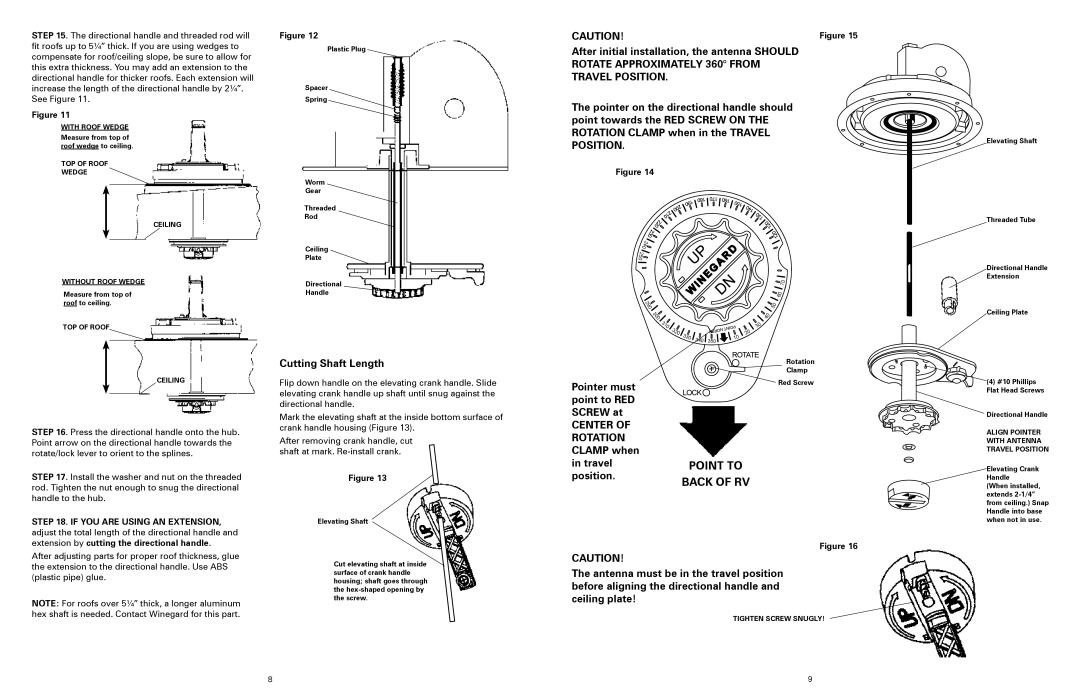
Winegard is a well-known manufacturer of advanced antenna technology, and its products are designed to provide high-quality reception for broadcast television. Among its lineup, the Winegard RM-DM00, RMFLDM4, RMDM04, and RM-DM46 antennas stand out for their exceptional features and efficiency.The Winegard RM-DM00 is a compact, multi-directional antenna that is engineered for optimal performance in urban areas with significant electronic interference. Its unique design allows it to capture over-the-air signals from multiple directions, ensuring a robust signal and exceptional picture quality. With a sleek and discreet profile, the RM-DM00 can be easily mounted on rooftops or exterior walls, offering versatility in installation options.
Next in line, the RMFLDM4 is a flat antenna known for its ultra-thin design and no-obstruction capabilities. This antenna employs advanced filtering technologies that minimize noise and enhance signal clarity. Its sleek aesthetic makes it an ideal choice for modern interiors, allowing homeowners to place it in living rooms or offices without disrupting the decor. The RMFLDM4 is engineered to pick up both VHF and UHF channels, making it a versatile choice for users in various regions.
The RMDM04 is a durable and weather-resistant model designed for outdoor usage. This antenna is perfect for those living in rural areas, where signal ranges can be challenging. Equipped with advanced amplification technology, the RMDM04 can extend the range of signal reception enough to capture long-distance broadcasts, ensuring viewers enjoy uninterrupted access to their favorite channels, even in remote locations.
Lastly, the RM-DM46 is designed for superior performance, boasting dual UHF/VHF reception capabilities. This model includes a built-in signal amplifier that boosts weak signals while reducing noise for the ultimate viewing experience. The RM-DM46 is versatile and easy to install, compatible with most devices, making it a favorite among cord-cutters who wish to access free, high-quality television content.
Overall, each of these Winegard antennas—RM-DM00, RMFLDM4, RMDM04, and RM-DM46—offers unique features and technologies designed to maximize signal reception while ensuring reliability and ease of use. Whether for urban settings or rural landscapes, Winegard's antennas effectively enhance viewers' experiences, allowing them to enjoy a diverse range of channels with excellent picture quality. With these options, users can find the perfect match for their television needs, underscoring Winegard's commitment to innovation and performance in the antenna market.

