Installation
Attaching the Reflector to the Antenna
1.Starting from the right side, slide the clip attached to the reflector diagonally into the notch at the back of the antenna. (See Fig. 4, 5.)
2.Once the clip is pushed in, slide it to the side so that it forms a 90 degree angle to the antenna’s edge. (See Fig. 6.)
3.Repeat steps 1 and 2 for all four clips.
Installation
Attaching the Antenna with reflector to the Base
1.Route the 6’ mini coax cable through the base, and screw it securely to the antenna.
2.Slide the antenna with reflector onto the base.
3.Using a screwdriver, slightly tighten the two screws, to secure the antenna to the base. (See Fig. 7.)
Fig. 4 |
Fig. 5 |
Fig. 7 |
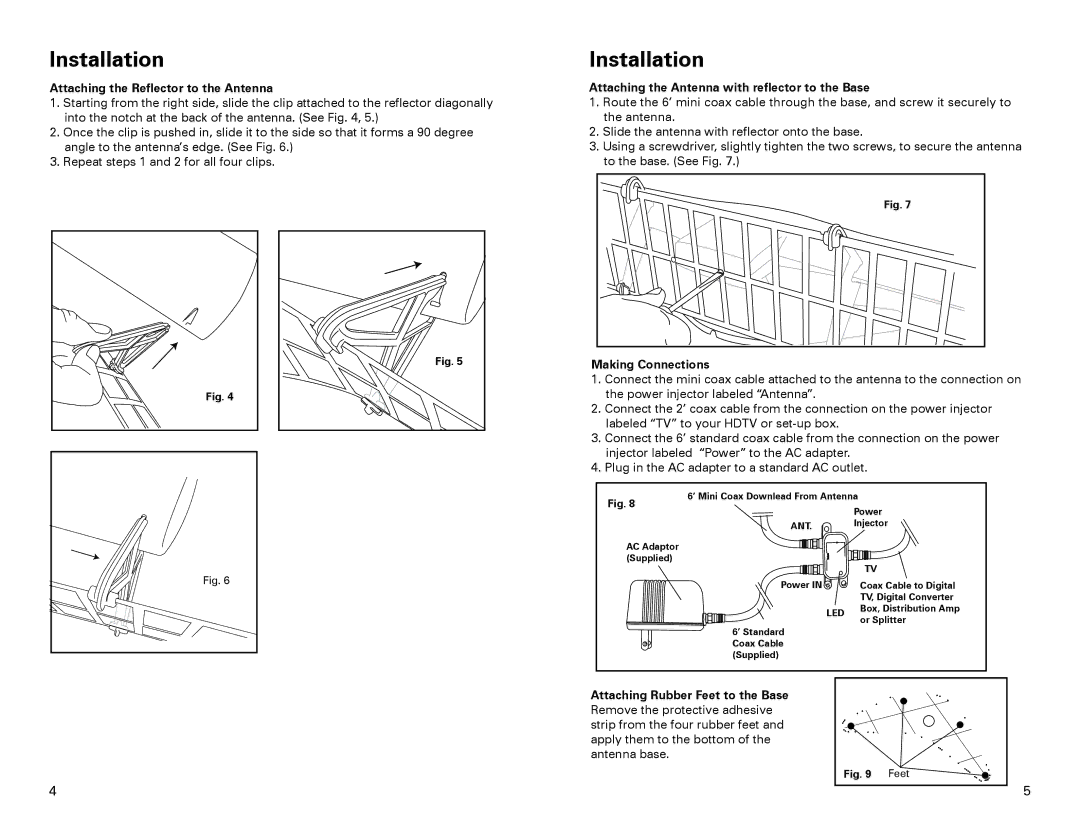
Making Connections
1.Connect the mini coax cable attached to the antenna to the connection on the power injector labeled “Antenna”.
2.Connect the 2’ coax cable from the connection on the power injector labeled “TV” to your HDTV or
3.Connect the 6’ standard coax cable from the connection on the power injector labeled “Power” to the AC adapter.
4.Plug in the AC adapter to a standard AC outlet.
Fig. 8
AC Adaptor (Supplied)
6’ Mini Coax Downlead From Antenna
Power
ANT. ![]() Injector
Injector
|
| TV |
Power IN |
| Coax Cable to Digital |
|
| TV, Digital Converter |
| LED | Box, Distribution Amp |
| or Splitter | |
|
|
6’ Standard Coax Cable (Supplied)
Attaching Rubber Feet to the Base Remove the protective adhesive strip from the four rubber feet and apply them to the bottom of the antenna base.
Fig. 9 | Feet |
4
5 |