WINEGARD®
Installation Instructions
Models DS-1111, VM-1111
INSTALLATION OF THIS MOUNT NEAR POWER LINES IS DANGEROUS. FOR YOUR
SAFETY, FOLLOW THE INSTALLATION INSTRUCTIONS.
NOTE: THIS MOUNT IS NOT DESIGNED FOR
APPLICATIONS ON A VERTICAL SURFACE
SUCH AS WALLS, POLES, ETC.
CAUTION: LIMIT SIZE OF TV ANTENNA TO
LENGTH OF 40” OR LESS.
STEP 1. Assemble satellite dish and mount per manufacturers instructions. Do not make fine tun-
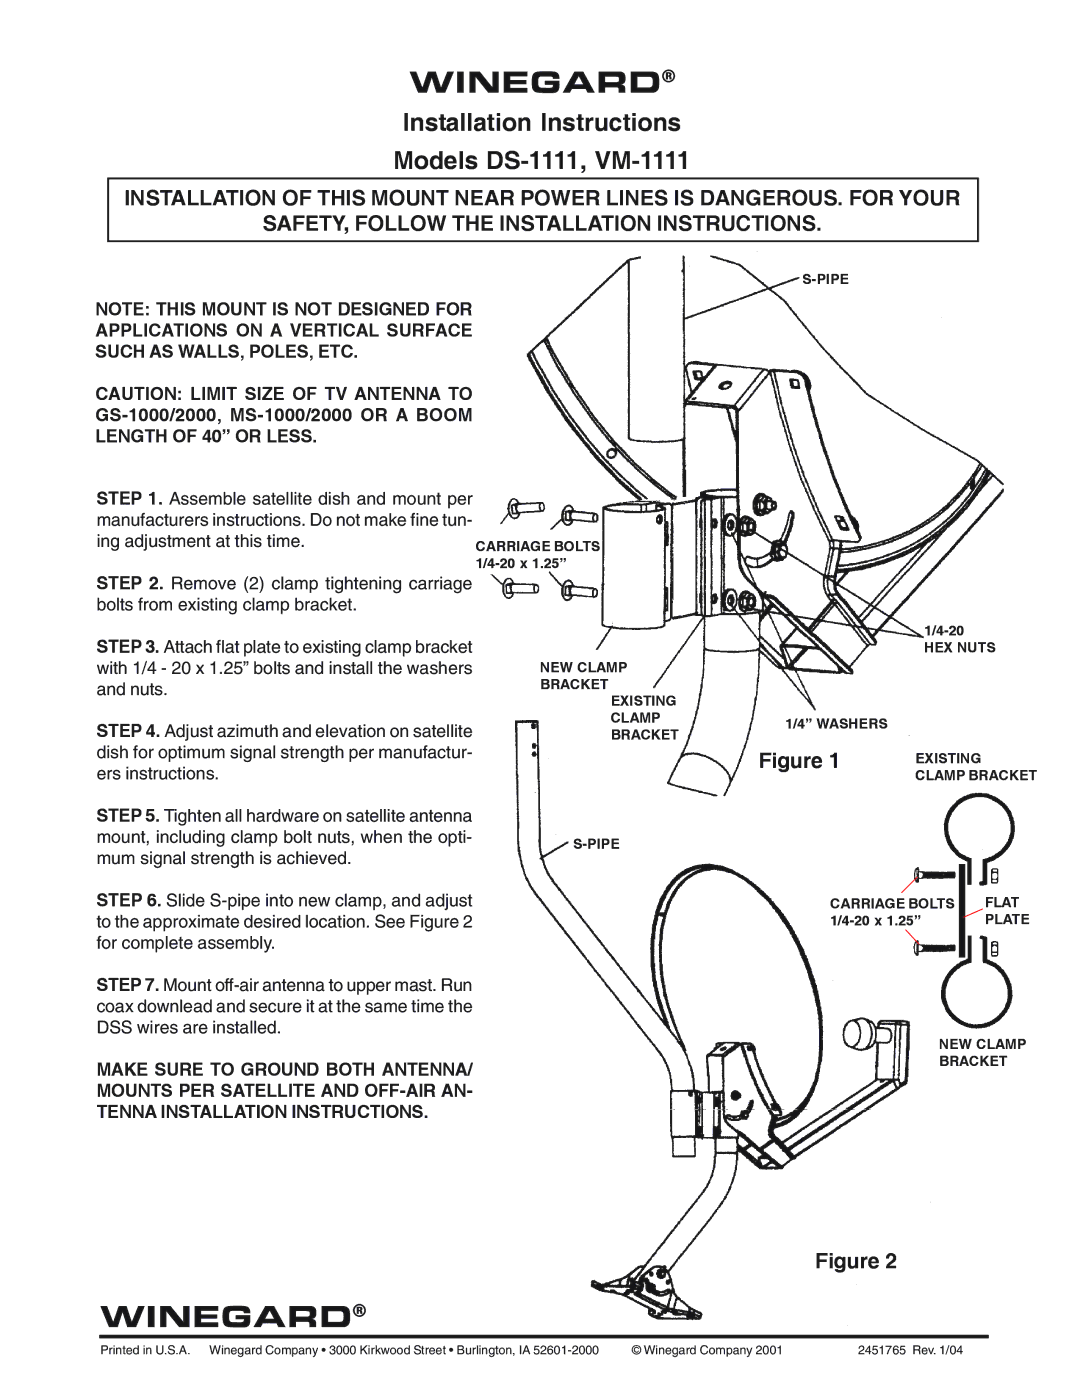
ing adjustment at this time.CARRIAGE BOLTS
STEP 2. Remove (2) clamp tightening carriage bolts from existing clamp bracket.
STEP 3. Attach flat plate to existing clamp bracket with 1/4 - 20 x 1.25” bolts and install the washers and nuts.
STEP 4. Adjust azimuth and elevation on satellite dish for optimum signal strength per manufactur- ers instructions.
STEP 5. Tighten all hardware on satellite antenna mount, including clamp bolt nuts, when the opti- mum signal strength is achieved.
STEP 6. Slide
STEP 7. Mount
MAKE SURE TO GROUND BOTH ANTENNA/ MOUNTS PER SATELLITE AND
NEW CLAMP BRACKET
EXISTING CLAMP BRACKET
| |
| HEX NUTS |
1/4” WASHERS |
|
Figure 1 | EXISTING |
| CLAMP BRACKET |
CARRIAGE BOLTS | FLAT |
PLATE |
NEW CLAMP
BRACKET
Figure 2
WINEGARD®
Printed in U.S.A. Winegard Company • 3000 Kirkwood Street • Burlington, IA | © Winegard Company 2001 | 2451765 Rev. 1/04 |