INSTALLATION I N S T R U C T I O N S
WALL HOOD I N S TA L L AT I O N
E L E C T R I C A L R E Q U I R E M E N T S
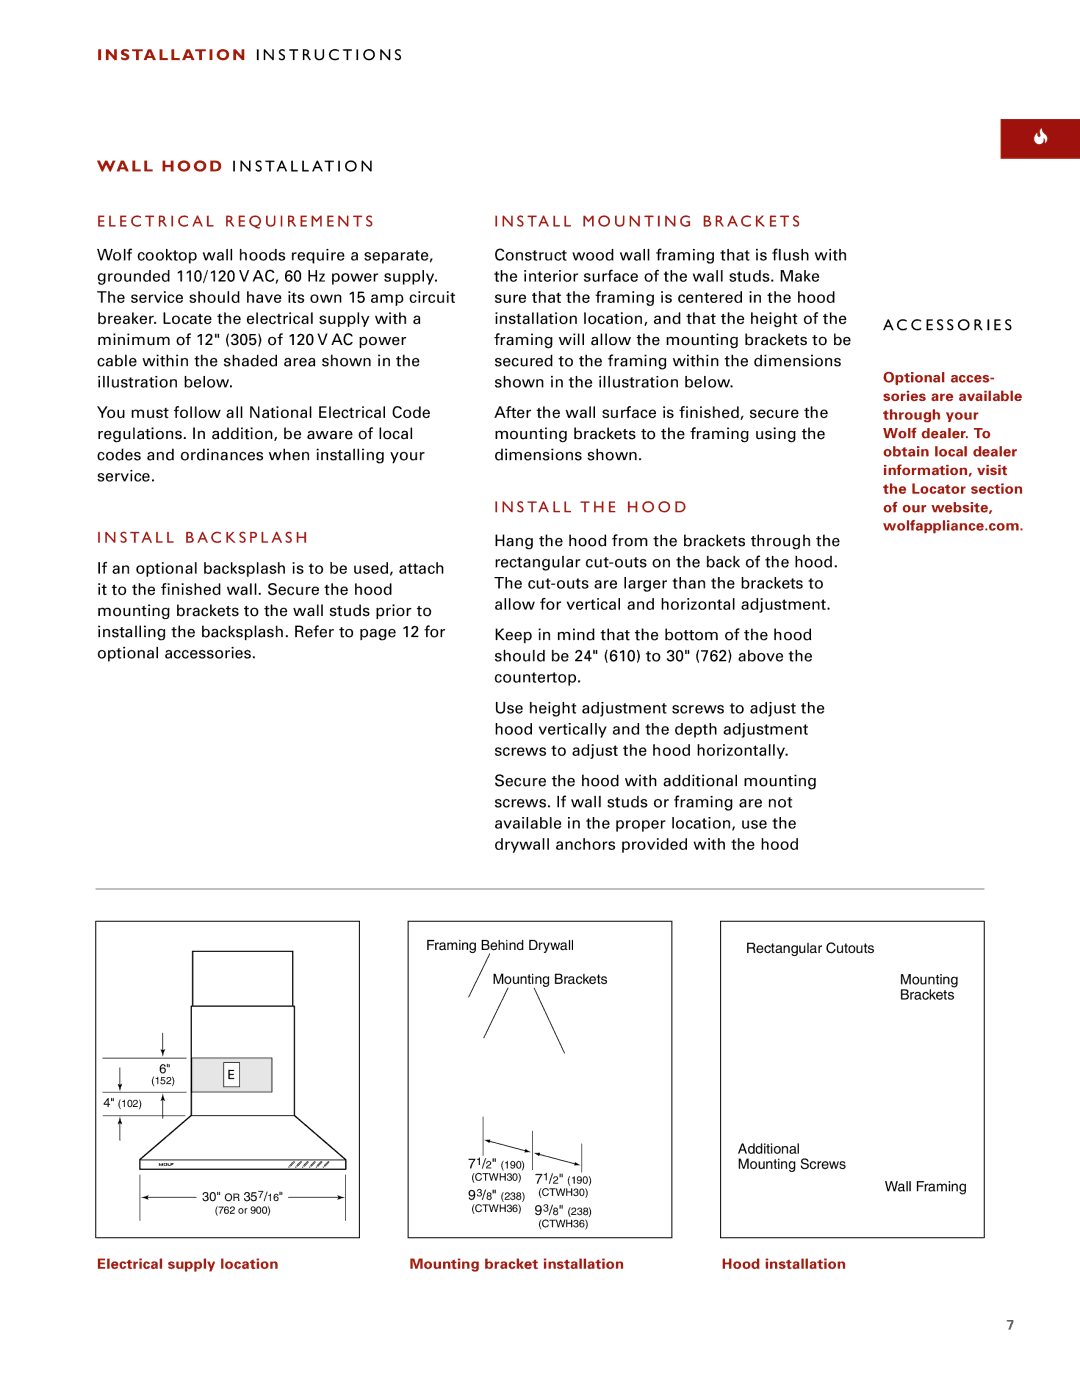
Wolf cooktop wall hoods require a separate, grounded 110/120 V AC, 60 Hz power supply. The service should have its own 15 amp circuit breaker. Locate the electrical supply with a minimum of 12" (305) of 120 V AC power cable within the shaded area shown in the illustration below.
You must follow all National Electrical Code regulations. In addition, be aware of local codes and ordinances when installing your service.
I N S TA L L B A C K S P L A S H
If an optional backsplash is to be used, attach it to the finished wall. Secure the hood mounting brackets to the wall studs prior to installing the backsplash. Refer to page 12 for optional accessories.
I N S TA L L M O U N T I N G B R A C K E T S
Construct wood wall framing that is flush with the interior surface of the wall studs. Make sure that the framing is centered in the hood installation location, and that the height of the framing will allow the mounting brackets to be secured to the framing within the dimensions shown in the illustration below.
After the wall surface is finished, secure the mounting brackets to the framing using the dimensions shown.
I N S TA L L T H E H O O D
Hang the hood from the brackets through the rectangular
Keep in mind that the bottom of the hood should be 24" (610) to 30" (762) above the countertop.
Use height adjustment screws to adjust the hood vertically and the depth adjustment screws to adjust the hood horizontally.
Secure the hood with additional mounting screws. If wall studs or framing are not available in the proper location, use the drywall anchors provided with the hood
A C C E S S O R I E S
Optional acces- sories are available through your Wolf dealer. To obtain local dealer information, visit the Locator section of our website, wolfappliance.com.
6" | E | |
(152) | ||
| ||
4" (102) |
| |
| 30" OR 357/16" | |
| (762 or 900) |
Electrical supply location
Framing Behind Drywall
Mounting Brackets
71/2" (190) ![]()
![]() (CTWH30) 71/2" (190) 93/8" (238) (CTWH30) (CTWH36) 93/8" (238)
(CTWH30) 71/2" (190) 93/8" (238) (CTWH30) (CTWH36) 93/8" (238)
(CTWH36)
Mounting bracket installation
Rectangular Cutouts
Mounting
Brackets
Additional
Mounting Screws
Wall Framing
Hood installation
7