ELECTRICAL CONNECTIONS
WARNING: ELECTRICAL AND GROUNDING CONNECTIONS MUST COMPLY WITH THE APPLICABLE PORTIONS OF THE NATIONAL ELECTRICAL CODE AND/OR OTHER LOCAL ELECTRICAL CODES.
WARNING: DISCONNECT ELECTRICAL POWER SUPPLY AND PLACE A TAG AT THE DISCONNECT SWITCH TO INDICATE THAT YOU ARE WORKING ON THE CIRCUIT.
Remove the wiring compartment cover on the front of the oven. Remove the appropriate knockout on the bottom of the oven and attach the power supply conduit to the bottom of the oven.
Comply with the wiring diagram (located inside the right side panel) when making connections to the electrical supply lines.
Replace the wiring compartment cover and turn on the power supply.
ELECTRICAL DATA
|
|
|
|
|
| 480V |
|
|
|
| NOMINAL AMPERES PER LINE WIRE |
|
|
| ||||||||
| TOTAL |
|
|
|
|
|
|
|
| |||||||||||||
| KW | KW PER PHASE | KW PER PHASE |
| 208V |
|
| 240V |
|
| 480V |
| 208V | 240V | 480V | |||||||
|
|
| L1 | L2 | L3 | L1 | L2 | L3 | L1 | L2 | L3 | |||||||||||
|
|
|
|
|
| |||||||||||||||||
Single Oven | 12.5 |
| 4 |
| 4 |
| 4.5 | 4 | 4 | 4.5 | 35 | 33 | 35 | 33 | 29 | 33 | 14.4 | 15.3 | 15.3 | 60 | 52 | 26 |
Stacked Oven | 25 |
| 8 |
| 8 |
| 9 | 8 | 8 | 9 | 70 | 66 | 70 | 66 | 58 | 66 | 28.8 | 30.6 | 30.6 | 120 | 104 | 52 |
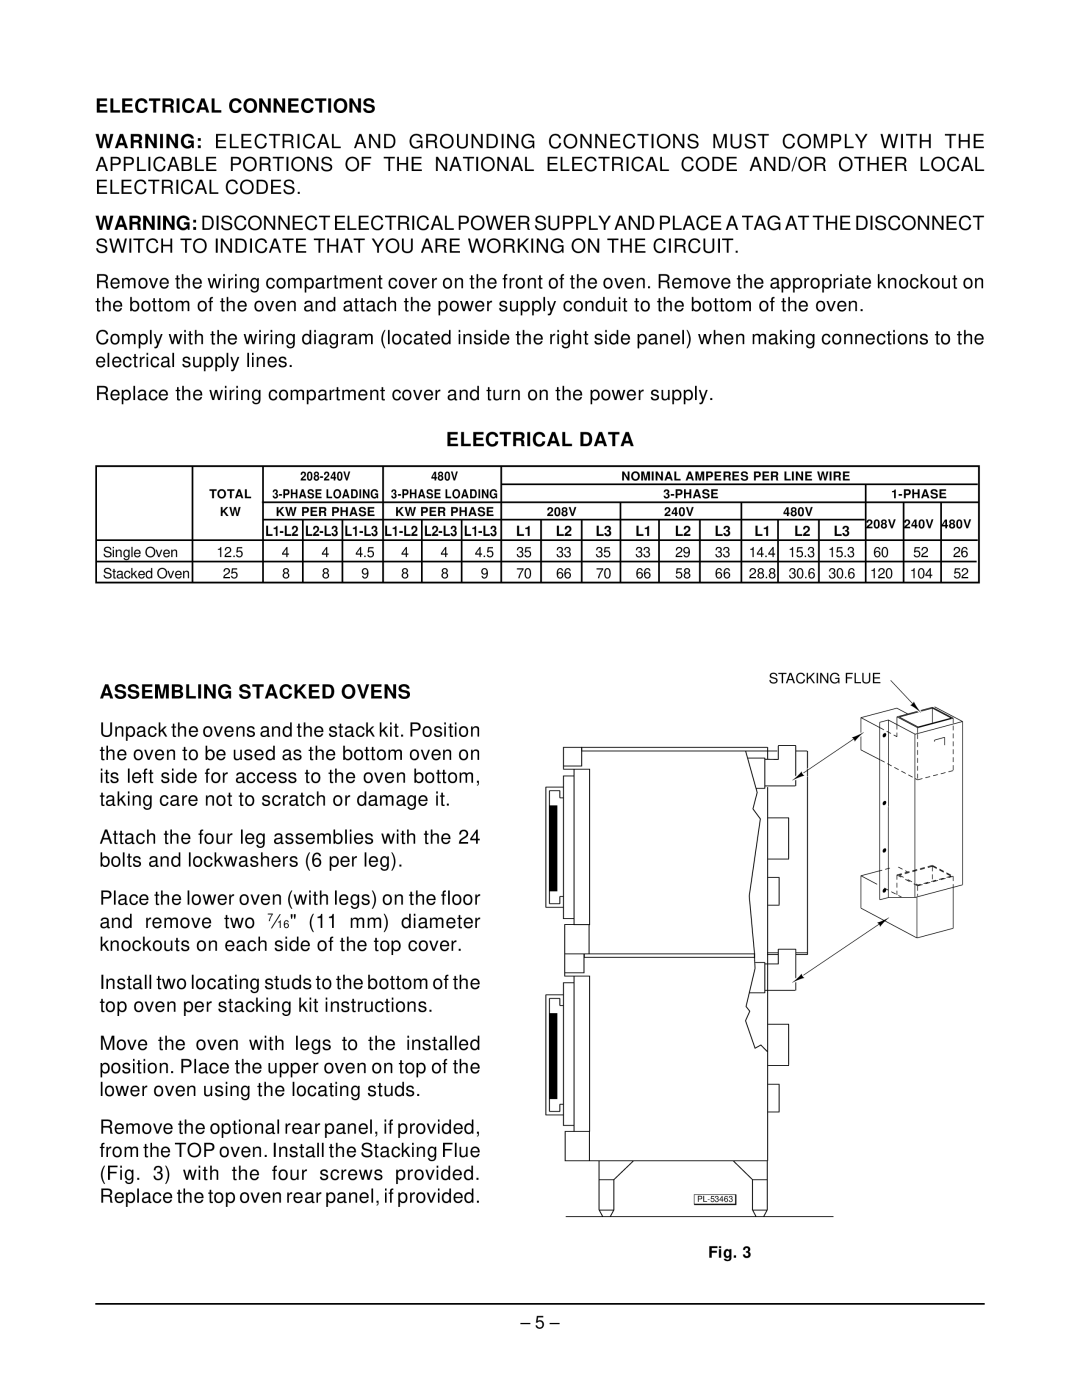
STACKING FLUE
ASSEMBLING STACKED OVENS |
|
Unpack the ovens and the stack kit. Position |
|
the oven to be used as the bottom oven on |
|
its left side for access to the oven bottom, |
|
taking care not to scratch or damage it. |
|
Attach the four leg assemblies with the 24 |
|
bolts and lockwashers (6 per leg). |
|
Place the lower oven (with legs) on the floor |
|
and remove two 7⁄16" (11 mm) diameter |
|
knockouts on each side of the top cover. |
|
Install two locating studs to the bottom of the |
|
top oven per stacking kit instructions. |
|
Move the oven with legs to the installed |
|
position. Place the upper oven on top of the |
|
lower oven using the locating studs. |
|
Remove the optional rear panel, if provided, |
|
from the TOP oven. Install the Stacking Flue |
|
(Fig. 3) with the four screws provided. |
|
Replace the top oven rear panel, if provided. |
Fig. 3
– 5 –