HSN_TriGrillManual0050 9/12/08 12:10 PM Page 9
Grilling in FLOAT Position
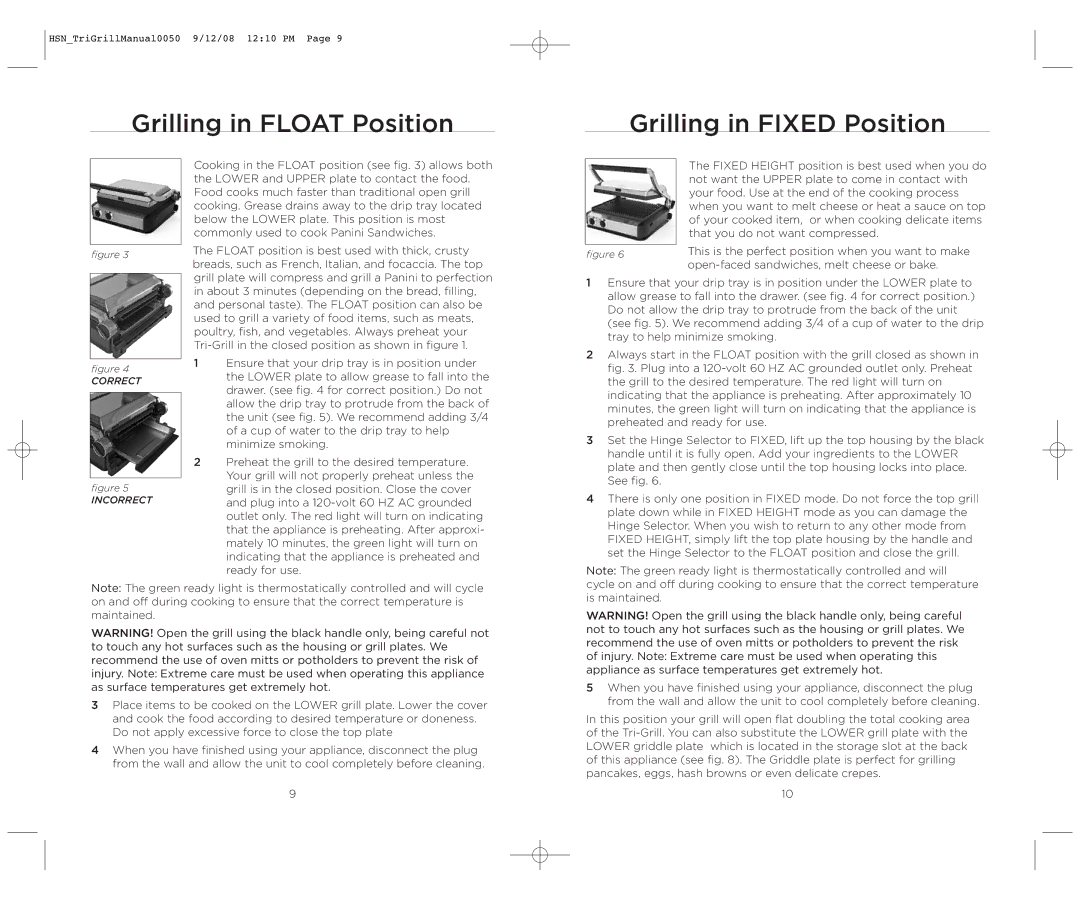
Grilling in FIXED Position
figure 3
figure 4
CORRECT
figure 5
INCORRECT
Cooking in the FLOAT position (see fig. 3) allows both the LOWER and UPPER plate to contact the food. Food cooks much faster than traditional open grill cooking. Grease drains away to the drip tray located below the LOWER plate. This position is most commonly used to cook Panini Sandwiches.
The FLOAT position is best used with thick, crusty breads, such as French, Italian, and focaccia. The top grill plate will compress and grill a Panini to perfection in about 3 minutes (depending on the bread, filling, and personal taste). The FLOAT position can also be used to grill a variety of food items, such as meats, poultry, fish, and vegetables. Always preheat your
1Ensure that your drip tray is in position under the LOWER plate to allow grease to fall into the drawer. (see fig. 4 for correct position.) Do not allow the drip tray to protrude from the back of the unit (see fig. 5). We recommend adding 3/4 of a cup of water to the drip tray to help minimize smoking.
2Preheat the grill to the desired temperature. Your grill will not properly preheat unless the grill is in the closed position. Close the cover and plug into a
| The FIXED HEIGHT position is best used when you do | |
| not want the UPPER plate to come in contact with | |
| your food. Use at the end of the cooking process | |
| when you want to melt cheese or heat a sauce on top | |
| of your cooked item, or when cooking delicate items | |
| that you do not want compressed. | |
| This is the perfect position when you want to make | |
figure 6 | ||
|
1Ensure that your drip tray is in position under the LOWER plate to allow grease to fall into the drawer. (see fig. 4 for correct position.) Do not allow the drip tray to protrude from the back of the unit (see fig. 5). We recommend adding 3/4 of a cup of water to the drip tray to help minimize smoking.
2Always start in the FLOAT position with the grill closed as shown in fig. 3. Plug into a
3Set the Hinge Selector to FIXED, lift up the top housing by the black handle until it is fully open. Add your ingredients to the LOWER plate and then gently close until the top housing locks into place. See fig. 6.
4There is only one position in FIXED mode. Do not force the top grill plate down while in FIXED HEIGHT mode as you can damage the Hinge Selector. When you wish to return to any other mode from FIXED HEIGHT, simply lift the top plate housing by the handle and set the Hinge Selector to the FLOAT position and close the grill.
Note: The green ready light is thermostatically controlled and will
Note: The green ready light is thermostatically controlled and will cycle on and off during cooking to ensure that the correct temperature is maintained.
WARNING! Open the grill using the black handle only, being careful not to touch any hot surfaces such as the housing or grill plates. We recommend the use of oven mitts or potholders to prevent the risk of injury. Note: Extreme care must be used when operating this appliance as surface temperatures get extremely hot.
3Place items to be cooked on the LOWER grill plate. Lower the cover and cook the food according to desired temperature or doneness. Do not apply excessive force to close the top plate
4When you have finished using your appliance, disconnect the plug from the wall and allow the unit to cool completely before cleaning.
9
cycle on and off during cooking to ensure that the correct temperature is maintained.
WARNING! Open the grill using the black handle only, being careful not to touch any hot surfaces such as the housing or grill plates. We recommend the use of oven mitts or potholders to prevent the risk of injury. Note: Extreme care must be used when operating this appliance as surface temperatures get extremely hot.
5When you have finished using your appliance, disconnect the plug from the wall and allow the unit to cool completely before cleaning.
In this position your grill will open flat doubling the total cooking area of the
10