VACUUM INSTALLATION
Remove Discharge Chute
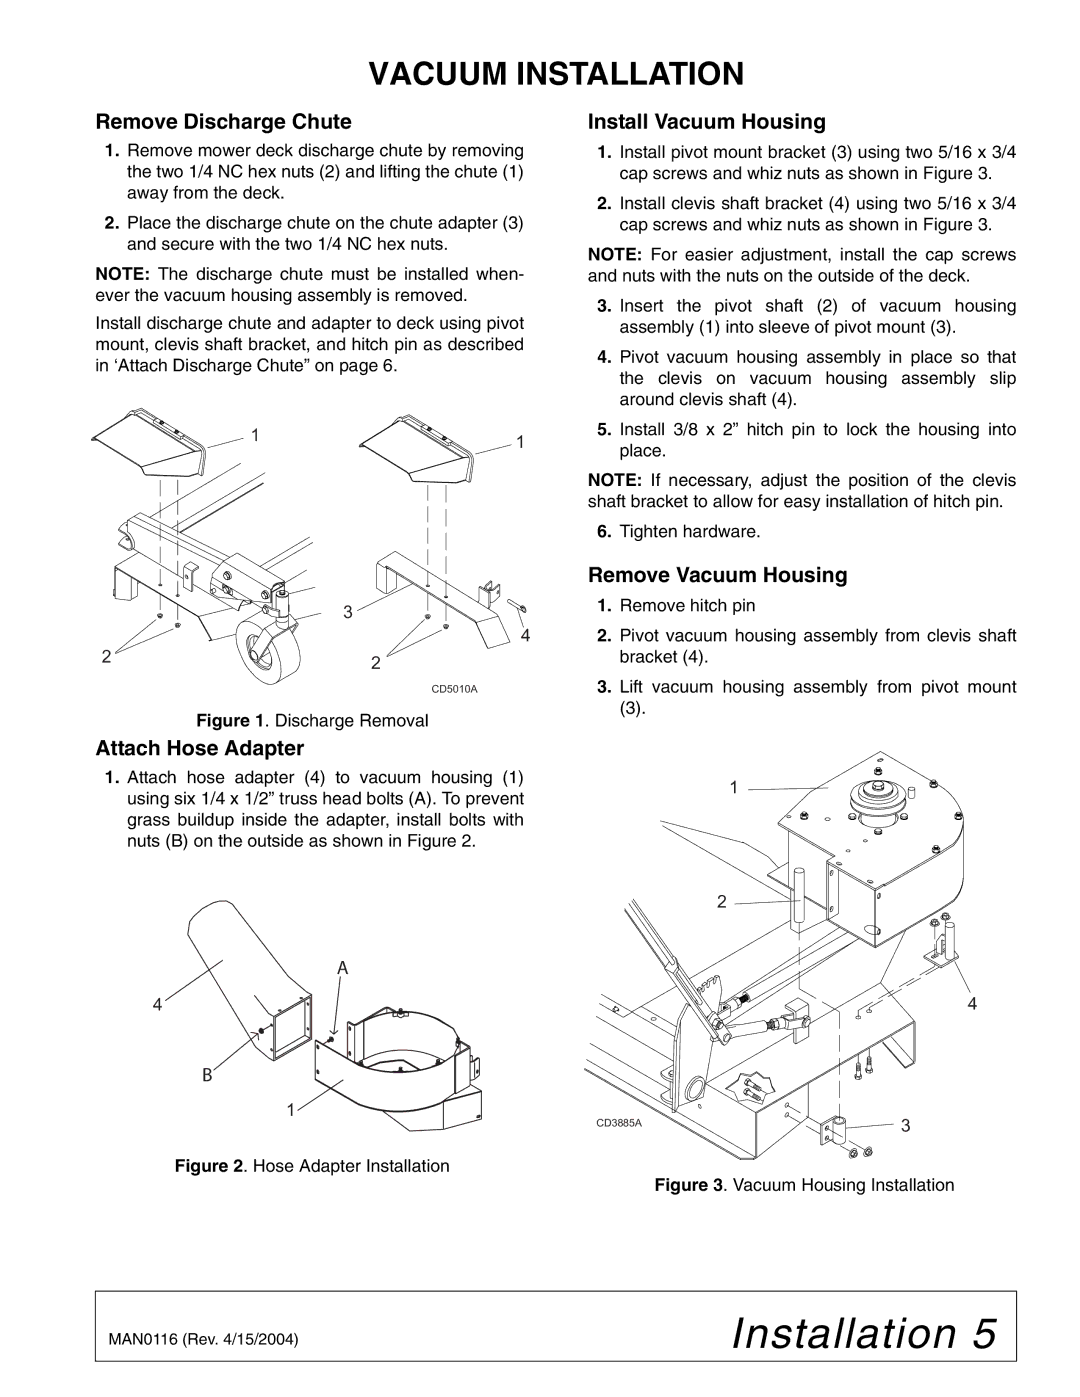
1.Remove mower deck discharge chute by removing the two 1/4 NC hex nuts (2) and lifting the chute (1) away from the deck.
2.Place the discharge chute on the chute adapter (3) and secure with the two 1/4 NC hex nuts.
NOTE: The discharge chute must be installed when- ever the vacuum housing assembly is removed.
Install discharge chute and adapter to deck using pivot mount, clevis shaft bracket, and hitch pin as described in ‘Attach Discharge Chute” on page 6.
1 | 1 |
|
3
4
2 | 2 |
|
CD5010A
Figure 1. Discharge Removal
Attach Hose Adapter
1.Attach hose adapter (4) to vacuum housing (1) using six 1/4 x 1/2” truss head bolts (A). To prevent grass buildup inside the adapter, install bolts with nuts (B) on the outside as shown in Figure 2.
Install Vacuum Housing
1.Install pivot mount bracket (3) using two 5/16 x 3/4 cap screws and whiz nuts as shown in Figure 3.
2.Install clevis shaft bracket (4) using two 5/16 x 3/4 cap screws and whiz nuts as shown in Figure 3.
NOTE: For easier adjustment, install the cap screws and nuts with the nuts on the outside of the deck.
3.Insert the pivot shaft (2) of vacuum housing assembly (1) into sleeve of pivot mount (3).
4.Pivot vacuum housing assembly in place so that the clevis on vacuum housing assembly slip around clevis shaft (4).
5.Install 3/8 x 2” hitch pin to lock the housing into place.
NOTE: If necessary, adjust the position of the clevis shaft bracket to allow for easy installation of hitch pin.
6.Tighten hardware.
Remove Vacuum Housing
1.Remove hitch pin
2.Pivot vacuum housing assembly from clevis shaft bracket (4).
3.Lift vacuum housing assembly from pivot mount
(3).
1
2
A
4 | 4 |
B
1
CD3885A | 3 |
|
Figure 2. Hose Adapter Installation
Figure 3. Vacuum Housing Installation
MAN0116 (Rev. 4/15/2004) | Installation 5 |
| |
|
|
