DP5
Figure 6. Parking Stands Lowered into Storage
Position
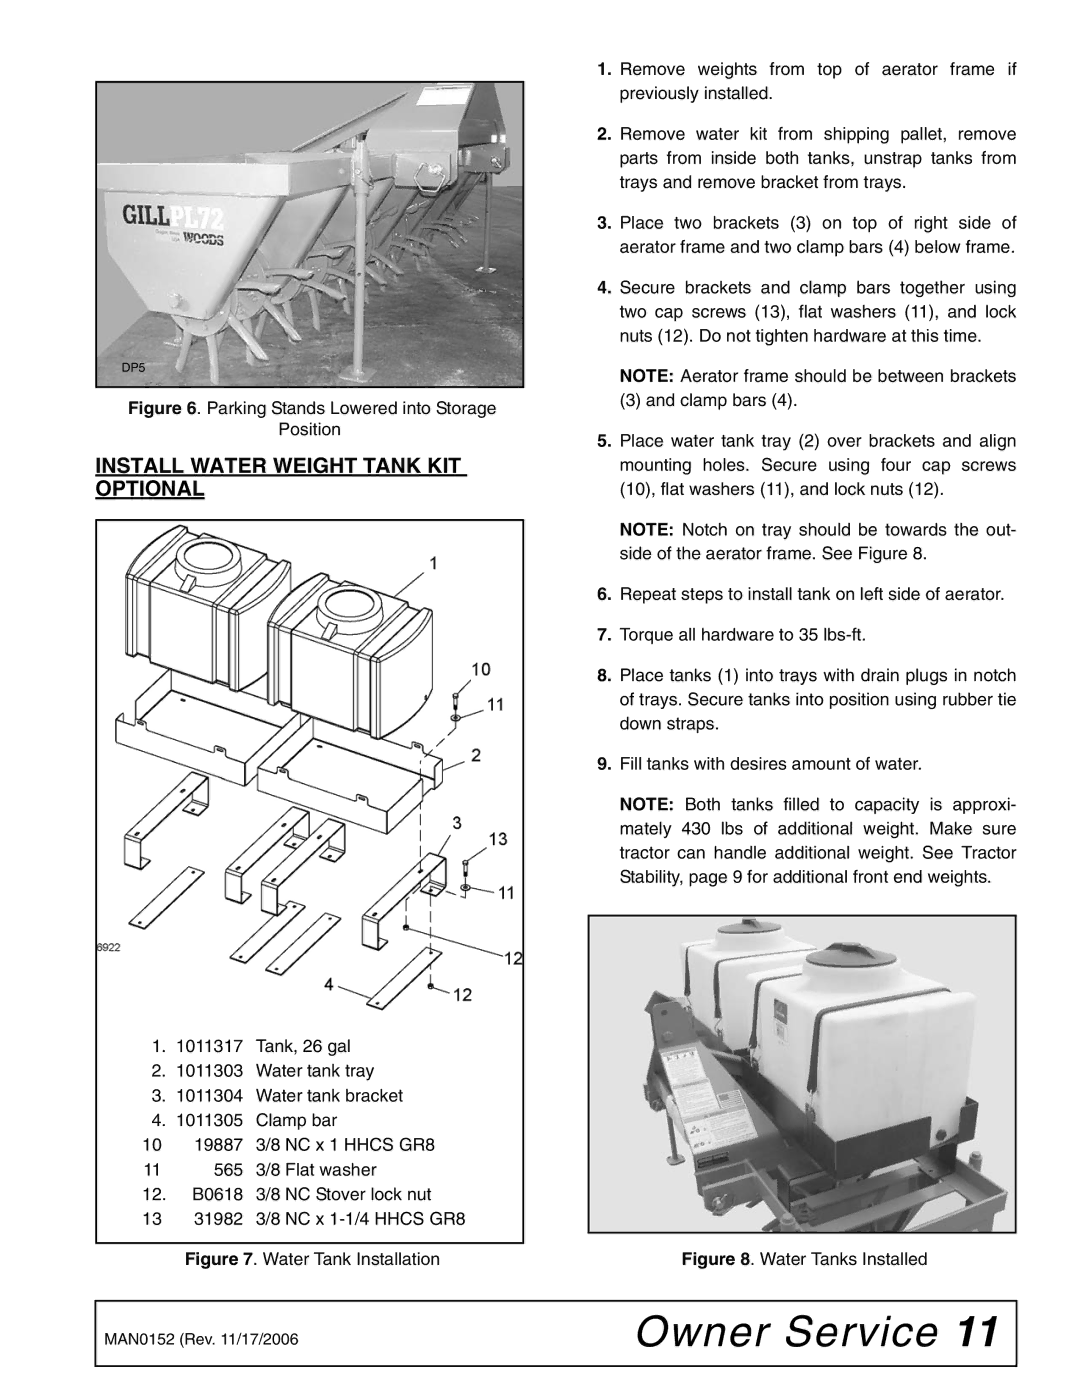
INSTALL WATER WEIGHT TANK KIT OPTIONAL
1.1011317 Tank, 26 gal
2.1011303 Water tank tray
3.1011304 Water tank bracket
4.1011305 Clamp bar
1019887 3/8 NC x 1 HHCS GR8
11565 3/8 Flat washer
12.B0618 3/8 NC Stover lock nut
13 31982 3/8 NC x
Figure 7. Water Tank Installation
1.Remove weights from top of aerator frame if previously installed.
2.Remove water kit from shipping pallet, remove parts from inside both tanks, unstrap tanks from trays and remove bracket from trays.
3.Place two brackets (3) on top of right side of aerator frame and two clamp bars (4) below frame.
4.Secure brackets and clamp bars together using two cap screws (13), flat washers (11), and lock nuts (12). Do not tighten hardware at this time.
NOTE: Aerator frame should be between brackets
(3) and clamp bars (4).
5.Place water tank tray (2) over brackets and align mounting holes. Secure using four cap screws (10), flat washers (11), and lock nuts (12).
NOTE: Notch on tray should be towards the out- side of the aerator frame. See Figure 8.
6.Repeat steps to install tank on left side of aerator.
7.Torque all hardware to 35 lbs-ft.
8.Place tanks (1) into trays with drain plugs in notch of trays. Secure tanks into position using rubber tie down straps.
9.Fill tanks with desires amount of water.
NOTE: Both tanks filled to capacity is approxi- mately 430 lbs of additional weight. Make sure tractor can handle additional weight. See Tractor Stability, page 9 for additional front end weights.
Figure 8. Water Tanks Installed
MAN0152 (Rev. 11/17/2006 | Owner Service 11 |
|
|