M1044 52" Foot Shear
Rear Extension Arms
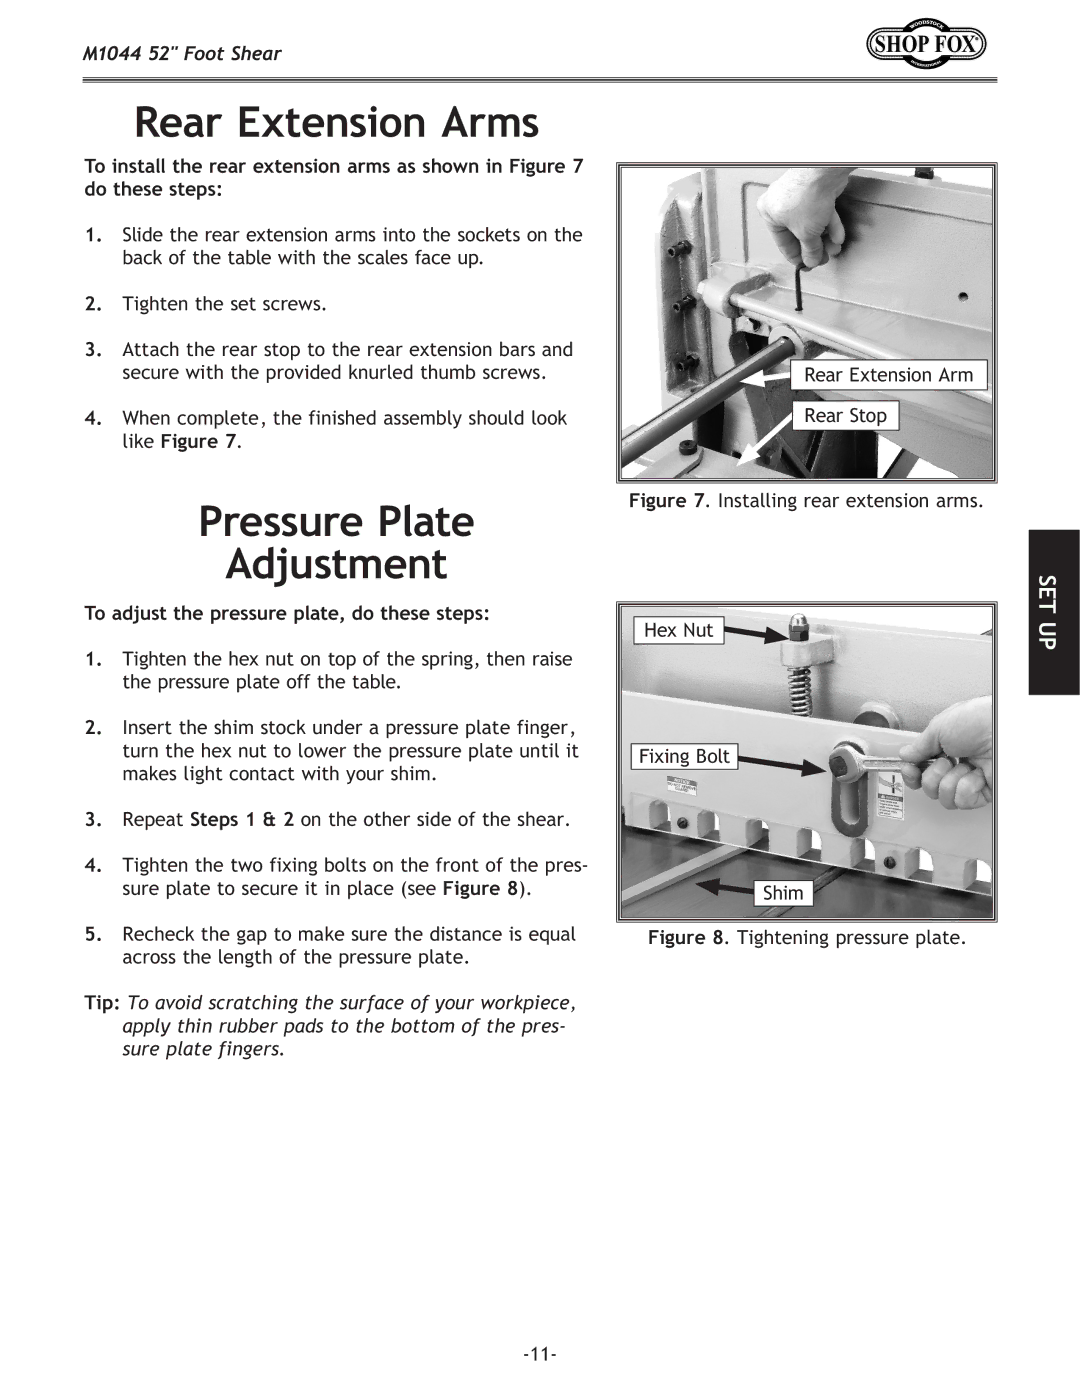
To install the rear extension arms as shown in Figure 7 do these steps:
1.Slide the rear extension arms into the sockets on the back of the table with the scales face up.
2.Tighten the set screws.
3.Attach the rear stop to the rear extension bars and secure with the provided knurled thumb screws.
4.When complete, the finished assembly should look like Figure 7.
Pressure Plate
Adjustment
To adjust the pressure plate, do these steps:
1.Tighten the hex nut on top of the spring, then raise the pressure plate off the table.
2.Insert the shim stock under a pressure plate finger, turn the hex nut to lower the pressure plate until it makes light contact with your shim.
3.Repeat Steps 1 & 2 on the other side of the shear.
4.Tighten the two fixing bolts on the front of the pres- sure plate to secure it in place (see Figure 8).
5.Recheck the gap to make sure the distance is equal across the length of the pressure plate.
Tip: To avoid scratching the surface of your workpiece, apply thin rubber pads to the bottom of the pres- sure plate fingers.
![]() Rear Extension Arm
Rear Extension Arm
![]() Rear Stop
Rear Stop
Figure 7. Installing rear extension arms.
Hex Nut
Fixing Bolt
 Shim Figure 8. Tightening pressure plate.
SET UP
