M1051 6" Bench Grinder
Shop Preparation
SET UP
•Working Clearances: Consider existing and anticipated needs, size of material to be processed through the machine, and space for other machinery when establishing a location for your new machine.
•Lighting: Lighting should be bright enough to eliminate shadow and prevent eye strain.
•Electrical: Electrical circuits should be dedicated. Outlets should be located near the machine, so power or extension cords are clear of
Mounting
The 6" Bench Grinder should be mounted to a workbench to avoid accidental tipping. If you intend on using the
6" Bench Grinder for portable applications, mount it to a heavy plywood base (at least 1" thick) that is wide enough to prevent tipping or rocking during use.
To mount the bench grinder, do these steps:
1.Determine the surface or object to which you will mount your 6" Bench Grinder, and obtain the needed hardware for your mounting application.
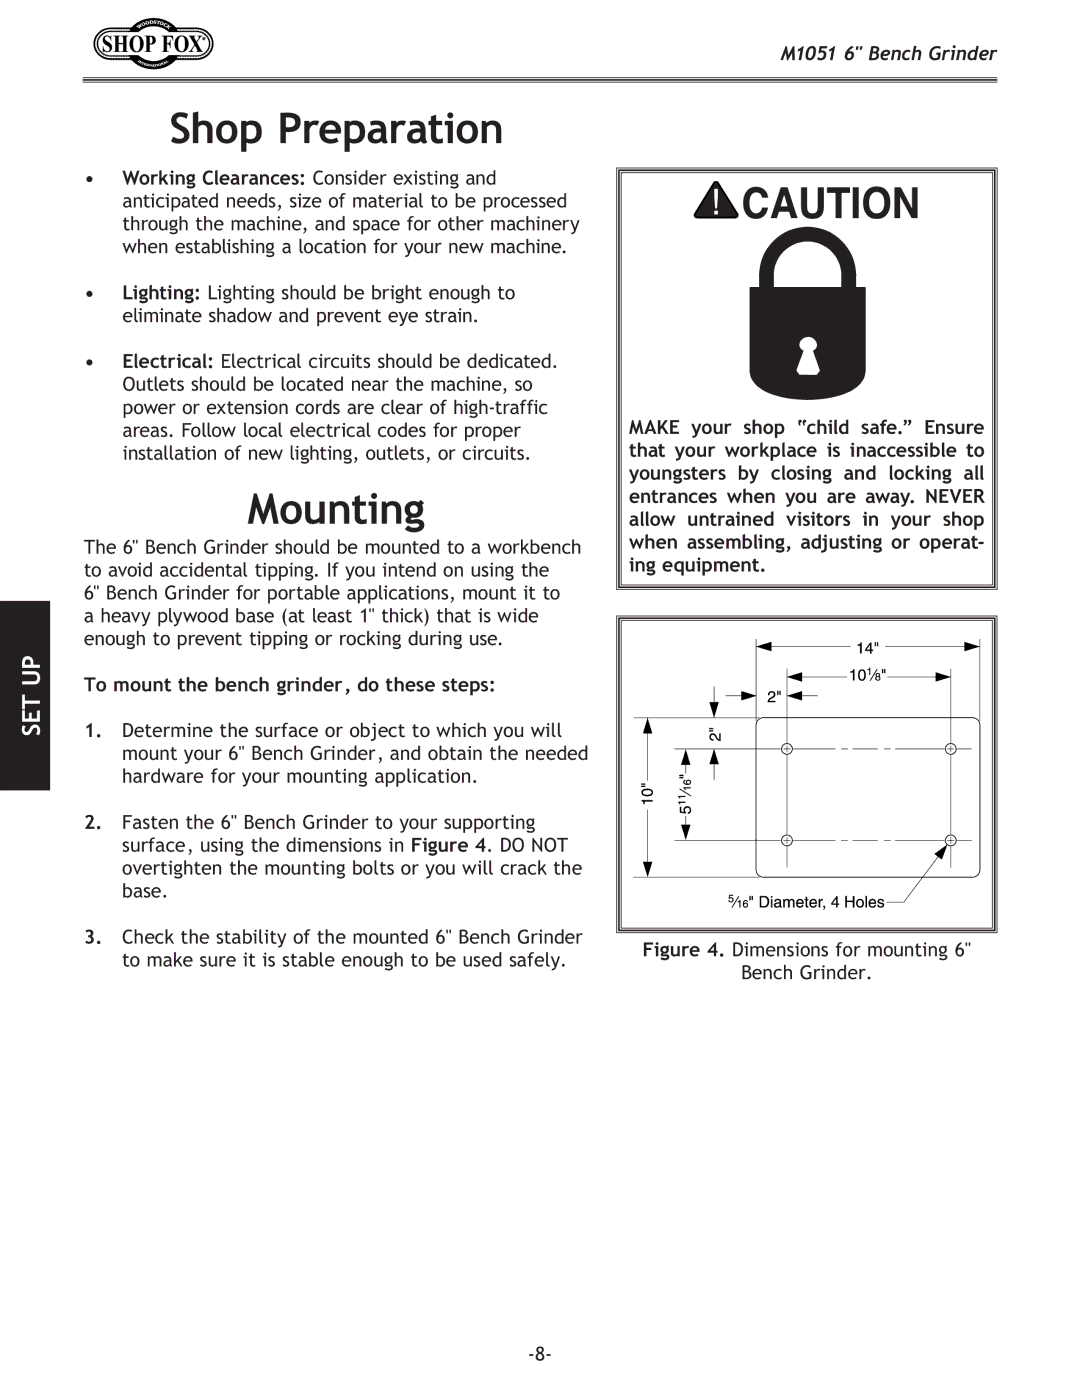
2.Fasten the 6" Bench Grinder to your supporting surface, using the dimensions in Figure 4. DO NOT overtighten the mounting bolts or you will crack the base.
3.Check the stability of the mounted 6" Bench Grinder to make sure it is stable enough to be used safely.
MAKE your shop “child safe.” Ensure that your workplace is inaccessible to youngsters by closing and locking all entrances when you are away. NEVER allow untrained visitors in your shop when assembling, adjusting or operat- ing equipment.