M1051 6" Bench Grinder
Changing Grinding
Wheels
Before installing any grinding wheel, check it for integrity by performing a “ring test.” Hang on a string, then lightly tap the rim of the wheel with a piece of wood such as the handle of a hammer. The wheel should have a ringing or harmonic type of sound. If the wheel responds with a dull thud it may indicate that the wheel has cracks. Do not use a wheel which is suspected of having cracks, or if there are visual chips, nicks or dents in the wheel surface. These discontinuities can lead to wheel failure causing the wheel to fly apart at operating speed.
Do not use a wheel that is is suspected of having cracks, or if there are visual chips, nicks or dents in the wheel surface. These discontinuities can lead to wheel failure where the wheel flies apart at operating speed. Always be sure to use a wheel which is rated for operating at speeds equal to or greater than 3450 RPM.
To change a grinding wheel, do these step:
1.DISCONNECT THE GRINDER FROM POWER!
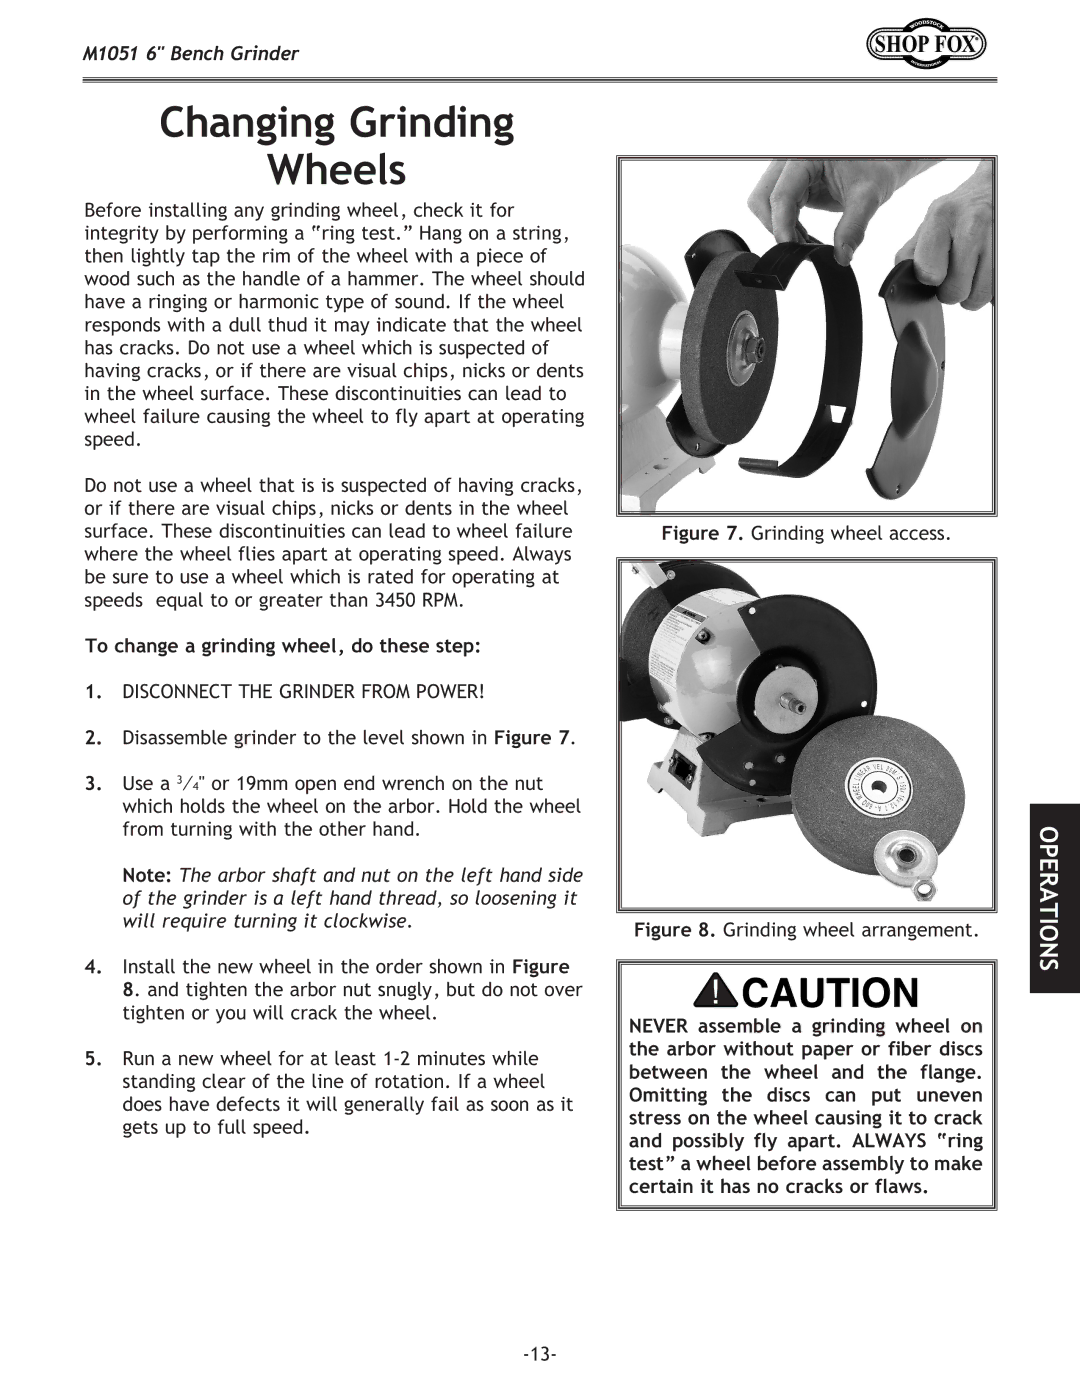
2.Disassemble grinder to the level shown in Figure 7.
3.Use a 3⁄4" or 19mm open end wrench on the nut which holds the wheel on the arbor. Hold the wheel from turning with the other hand.
Note: The arbor shaft and nut on the left hand side of the grinder is a left hand thread, so loosening it will require turning it clockwise.
4.Install the new wheel in the order shown in Figure
8. and tighten the arbor nut snugly, but do not over tighten or you will crack the wheel.
5.Run a new wheel for at least
Figure 7. Grinding wheel access.
Figure 8. Grinding wheel arrangement.
NEVER assemble a grinding wheel on the arbor without paper or fiber discs between the wheel and the flange. Omitting the discs can put uneven stress on the wheel causing it to crack and possibly fly apart. ALWAYS “ring test” a wheel before assembly to make certain it has no cracks or flaws.
OPERATIONS