Model W1783 (Mfg. Since 2/07)
3.The jammed nail should be visible in the discharge area.
—If the jammed nail can be removed with needle nose pliers, do so and continue to Step 7.
—If you cannot remove the jammed nail, then continue with Step 4.
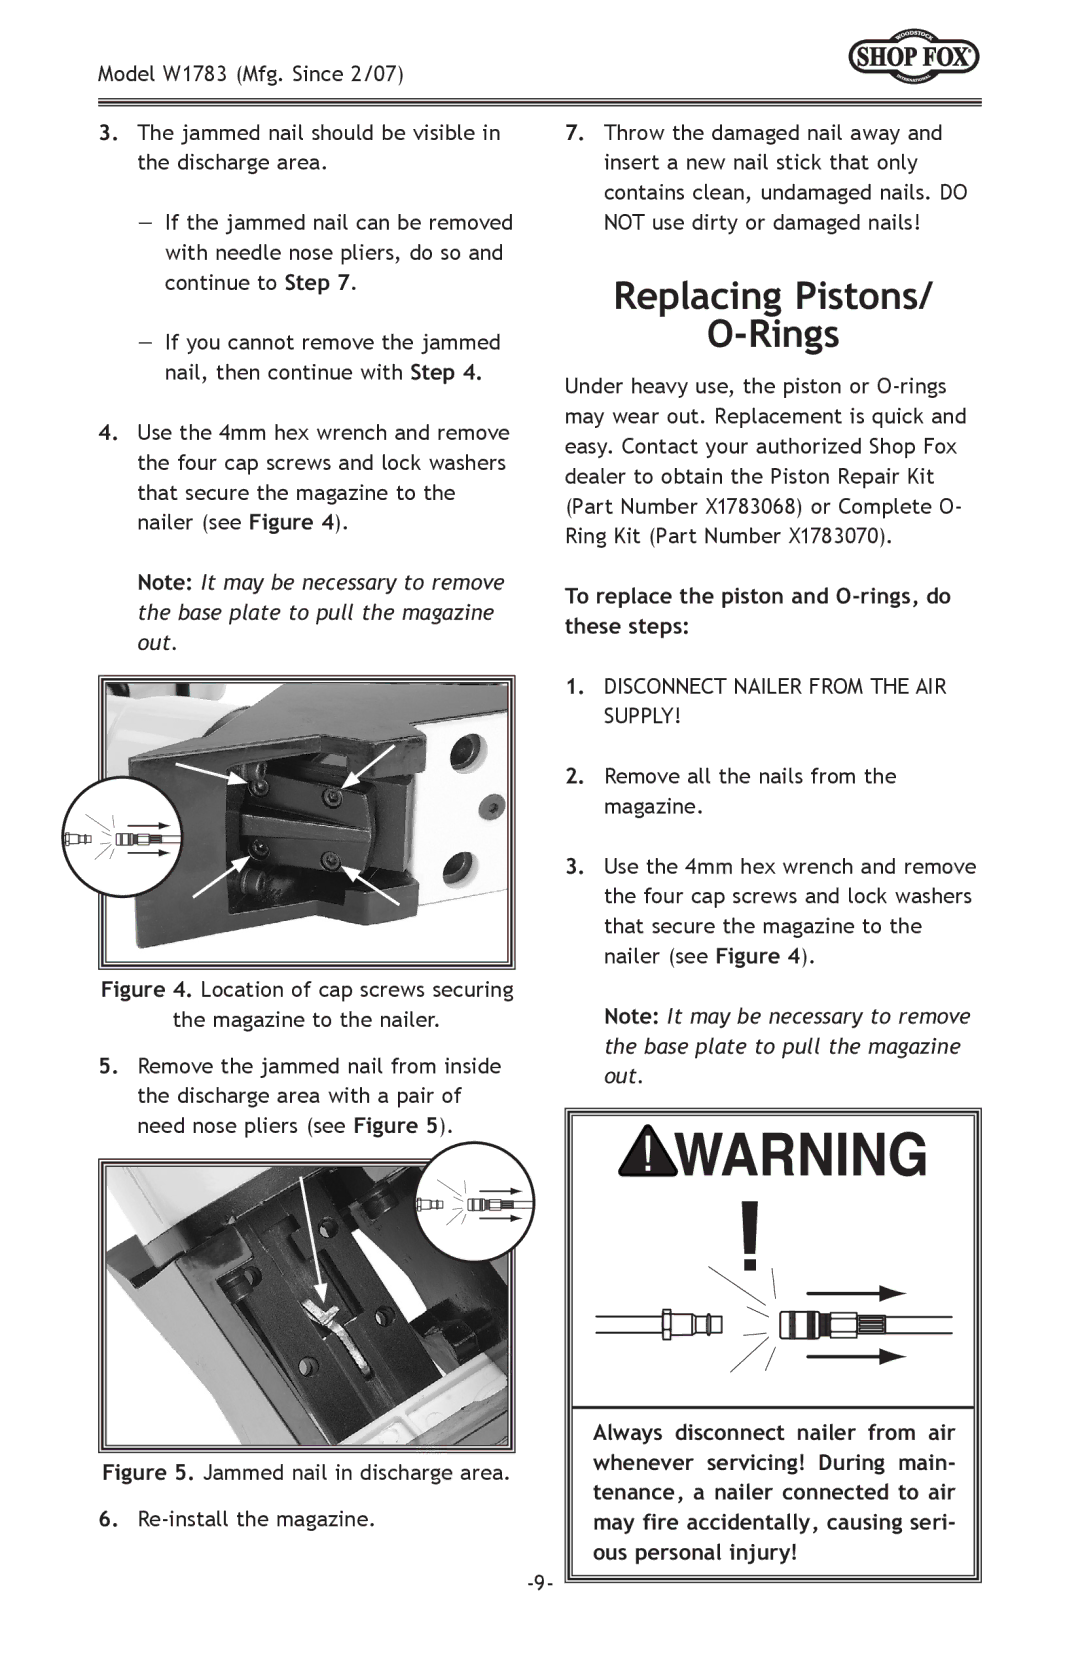
4.Use the 4mm hex wrench and remove the four cap screws and lock washers that secure the magazine to the nailer (see Figure 4).
Note: It may be necessary to remove the base plate to pull the magazine out.
Figure 4. Location of cap screws securing
the magazine to the nailer.
5.Remove the jammed nail from inside the discharge area with a pair of need nose pliers (see Figure 5).
Figure 5. Jammed nail in discharge area.
6.Re-install the magazine.
7.Throw the damaged nail away and insert a new nail stick that only contains clean, undamaged nails. DO NOT use dirty or damaged nails!
Replacing Pistons/
O-Rings
Under heavy use, the piston or
To replace the piston and O-rings, do these steps:
1.DISCONNECT NAILER FROM THE AIR SUPPLY!
2.Remove all the nails from the magazine.
3.Use the 4mm hex wrench and remove the four cap screws and lock washers that secure the magazine to the nailer (see Figure 4).
Note: It may be necessary to remove the base plate to pull the magazine out.
Always disconnect nailer from air whenever servicing! During main- tenance, a nailer connected to air may fire accidentally, causing seri- ous personal injury!