Model W1802 2 QT. Professional Spray Gun
6.Attach the compressed air line to the air inlet, as shown in Figure 7. For easier operation and maintenance, install a 1/4" NPT quick disconnect set- up on the air line (not included).
Note: For the best results, use a fil- ter that will extract water and oil contaminants and a hose that will be dedicated for spray use only. Do not use a hose that has been used with an
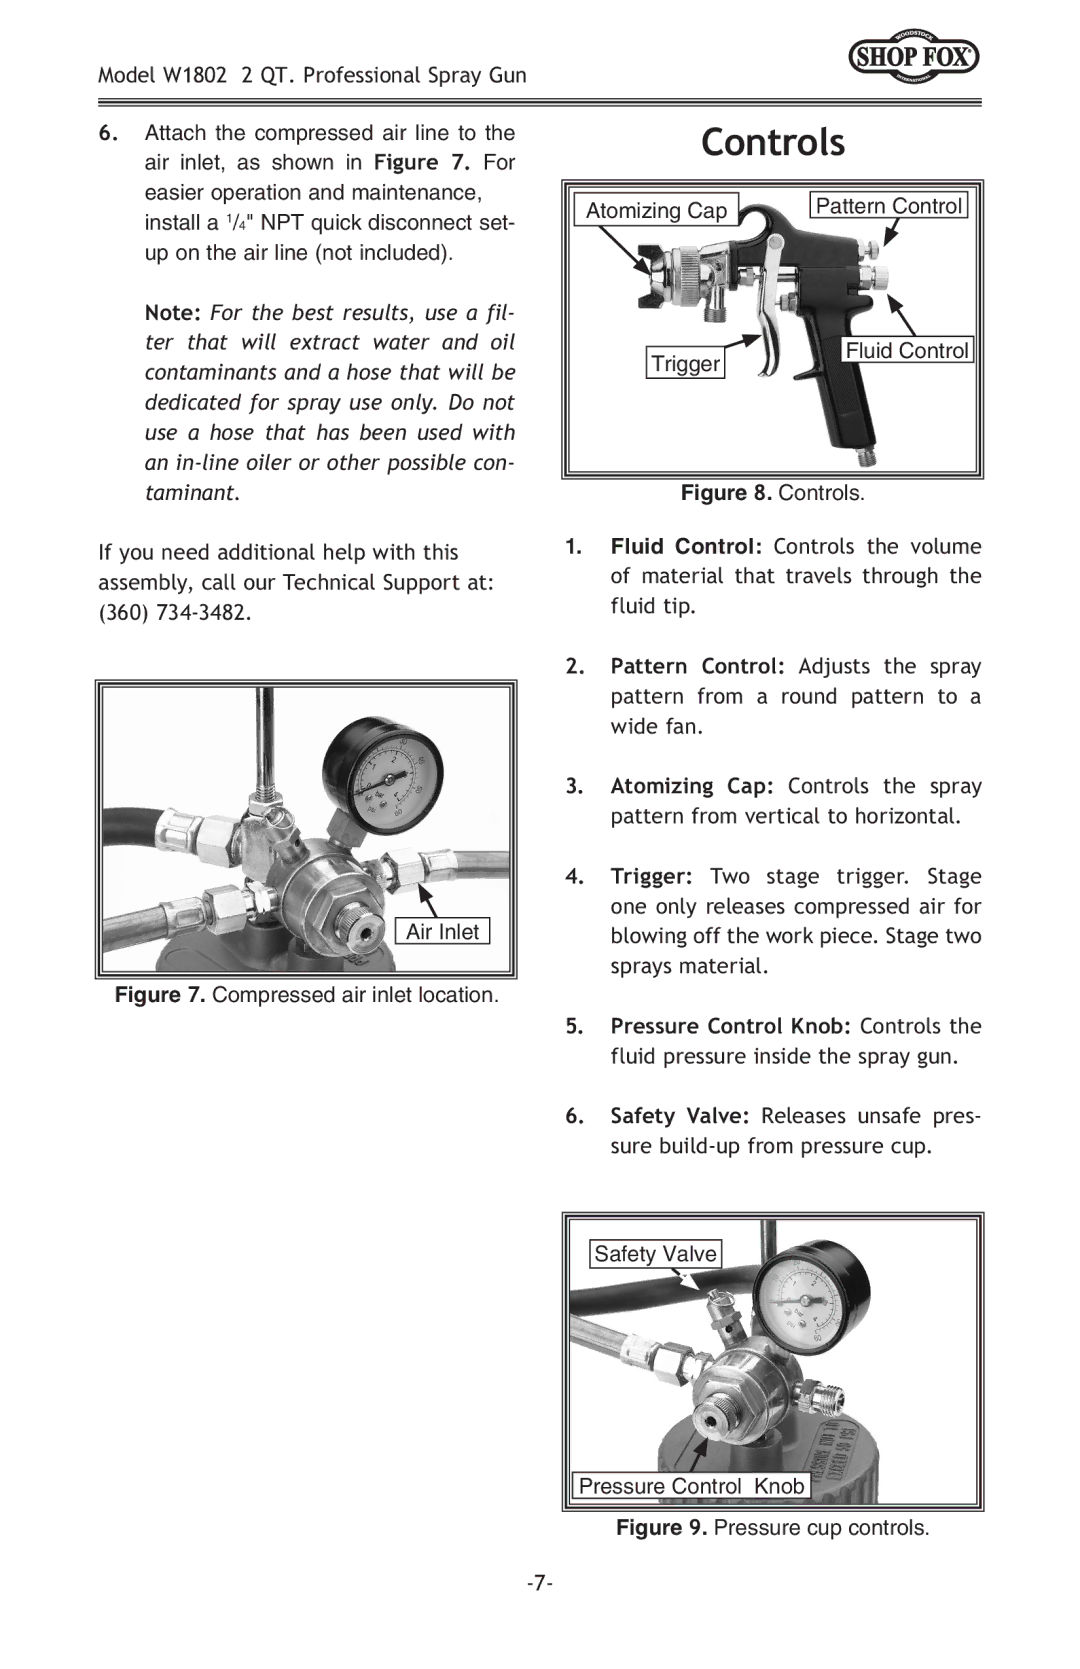
Controls | |
Atomizing Cap | Pattern Control |
Trigger | Fluid Control |
| |
Figure 8. Controls. | |
If you need additional help with this assembly, call our Technical Support at: (360)
Air Inlet
Figure 7. Compressed air inlet location.
1.Fluid Control: Controls the volume of material that travels through the fluid tip.
2.Pattern Control: Adjusts the spray pattern from a round pattern to a wide fan.
3.Atomizing Cap: Controls the spray pattern from vertical to horizontal.
4.Trigger: Two stage trigger. Stage one only releases compressed air for blowing off the work piece. Stage two sprays material.
5.Pressure Control Knob: Controls the fluid pressure inside the spray gun.
6.Safety Valve: Releases unsafe pres- sure
Safety Valve
Pressure Control Knob
