Worksaver CS-694, CS-1094, CSP-694, CSP-1094 Tractor Requirements & Preparation, Packing, Page

Models: CS-694, CS-1094, CSP-694, CSP-1094

1 12
Download 12 pages 28.17 Kb
Page 2
Image 2
To the Owner/Operator/Dealer

To the Owner/Operator/Dealer

All implements with moving parts are potentially hazardous. There is no substitute for a cautious, safe -minded operator who recognizes the potential hazards and follows reasonable safety practices. The manufacturer has designed this implement to be used with all its safety equipment properly attached, to minimize the chance of accidents.

BEFORE YOU START!!

Read the safety messages on the implement and shown in your manual. Observe the rules of safety and common sense!

Instructions

TRACTOR REQUIREMENTS & PREPARATION

The 3-pt. mounted broadcast seeder/spreader with a PTO drive will fit most Categories I and some larger Category 0 tractors. Larger Category II tractors may also be used if the 3-pt. hitch lift arms will narrow to 26 inches. Bushings will be needed to fit the Category I (7/8” dia.) lift pins.

NOTE: Some Category 0 tractors have very short lift arms or 5/8” diameter (Cat. 0) lift arm ball ends. These tractors are not usually suitable.

Check the tractor’s 3-pt. hitch. The hitch hydraulic system should be able to hold the lift arms at a set height. If the hydraulic system leaks and allows the lift arms to drop, then use stay straps to lock the hitch into position.

Refer to your operator’s manual or dealer for any adjustments necessary to put the 3-pt. hydraulic lift system in good working order. (I&T shop manuals will list most specifications and adjustment instructions – available from most farm equipment dealers.)

NOTE: The Model CS-694 Seeder/Spreader weighs 123 pounds and can hold up to 600 pounds of fertilizer. The tractor needs to be large enough to handle this possible 723-pound load safely. The tractor may have to be equipped with front-end weights to be properly counterbalanced.

Check the shield over the PTO stub shaft. Make sure it is in good condition and bolted securely to the tractor. Purchase a new shield if old shield is damaged or missing.

CAUTION!

Be sure your tractor is in good condition. Read all the safety precautions and make sure all tractor operators are familiar with the safety rules of operation.

PACKING

The CS-94 series of seeder/spreaders are shipped assembled, except for the PTO drive shaft.

ASSEMBLY & MOUNTING

Mount the seeder on your tractor by sliding the lift arm ball sockets over the seeder pull pins and secure with linchpins (not furnished). Attach the center link (not furnished) to the center link bracket on the seeder using a center link pin (not furnished), and secure it with a suitable linchpin. Adjust the center link so that the seeder fan is parallel to the ground.

NOTE: Use stabilizer bars, adjustable sway chains, or sway blocks on your tractor lift arms to keep the seeder/spreader from swinging side to side. Adjust as tightly as practical for best performance.
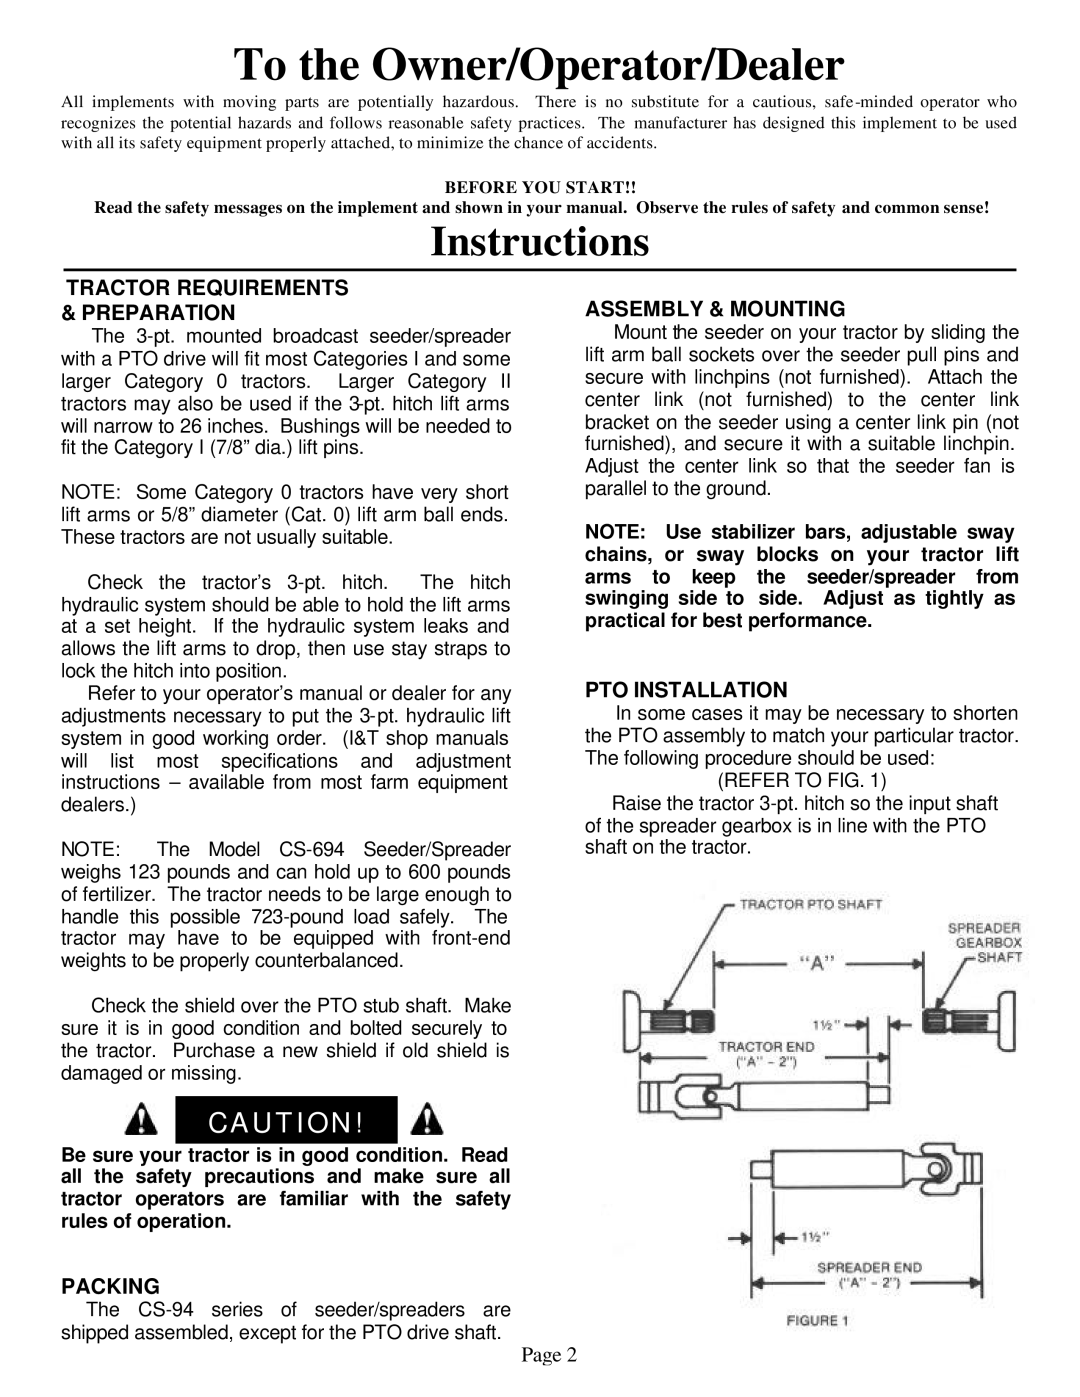
PTO INSTALLATION

In some cases it may be necessary to shorten the PTO assembly to match your particular tractor. The following procedure should be used:

(REFER TO FIG. 1)

Raise the tractor 3-pt. hitch so the input shaft of the spreader gearbox is in line with the PTO shaft on the tractor.

Page 2

Page 2
Image 2
Worksaver CS-694, CS-1094, CSP-694, CSP-1094 Tractor Requirements & Preparation, Packing, Assembly & Mounting, Page