[6] AC POWER INPUT
Standard IEC
[7] RS232 EXPANSION
The HD44C and HD44CC5 can be expanded into a larger system. By using any combination of the HD44C and HD44CC5 (up to 4 units), a larger
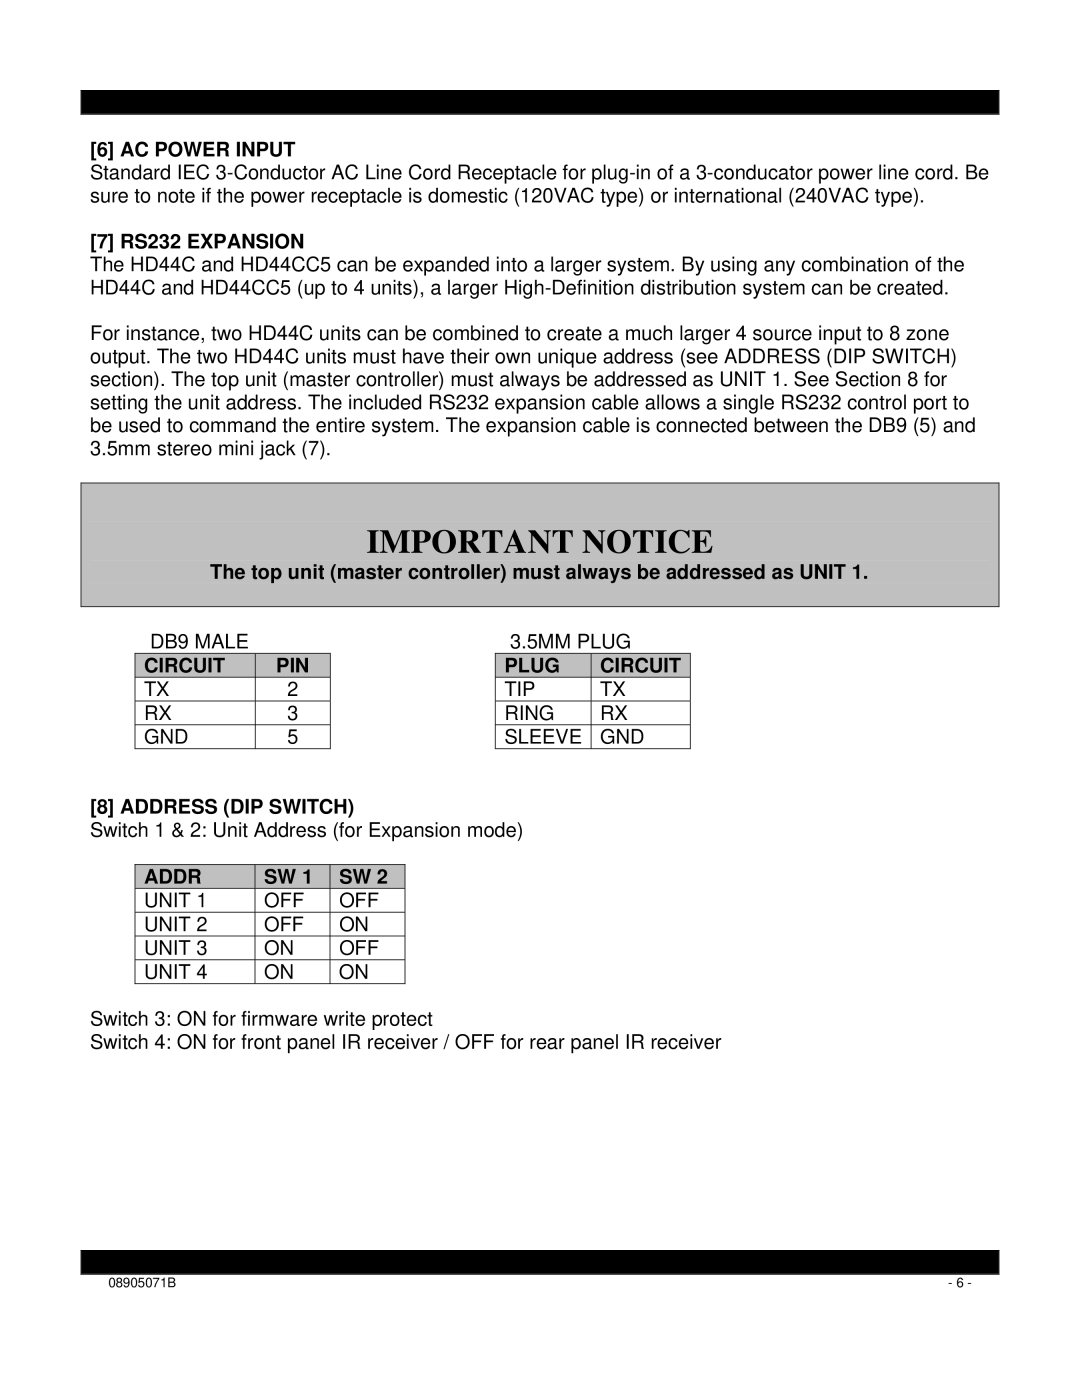
For instance, two HD44C units can be combined to create a much larger 4 source input to 8 zone output. The two HD44C units must have their own unique address (see ADDRESS (DIP SWITCH) section). The top unit (master controller) must always be addressed as UNIT 1. See Section 8 for setting the unit address. The included RS232 expansion cable allows a single RS232 control port to be used to command the entire system. The expansion cable is connected between the DB9 (5) and 3.5mm stereo mini jack (7).
IMPORTANT NOTICE
The top unit (master controller) must always be addressed as UNIT 1.
DB9 MALE
CIRCUIT | PIN |
TX | 2 |
RX | 3 |
GND | 5 |
3.5MM PLUG
PLUG | CIRCUIT |
TIP | TX |
RING | RX |
SLEEVE | GND |
[8] ADDRESS (DIP SWITCH)
Switch 1 & 2: Unit Address (for Expansion mode)
ADDR | SW 1 | SW 2 |
UNIT 1 | OFF | OFF |
UNIT 2 | OFF | ON |
UNIT 3 | ON | OFF |
UNIT 4 | ON | ON |
Switch 3: ON for firmware write protect
Switch 4: ON for front panel IR receiver / OFF for rear panel IR receiver
|
|
08905071B | - 6 - |