QUICK START
Installing Batteries
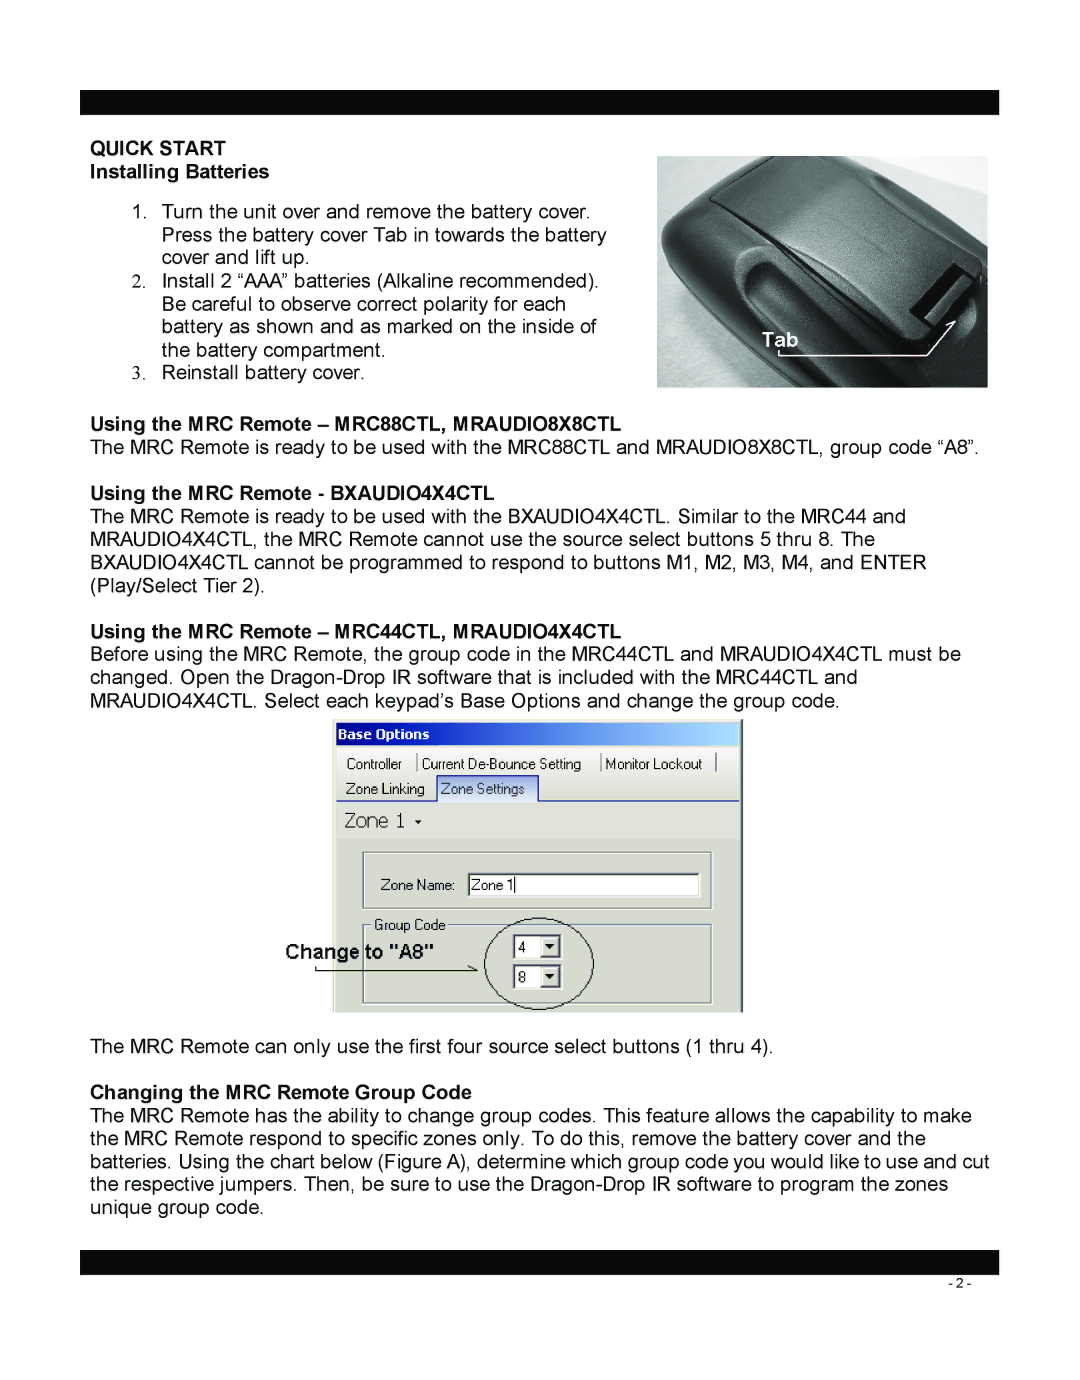
1.Turn the unit over and remove the battery cover. Press the battery cover Tab in towards the battery cover and lift up.
2.Install 2 “AAA” batteries (Alkaline recommended). Be careful to observe correct polarity for each battery as shown and as marked on the inside of the battery compartment.
3.Reinstall battery cover.
Using the MRC Remote – MRC88CTL, MRAUDIO8X8CTL
The MRC Remote is ready to be used with the MRC88CTL and MRAUDIO8X8CTL, group code “A8”.
Using the MRC Remote - BXAUDIO4X4CTL
The MRC Remote is ready to be used with the BXAUDIO4X4CTL. Similar to the MRC44 and MRAUDIO4X4CTL, the MRC Remote cannot use the source select buttons 5 thru 8. The BXAUDIO4X4CTL cannot be programmed to respond to buttons M1, M2, M3, M4, and ENTER (Play/Select Tier 2).
Using the MRC Remote – MRC44CTL, MRAUDIO4X4CTL
Before using the MRC Remote, the group code in the MRC44CTL and MRAUDIO4X4CTL must be changed. Open the
The MRC Remote can only use the first four source select buttons (1 thru 4).
Changing the MRC Remote Group Code
The MRC Remote has the ability to change group codes. This feature allows the capability to make the MRC Remote respond to specific zones only. To do this, remove the battery cover and the batteries. Using the chart below (Figure A), determine which group code you would like to use and cut the respective jumpers. Then, be sure to use the
- 2 -
