4. MRKP1E Main Setup Menu
To access the Main Setup Menu,
1.Press and hold down the “X” key for at least 3 seconds.
2.Once the Main Setup Menu is displayed on the screen, use the “SOURCE <” and “SOURCE >” buttons to highlight the category to be changed.
3.Press the “X” button to choose the category.
4.Use the “SOURCE <” and “SOURCE >” buttons to highlight the parameter to be changed.
5.Use the “VOLUME UP” and “VOLUME DN” buttons to c hange the parameters. (For further details see diagram on Figure 4.1)
The Main Setup Menu consists of the following categories:
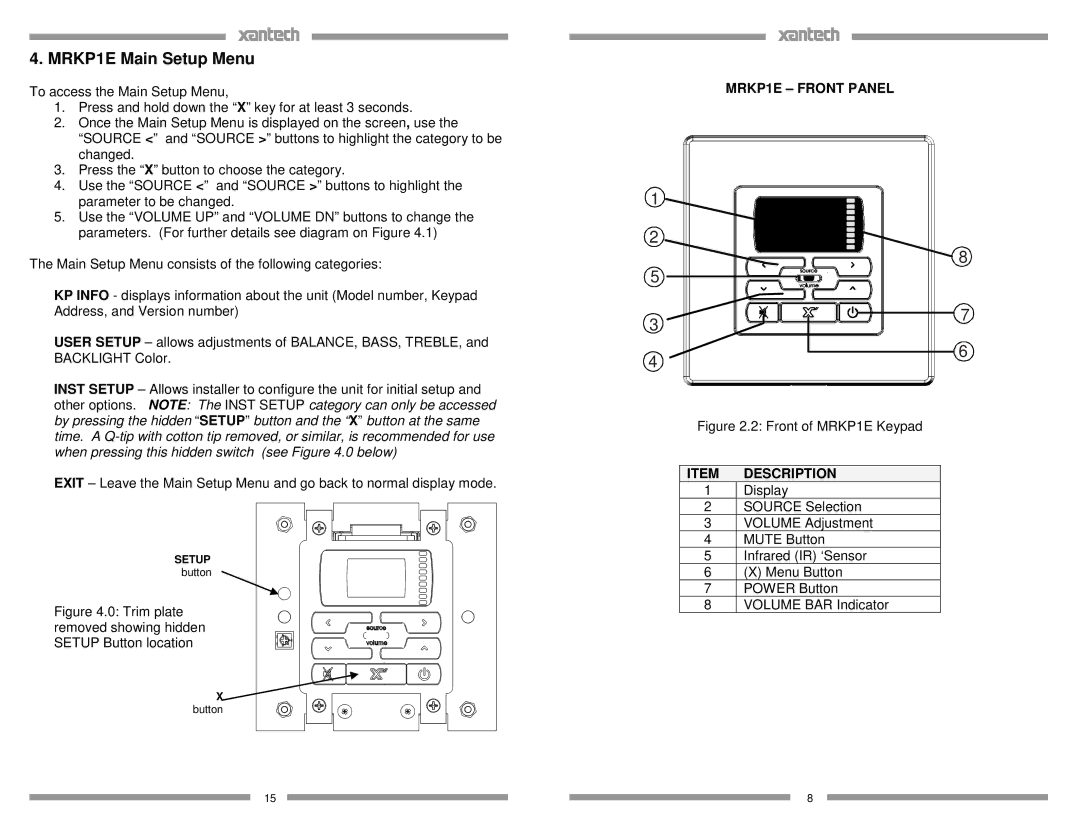
MRKP1E – FRONT PANEL
1
2
8
5![]()
KP INFO - displays information about the unit (Model number, Keypad Address, and Version number)
3
![]() 7
7
USER SETUP – allows adjustments of BALANCE, BASS, TREBLE, and BACKLIGHT Color.
4
6
INST SETUP – Allows installer to configure the unit for initial setup and other options. NOTE: The INST SETUP category can only be accessed by pressing the hidden “SETUP” button and the “X” button at the same time. A
EXIT – Leave the Main Setup Menu and go back to normal display mode.
SETUP
button
Figure 4.0: Trim plate removed showing hidden SETUP Button location
X
button
15
Figure 2.2: Front of MRKP1E Keypad
ITEM | DESCRIPTION |
1 | Display |
2 | SOURCE Selection |
3 | VOLUME Adjustment |
4 | MUTE Button |
5 | Infrared (IR) ‘Sensor |
6 | (X) Menu Button |
7 | POWER Button |
8 | VOLUME BAR Indicator |
8