PA1235 specifications
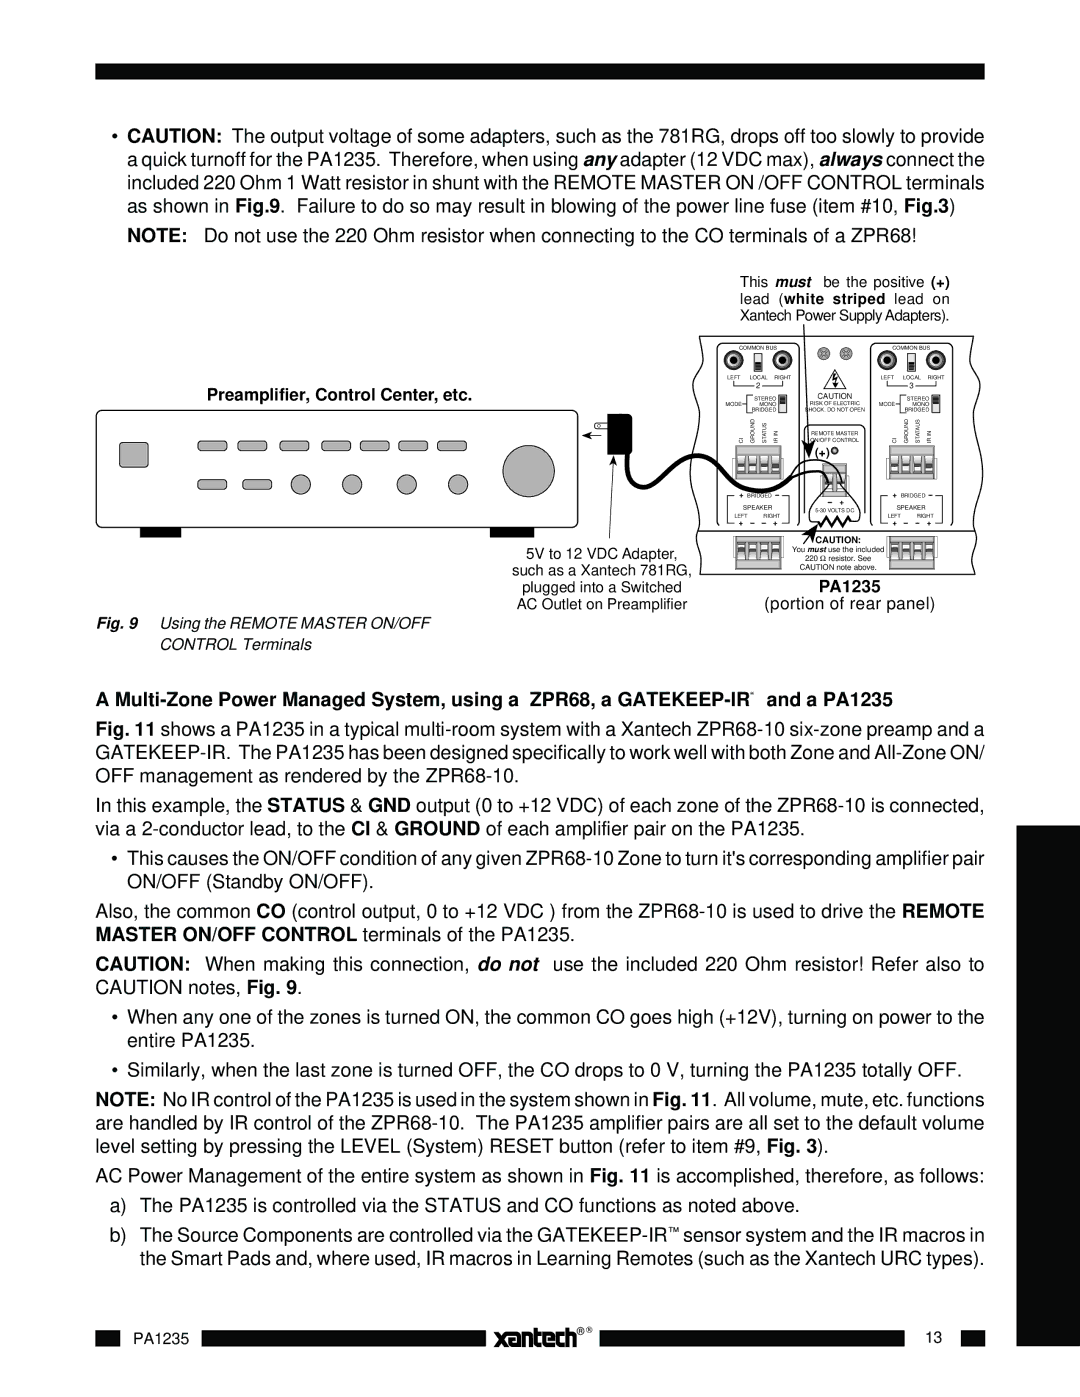
The Xantech PA1235 is a cutting-edge multi-zone power amplifier designed for both residential and commercial audio applications. Renowned for its impressive performance and reliability, the PA1235 offers robust amplification for distributed audio systems, fulfilling various audio needs in different environments.One of the main features of the PA1235 is its power handling capabilities. It delivers 35 watts per channel across six channels, ensuring that every zone in a multi-room setup receives adequate power for optimal sound quality. This makes it suitable for powering a variety of speaker types, from in-ceiling speakers to outdoor sound systems. Its architecture allows flexibility in system configuration, making it easy to distribute audio throughout a home or business.
The PA1235 employs advanced Class D amplification technology, which maximizes efficiency while reducing power consumption and heat generation. This not only makes the amplifier more environmentally friendly but also enhances longevity and reliability. The lightweight design of Class D amplifiers allows for easier installation, especially in complex multi-zone environments.
Another characteristic of the PA1235 is its multi-zone functionality. Users can easily assign audio sources to different zones, allowing for personalized control of audio in various spaces. This feature is particularly valuable in commercial settings, where different areas may require distinct audio content or volume levels. It offers seamless integration with existing automation systems, thanks to its compatibility with various control protocols, facilitating a user-friendly experience.
The amplifier also features adjustable gain controls for each channel, allowing users to fine-tune the audio output for different speaker types or acoustic environments. Additionally, the built-in protection circuitry ensures that both the amplifier and attached speakers are safeguarded from overload or short-circuit situations, thereby enhancing overall system durability.
With its combination of power, efficiency, and versatility, the Xantech PA1235 is an ideal choice for integrators and audiophiles alike. Whether used in home theaters, restaurant sound systems, or corporate audio solutions, it provides high-quality audio performance that meets the demands of modern audio requirements, making it a prominent player in the audio amplification market.

