Manuals
/
Xantrex Technology
/
Computer Equipment
/
Power Supply
Xantrex Technology
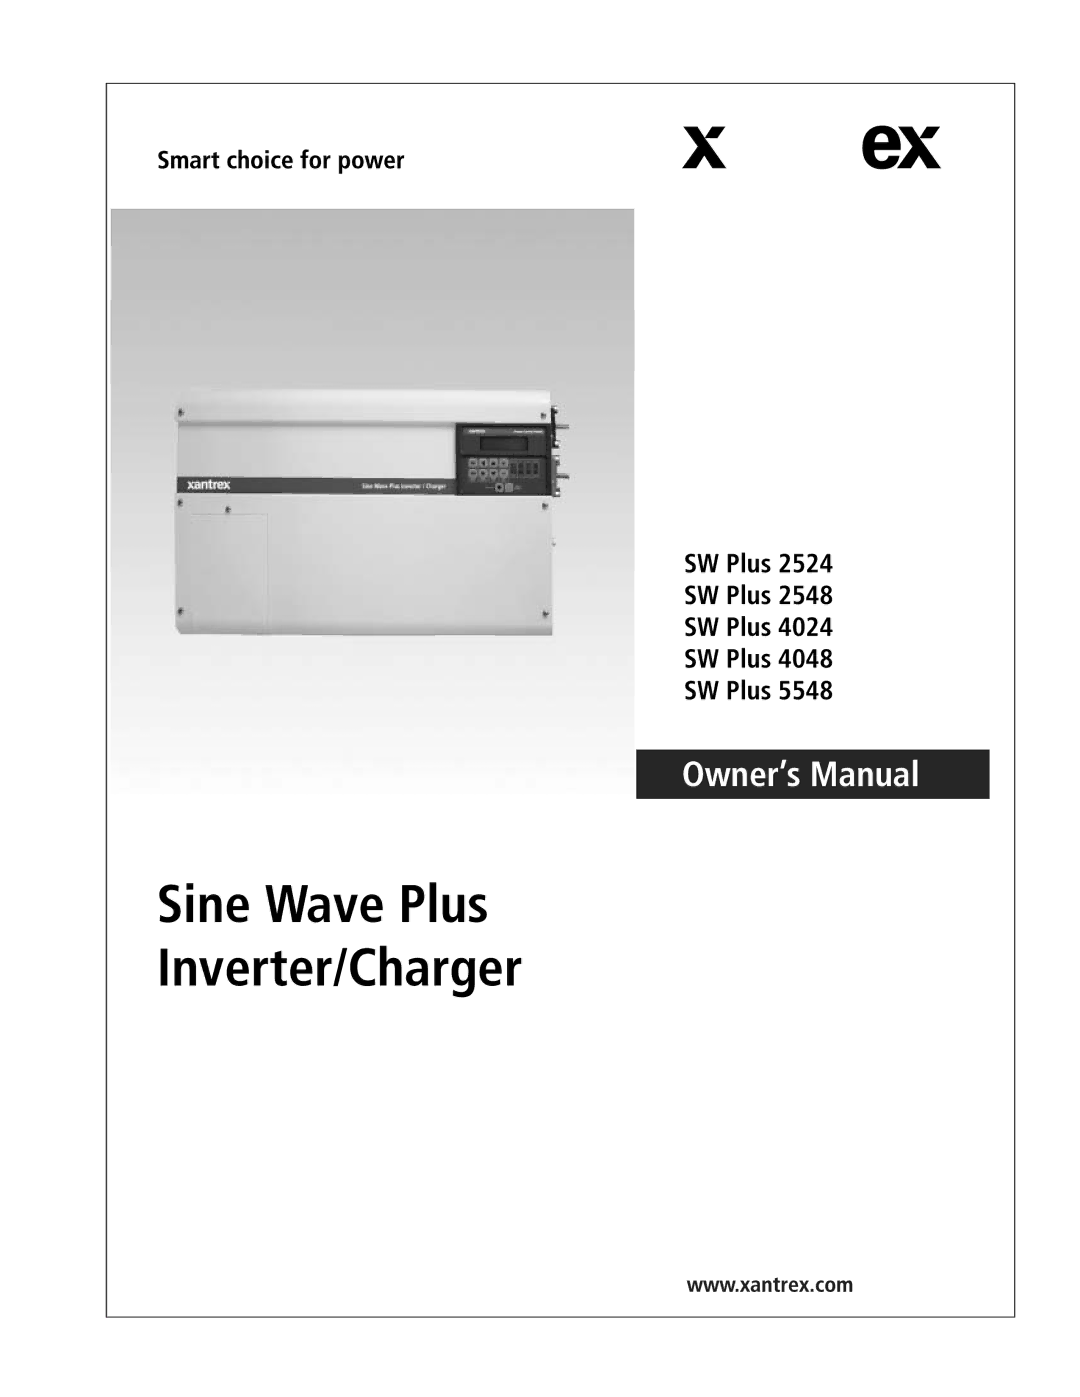
SW Plus 4024, SW Plus 2524, SW Plus 5548, SW Plus 2548, SW Plus 4048
owner manual
Models:
SW Plus 4048
SW Plus 2548
SW Plus 4024
SW Plus 5548
SW Plus 2524
1
2
344
344
Download
344 pages
33.92 Kb
1
2
3
4
5
6
7
8
Troubleshooting
Specifications
Install
AWG Wire Size Reference Chart
Error and Status LEDs
11D BCO Delay Minutes
Operational Status Indicators
Wiring Considerations
Warranty
Dimension
Page 2
Image 2
Page 1
Page 3
Page 2
Image 2
Page 1
Page 3
Contents
Sine Wave Plus Inverter/Charger
Page
Sine Wave Plus Inverter/Charger
Page
Purpose Scope
Audience
Organization
Conventions Used
Related Information
Important Safety Instructions
Explosive gas precautions
FCC Information to the User
Contents
Installation
Functional Test
Basic Setup Programming
Navigation
Advanced Setup
Operation
976-0043-01-02
Troubleshooting
Inverter Specifications
Generators
Configuration Settings
Battery Information
Over-Charge Protection
Warranty and Product Information
Multi-wire Branch Circuit Wiring
Emergency Power Off Switches
Figures
Dimensional Drawing
Accessing the Basic Setup Menu
Xxii
Tables
Tables
Introduction
Basic Features
Front Panel
1The Sine Wave Plus
AC Side
3The AC side of the Sine Wave Plus
Emergency Power Off EPO Option
Certification Label
DC Side
5The DC side of the Sine Wave Plus
Battery Temperature Sensor BTS
6Battery Temperature Sensor BTS
Top
7External Output Circuit Breaker
System Configuration
System Considerations
Pre-Configuration Planning
Types of Applications
Renewable energy systems e.g., PV arrays, wind turbines etc
System Output Requirements
System Input Requirements
Location Considerations
See FCC Information to the User on page viii for additional
Mounting Considerations
Ventilation Requirements
Grounding Considerations
DC System Grounding
Inverter Grounding
System. See Bonding the Grounding System on page 2-10for
Equipment or Chassis Grounding
Grounding Electrodes/Ground Rods
Bonding the Grounding System
Ground and neutral must be bonded at one place, and only one
Battery Considerations
Battery Bank Requirements
Battery Cable Requirements
AWG Wire Size Reference Chart
2Recommendced Battery Cable Size Versus Length
Battery Requirements for Dual Inverter Systems
3Battery Cable to Maximum Breaker/Fuse Size
For example
Battery Temperature
Wiring Considerations
Generator Considerations
Types of Generators
Generator start types
For unattended starting and operation
Additional/Optional Equipment Considerations
AC Conduit Box Accb
DC Conduit Box Dccb
4DC Conduit Box
DC Disconnect Boxes DC175/DC250
Fuse Block
Battery Status Meter TM500A
7DC250 Disconnect Box and TM500A Battery Status Meter
8Accessories for Remote Monitoring
Remote Monitors
Inverter Control Module ICM
Inverter Communications Adapter ICA
Generator Start Module GSM
Auxiliary Load Module ALM
Inverter Stacking Control Series ISC-S Cable
Vac Application Requirements
Autotransformer for 240 VAC Applications T240
Renewable Energy DC Input Sources
15 Xantrex C-Series Charge Controllers
Single-Inverter Configurations 120/240 Vac
Renewable Energy Systems with/without Generator Backup
Single-Inverter Configurations 120 Vac
Off-Grid Applications
Off-Grid Applications
Dual-Inverter Configurations 240 Vac
976-0043-01-02
Single-Inverter Configurations
Generator-Only Systems
976-0043-01-02
Dual-Inverter Configurations
Vac-only Input Source
976-0043-01-02
Single-Inverter Configurations 240 Vac
On-Grid Applications
21On-Grid Application Backup System using a Single Inverter
Dual-Inverter Configurations 240 Vac
976-0043-01-02
Peak Load Management
RE Backup with Utility SB Mode
Energy Management
Time-of-Use TOU Metering
23Time-of-Use Metering
AC Load Support
Renewable Energy with Grid Backup BX Mode
24AC Support Mode
Page
Installation
Pre-Installation
Tools Required
Optional System Accessories
Hardware / Materials Required
Battery Bank Preparation
Prepare the battery bank as follows
Unpacking and Inspecting the Inverter
1Certification Label Location
Knockout Preparation
2Serial Number Sticker and Knockout Locations and Sizes
Mounting
Shelf-Mounting
Not to Scale
4’s using ¼ x 1½-inch lag bolts and washers
Wall-Mounting
4Wall-Mounting Method using 2 x 4’s
976-0043-01-02
5Wall Mounting using Plywood
DC Wiring
Preparing the Battery Bank
DC Wiring
Grounding the DC System
To ground a single inverter
7DC Grounding of a Single Inverter
To ground a dual-inverter configuration
8DC Grounding of Dual Inverters
To install the BTS, follow the steps below
Connecting DC Input Sources Renewable Energy Configurations
Installing the Battery Temperature Sensor BTS
9BTS RJ11 Port Location and Installation
Connecting the Batteries to the Inverter
10shows the locations of the DC connectors
11Battery Cable Connection
Procedure for Single Inverter Systems
13DC Connections to a Single Inverter
Procedure for Dual-Inverter Systems
14DC Connections to Dual Inverters
AC Wiring
1AC Disconnect and Wire Sizing
To replace the AC access cover
Accessing the AC Terminal Block and Ground Bar
To remove the AC access cover
16AC Input/Output Wiring Terminals
AC Wiring for Single Inverter Systems
Manual and Auto Start Generators
Wave Plus
976-0043-01-02
See Bonding the Grounding System on page 2-10for details
19AC Output Wiring to the Inverter AC Panel
Install Generator Wiring to the Inverter
To install a generator disconnect switch
To install the AC wiring from the generator to the inverter
20Generator Input Wiring to a Single Inverter
976-0043-01-02
Optional Equipment
Stacking Dual Inverter Systems
Installing the ISC-S Cable
To install the ISC-S cable on the inverters
To install the remote monitor’s cable
Remote Monitoring Options
24Connecting the ALM Communications Cable to the Sine
To connect the ALM to the Sine Wave Plus
Emergency Power Off EPO
EPO Port
Page
Functional Test
Basic Functional Test
Applying Battery Power to the Inverter
To apply battery power to the inverter
Confirm all Connections
Turning on the Inverter
To turn on the inverter
AC Voltage Check
Confirming Battery Charger Operation
To confirm that battery charging is operating correctly
To perform an AC voltage check
Confirming Inverter Operation
To confirm that the inverter is operating correctly
Page
Navigation
Navigating the Sine Wave Plus
Display
Inverter Control Module Features
Inverter Control Module ICM
Cursor
ON/OFF Menu Buttons
Display contrast
Push-buttons
Menu Heading Buttons
Menu Item Buttons
Reset Factory Defaults
Set Point Buttons
Menu Map
8Menu Structure
9User Menu Map Part
10User Menu Map Part
11Basic Setup Menu Map Part
12Basic Setup Menu Map Part
13Advanced Setup Menu Map Part
14Advanced Setup Menu Map Part
15Complete User Menu Map
16Complete Basic Setup Menu Map
17Complete Advanced Setup Menu Map
Basic Setup
Basic Setup Summary
Sine Wave Plus
Basic Setup Summary
END Basic Setup Menu
END Basic Setup Menu
Sine Wave Plus
14A Push INV now to save Settings
Before You Begin Programming
DC Amps verses AC Amps
Basic Setup Process
Accessing the Basic Setup Menu
To access the Basic Setup Menu
Set Hour
Time of Day Setup Menu
Menu Item Descriptions
Minute
Low Cut In VDC
High Battery Cut Out VDC
10C Set Seconds
To set the second display
11C Low Battery Cut Out VDC
11D BCO Delay Minutes
11E Search Watts
Selected in 01A Inverter
Battery Charger Functions
Multi-Stage Charging Process
Finish Stage
12C Float Volts DC
Equalize Charging the Batteries
Battery Charging Menu
Ish Stage
Float Volts DC
12B Bulk Volts DC setting
12B Bulk Volts DC
4Battery Voltages For Setting Charging Parameters
12E Max Charge Amps AC
To calculate the 12E Max Charge Amps AC
12F Bulk Done Amps AC
To calculate the 12F Bulk Done Amps AC
12G EQ VDC Done Timer
Amp-hour Battery
12H Max Bulk/EQ Timer hm
13B Gen AC2 Amps
AC Inputs Menu
13A Grid AC1 Amps
13C Input Upper Limit Vac
AC1
13D Input Lower Limit VAC setting
13A Grid AC1 Amps AC
13B Gen Amps AC
13C Input Upper Limit VAC
Equipment connected to the inverter
GEN to Restore Settings
Save/Restore Settings Menu
Push INV now to Save Settings
To restore the factory default settings
End Basic Setup Menu
14C Push GEN for Factory Defaults
Advanced Setup
Advanced Setup Summary
Settings See
Advanced Setup Summary
END Advanced Setup Menu
Default Advanced Setup Menus Range/Display Settings
See 25 Gen Starting Details Menu on page 7-29for details
Default Advanced Setup Menus Range/Display Settings See
See 23 ALM Relays Menu on page 7-19for details
27A Push INV now to save Push INV now to Save Settings
Before You Begin Advanced Programming
Accessing the Advanced Setup Menu
To access the Advanced Setup Menu from the User Menu
2Accessing the Advanced Setup Menu Method
Silent Setup Menu
When20MenuSilentit worksSetup
Low Volts DC setting
20A Refloat High Volts DC or 20B Refloat Low Volts DC then
20C Float Done Amps AC
20A Refloat High Volts DC
20B At Low Volts DC
20D Must Float Time Min
Grid AC1 Usage Menu and 22 Battery Xfer Menu are used
Gr d AC1 Usage Menu
21A Grid Usage
21B Grid Usage Begin hm
Point levels in Menus 11A High Battery Cut Out VDC
Battery Xfer BX Menu
Setup Menu
11C Low Battery Cut Out
22A High Xfer HBX VDC
22B Low
23B DeEnergized
23C 9 Delay At DeEngz. Min
23A RY9 VDC Energized
23D VDC Energized
23E RY10 Vdc DeEnergized
Delay at Engz. Min
RY11 Mode
976-0043-01-02
Generator Starting Scenarios
Manual Generator Control
AC Current
Battery Voltage
Automatic Generator Control
Actual Volts DC menu item
Time of Day
Exercise Period Days
Generator Timers Menu
24C Quiet Begin hm
24A Gen Run Time Start hm
24B Run Time Stop HM
02A Generator ON/OFF menu item
24D Quiet Time End hm
Timer Min
Gen Cooldown Timer Min
Gen Exercise Period Days
Nerator Module GSM
Gen Starting Details Menu
24H RN2/Max Gen Run hm
25A RY7 Mode
5Generator Control Mode RN2
Generator
RY8 Relay GS and RN1 only
RY8 Relay RN2 only
7Wiring examples of Honda and Onan Generators
8RY7 and RY8 Timing Diagram
9R 7/RY8 Sequence of Events for RN1 or RN2 Selection
10RY7/RY8 Sequence of Ev nts for GS Selection
25D Max anking Seconds
25B Gen Warm-up Seconds/minutes
25C Pre Crank Seconds
25E Po tCrankingSeconds
Gen Auto Run Setup Menu
Button to select 27A Push INV Now to Save Settings
Save/Res ore Settings Menu
27A Push INV now to Save Settings
26F 15 Min Start Volts DC
Method
27B Push GEN to Restore Settings
27C
Operation
See Accessing the User Menu on page 8-14for instructions on
Operating the Sine Wave Plus
Operational Status Indicators
LED Indicators
Inverter Operation Status Yellow
Grid TIE LED
AC Input Status Green
LED
12F Bulk Done Amps AC setting or meets the 12H Max Bulk/EQ
Charge Status Yellow and Green
Error and Status LEDs
Operational Status Indication Red and Yellow
Error LED Reset
Status LED
LED Summary
1LED Summary Table
Use 06 Status Menu to
User Menu Summary
User Menu
No YES
END User Menu
To directly access the 02 Generator User Menu
Accessing the User Menu
To directly access the 01A Inverter User Menu
01AInverter
User Menu Description
Inverter ON/OFF Menu
01B EQ Charge OFF on
Search Watts Srch
01D Bypass Mode
Generator ON/OFF Menu
02A Generator
02C Gen Start Volts/Manual
02B Gen Start Load Amps
Gen Volts/ManuStart
02D Exercise Run
Time Of Day Menu
Press Reset for Factory Defaults
Pressing the Reset Factory Defaults button
Meters Menu
04ABattery
04A Battery Actual Vdc
Comp
04B Battery Comp Vdc
Inverter/Charger Amps AC
04D nput Amps AC
Frequency Hertz
04G Grid AC1 Volts AC
04H Gen Volts AC
Max Bulk/EQ Time hm
Error Causes Menu
Transfo mer Overtemp
11B Low Battery Cut In VDC
Low Battery Voltage
11D Lbco Delay Minutes period
05C Heatsink Overtemp
11A High Battery Cut Out VDC menu item
05E High Battery Voltage
Value set in the 11A High Battery Cut Out VDC menu item
External E Stacked
Stopped Due to V/F
Status Menu
05H Gen Failed to Start
Menu 24G Gen Cooldown Period
06A Bypass Mode Selected
Chr Select d No Backup
Ery VDC Hbco
06E EQ Charge Selected
6F Ba tery VDC Lbco
RY7 GSM Energized
Y9 DeEngz. Time Minute
07B RY8 GSM Energized
Y9 ALM Energized
ALM Energized
Page
Troubleshooting
Inverter Troubleshooting
Look under the 05 Error Causes Menu
Solution
Battery Charger Troubleshooting
22B Low Xfer BX
PossibleCause
Problem
Error Causes
05AMessageOver Current
Message
InverterSpecifications
Electrical Specifications
Electrical Specifications
Mechanical Specifications
SineWavePlus
SineWavePlus4024 SineWavePlus4048 SineWavePlus5548
Theory of Operation
Sine Wave Plus Inverter Charger
Figure A-2 Sine Wave Plus Inverter Output Waveform
Power Versus Efficiency
Figure A-3Power Versus Efficiency Curves for All Models
Figure A-5Sine Wave Plus Efficiency Curve for the SW Plus
Figure A-7Sine Wave Plus Efficiency Curve for the SW Plus
Inverter Capacity versus Temperature
Time versus Current
Figure A-9Time versus Current for the Sine Wave Plus
Figure A-10Time versus Current for the Sine Wave Plus
Figure A-12Time versus Current for the Sine Wave Plus
Page
ConfigurationSettings
User Menu Settings
Table B-1User Menu Default and User Settings
User Menu Settings
See 06 Status Menu on page 8-28for details
Basic Setup Menu
Basic Setup Menus Display Default
12I Temp Comp LeadAcid NiCad AC Inputs Menu
See 13 AC Inputs Menu on page 6-26for details
Basic Setup Menus Range/Display Default User Settings
Sine Wave Plus
Advanced Setup Menu
Advanced Setup Menus Display Settings
Advanced Setup Menus Display
Lbco
Sine Wave Plus
22A High Xfer HBX Vdc 32.2 to 54.0
22B Low Xfer LBX Vdc 32.2 to 46.0 ALM Relays Menu
Sine Wave Plus
Battery Information
Deep-cycle Flooded Lead Acid FLA
Battery Types
Introduction
Sealed Batteries Gel and AGM
NiCad and NiFe Batteries
Understanding Battery Capacity Ratings
Battery Bank Sizing
Power
Understanding Amp-hour Requirements
Calculating Amp Hours
60 =
Amp Hour Example Worksheet
To calculate amp-hour requirements
Battery bank size worksheet
Table C-2Determining Battery Bank Size
Battery Configurations
Wiring Batteries in Series
Wiring Batteries in Parallel
Fu se w ith a Discon ne ct
To wire the batteries in parallel
Wiring Batteries in Series-Parallel
To wire in series
Battery Connections for Stacked Inverters
Connect to inverter To connect to the inverter
Battery Maintenance
Battery charging
Table C-5Temperature Compensation Calculation
Equalization Charging
General Maintenance
Table C-6
Page
Generators
Honda 3-Wire Type Generators
Two-Wire Start Circuits
Three-Wire Start Circuits
Onan 3-Wire Type Generators
Wire Converters
Page
Over-Charge Protection
Overvoltage Protection using a Charge Controller
Figure E-1Overvoltage using a C-Series Charge Controller
Diversion Load Control
Figure E-2Diversion Load Control
Page
Circuit Wiring
Multi-wire Branch Circuits
Figure F-1Conventional Home-type Wiring
Figure F-2Multi-wire Branch Circuit Wiring and Current Flow
Identifying Multi-wire Branch Circuits
Figure F-4Multi-wire Branch Circuit Wiring
Correcting Multi-wire Branch Circuit Wiring
Load Center
Switches
Purpose of an EPO switch
Figure G-1Emergency Power OFF Disconnect Switch
Purpose of an EPO switch
How to use the EPO Port for an EPO Switch
Glossary
Glossary of Terms
Und
Tie
Ies
AC AbbreviationDefinitioncronymor Alternating Current
Abbreviations and Acronyms
Abbreviation
Warranty and Product Information
Warranty
Disclaimer
Product
Return Material Authorization Policy
Exclusions
Return Procedure
Out of Warranty Service
Information About Your System
Page
Equalization Charging C-15 Temperature Compensation C-13
Output Waveform A-7
976-0043-01-02 IX-3
Index IX-4
Page
Xantrex Technology Inc
Top
Page
Image
Contents