Manuals
/
Xerox
/
Computer Equipment
/
All in One Printer
Xerox
manual
7+2&8017&203$1, DC230LP Windows NT 4.0 TCP/IP Quick Install, Press, displays
Models:
DC230LP
1
1
4
4
Download
4 pages
12.55 Kb
1
2
3
4
Install
EnabledEnablement
Page 1
Image 1
Page 1
Page 2
Page 1
Image 1
Page 1
Page 2
Contents
5. RARP Setup
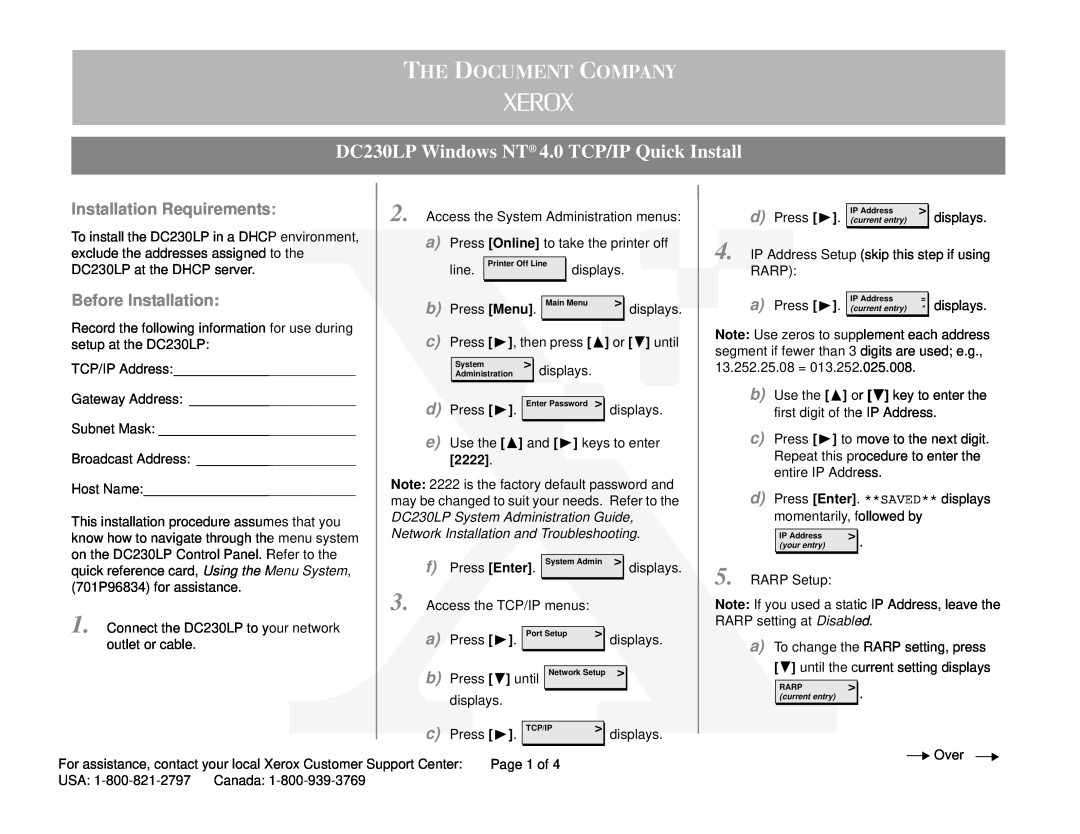
DC230LP Windows NT 4.0 TCP/IP Quick Install
7+2&8017&203$1
Press
Press until
b Press
b Press Enter
f Press Enter. **SAVED** displays momentarily, followed by
EnabledEnablement
1998 Xerox Corporation
Page 4 of
701P98454 Version
Top
Page
Image
Contents