Installation
Method 2: Digital (DVI) Connection
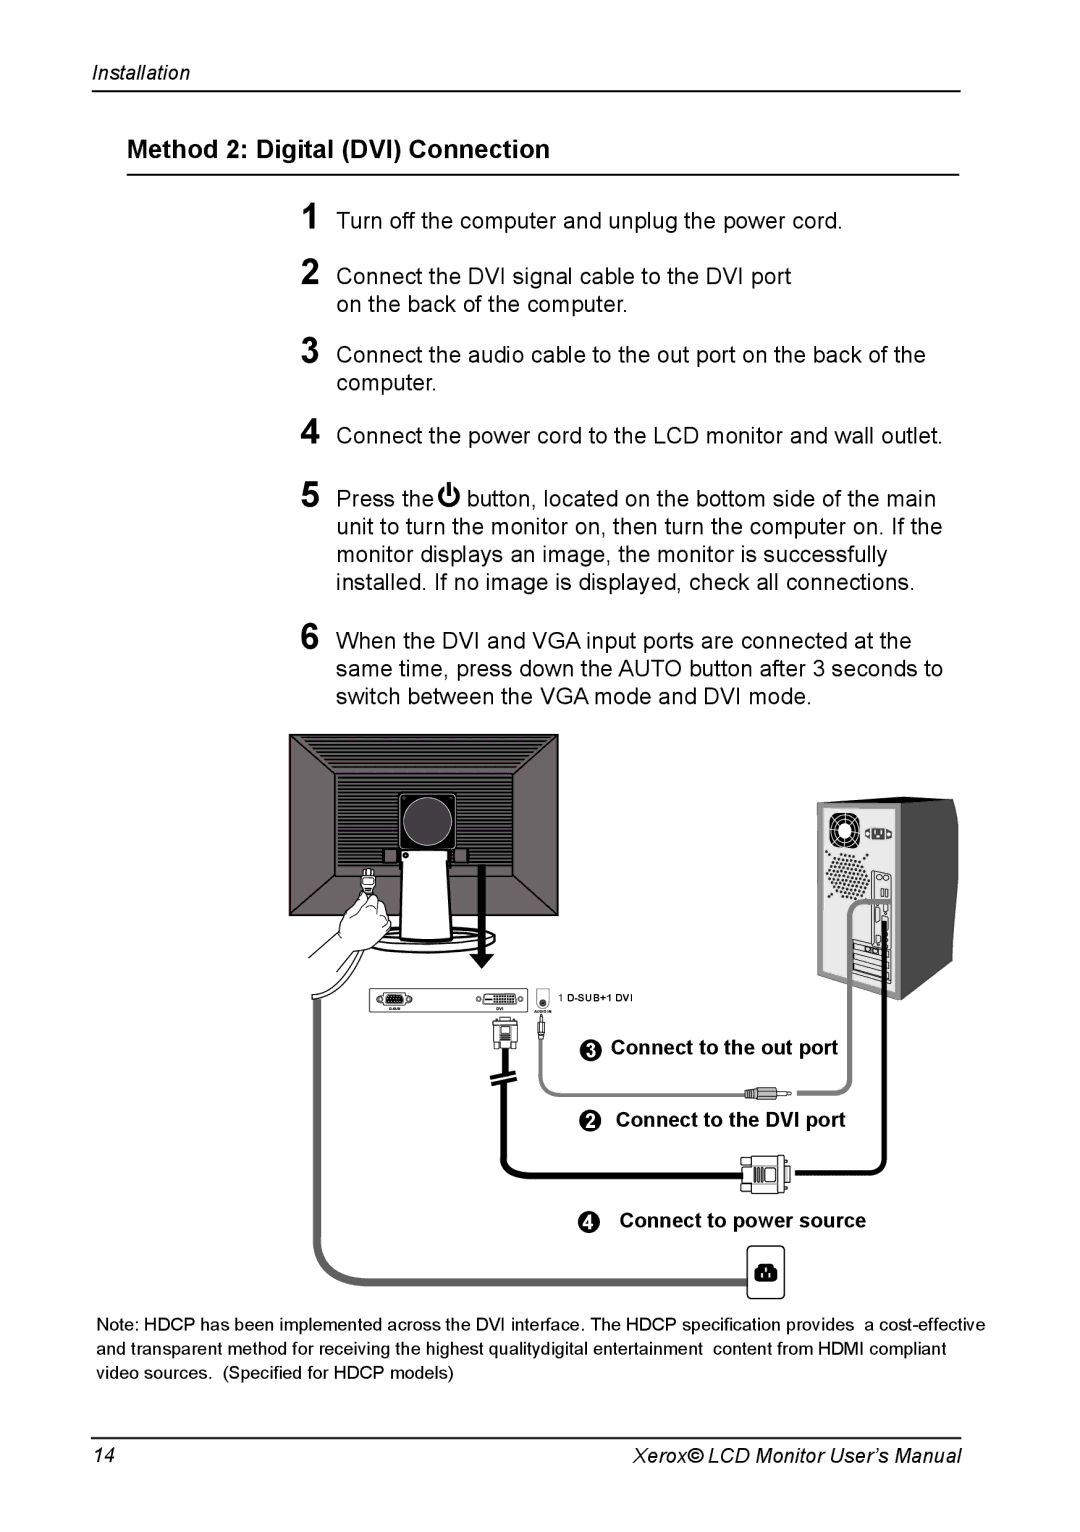
1Turn off the computer and unplug the power cord.
2Connect the DVI signal cable to the DVI port on the back of the computer.
3Connect the audio cable to the out port on the back of the computer.
4Connect the power cord to the LCD monitor and wall outlet.
5Press the![]() button, located on the bottom side of the main unit to turn the monitor on, then turn the computer on. If the monitor displays an image, the monitor is successfully installed. If no image is displayed, check all connections.
button, located on the bottom side of the main unit to turn the monitor on, then turn the computer on. If the monitor displays an image, the monitor is successfully installed. If no image is displayed, check all connections.
6When the DVI and VGA input ports are connected at the same time, press down the AUTO button after 3 seconds to switch between the VGA mode and DVI mode.
1
3 Connect to the out port
2 Connect to the DVI port
4 Connect to power source
Note: HDCP has been implemented across the DVI interface. The HDCP specification provides a
14 | Xerox© LCD Monitor User’s Manual |