■Changing Strings
As the strings get old, sound quality will gradually decrease, and it will become difficult to tune the instrument. Change the strings as soon as you think they are getting old.
Always change the strings one at a time, even if all strings must be changed.
•The end of the strings are sharp and can cut fingers. Use caution when changing strings.
•When changing or adjusting strings, do not put your face close to the instrument. The string may suddenly break resulting in eye or other unexpected injuries.
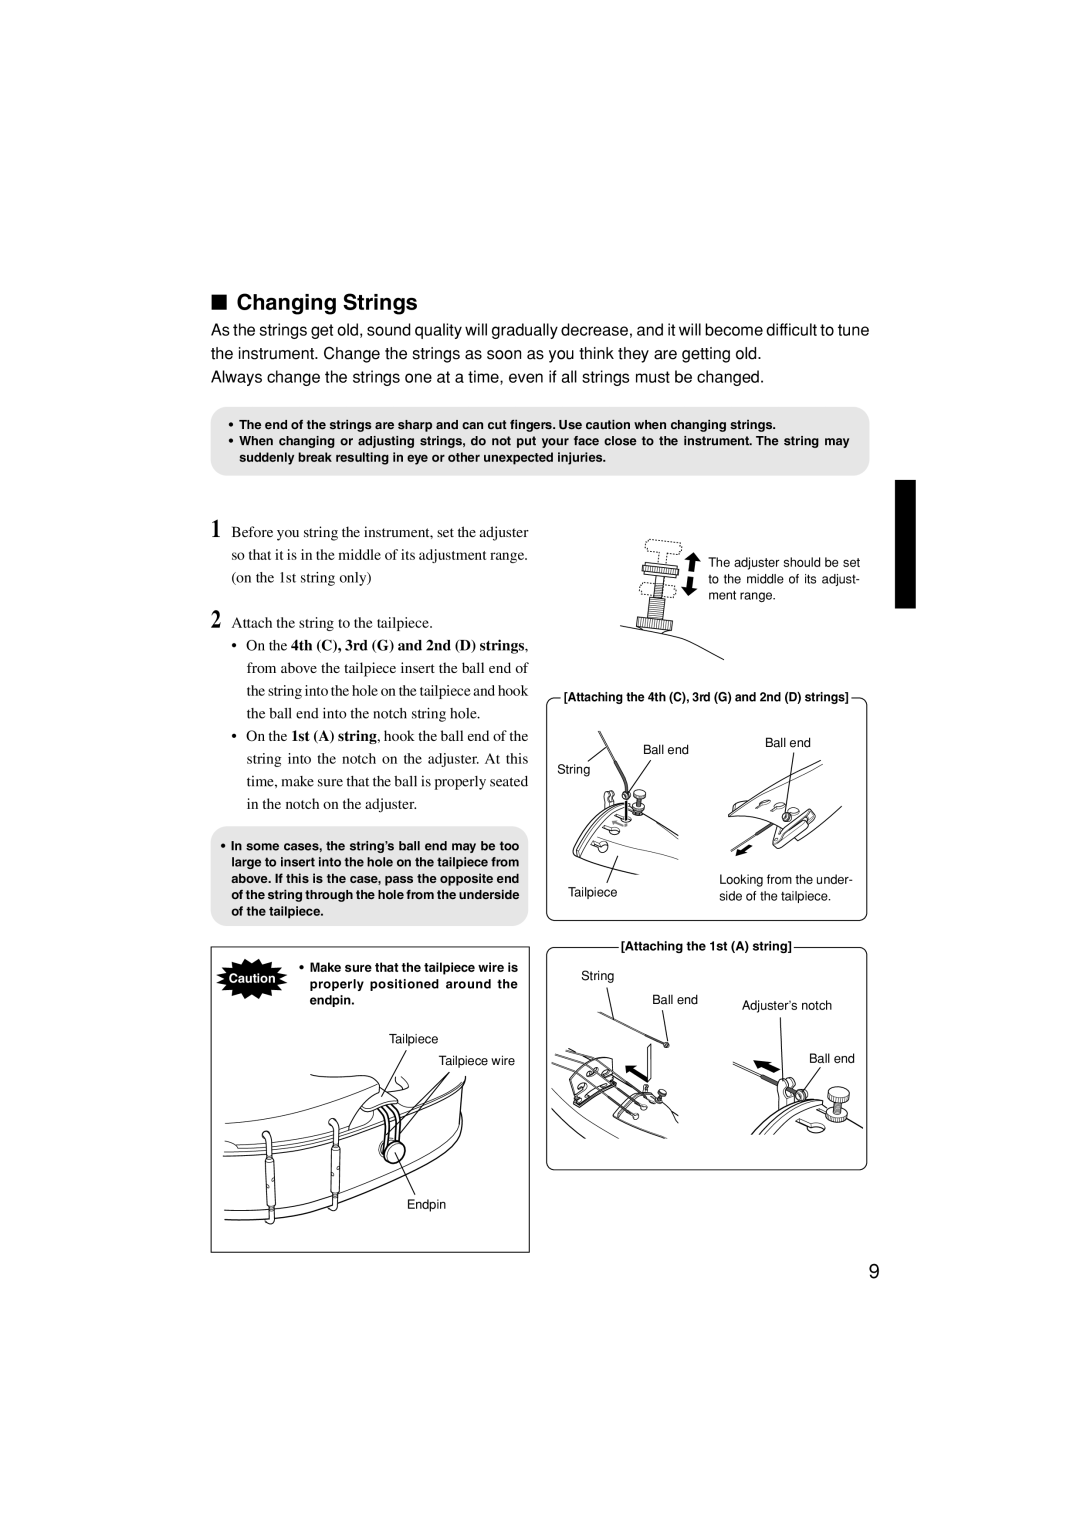
1 Before you string the instrument, set the adjuster so that it is in the middle of its adjustment range. (on the 1st string only)
2 Attach the string to the tailpiece.
• | On the 4th (C), 3rd (G) and 2nd (D) strings, |
| from above the tailpiece insert the ball end of |
| the string into the hole on the tailpiece and hook |
| the ball end into the notch string hole. |
• | On the 1st (A) string, hook the ball end of the |
The adjuster should be set to the middle of its adjust- ment range.
[Attaching the 4th (C), 3rd (G) and 2nd (D) strings]
string into the notch on the adjuster. At this |
time, make sure that the ball is properly seated |
in the notch on the adjuster. |
• In some cases, the string’s ball end may be too |
large to insert into the hole on the tailpiece from |
Ball end
String
Ball end
above. If this is the case, pass the opposite end |
of the string through the hole from the underside |
of the tailpiece. |
•Make sure that the tailpiece wire is
Caution | properly positioned around the |
| |
| endpin. |
| Tailpiece |
| Tailpiece wire |
Looking from the under-
Tailpiece |
| side of the tailpiece. |
|
| |
| [Attaching the 1st (A) string] | |
String |
|
|
| Ball end | Adjuster’s notch |
|
| |
|
| Ball end |
Endpin
9