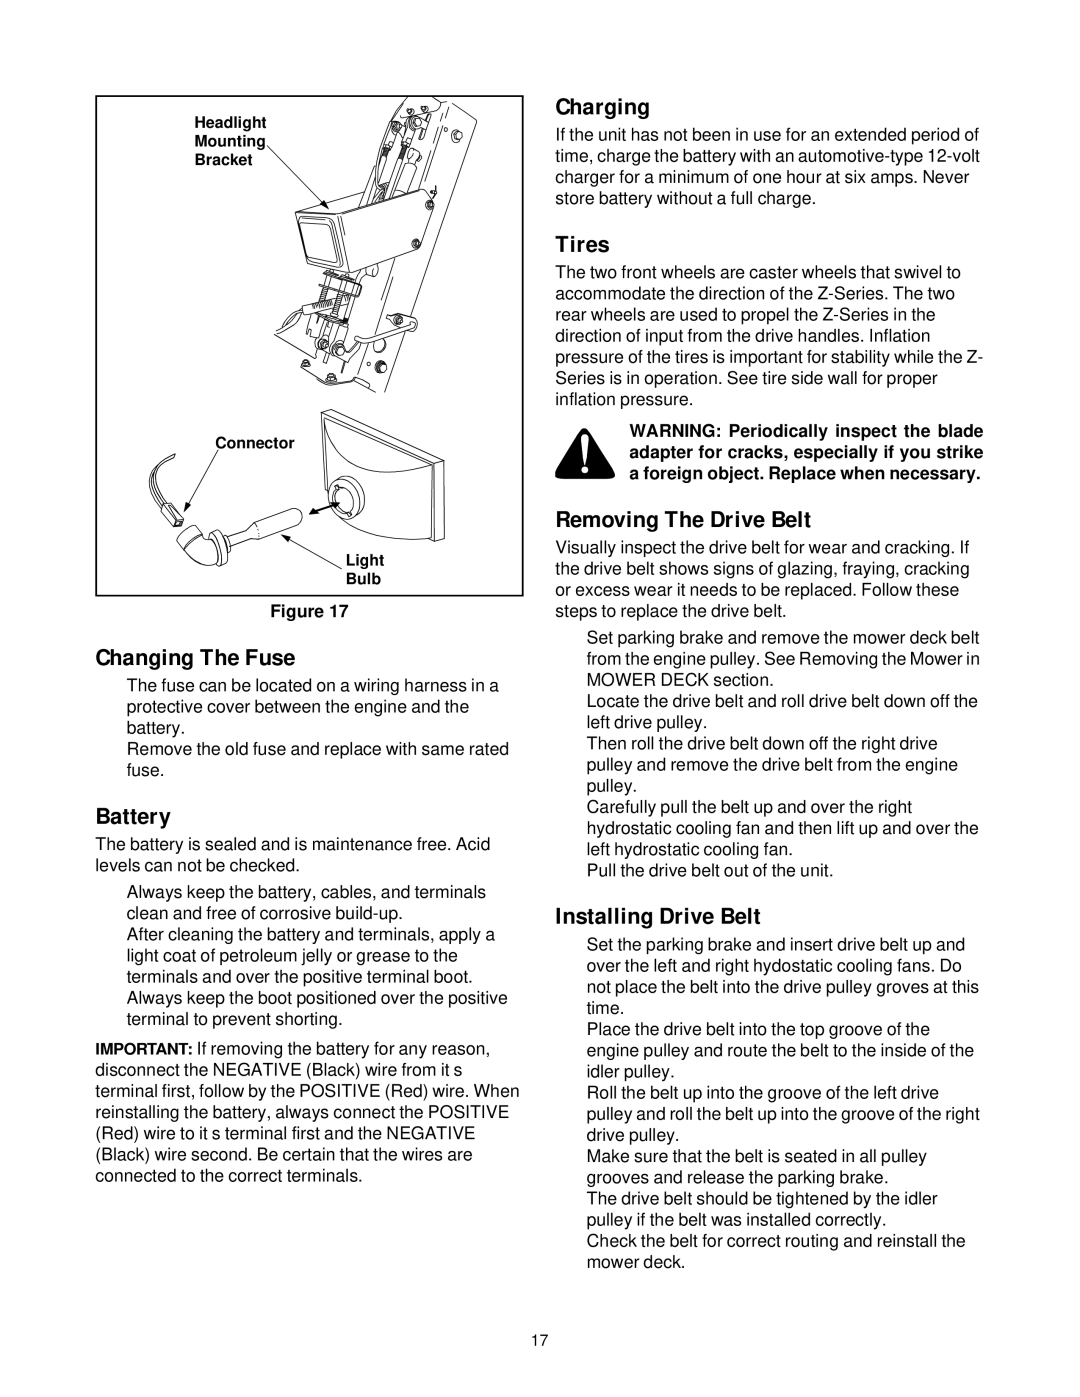
Headlight

Mounting

Bracket

Connector

Light

Bulb

Figure 17

Changing The Fuse

The fuse can be located on a wiring harness in a protective cover between the engine and the battery.

Remove the old fuse and replace with same rated fuse.

Battery

The battery is sealed and is maintenance free. Acid levels can not be checked.

Always keep the battery, cables, and terminals clean and free of corrosive build-up.

After cleaning the battery and terminals, apply a light coat of petroleum jelly or grease to the terminals and over the positive terminal boot.

Always keep the boot positioned over the positive terminal to prevent shorting.

IMPORTANT: If removing the battery for any reason, disconnect the NEGATIVE (Black) wire from it’s terminal first, follow by the POSITIVE (Red) wire. When reinstalling the battery, always connect the POSITIVE (Red) wire to it’s terminal first and the NEGATIVE (Black) wire second. Be certain that the wires are connected to the correct terminals.

Charging

If the unit has not been in use for an extended period of time, charge the battery with an automotive-type 12-volt charger for a minimum of one hour at six amps. Never store battery without a full charge.

Tires

The two front wheels are caster wheels that swivel to accommodate the direction of the Z-Series. The two rear wheels are used to propel the Z-Series in the direction of input from the drive handles. Inflation pressure of the tires is important for stability while the Z- Series is in operation. See tire side wall for proper inflation pressure.

WARNING: Periodically inspect the blade adapter for cracks, especially if you strike a foreign object. Replace when necessary.

Removing The Drive Belt

Visually inspect the drive belt for wear and cracking. If the drive belt shows signs of glazing, fraying, cracking or excess wear it needs to be replaced. Follow these steps to replace the drive belt.

Set parking brake and remove the mower deck belt from the engine pulley. See Removing the Mower in MOWER DECK section.

Locate the drive belt and roll drive belt down off the left drive pulley.

Then roll the drive belt down off the right drive pulley and remove the drive belt from the engine pulley.

Carefully pull the belt up and over the right hydrostatic cooling fan and then lift up and over the left hydrostatic cooling fan.

Pull the drive belt out of the unit.

Installing Drive Belt

Set the parking brake and insert drive belt up and over the left and right hydostatic cooling fans. Do not place the belt into the drive pulley groves at this time.

Place the drive belt into the top groove of the engine pulley and route the belt to the inside of the idler pulley.

Roll the belt up into the groove of the left drive pulley and roll the belt up into the groove of the right drive pulley.

Make sure that the belt is seated in all pulley grooves and release the parking brake.

The drive belt should be tightened by the idler pulley if the belt was installed correctly.

Check the belt for correct routing and reinstall the mower deck.

17

Page 17
Image 17
Yard-Man 53AA1A3G401 manual Changing The Fuse, Battery, Charging, Tires, Removing The Drive Belt, Installing Drive Belt

53AA1A3G401 specifications

The Yard-Man 53AA1A3G401 is a standout model in the realm of outdoor lawn care equipment, specifically designed for homeowners seeking efficiency and ease in lawn maintenance. This lawn mower integrates advanced technology and robust features that cater to both novice and experienced users alike.

One of the most impressive aspects of the Yard-Man 53AA1A3G401 is its powerful engine. The mower is equipped with a reliable gas engine that delivers exceptional performance, ensuring it can tackle a variety of grass types and terrains without compromising on power. The engine is designed for easy starting, minimizing the hassle often associated with traditional pull-start models.

At the heart of the Yard-Man 53AA1A3G401 is its cutting system. This mower features a 21-inch cutting deck that provides a wide swath with each pass, significantly reducing mowing time. The deck is constructed from durable materials, ensuring longevity and resistance to wear. Furthermore, the mower boasts adjustable cutting heights, allowing users to customize the grass length according to their preferences.

Another notable characteristic is the self-propulsion feature, which makes maneuvering this mower a breeze. Users can easily navigate around obstacles and tackle slopes without excessive effort, thanks to the adjustable speed settings that cater to varying terrains. This feature is particularly beneficial for larger lawns or uneven surfaces, where control and ease of operation are essential.

In terms of ergonomics, the Yard-Man 53AA1A3G401 is designed with user comfort in mind. The handles are adjustable and equipped with soft grips, reducing fatigue during extended use. Additionally, the mower is relatively lightweight, making it easier to transport and store when not in use.

The Yard-Man 53AA1A3G401 also comes with a robust grass collection system. It includes a spacious rear bag, allowing for efficient grass clippings collection without frequent stops for emptying. This feature keeps lawns tidy and minimizes the need for additional cleanup efforts afterward.

In summary, the Yard-Man 53AA1A3G401 is a well-rounded lawn mower that combines power, efficiency, and user-friendly features. With its strong engine, adaptable cutting deck, self-propulsion capabilities, and ergonomic design, it stands out as an excellent choice for homeowners looking to maintain a healthy, well-manicured lawn with minimal fuss.