9.Use wrenches to remove hex lock nut (D). Remove two spacers (E), and hex bolt (F) from top of the housing assembly. For easy assembly, do not remove the second spacer from the hex bolt. See Figure 5.
10.Place the discharge chute in position on the discharge opening. Insert hex bolt (F) and spacer (E) through hinge on discharge chute and housing (spacer fits inside of hinge).
11.Place second spacer (E) over hex bolt (F) inside the other half of the hinge. Secure with hex lock nut (D). Tighten securely.
12.Secure both sides of discharge chute to flail housing using wing knobs (C). Tighten wing knobs.
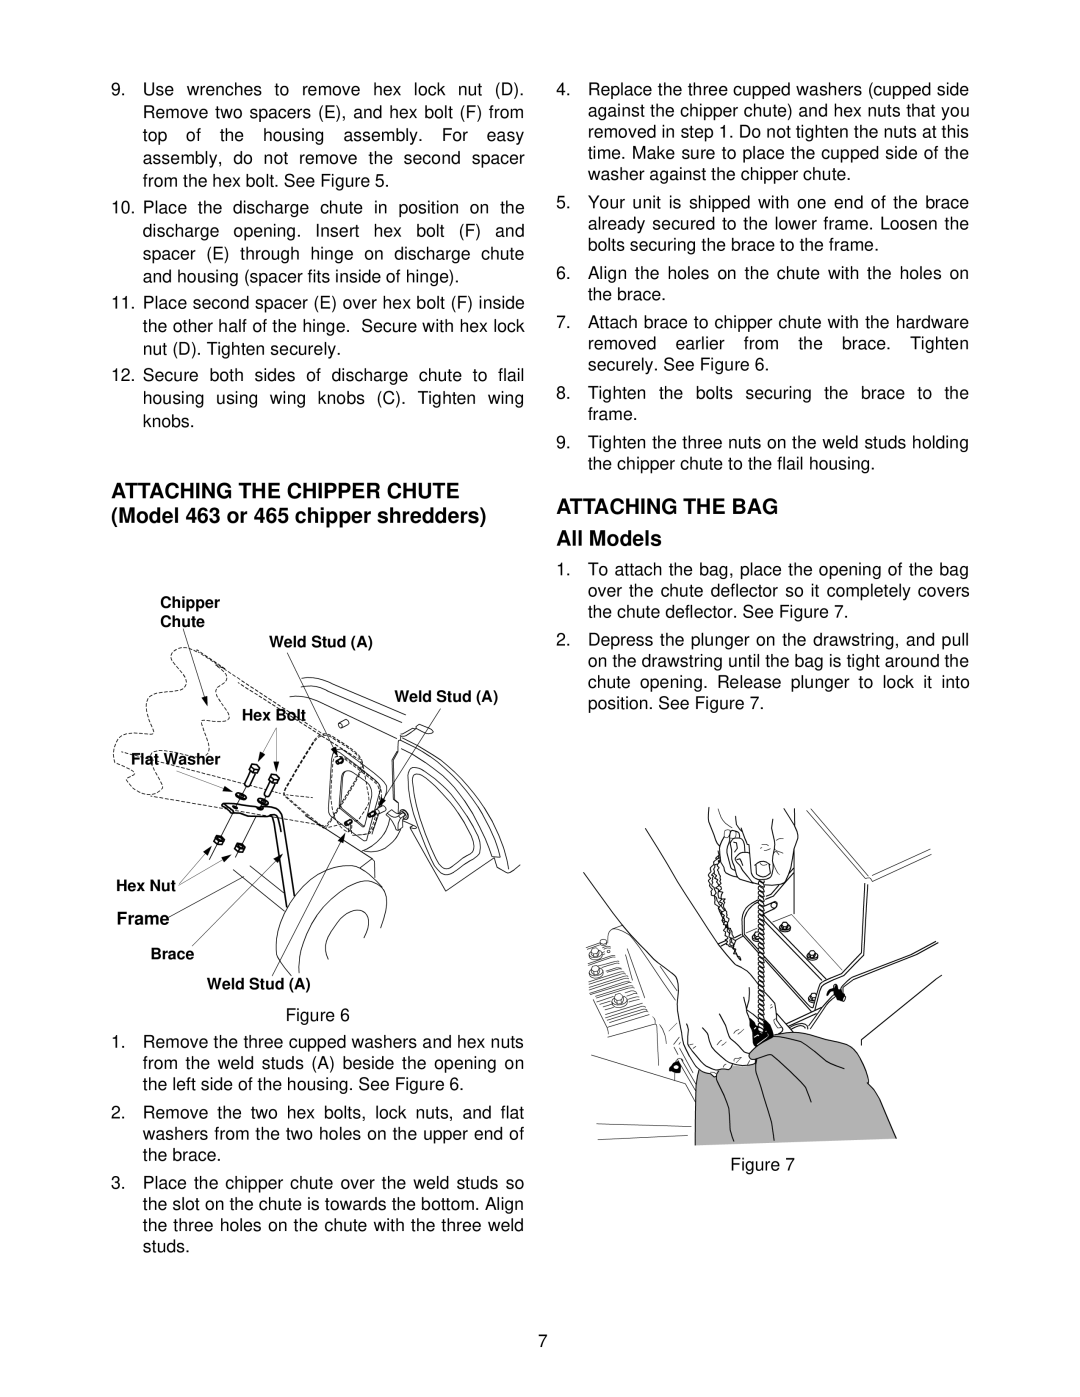
ATTACHING THE CHIPPER CHUTE (Model 463 or 465 chipper shredders)
Chipper
Chute
Weld Stud (A)
Weld Stud (A)
Hex Bolt
Flat Washer
Hex Nut ![]()
Frame
Brace
Weld Stud (A)
Figure 6
1.Remove the three cupped washers and hex nuts from the weld studs (A) beside the opening on the left side of the housing. See Figure 6.
2.Remove the two hex bolts, lock nuts, and flat washers from the two holes on the upper end of the brace.
3.Place the chipper chute over the weld studs so the slot on the chute is towards the bottom. Align the three holes on the chute with the three weld studs.
4.Replace the three cupped washers (cupped side against the chipper chute) and hex nuts that you removed in step 1. Do not tighten the nuts at this time. Make sure to place the cupped side of the washer against the chipper chute.
5.Your unit is shipped with one end of the brace already secured to the lower frame. Loosen the bolts securing the brace to the frame.
6.Align the holes on the chute with the holes on the brace.
7.Attach brace to chipper chute with the hardware removed earlier from the brace. Tighten securely. See Figure 6.
8.Tighten the bolts securing the brace to the frame.
9.Tighten the three nuts on the weld studs holding the chipper chute to the flail housing.
ATTACHING THE BAG
All Models
1.To attach the bag, place the opening of the bag over the chute deflector so it completely covers the chute deflector. See Figure 7.
2.Depress the plunger on the drawstring, and pull on the drawstring until the bag is tight around the chute opening. Release plunger to lock it into position. See Figure 7.
Figure 7
7