MICROMIX
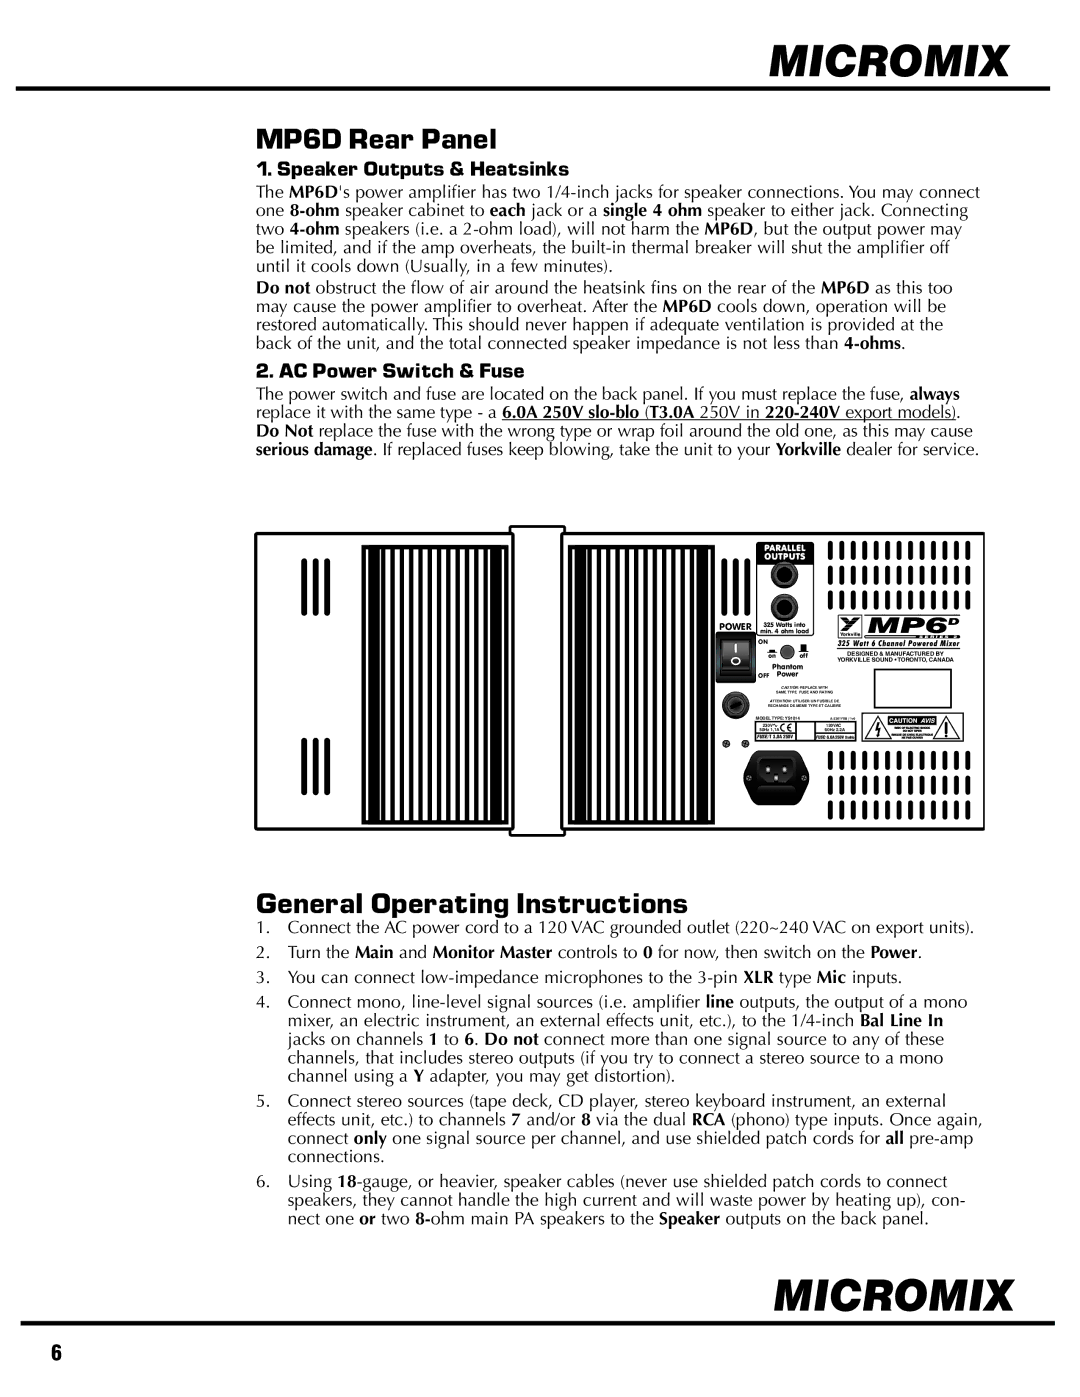
MP6D Rear Panel
1. Speaker Outputs & Heatsinks
The MP6D's power amplifier has two
Do not obstruct the flow of air around the heatsink fins on the rear of the MP6D as this too may cause the power amplifier to overheat. After the MP6D cools down, operation will be restored automatically. This should never happen if adequate ventilation is provided at the back of the unit, and the total connected speaker impedance is not less than
2. AC Power Switch & Fuse
The power switch and fuse are located on the back panel. If you must replace the fuse, always replace it with the same type - a 6.0A 250V
PARALLEL
OUTPUTS
POWER min. 4 ohm load |
|
|
|
|
| |||||||||||||||
|
|
| MP6S E R I E S 2 | |||||||||||||||||
| 325 Watts into |
|
|
|
|
|
| D | ||||||||||||
| ON |
|
|
|
|
|
|
|
|
|
|
|
|
|
|
|
|
| ||
|
|
|
|
|
|
|
|
|
|
|
|
|
|
|
|
| ||||
|
|
| on |
|
|
|
| off |
|
|
| DESIGNED & MANUFACTURED BY | ||||||||
|
|
| Phantom | YORKVILLE SOUND • TORONTO, CANADA | ||||||||||||||||
|
|
|
|
|
|
|
|
|
|
|
| |||||||||
| OFF |
| Power |
|
|
|
|
|
|
|
|
| ||||||||
|
|
|
|
| CAUTION: REPLACE WITH |
|
|
|
|
|
|
|
|
| ||||||
|
|
|
| SAME TYPE FUSE AND RATING |
|
|
|
|
| |||||||||||
|
|
| ATTENTION: UTILISER UN FUSIBLE DE |
|
|
|
|
| ||||||||||||
|
| RECHANGE DE MEME TYPE ET CALIBRE |
|
|
|
|
| |||||||||||||
MODEL TYPE: YS1014 |
|
|
|
|
|
|
| |||||||||||||
|
|
|
|
|
| |||||||||||||||
|
|
|
|
|
|
|
|
|
|
|
|
|
|
|
|
|
|
|
|
|
|
|
|
|
|
|
|
|
|
|
|
|
|
|
|
|
|
|
|
|
|
General Operating Instructions
1.Connect the AC power cord to a 120 VAC grounded outlet (220~240 VAC on export units).
2.Turn the Main and Monitor Master controls to 0 for now, then switch on the Power.
3.You can connect
4.Connect mono,
5.Connect stereo sources (tape deck, CD player, stereo keyboard instrument, an external effects unit, etc.) to channels 7 and/or 8 via the dual RCA (phono) type inputs. Once again, connect only one signal source per channel, and use shielded patch cords for all
6.Using
MICROMIX
6