On the opposite side:
1 | Install the lower pin. |
2 | Install the lower door. |
3 | Tighten the middle |
hinge. | |
4 | Install the upper door. |
5 | Tighten the spacer and |
x
![]() 2
2
x1
4Remove the lower door.
4Loosen the lower pin.
the upper pin. |
1If necessary cut the adhesive sealing strip and then apply it to the appli- ance as shown in figure.
2 Install the appliance in |
the niche. |
Push the appliance in the |
direction of the arrows (1) |
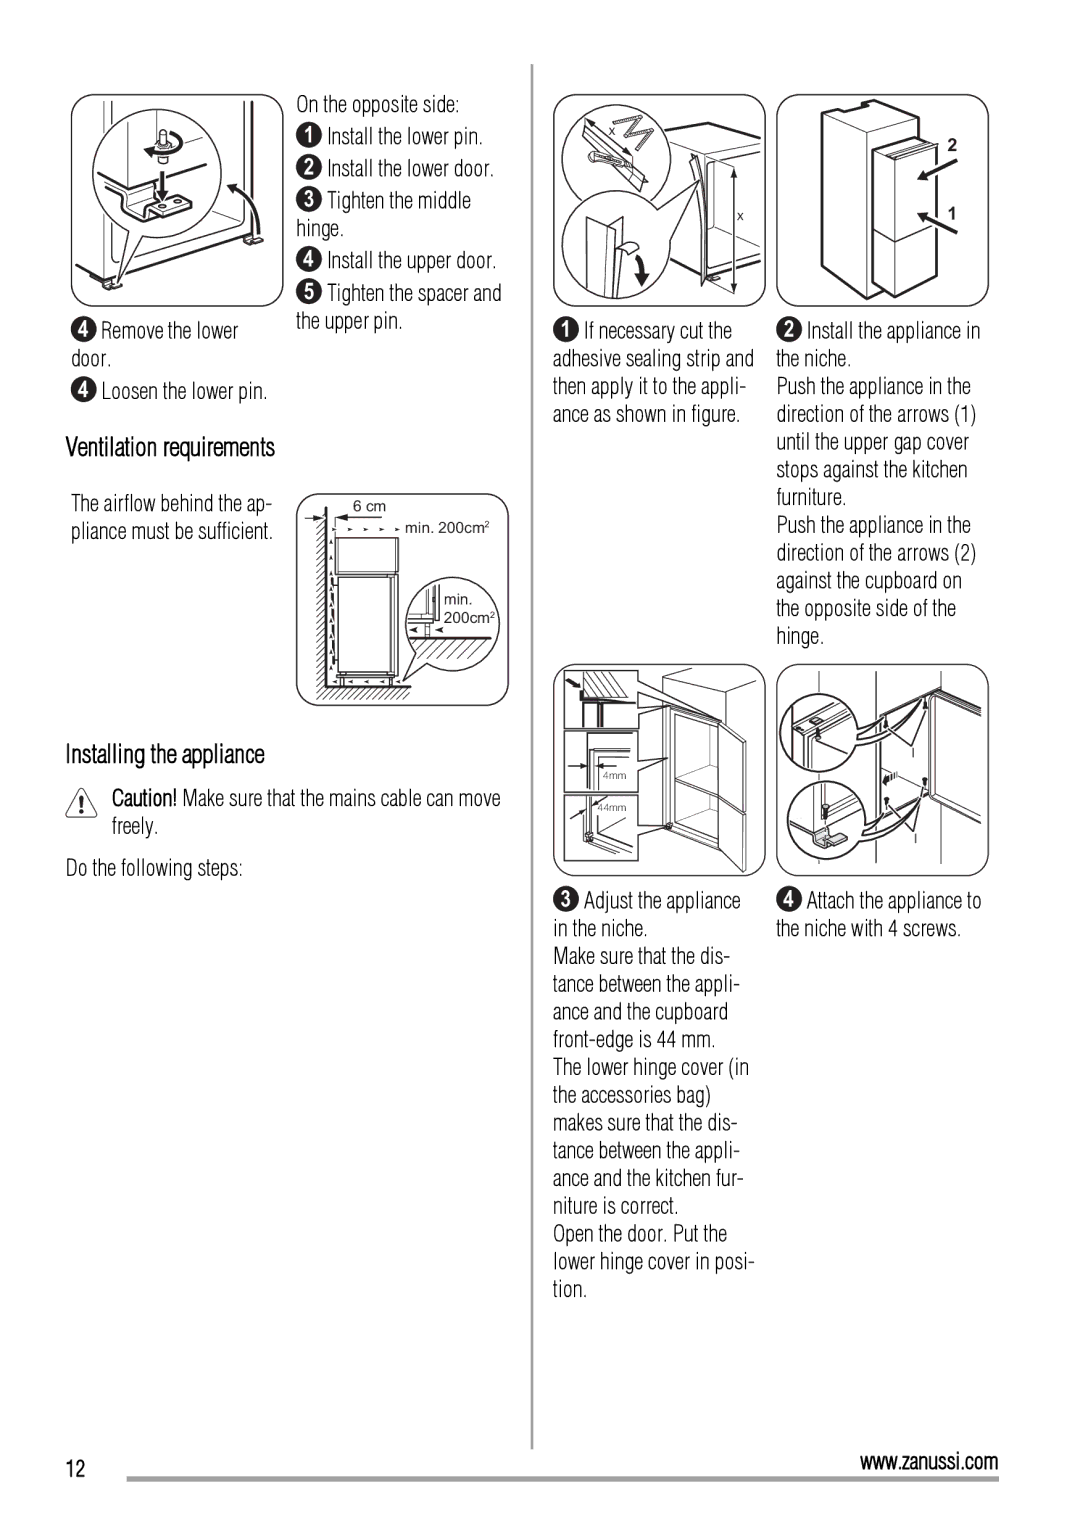
Ventilation requirements
The airflow behind the ap- pliance must be sufficient.
6 cm |
min. 200cm2 |
min. |
200cm2 |
until the upper gap cover |
stops against the kitchen |
furniture. |
Push the appliance in the |
direction of the arrows (2) |
against the cupboard on |
the opposite side of the |
hinge. |
Installing the appliance
Caution! Make sure that the mains cable can move freely.
Do the following steps:
I
4mm
![]() 44mm
44mm
I
3Adjust the appliance in the niche.
Make sure that the dis- tance between the appli- ance and the cupboard
Open the door. Put the lower hinge cover in posi- tion.
4Attach the appliance to the niche with 4 screws.
12
www.zanussi.com