Location
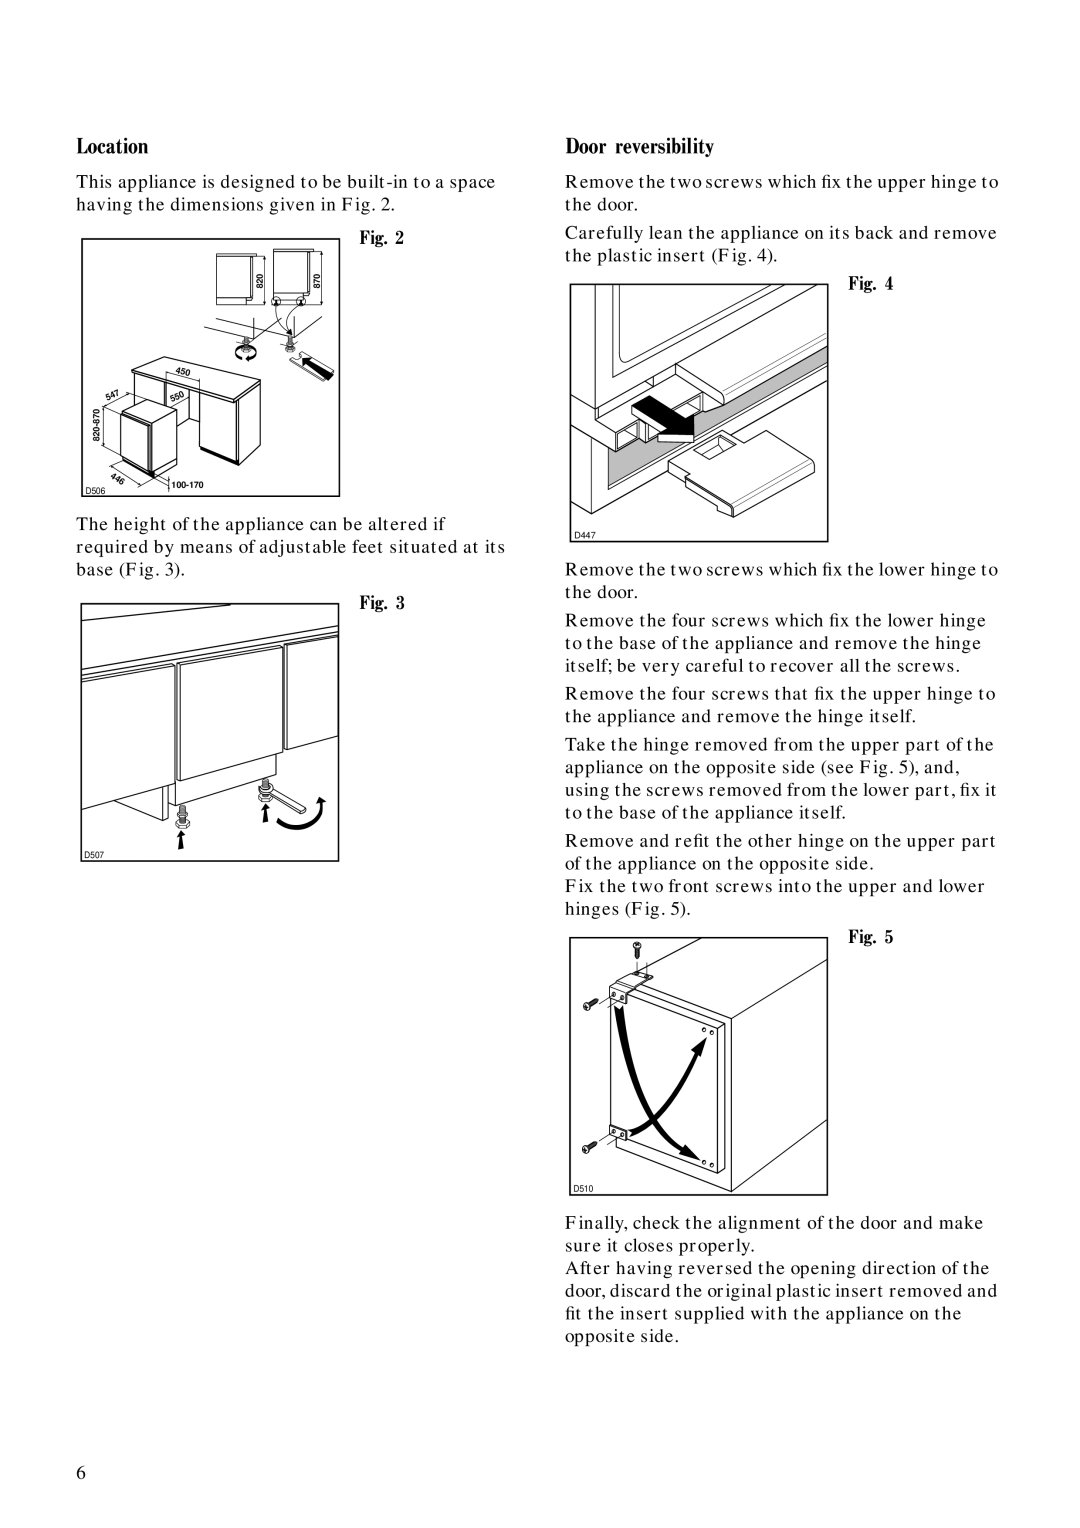
This appliance is designed to be
|
| Fig. 2 |
| 820 | 870 |
| 450 |
|
547 | 550 |
|
|
| |
446 |
| |
D506 |
| |
|
|
The height of the appliance can be altered if required by means of adjustable feet situated at its base (Fig. 3).
Fig. 3
D507
Door reversibility
Remove the two screws which fix the upper hinge to the door.
Carefully lean the appliance on its back and remove the plastic insert (Fig. 4).
Fig. 4
D447
Remove the two screws which fix the lower hinge to the door.
Remove the four screws which fix the lower hinge to the base of the appliance and remove the hinge itself; be very careful to recover all the screws.
Remove the four screws that fix the upper hinge to the appliance and remove the hinge itself.
Take the hinge removed from the upper part of the appliance on the opposite side (see Fig. 5), and, using the screws removed from the lower part, fix it to the base of the appliance itself.
Remove and refit the other hinge on the upper part of the appliance on the opposite side.
Fix the two front screws into the upper and lower hinges (Fig. 5).
Fig. 5
D510
Finally, check the alignment of the door and make sure it closes properly.
After having reversed the opening direction of the door, discard the original plastic insert removed and fit the insert supplied with the appliance on the opposite side.
6
