DEFROSTING
The refrigerator automatically defrosts every time the compressor stops. The water is discharged, via the pipe, into a tray located at the back of the appliance above the compressor, where it evaporates.
Important
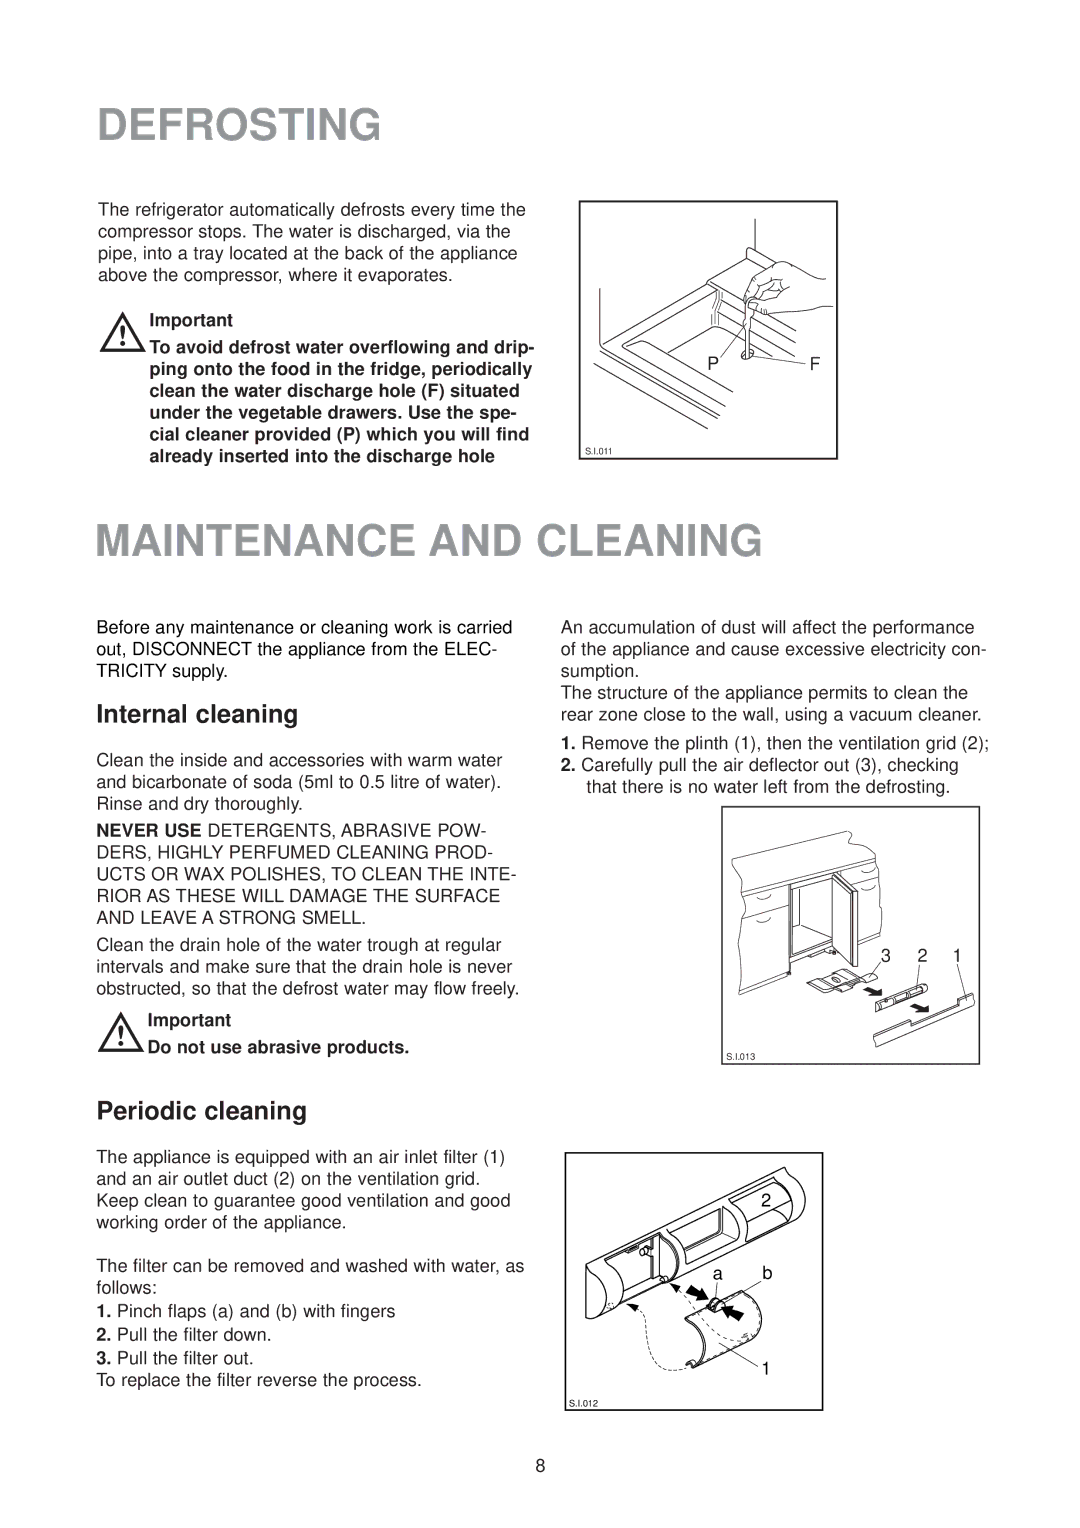
To avoid defrost water overflowing and drip- ping onto the food in the fridge, periodically clean the water discharge hole (F) situated under the vegetable drawers. Use the spe- cial cleaner provided (P) which you will find already inserted into the discharge hole
P![]() F
F
S.I.011
MAINTENANCE AND CLEANING
Before any maintenance or cleaning work is carried out, DISCONNECT the appliance from the ELEC- TRICITY supply.
Internal cleaning
Clean the inside and accessories with warm water and bicarbonate of soda (5ml to 0.5 litre of water). Rinse and dry thoroughly.
NEVER USE DETERGENTS, ABRASIVE POW- DERS, HIGHLY PERFUMED CLEANING PROD- UCTS OR WAX POLISHES, TO CLEAN THE INTE- RIOR AS THESE WILL DAMAGE THE SURFACE AND LEAVE A STRONG SMELL.
Clean the drain hole of the water trough at regular intervals and make sure that the drain hole is never obstructed, so that the defrost water may flow freely.
Important
Do not use abrasive products.
An accumulation of dust will affect the performance of the appliance and cause excessive electricity con- sumption.
The structure of the appliance permits to clean the rear zone close to the wall, using a vacuum cleaner.
1.Remove the plinth (1), then the ventilation grid (2);
2.Carefully pull the air deflector out (3), checking that there is no water left from the defrosting.
3 | 2 | 1 |
S.I.013 |
|
|
Periodic cleaning
The appliance is equipped with an air inlet filter (1) and an air outlet duct (2) on the ventilation grid. Keep clean to guarantee good ventilation and good working order of the appliance.
The filter can be removed and washed with water, as follows:
1.Pinch flaps (a) and (b) with fingers
2.Pull the filter down.
3.Pull the filter out.
To replace the filter reverse the process.
| 2 |
a | b |
| 1 |
S.I.012 |
|
8