4.Move the choke lever to the closed position.
5.Set the stop switch to the “RUN” position. Place the unit on a flat, firm place.
Keep the cutting head clear of everything around it.
(1)
(1)
(1) Stop switch
6.While holding the unit firmly, pull out the starter rope quickly until engine fires.

 WARNING
The product is equipped with a centrifugal clutch mechanism, so the cutting attachment begins to rotate as soon as the engine is started by putting the throttle into the start position. When starting the engine, place the product onto the ground in a flat clear area and hold it firmly in place so as to ensure that neither the cutting part nor the throttle come into contact with any obstacle when the engine starts.
IMPORTANT
Avoid pulling the rope to its end or returning it by releasing the knob. Such actions can cause starter failures.
7.Move the choke lever downward to open the choke. And restart engine.
8.Allow the engine to warm up for a several minutes before starting operation.
NOTE
1.When restarting the engine immediately after stopping it, leave the choke open.
2.Overchoking can make the engine hard to start due to excess fuel. When the engine failed to start after several attempts, open the choke and repeat pulling the rope, or remove the spark plug and dry it.
■STOPPING ENGINE
1.Release the throttle trigger and run the engine for half a minute.
2.Shift the stop switch to the STOP position.
(1)
(1)
(1) Stop switch
IMPORTANT
Except for an emergency, avoid stopping the engine while pulling the throttle lever.
■ADJUSTING THROTTLE CABLE
•The normal play is 1 or 2 mm when measured at the carburetor side end. Readjust with the cable adjuster as required.
(1)
(1) Cable adjuster
■ADJUSTING IDLING SPEED
1.When the engine tends to stop frequently at idling mode, turn the adjusting screw clockwise.
2.When the cutting head keeps rotating after releasing the trigger, turn the adjusting screw counter-clockwise.
(1) Idle adjusting screw
NOTE
Warm up the engine before adjusting the idling speed.
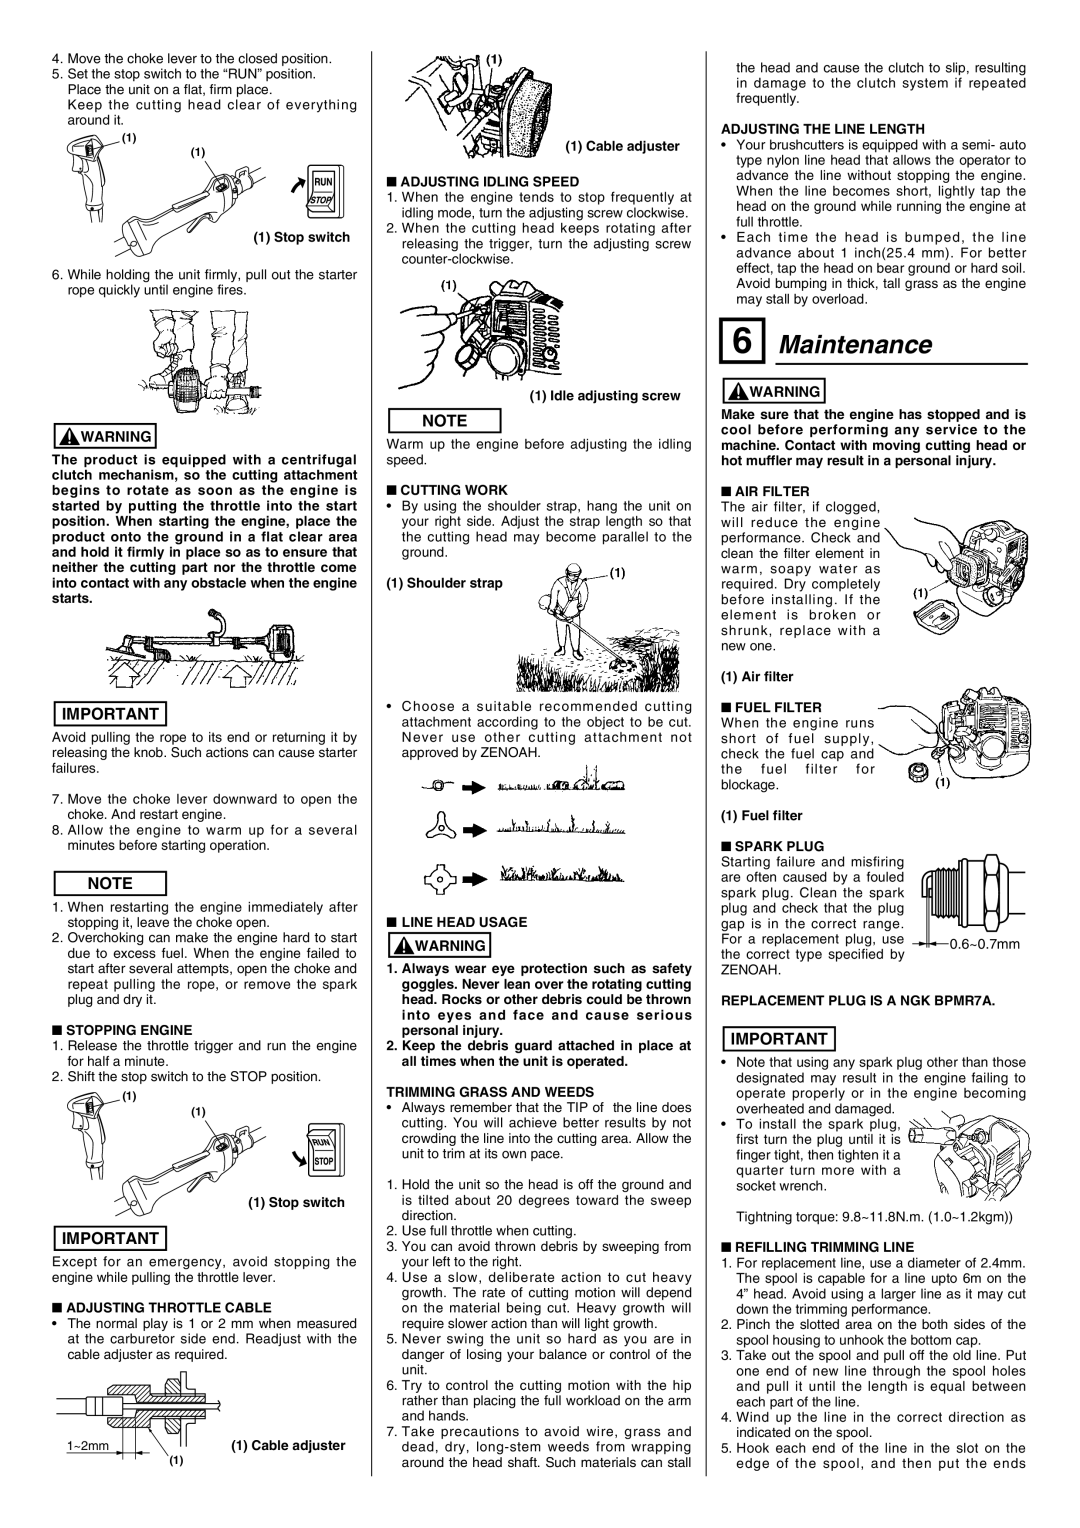
■CUTTING WORK
•By using the shoulder strap, hang the unit on your right side. Adjust the strap length so that the cutting head may become parallel to the ground.
(1) Shoulder strap
•Choose a suitable recommended cutting attachment according to the object to be cut. Never use other cutting attachment not approved by ZENOAH.
■LINE HEAD USAGE

 WARNING
1.Always wear eye protection such as safety goggles. Never lean over the rotating cutting head. Rocks or other debris could be thrown into eyes and face and cause serious personal injury.
2.Keep the debris guard attached in place at all times when the unit is operated.
TRIMMING GRASS AND WEEDS
•Always remember that the TIP of the line does cutting. You will achieve better results by not crowding the line into the cutting area. Allow the unit to trim at its own pace.
1.Hold the unit so the head is off the ground and is tilted about 20 degrees toward the sweep direction.
2.Use full throttle when cutting.
3.You can avoid thrown debris by sweeping from your left to the right.
4.Use a slow, deliberate action to cut heavy growth. The rate of cutting motion will depend on the material being cut. Heavy growth will require slower action than will light growth.
5.Never swing the unit so hard as you are in danger of losing your balance or control of the unit.
6.Try to control the cutting motion with the hip rather than placing the full workload on the arm and hands.
7.Take precautions to avoid wire, grass and dead, dry, long-stem weeds from wrapping around the head shaft. Such materials can stall
the head and cause the clutch to slip, resulting in damage to the clutch system if repeated frequently.
ADJUSTING THE LINE LENGTH
•Your brushcutters is equipped with a semi- auto type nylon line head that allows the operator to advance the line without stopping the engine. When the line becomes short, lightly tap the head on the ground while running the engine at full throttle.
•Each time the head is bumped, the line advance about 1 inch(25.4 mm). For better effect, tap the head on bear ground or hard soil. Avoid bumping in thick, tall grass as the engine may stall by overload.
6 Maintenance

 WARNING
Make sure that the engine has stopped and is cool before performing any service to the machine. Contact with moving cutting head or hot muffler may result in a personal injury.
■AIR FILTER
The air filter, if clogged, will reduce the engine performance. Check and clean the filter element in warm, soapy water as required. Dry completely before installing. If the element is broken or shrunk, replace with a new one.
(1) Air filter
■FUEL FILTER
When the engine runs short of fuel supply, check the fuel cap and the fuel filter for blockage.
(1) Fuel filter
■SPARK PLUG
Starting failure and misfiring are often caused by a fouled spark plug. Clean the spark plug and check that the plug gap is in the correct range.
For a replacement plug, use  0.6~0.7mm the correct type specified by
ZENOAH.
REPLACEMENT PLUG IS A NGK BPMR7A.
IMPORTANT
•Note that using any spark plug other than those designated may result in the engine failing to operate properly or in the engine becoming overheated and damaged.
•To install the spark plug, first turn the plug until it is finger tight, then tighten it a quarter turn more with a socket wrench.
Tightning torque: 9.8~11.8N.m. (1.0~1.2kgm))
■REFILLING TRIMMING LINE
1.For replacement line, use a diameter of 2.4mm. The spool is capable for a line upto 6m on the 4” head. Avoid using a larger line as it may cut down the trimming performance.
2.Pinch the slotted area on the both sides of the spool housing to unhook the bottom cap.
3.Take out the spool and pull off the old line. Put one end of new line through the spool holes and pull it until the length is equal between each part of the line.
4.Wind up the line in the correct direction as indicated on the spool.
5.Hook each end of the line in the slot on the edge of the spool, and then put the ends