Troy-Bilt 42051, 42052 owner manual Assembly, Install Handlebars, Install Discharge Chute

Page 7

Section 2: Assembly

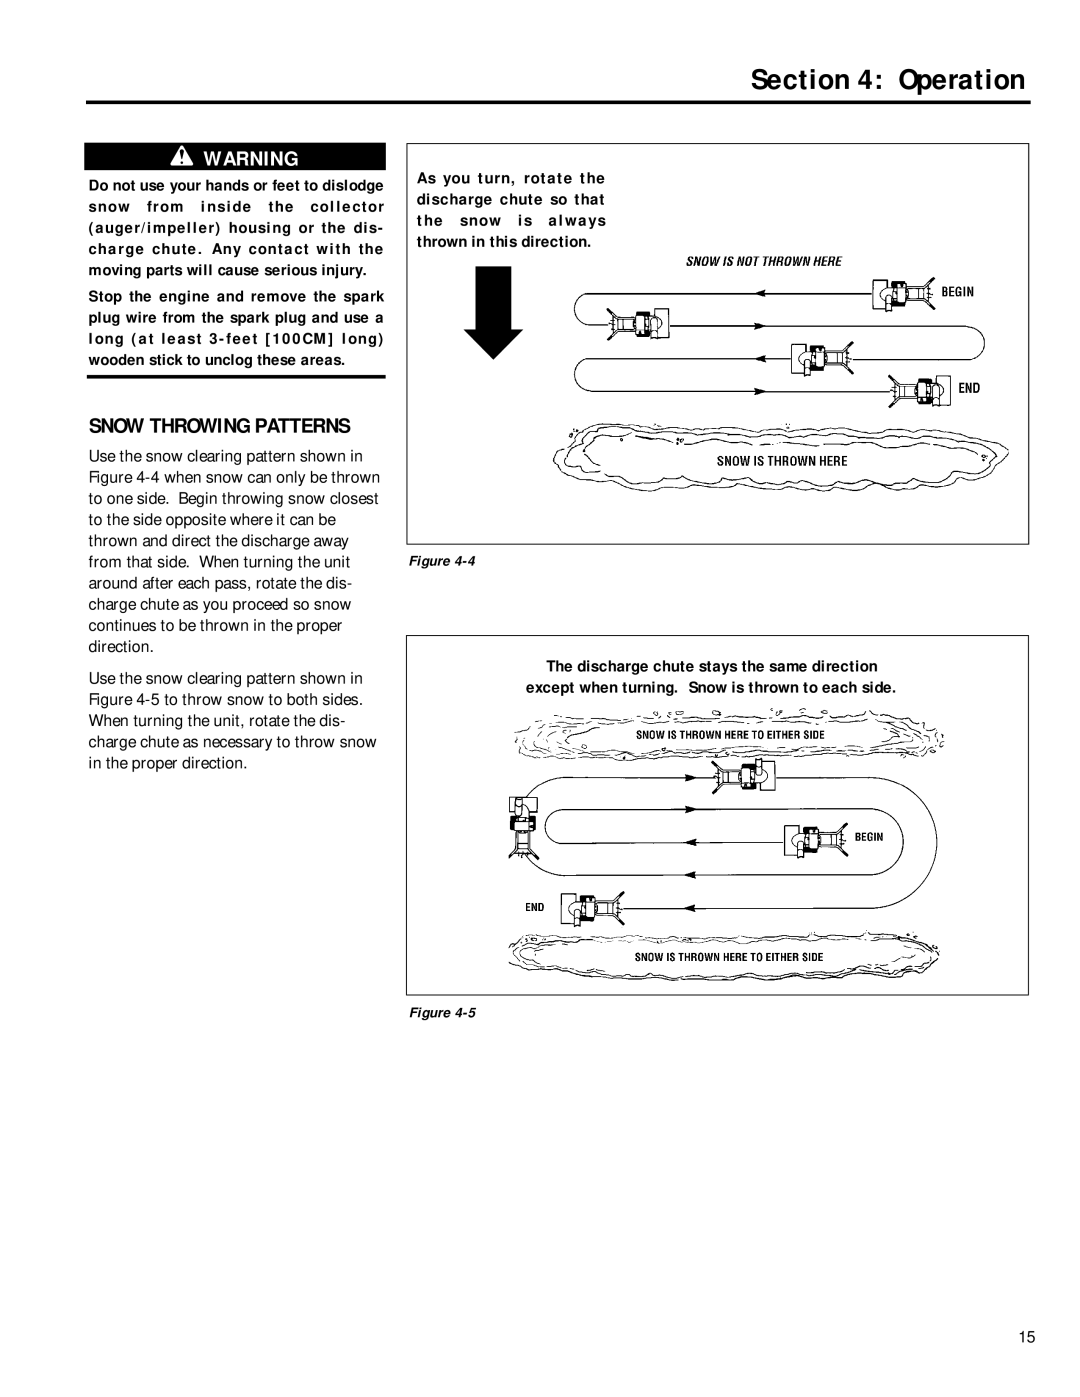
D. Install Handlebars

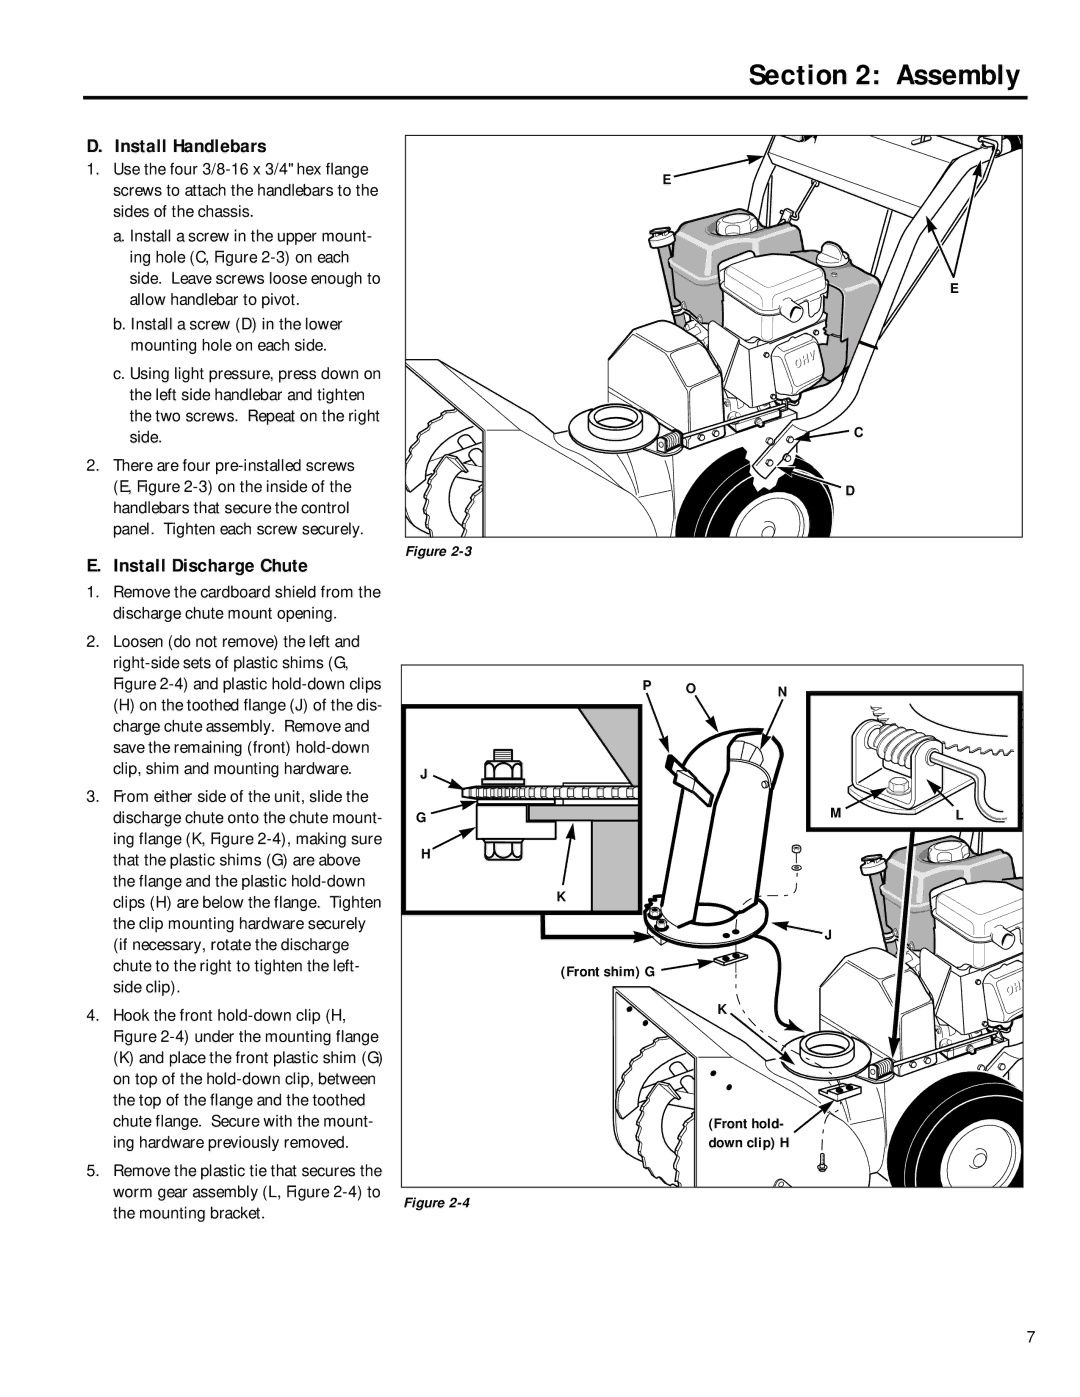
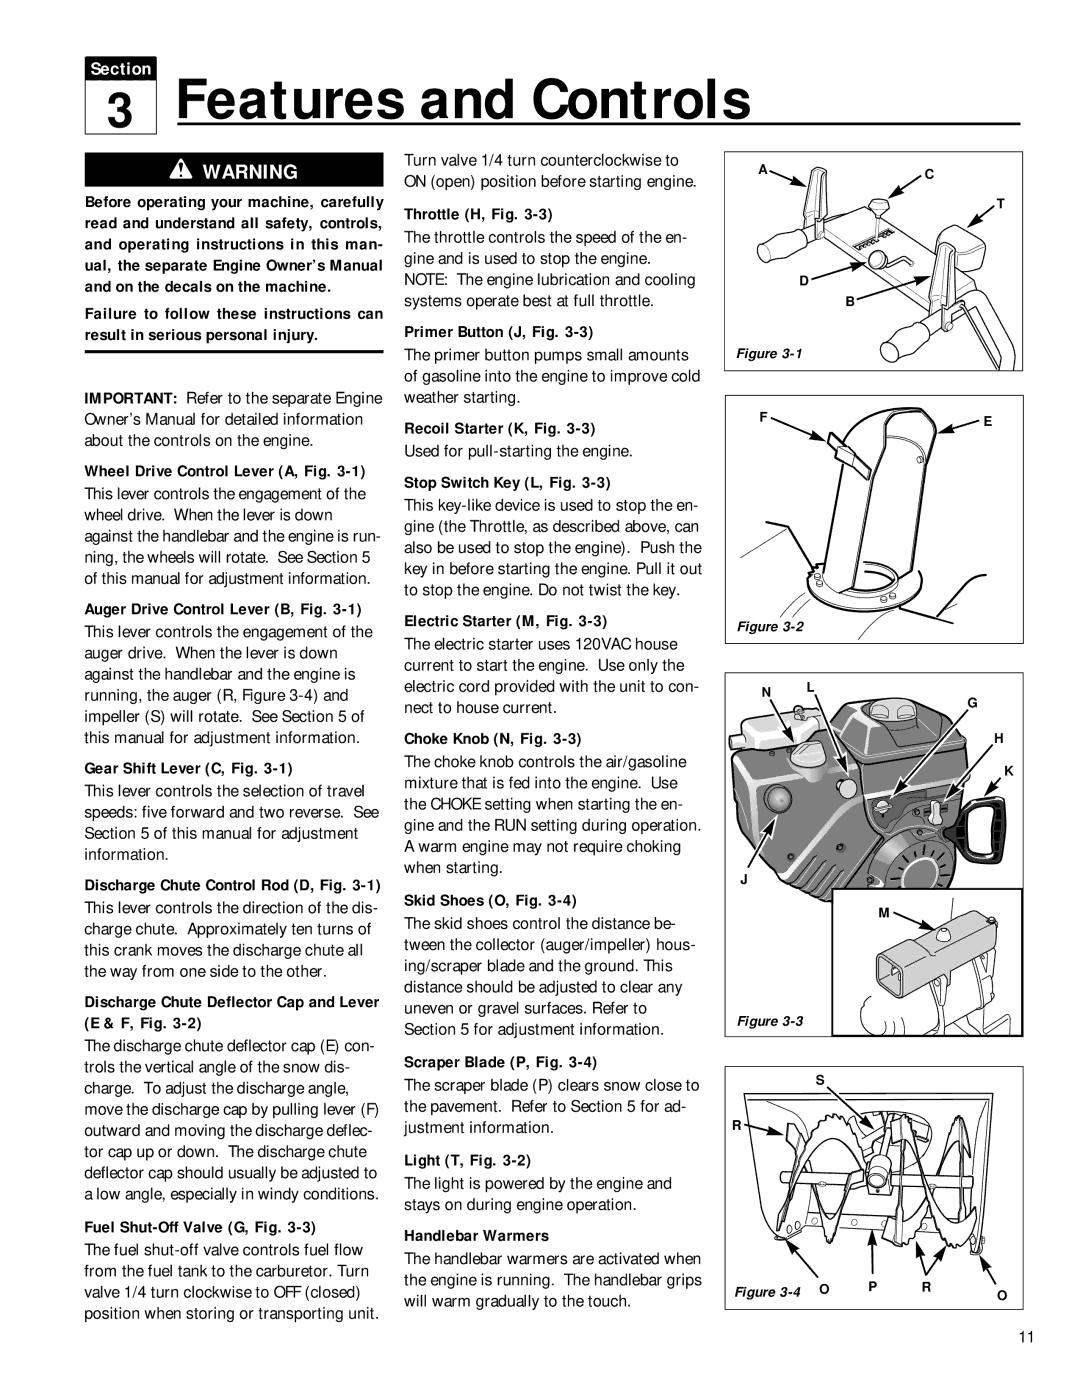
1.Use the four 3/8-16 x 3/4" hex flange screws to attach the handlebars to the sides of the chassis.

a.Install a screw in the upper mount- ing hole (C, Figure 2-3) on each side. Leave screws loose enough to allow handlebar to pivot.

b.Install a screw (D) in the lower mounting hole on each side.

c.Using light pressure, press down on the left side handlebar and tighten the two screws. Repeat on the right side.

2.There are four pre-installed screws (E, Figure 2-3) on the inside of the handlebars that secure the control panel. Tighten each screw securely.

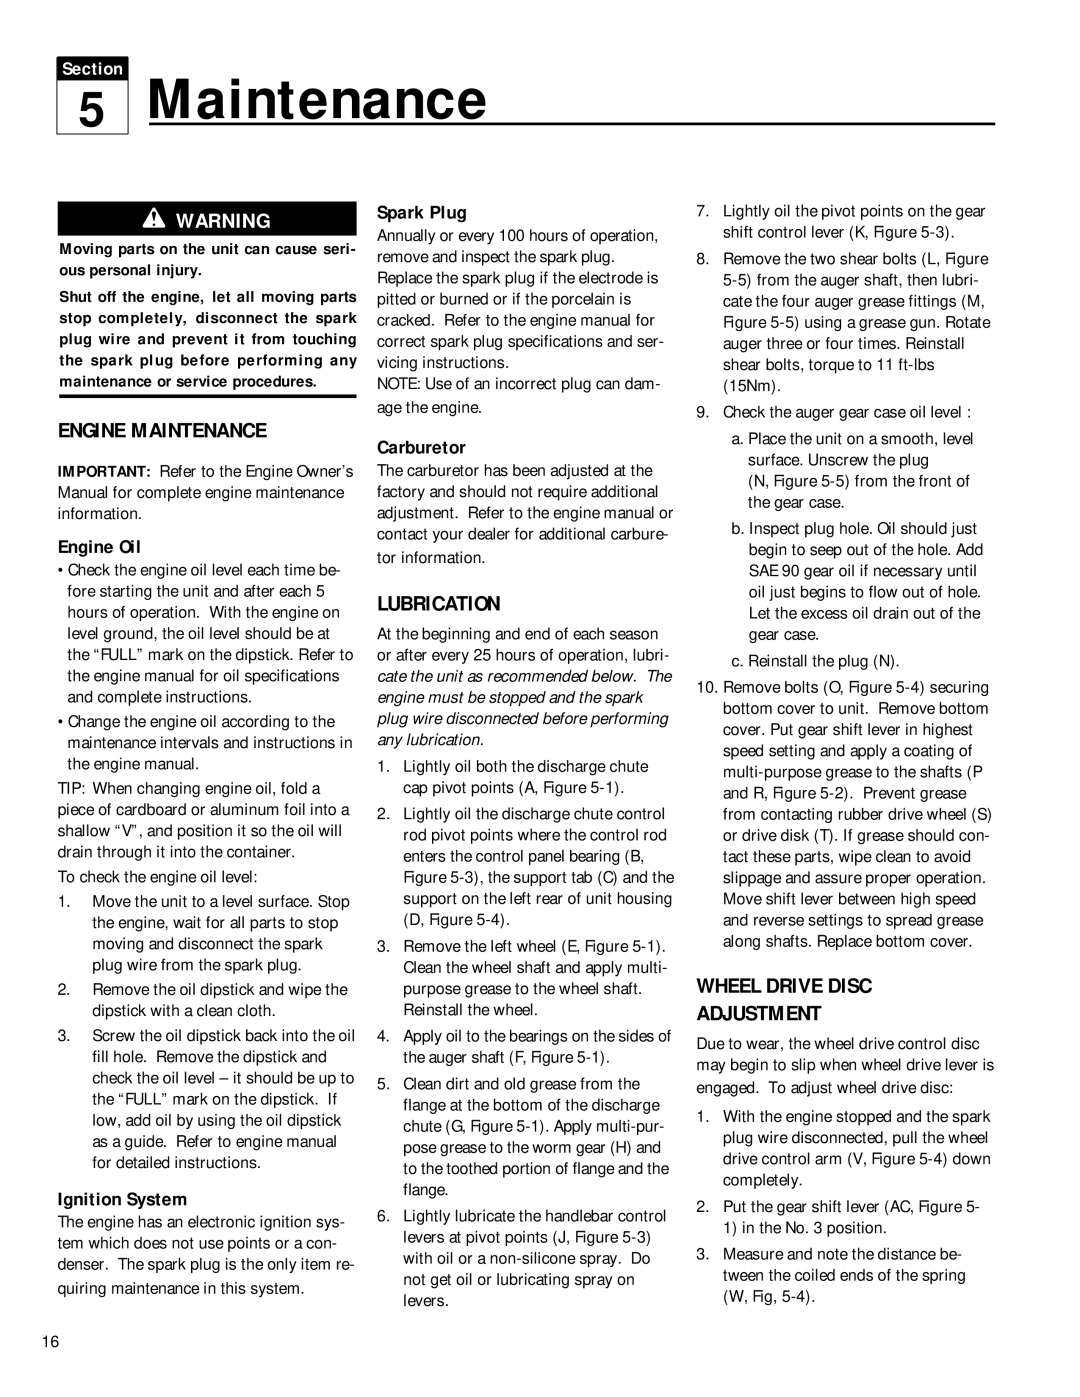
E. Install Discharge Chute

1.Remove the cardboard shield from the discharge chute mount opening.

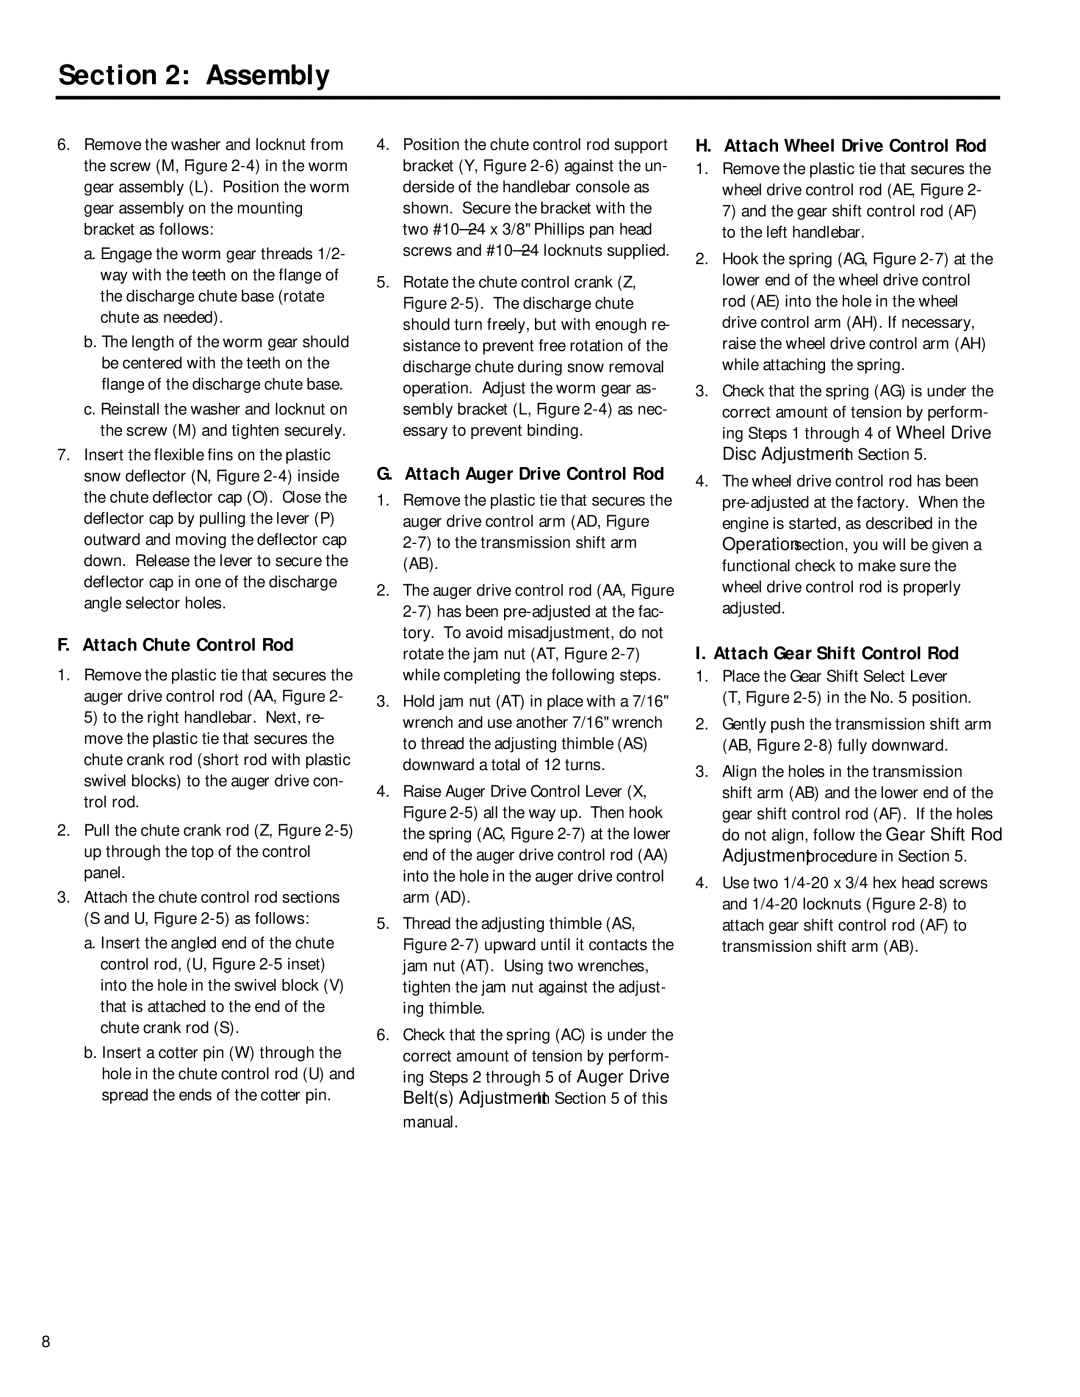
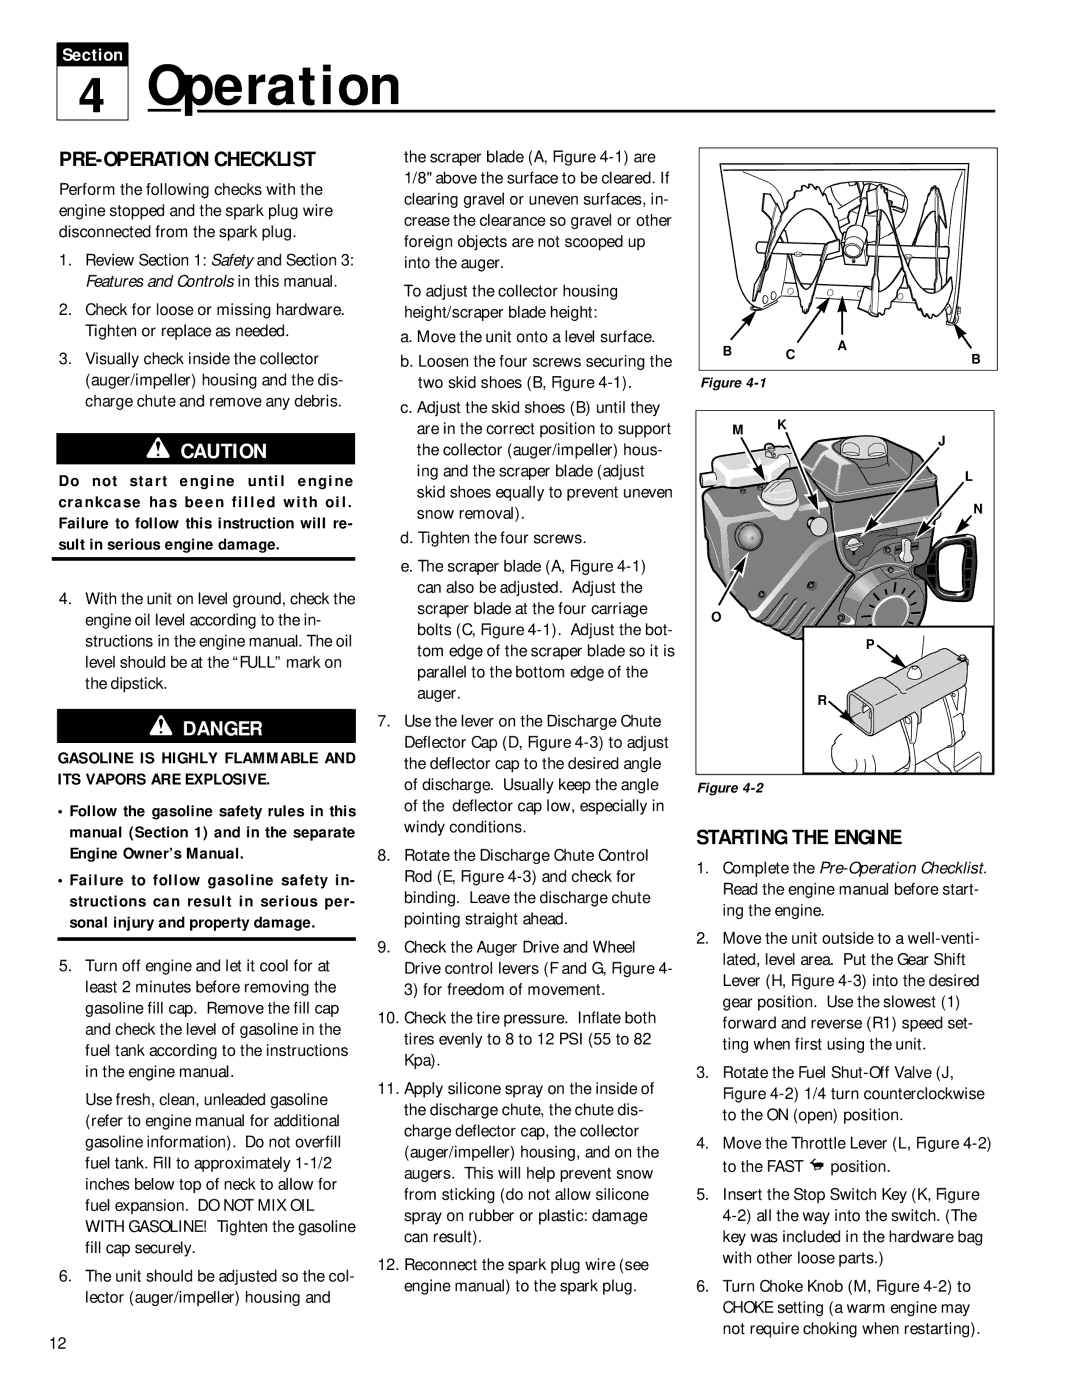
2.Loosen (do not remove) the left and right-side sets of plastic shims (G, Figure 2-4) and plastic hold-down clips

(H)on the toothed flange (J) of the dis- charge chute assembly. Remove and save the remaining (front) hold-down clip, shim and mounting hardware.

3.From either side of the unit, slide the discharge chute onto the chute mount- ing flange (K, Figure 2-4), making sure that the plastic shims (G) are above the flange and the plastic hold-down clips (H) are below the flange. Tighten the clip mounting hardware securely (if necessary, rotate the discharge chute to the right to tighten the left- side clip).

4.Hook the front hold-down clip (H, Figure 2-4) under the mounting flange

(K)and place the front plastic shim (G) on top of the hold-down clip, between the top of the flange and the toothed chute flange. Secure with the mount- ing hardware previously removed.

5.Remove the plastic tie that secures the worm gear assembly (L, Figure 2-4) to the mounting bracket.

E

E

C

D

Figure 2-3

P

O

N


J


G


M

L

H


K


J


(Front shim) G


K


(Front hold-


down clip) H


Figure 2-4


7

Image 7
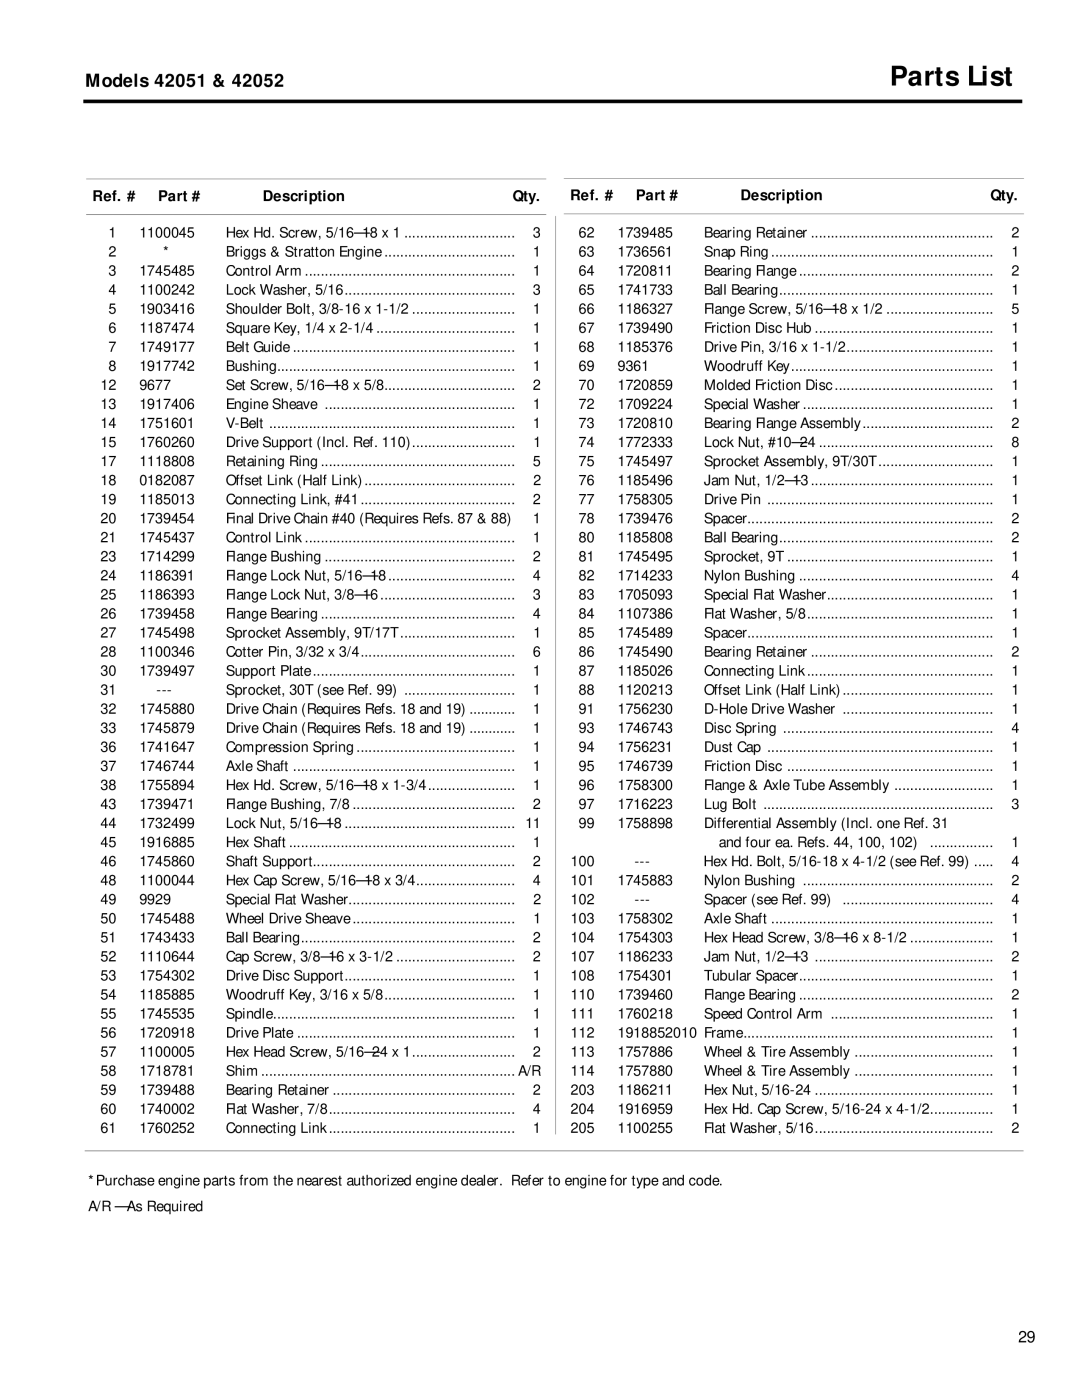
Contents Snow Thrower See Back Cover for Customer Service Information Keep the area of operation clear SafetyTraining PreparationOperation SafetySafety Decals Maintenance and StorageDescription AssemblyInspect Unit Unpack UnitInstall Handlebars AssemblyInstall Discharge Chute Attach Wheel Drive Control Rod Attach Chute Control RodAttach Gear Shift Control Rod Assembly Check Auger Gear Case Oil Level Connect Wiring for Handlebar Warmers and LightAdd Motor Oil to Crankcase Check Tire PressureFeatures and Controls Gasoline is Highly Flammable and ITS Vapors are Explosive PRE-OPERATION ChecklistOperation Starting the EngineNormal non-emergency stopping OperationStopping Emergency stoppingSnow Throwing Tips Auger Drive EngagementShifting Gears Transporting the UnitSnow Throwing Patterns Lubrication MaintenanceEngine Maintenance Wheel Drive Disc AdjustmentMaintenance 15 Nm Auger Drive Belts AdjustmentInstallation Shear BoltsBrake ARM Adjustment Drive Disc Clearance AdjustmentOFF-SEASON Storage Slip Differential AdjustmentTrouble Possible Problem Solution TroubleshootingDisengaged Auger spins with drive leverAuger drive control lever does not Engage auger driveSchedule Required Maintenance ScheduleOptional Kits and Accessories Specifications, Optional Kits and AccessoriesSPECIFICATIONS/OPTIONAL Kits and Accessories SpecificationsRef. # Description Qty Parts ListDescription Qty Drawing no Ref. # Description Parts List104 108 203 205 204 112 111 113 110 1100045 Drawing no 1185403 Owner Registration Card Warranty ServiceReplacement Parts Engine Service and Repair

42051, 42052 specifications

Troy-Bilt has long been a trusted name in outdoor power equipment, and the models 42051 and 42052 continue this tradition with their robust features and reliable performance. Designed for residential lawn care and landscaping tasks, these models are primarily known for their powerful engine, ease of use, and innovative technology that cater to both novice and experienced users.

At the heart of the Troy-Bilt 42051 and 42052 is a reliable 420cc engine that delivers exceptional power for tackling various yard tasks, whether it's mowing, mulching, or bagging. The engine’s design emphasizes efficiency and ease of starting, ensuring that users can get right to work without any hassle. This engine has been engineered to minimize vibrations, which adds to the overall comfort during prolonged use.

One standout feature of both models is their adjustable cutting height. With multiple positions, users can easily customize the cutting height to suit their lawn's needs, giving them the versatility to achieve the perfect cut no matter the grass type or terrain.

Equipped with a heavy-duty steel deck, the 42051 and 42052 are designed for durability and longevity. This robust construction not only withstands rough conditions and impacts but also facilitates a smooth cutting experience, ensuring consistent results with each pass.

Another notable technology found in these mowers is the TriAction cutting system. This innovative design combines a specially designed blade with a rake that lifts grass for an even, clean cut. The system enhances bagging capability by ensuring that more clippings are efficiently collected, keeping lawns tidy and reducing the need for additional clean-up.

Both models also feature a rear bagging attachment, making it easier to collect clippings and debris as you mow. This capability is particularly advantageous for those looking to maintain a neat and well-kept lawn without the mess that often accompanies traditional mowing.

Moreover, the user-friendly controls make these mowers easy to operate. With intuitive levers and simple starting mechanisms, even those who are new to lawn care can gain confidence quickly.

Overall, the Troy-Bilt 42051 and 42052 embody the brand’s commitment to quality, performance, and user satisfaction, making them excellent choices for homeowners seeking a reliable solution for their lawn care needs. Whether tackling vast yards or smaller spaces, these mowers demonstrate power, innovation, and ease of use, fulfilling the diverse requirements of modern landscaping.