Descriptions and Functions
Front Panel
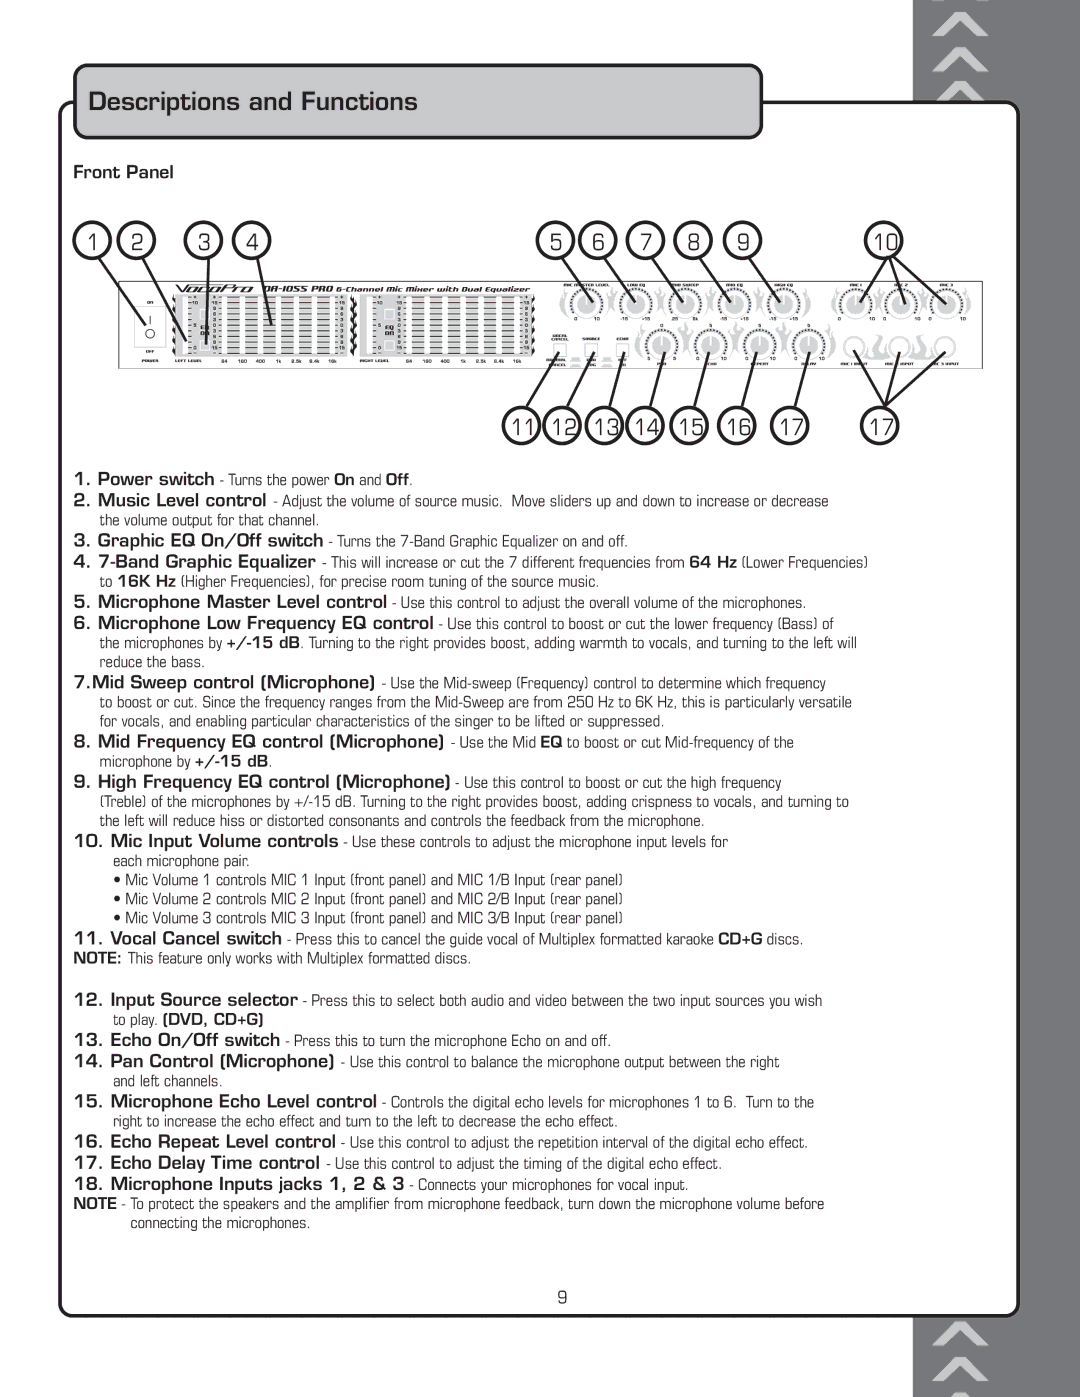
1 | 2 | 3 | 4 | 5 | 6 | 7 | 8 | 9 | 10 |
11 | 12 | 13 | 14 | 15 | 16 | 17 | 17 |
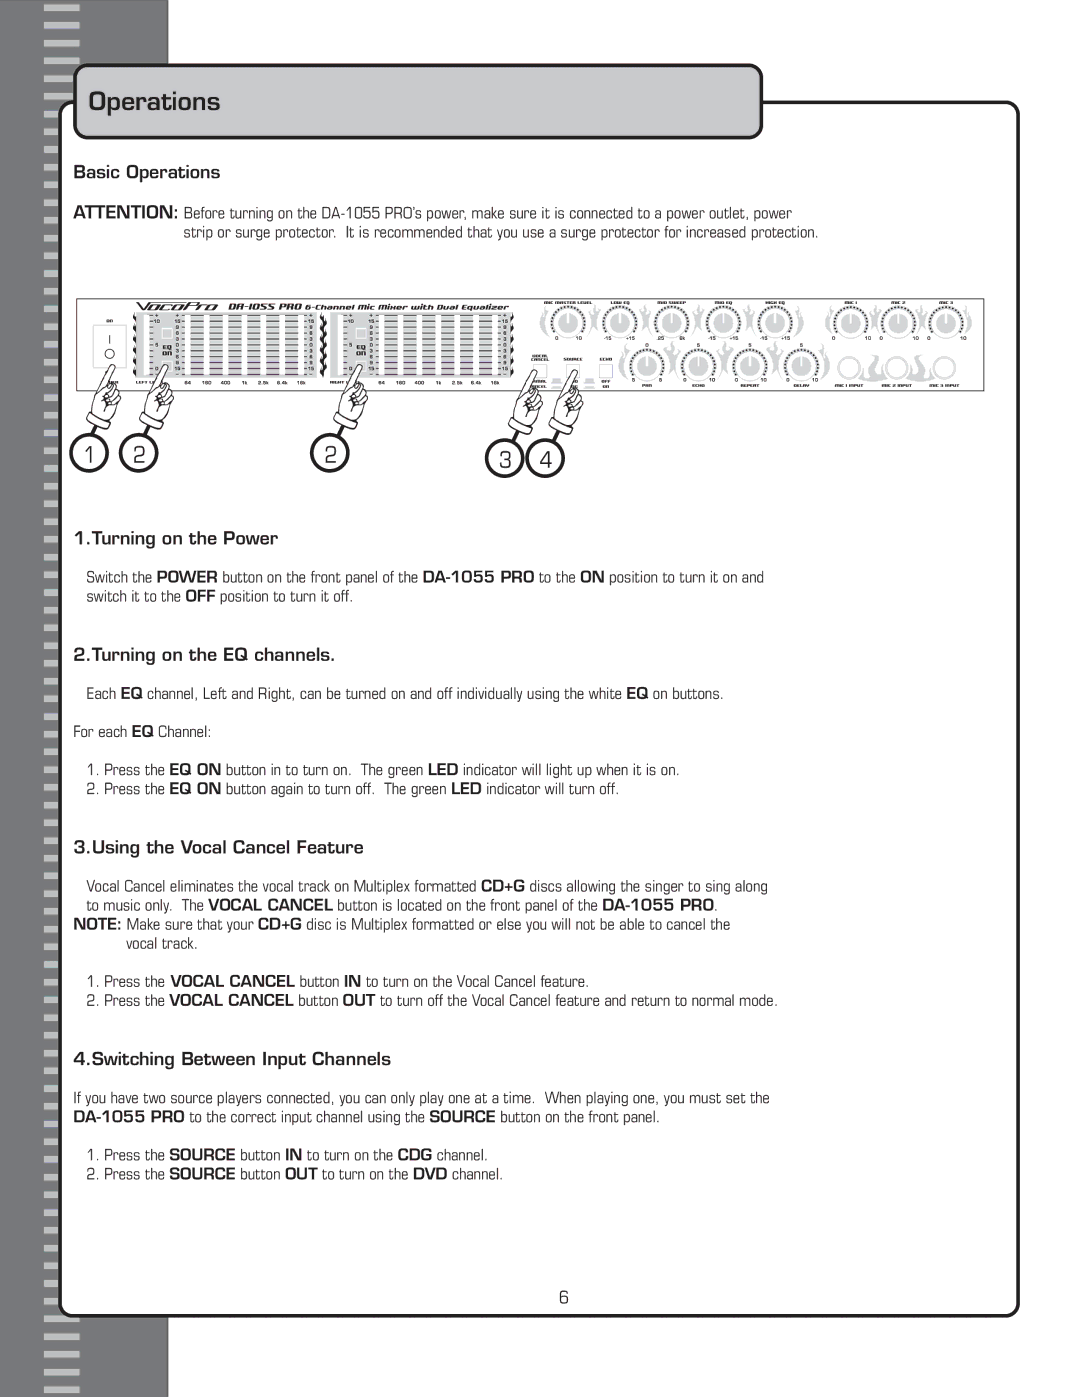
1.Power switch - Turns the power On and Off.
2.Music Level control - Adjust the volume of source music. Move sliders up and down to increase or decrease the volume output for that channel.
3.Graphic EQ On/Off switch - Turns the
4.
5.Microphone Master Level control - Use this control to adjust the overall volume of the microphones.
6.Microphone Low Frequency EQ control - Use this control to boost or cut the lower frequency (Bass) of the microphones by
7.Mid Sweep control (Microphone) - Use the
to boost or cut. Since the frequency ranges from the
8.Mid Frequency EQ control (Microphone) - Use the Mid EQ to boost or cut
9.High Frequency EQ control (Microphone) - Use this control to boost or cut the high frequency
(Treble) of the microphones by
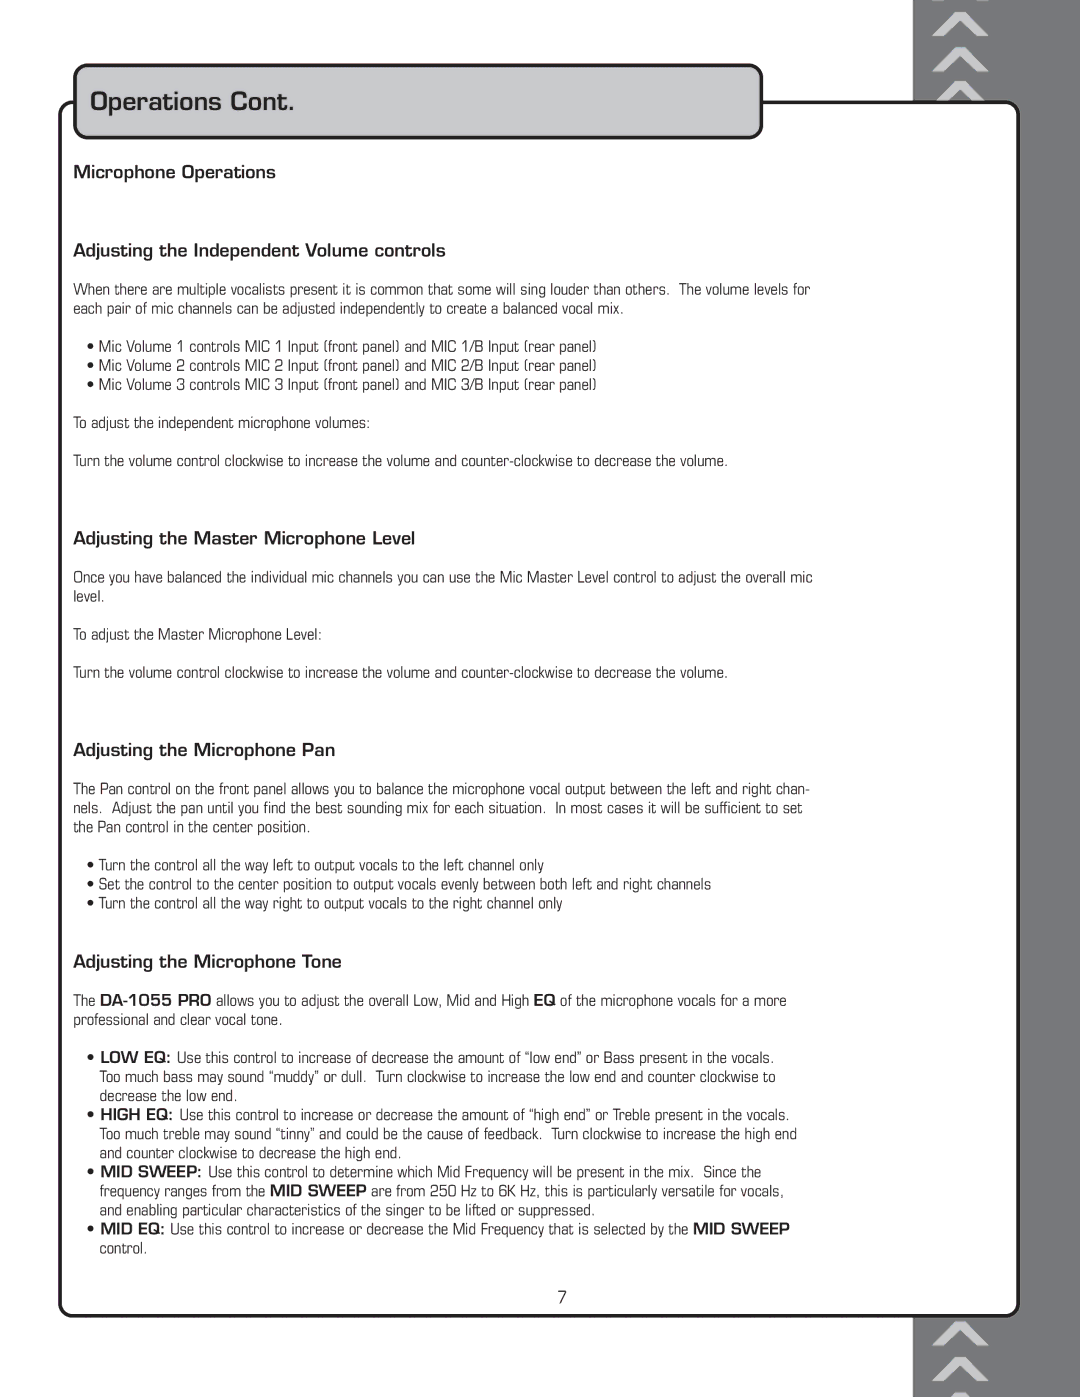
10.Mic Input Volume controls - Use these controls to adjust the microphone input levels for
each microphone pair.
•Mic Volume 1 controls MIC 1 Input (front panel) and MIC 1/B Input (rear panel)
•Mic Volume 2 controls MIC 2 Input (front panel) and MIC 2/B Input (rear panel)
•Mic Volume 3 controls MIC 3 Input (front panel) and MIC 3/B Input (rear panel)
11.Vocal Cancel switch - Press this to cancel the guide vocal of Multiplex formatted karaoke CD+G discs. NOTE: This feature only works with Multiplex formatted discs.
12.Input Source selector - Press this to select both audio and video between the two input sources you wish to play. (DVD, CD+G)
13.Echo On/Off switch - Press this to turn the microphone Echo on and off.
14.Pan Control (Microphone) - Use this control to balance the microphone output between the right
and left channels.
15.Microphone Echo Level control - Controls the digital echo levels for microphones 1 to 6. Turn to the right to increase the echo effect and turn to the left to decrease the echo effect.
16.Echo Repeat Level control - Use this control to adjust the repetition interval of the digital echo effect.
17.Echo Delay Time control - Use this control to adjust the timing of the digital echo effect.
18.Microphone Inputs jacks 1, 2 & 3 - Connects your microphones for vocal input.
NOTE - To protect the speakers and the amplifier from microphone feedback, turn down the microphone volume before connecting the microphones.
9
