Acoustic Energy LT35 Turning on Noise Reduction Noise Reduction, Setting Telecine Mode Telecine

Page 47

5. Using On-Screen Menu

NOTE:

When you are displaying an RGB image with a higher resolution than the projector's native resolution, the image will be displayed in [Normal] even if [Native] is selected.

Only when displaying an RGB image with a lower resolution than the projector's native resolution, will the image be able to be displayed in its true resolution [Native].

When [Normal] is selected, an HDTV (1080i/720p) signal will be shown in its true aspect, as is the case when selecting [Cinema].

You can adjust the image position for Cinema aspect. See [Cinema Position] for setting the image position.

Copyright

Please note that using this projector for the purpose of commercial gain or the attraction of public attention in a venue such as a coffee shop or hotel and employing compression or expansion of the screen image with a [Aspect Ratio] setting may raise concern about the infringement of copyrights which are protected by copyright law.

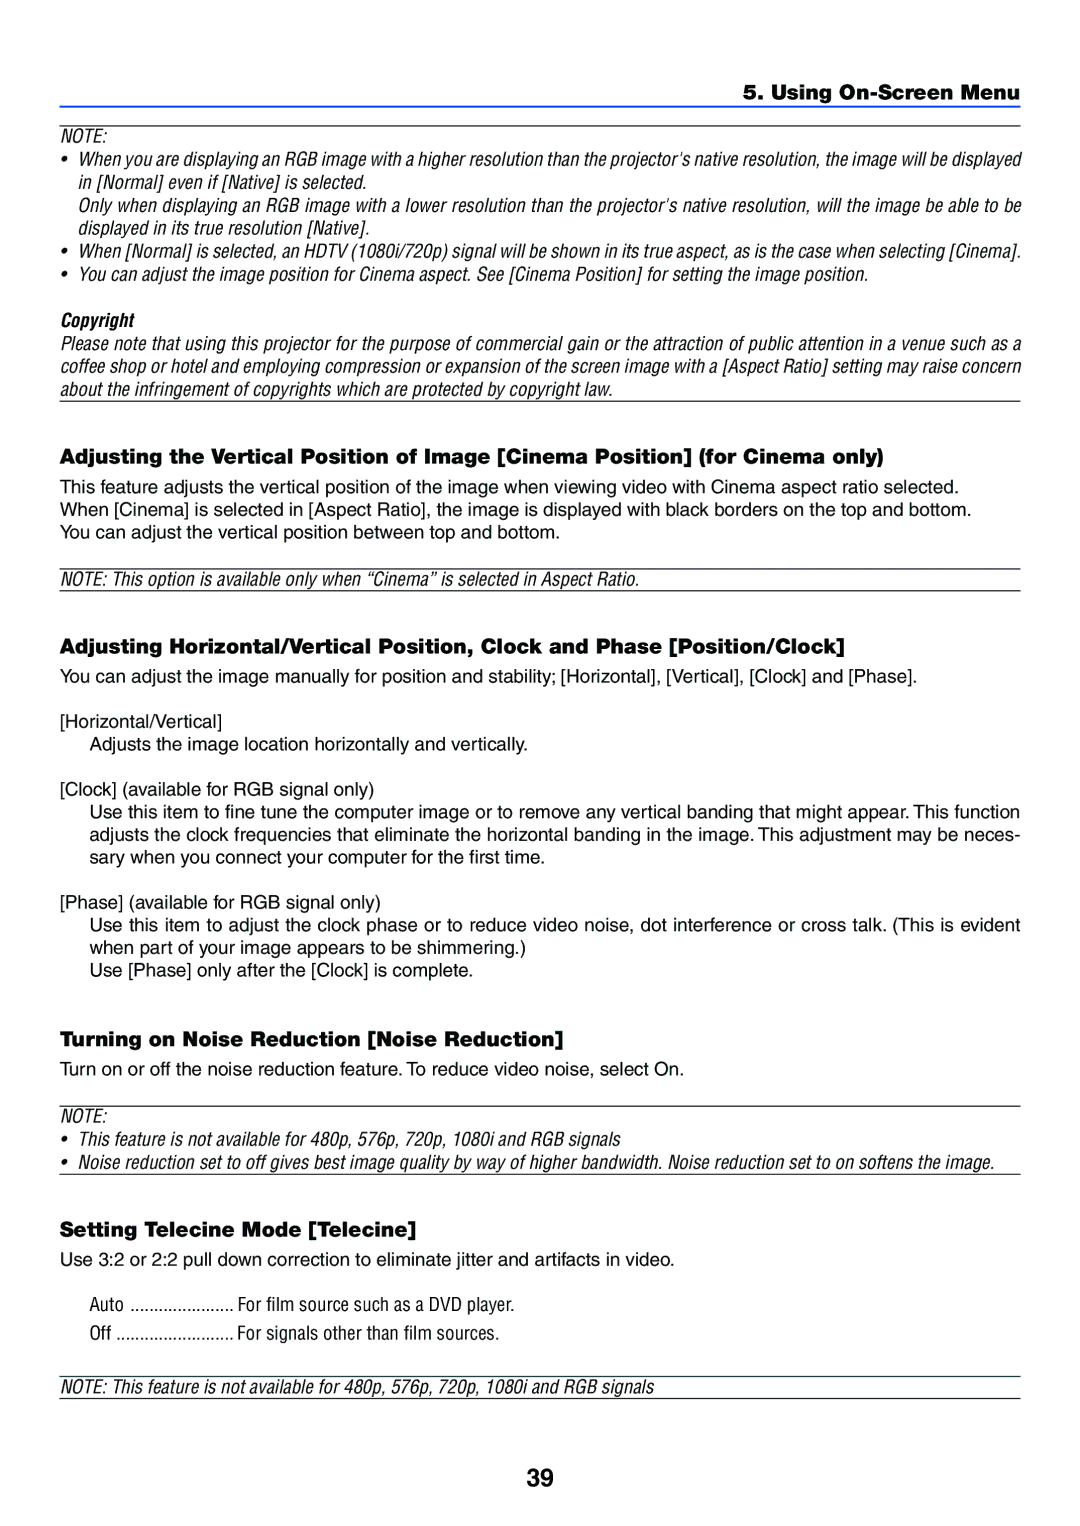
Adjusting the Vertical Position of Image [Cinema Position] (for Cinema only)

This feature adjusts the vertical position of the image when viewing video with Cinema aspect ratio selected. When [Cinema] is selected in [Aspect Ratio], the image is displayed with black borders on the top and bottom. You can adjust the vertical position between top and bottom.

NOTE: This option is available only when “Cinema” is selected in Aspect Ratio.

Adjusting Horizontal/Vertical Position, Clock and Phase [Position/Clock]

You can adjust the image manually for position and stability; [Horizontal], [Vertical], [Clock] and [Phase].

[Horizontal/Vertical]

Adjusts the image location horizontally and vertically.

[Clock] (available for RGB signal only)

Use this item to fine tune the computer image or to remove any vertical banding that might appear. This function adjusts the clock frequencies that eliminate the horizontal banding in the image. This adjustment may be neces- sary when you connect your computer for the first time.

[Phase] (available for RGB signal only)

Use this item to adjust the clock phase or to reduce video noise, dot interference or cross talk. (This is evident when part of your image appears to be shimmering.)

Use [Phase] only after the [Clock] is complete.

Turning on Noise Reduction [Noise Reduction]

Turn on or off the noise reduction feature. To reduce video noise, select On.

NOTE:

This feature is not available for 480p, 576p, 720p, 1080i and RGB signals

Noise reduction set to off gives best image quality by way of higher bandwidth. Noise reduction set to on softens the image.

Setting Telecine Mode [Telecine]

Use 3:2 or 2:2 pull down correction to eliminate jitter and artifacts in video.

Auto

For film source such as a DVD player.

Off

For signals other than film sources.

NOTE: This feature is not available for 480p, 576p, 720p, 1080i and RGB signals

39

Image 47
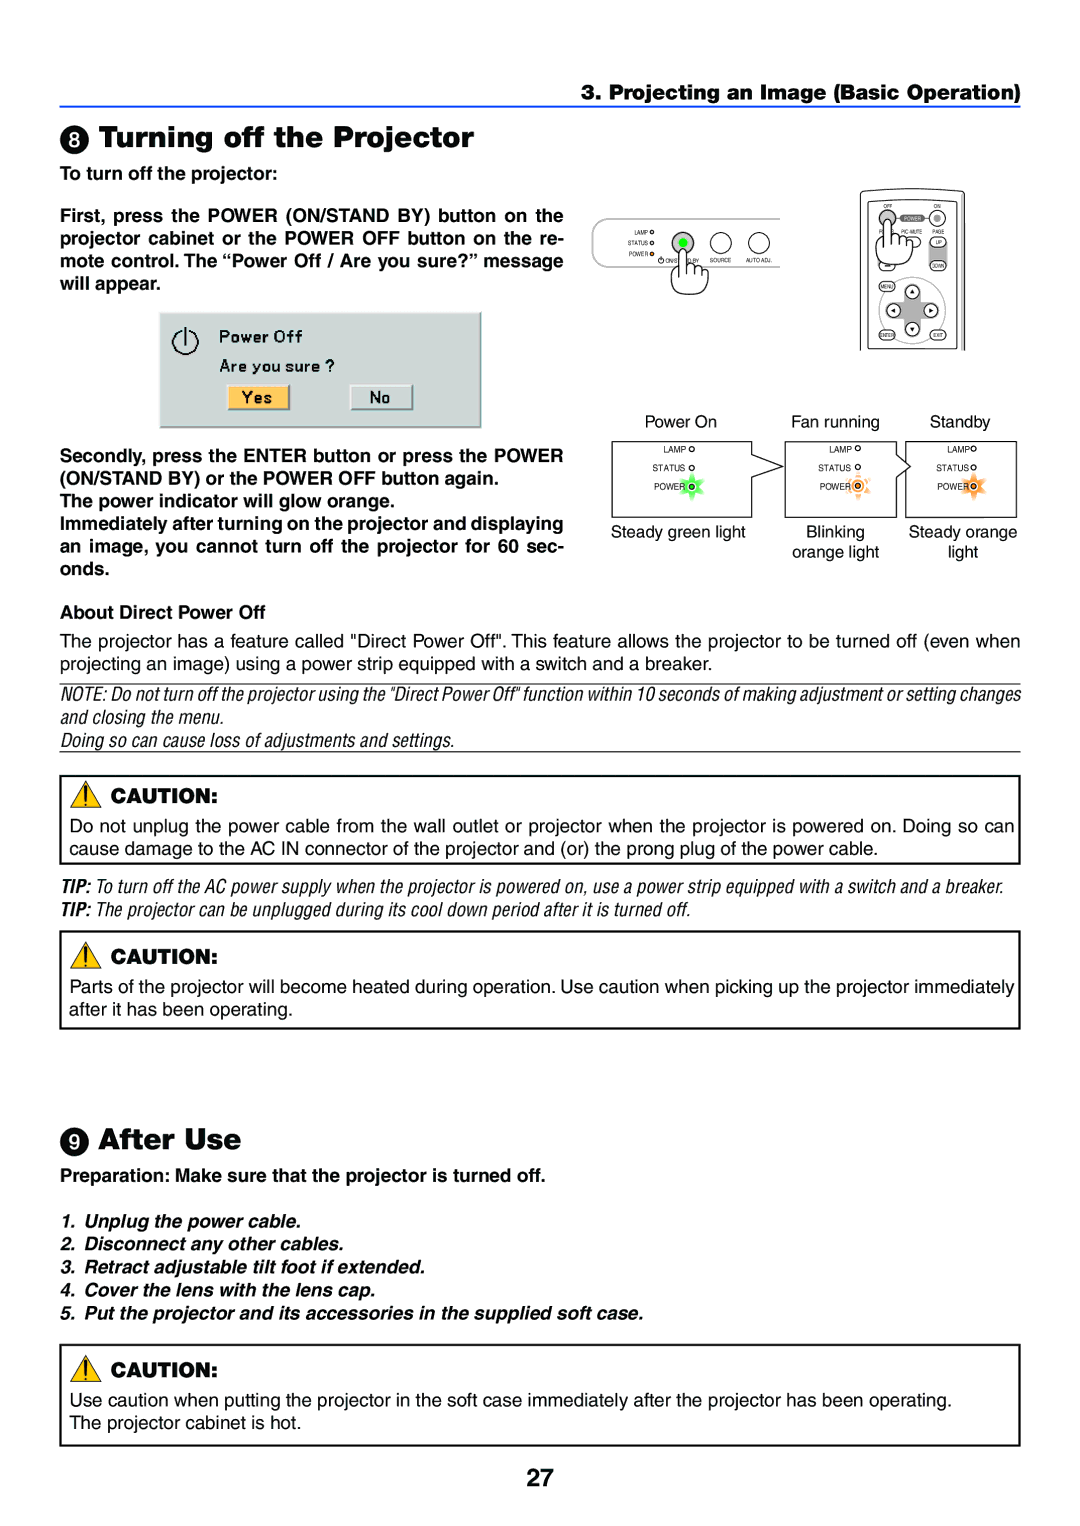
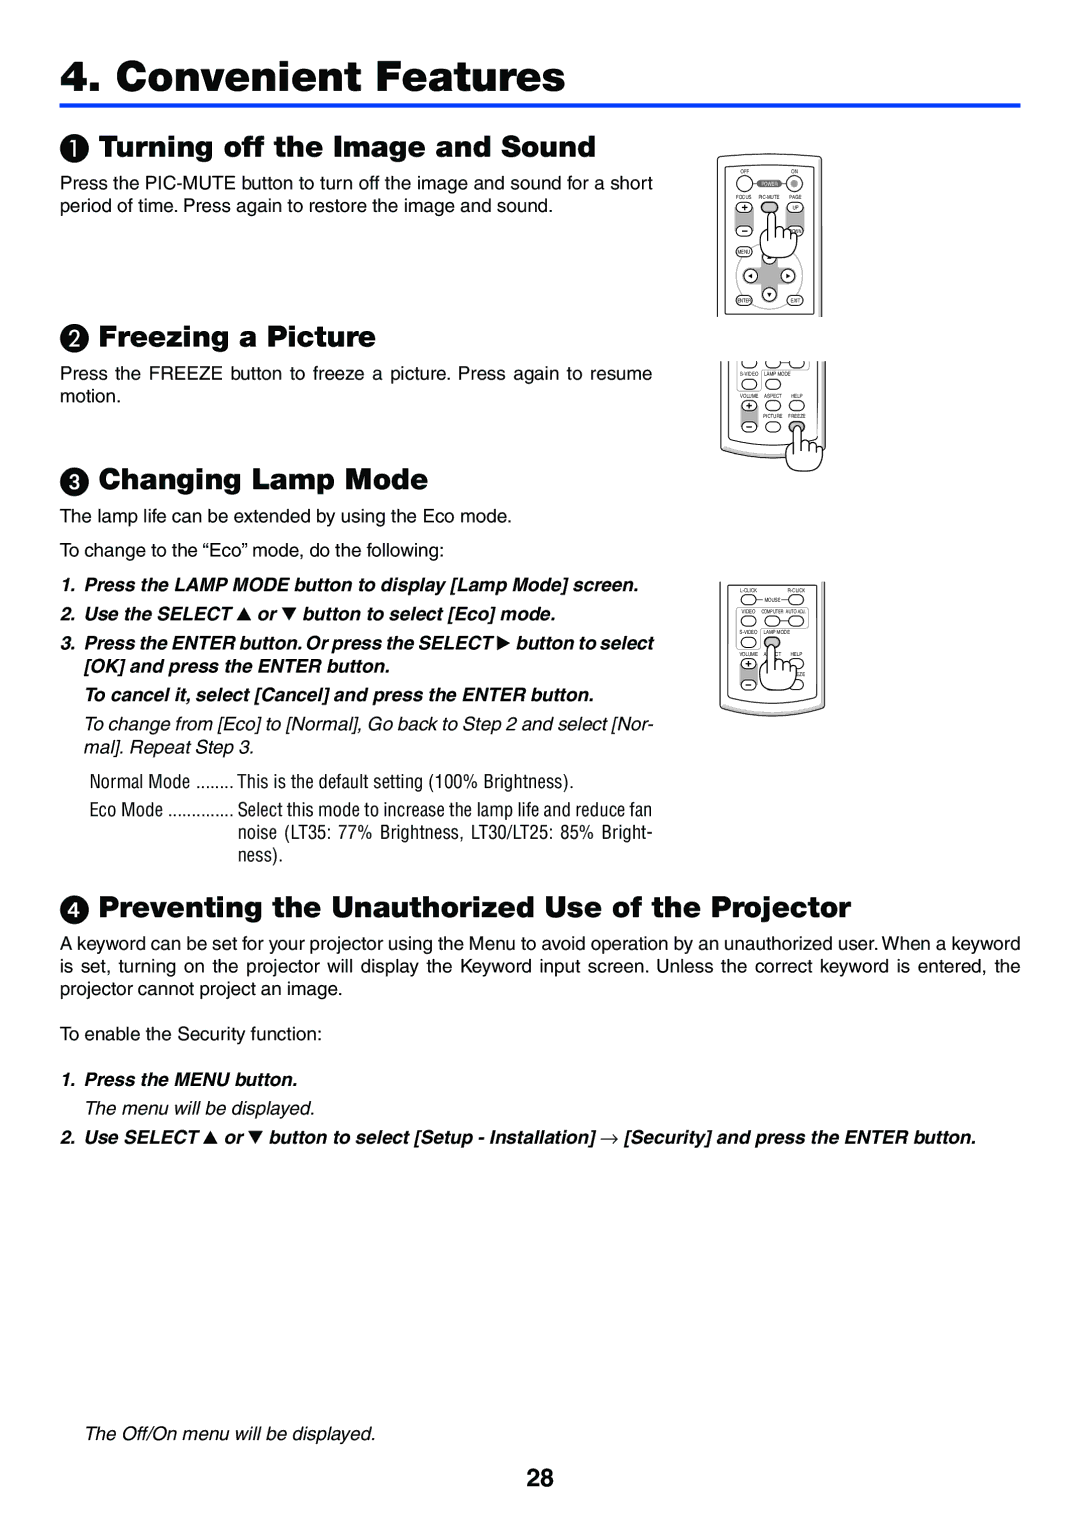
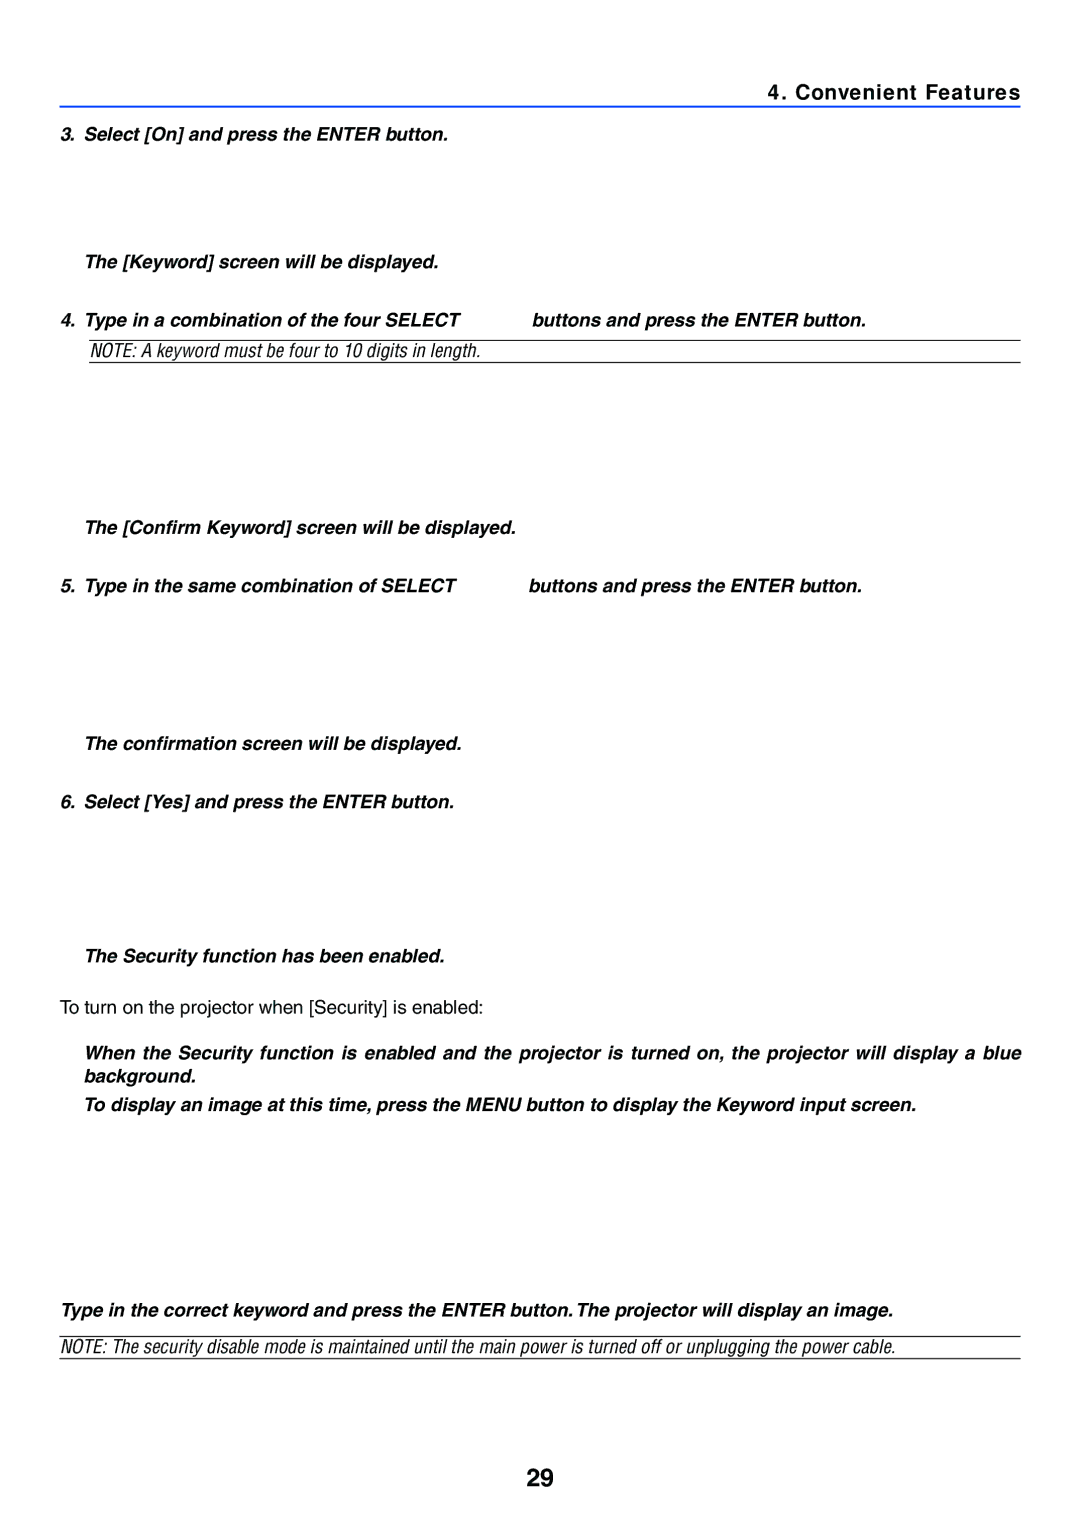
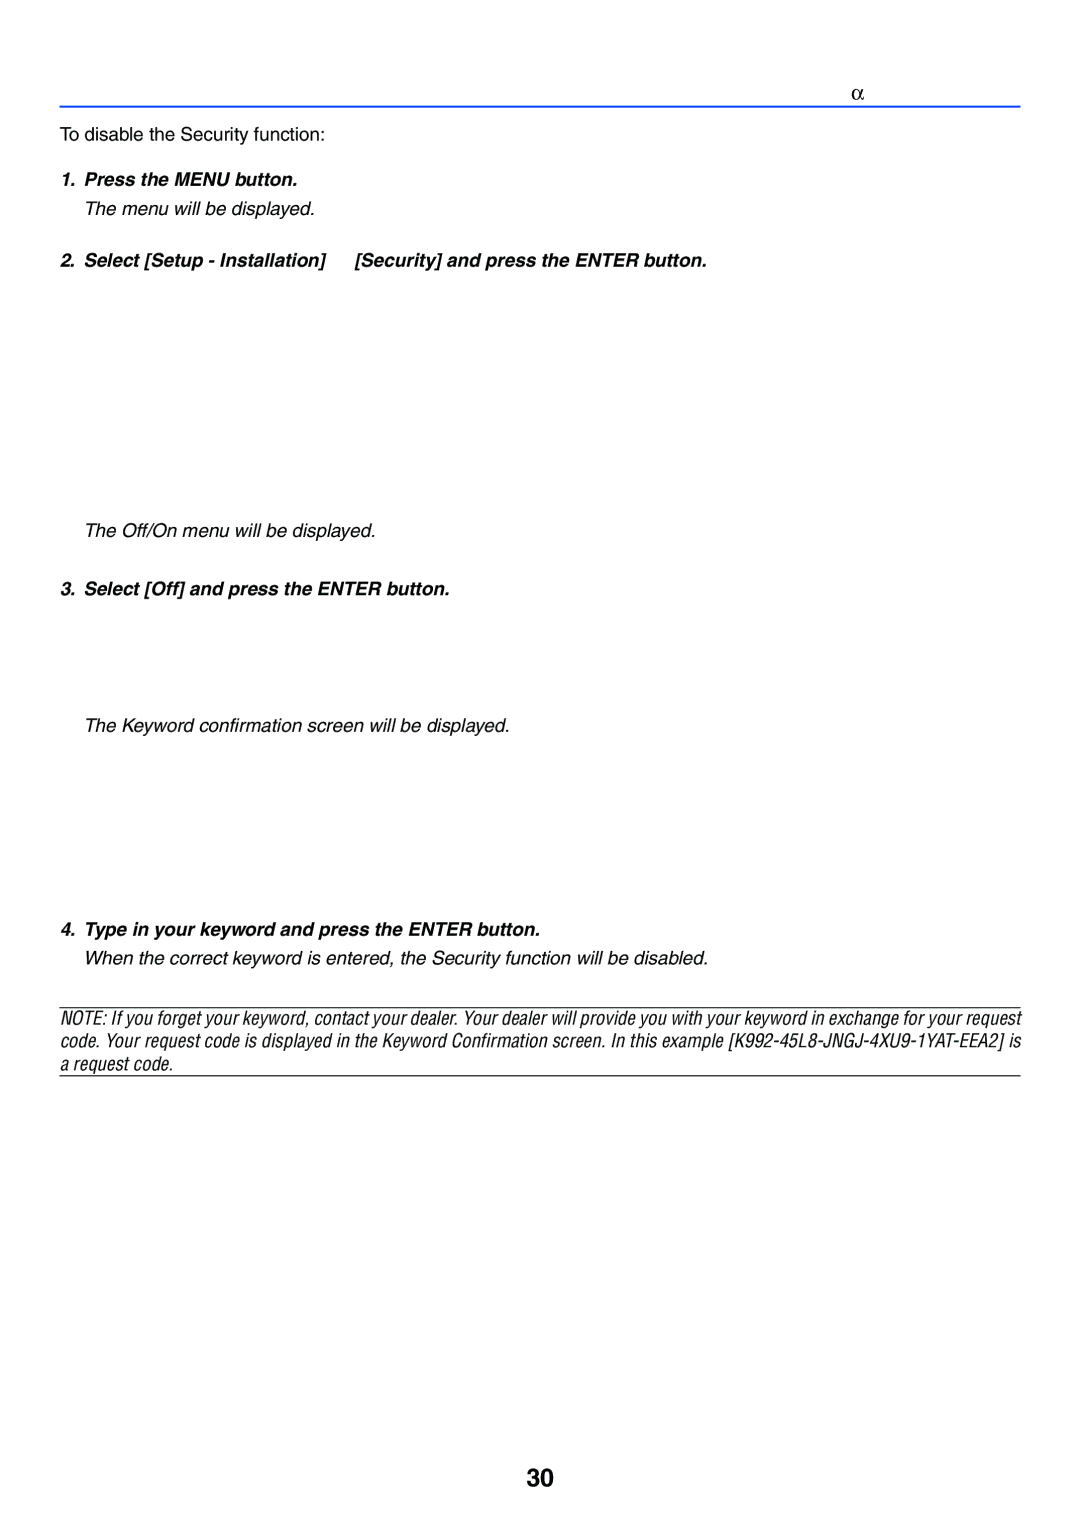
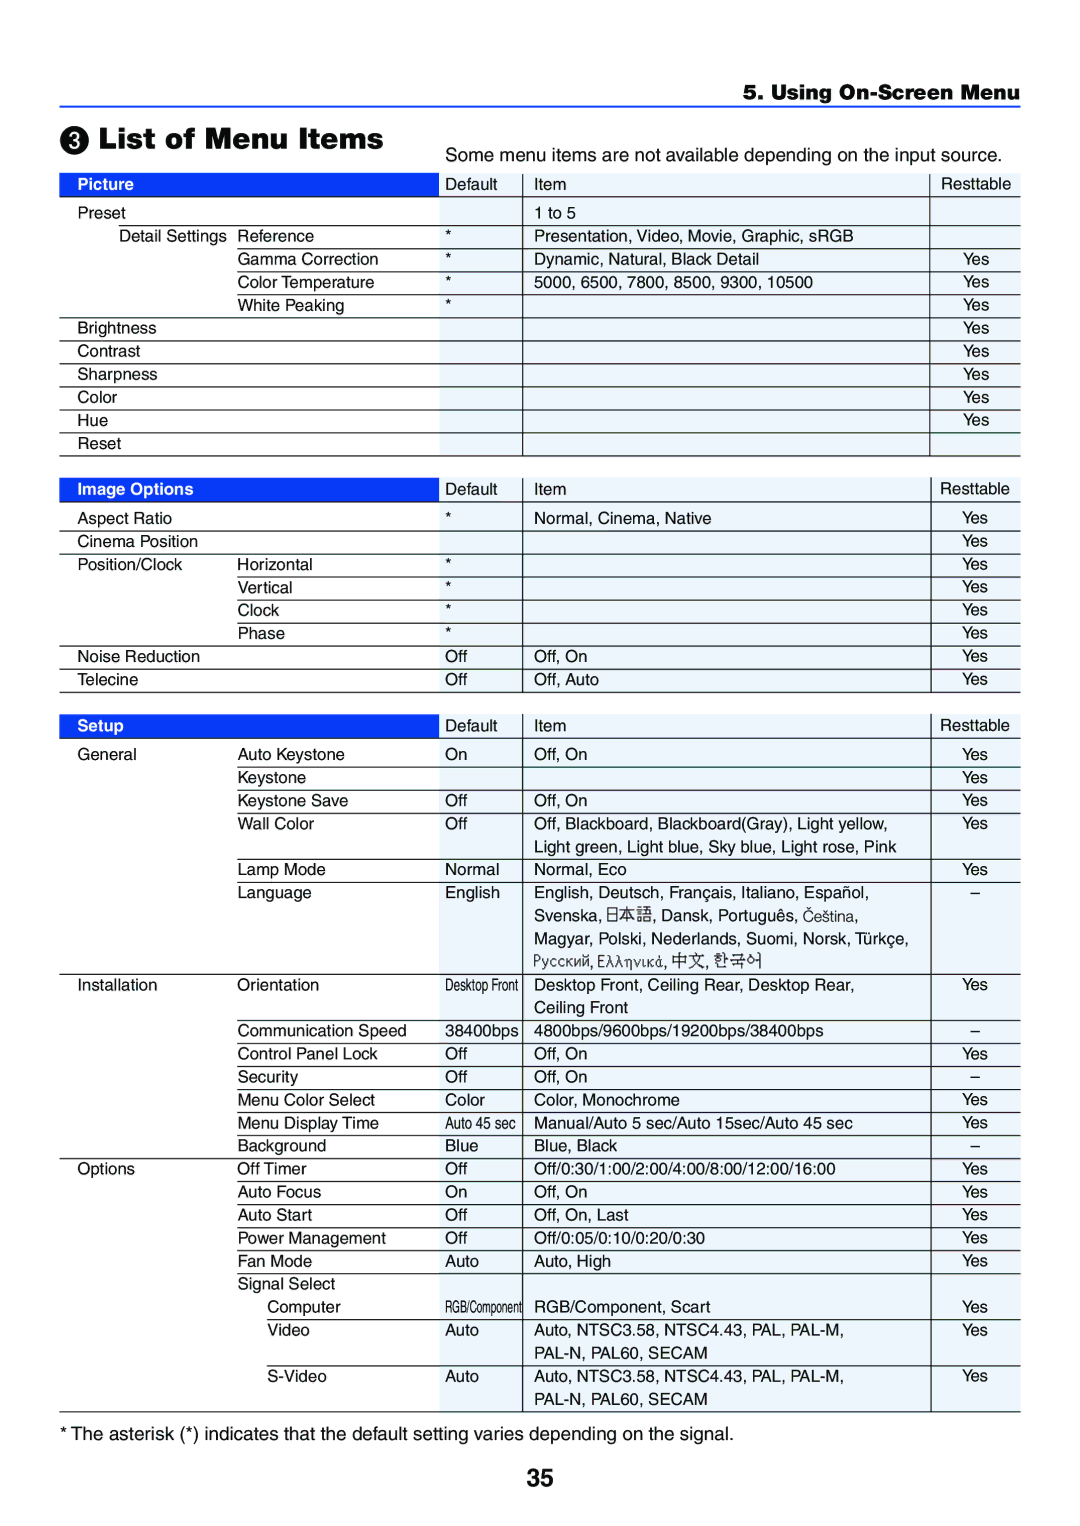
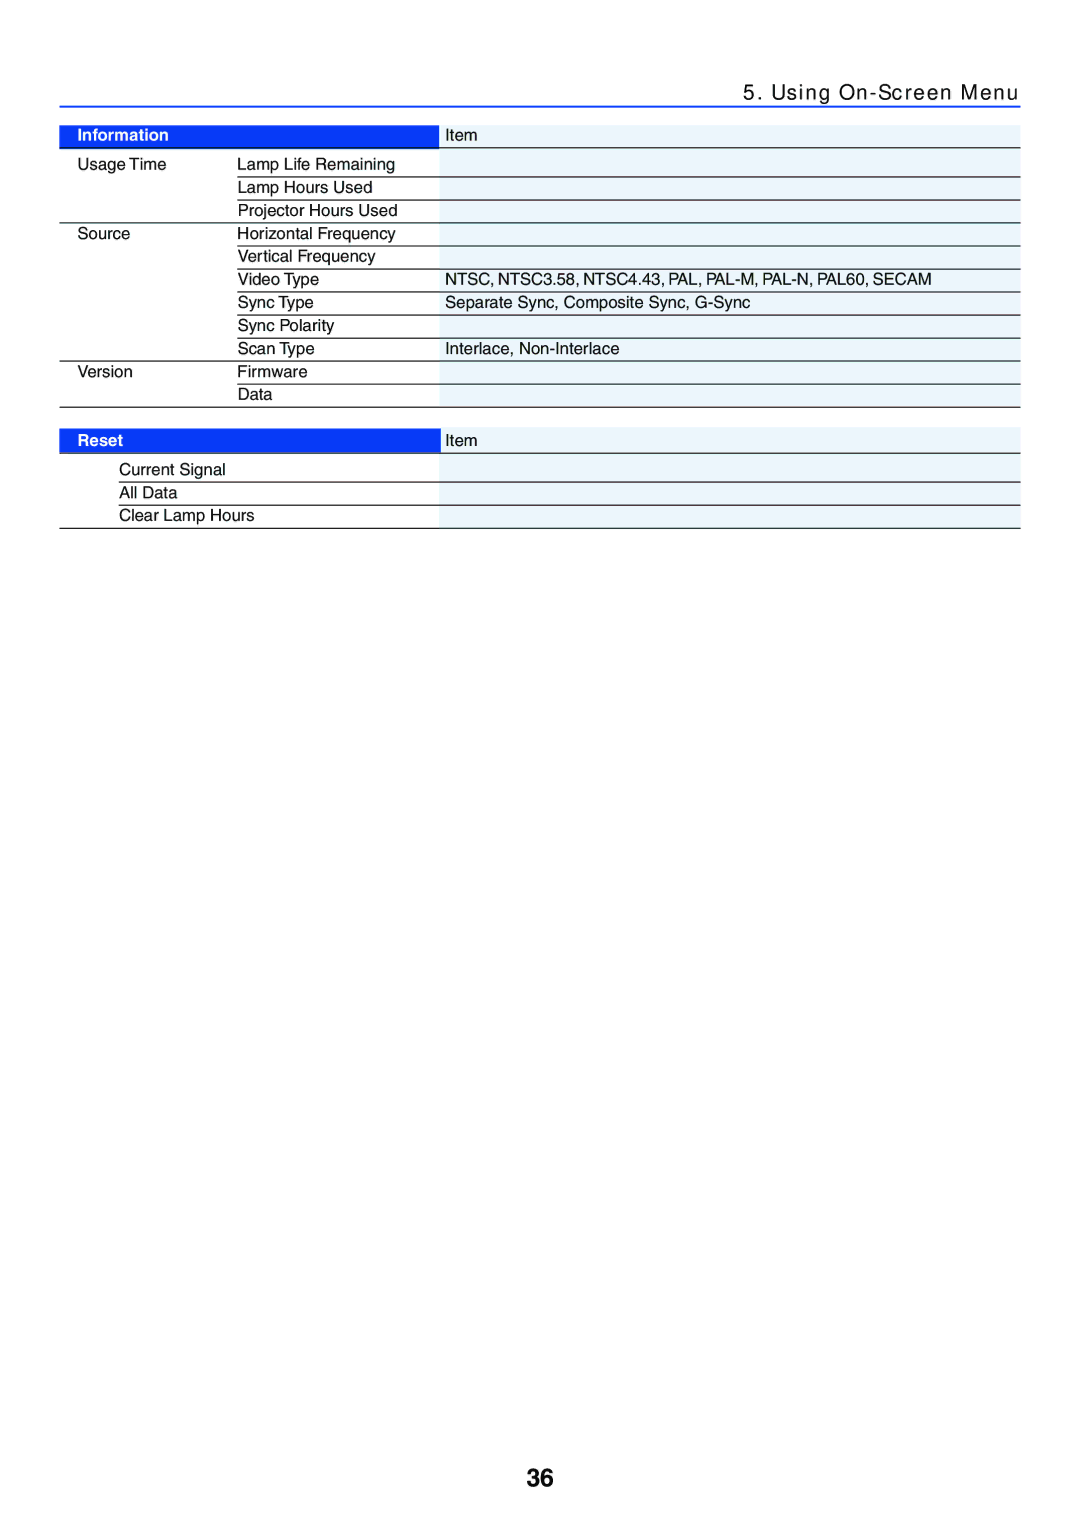
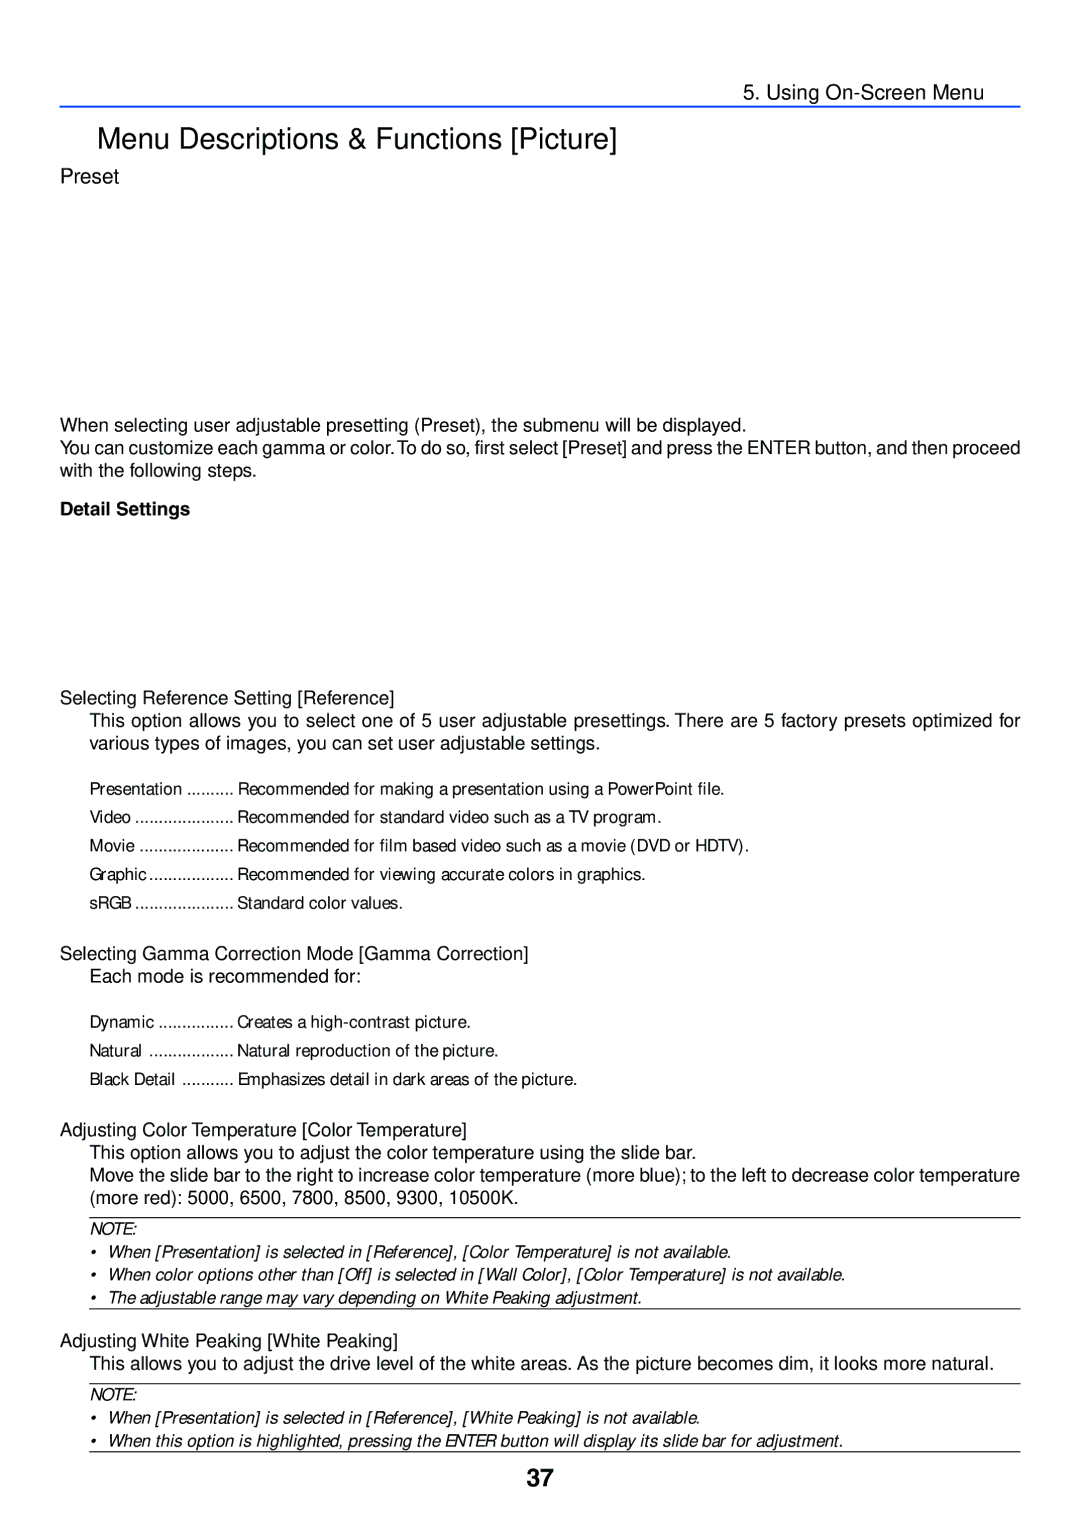
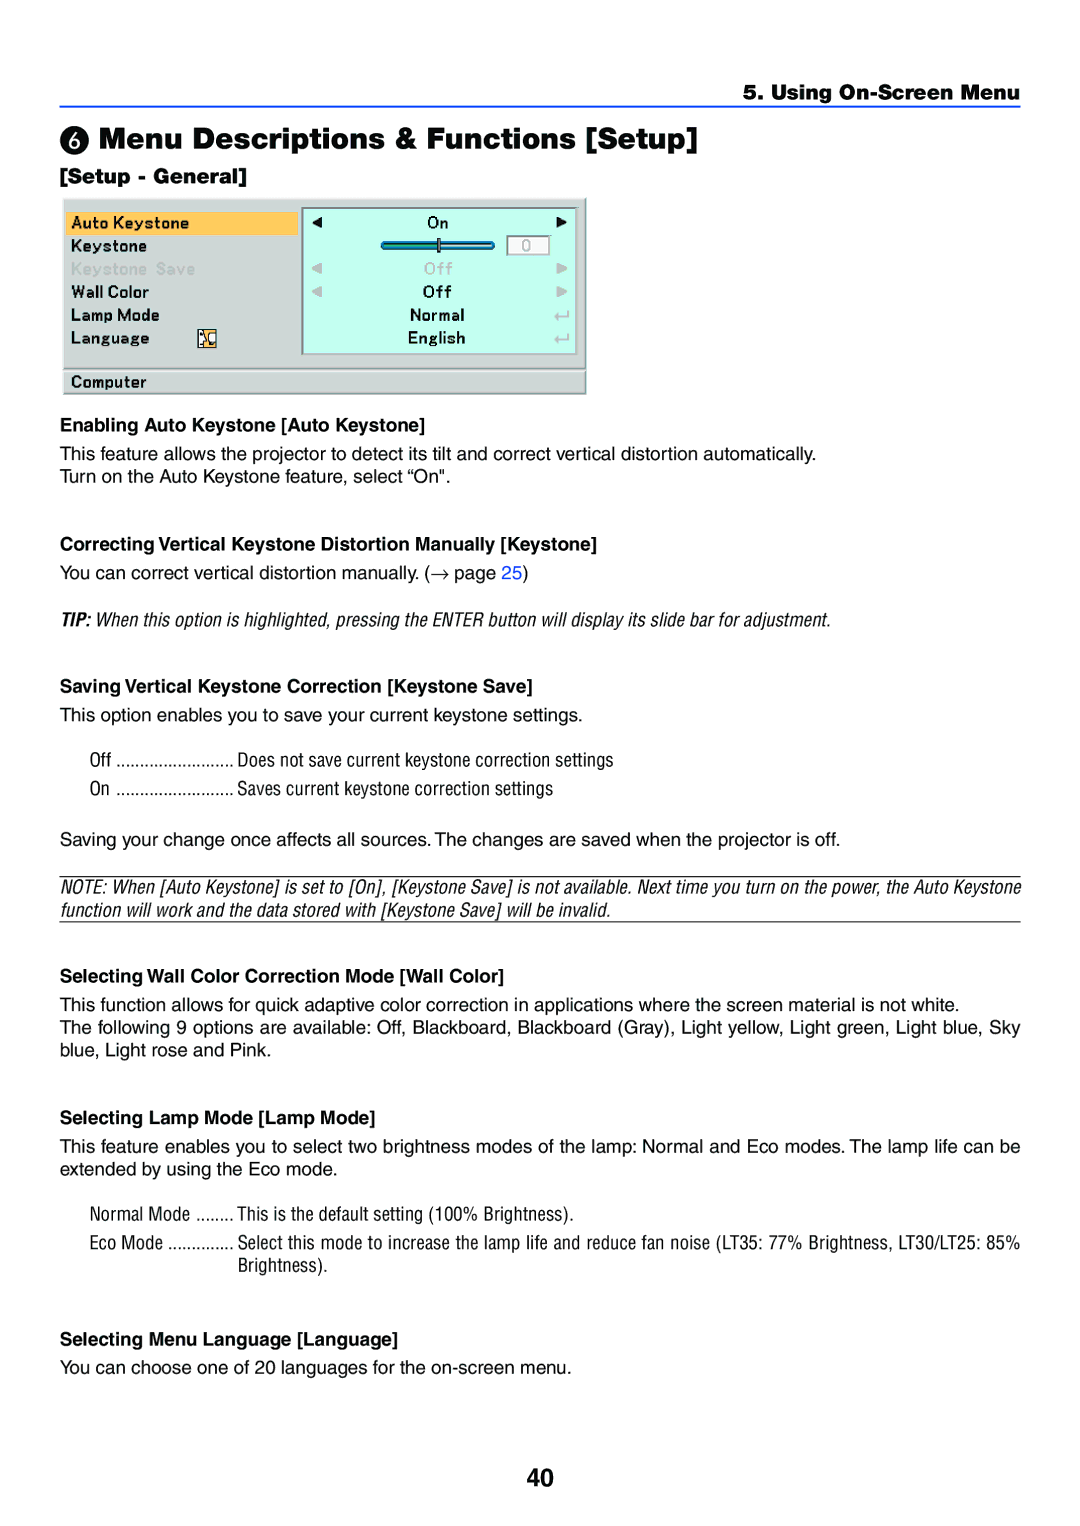
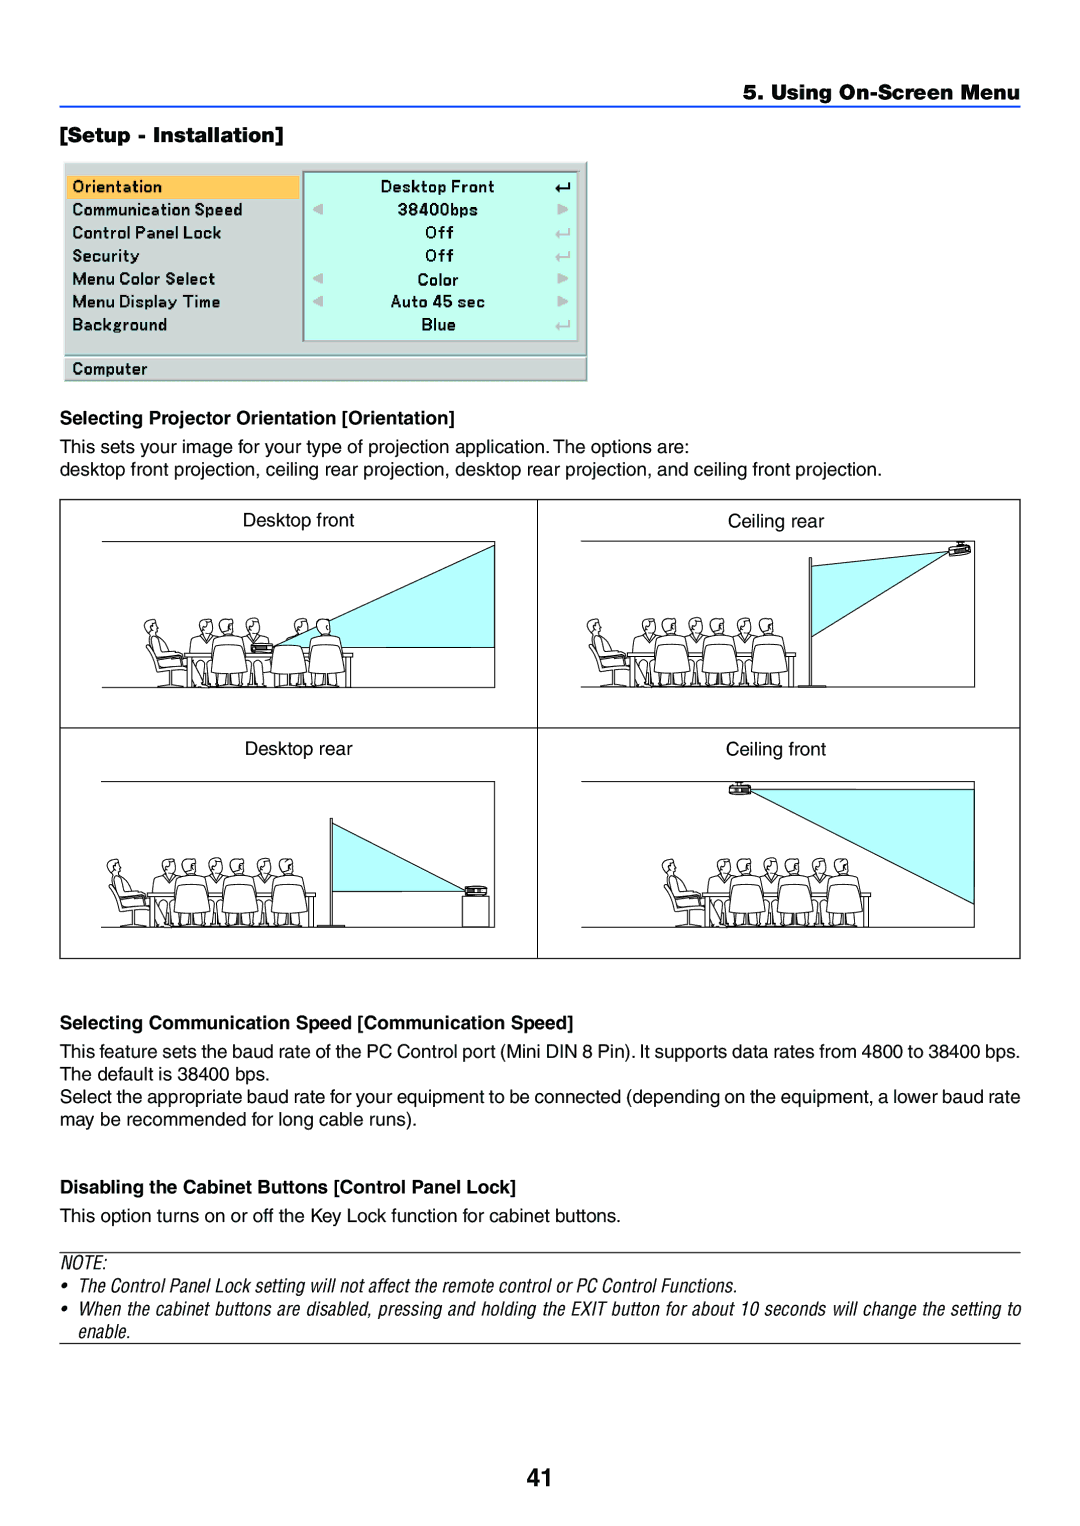
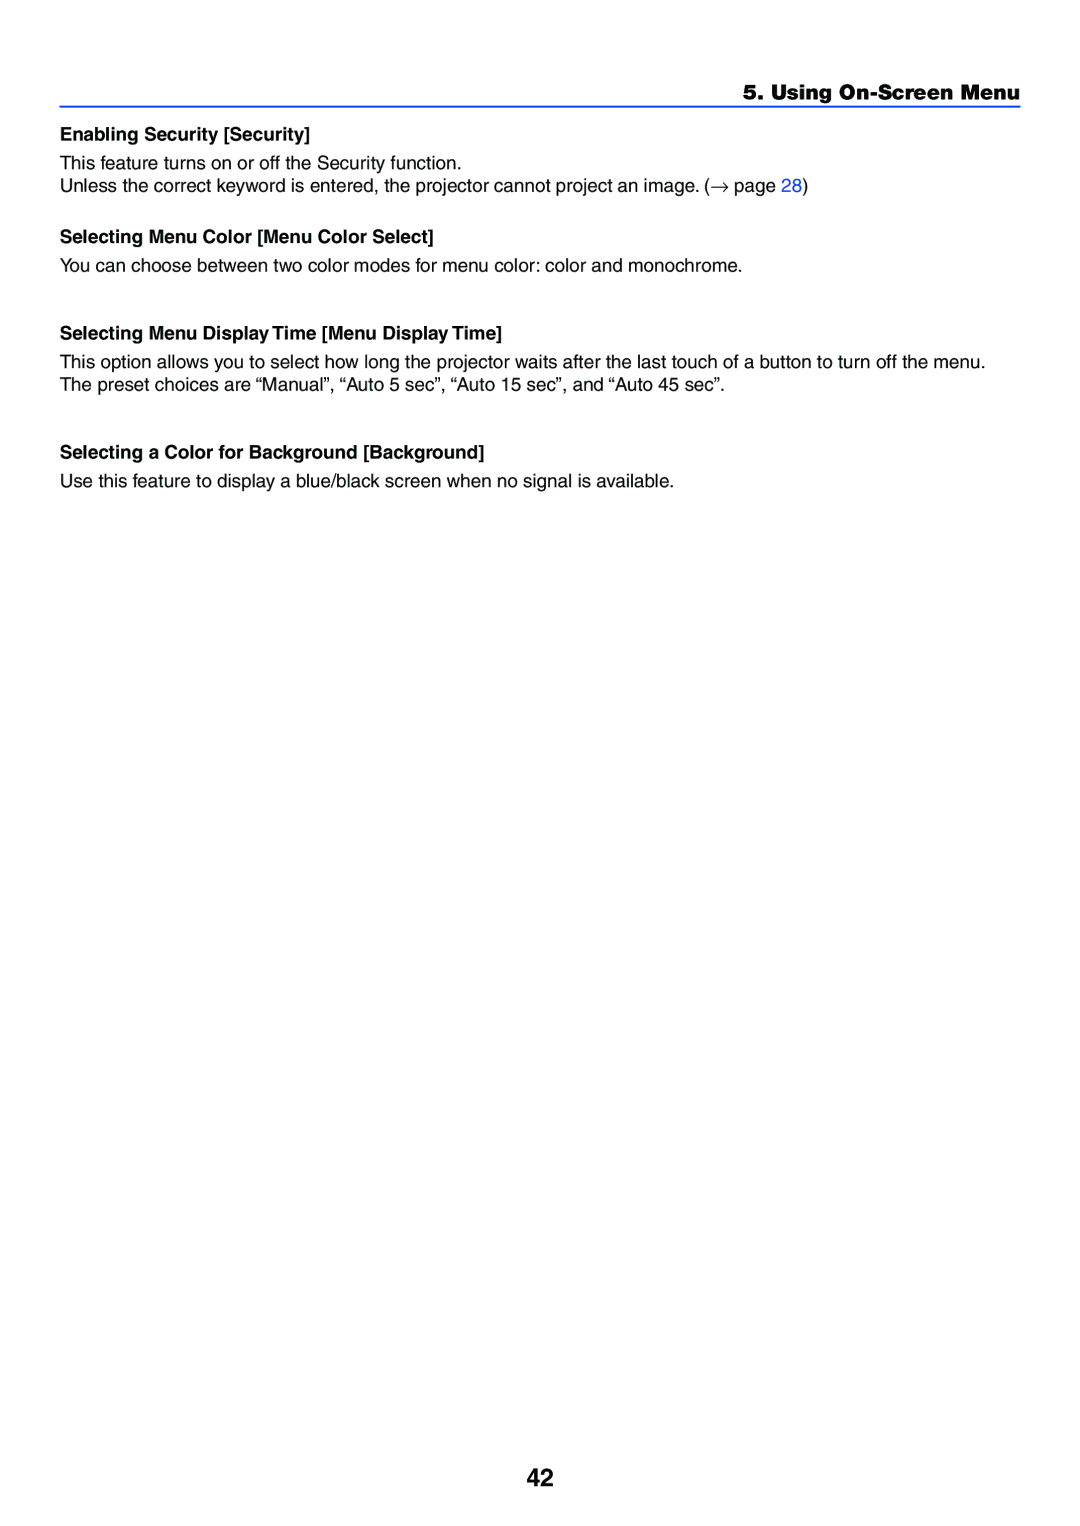
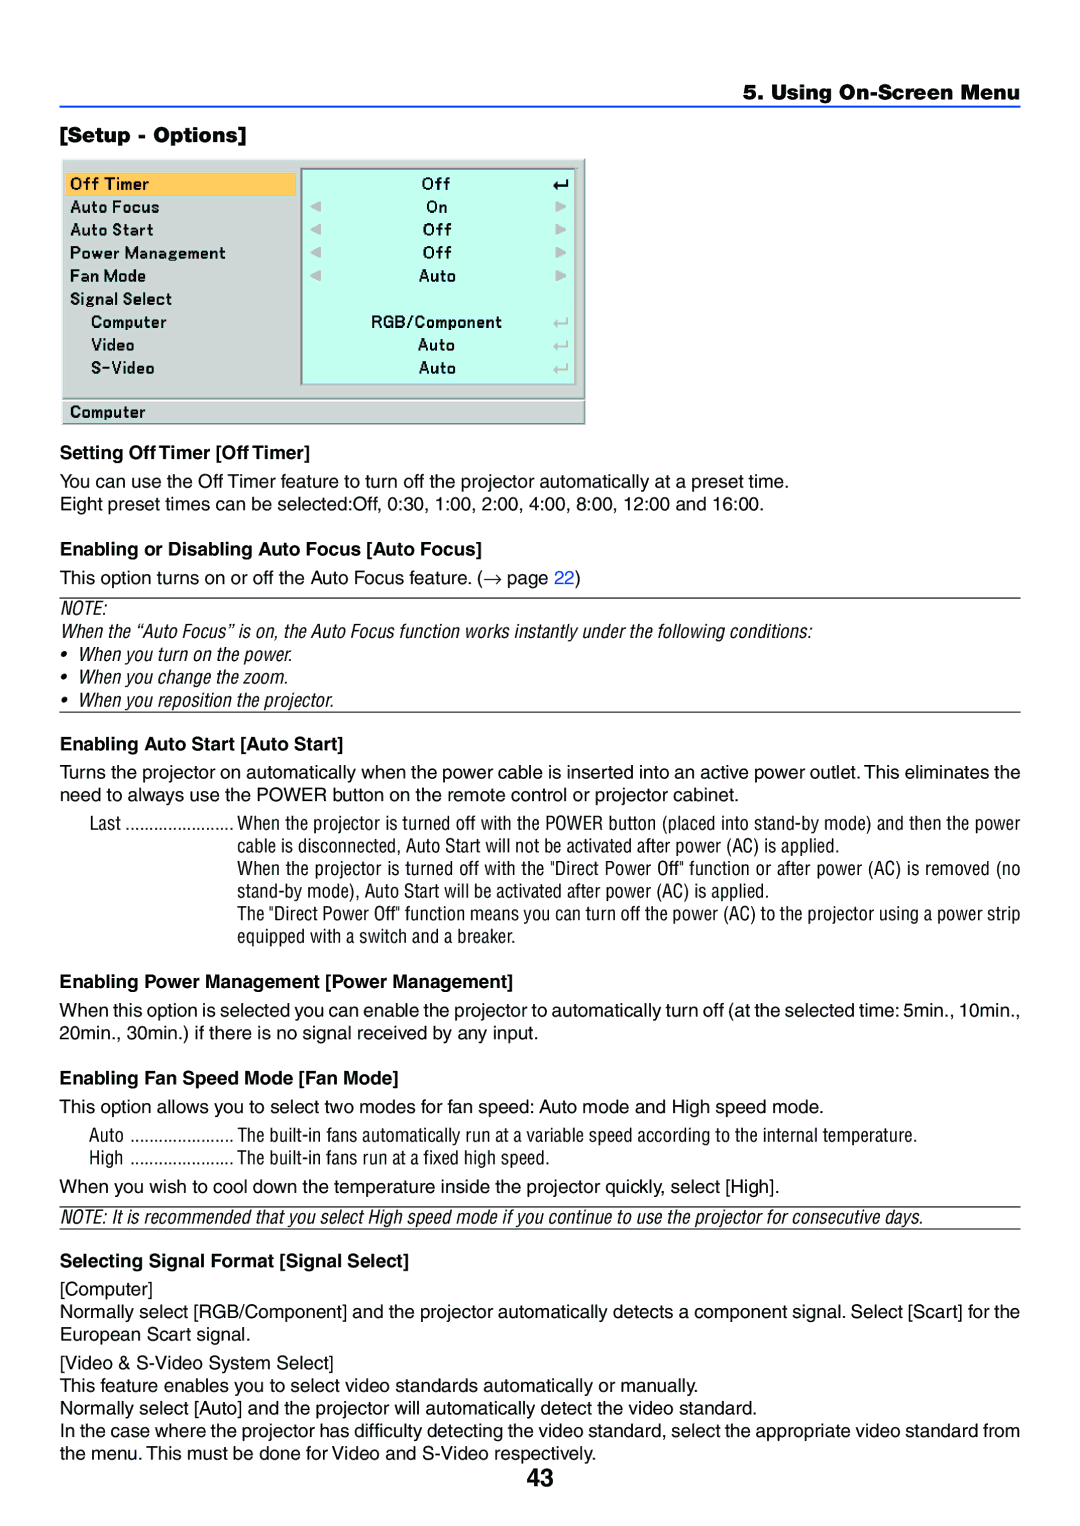
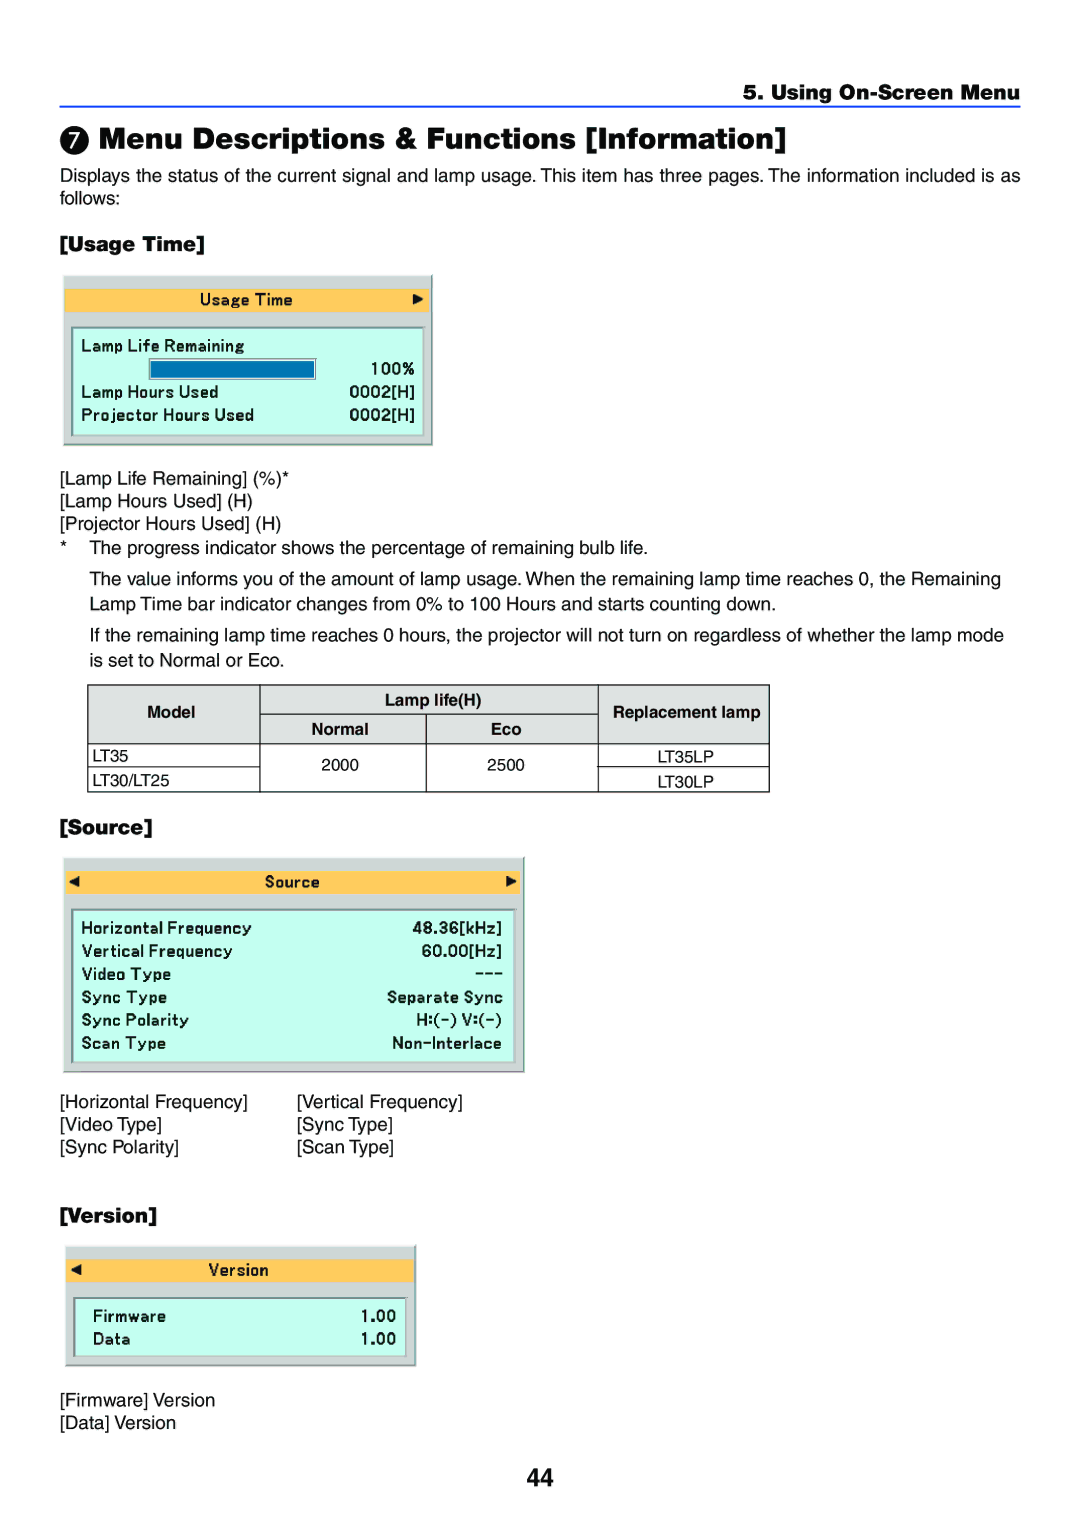
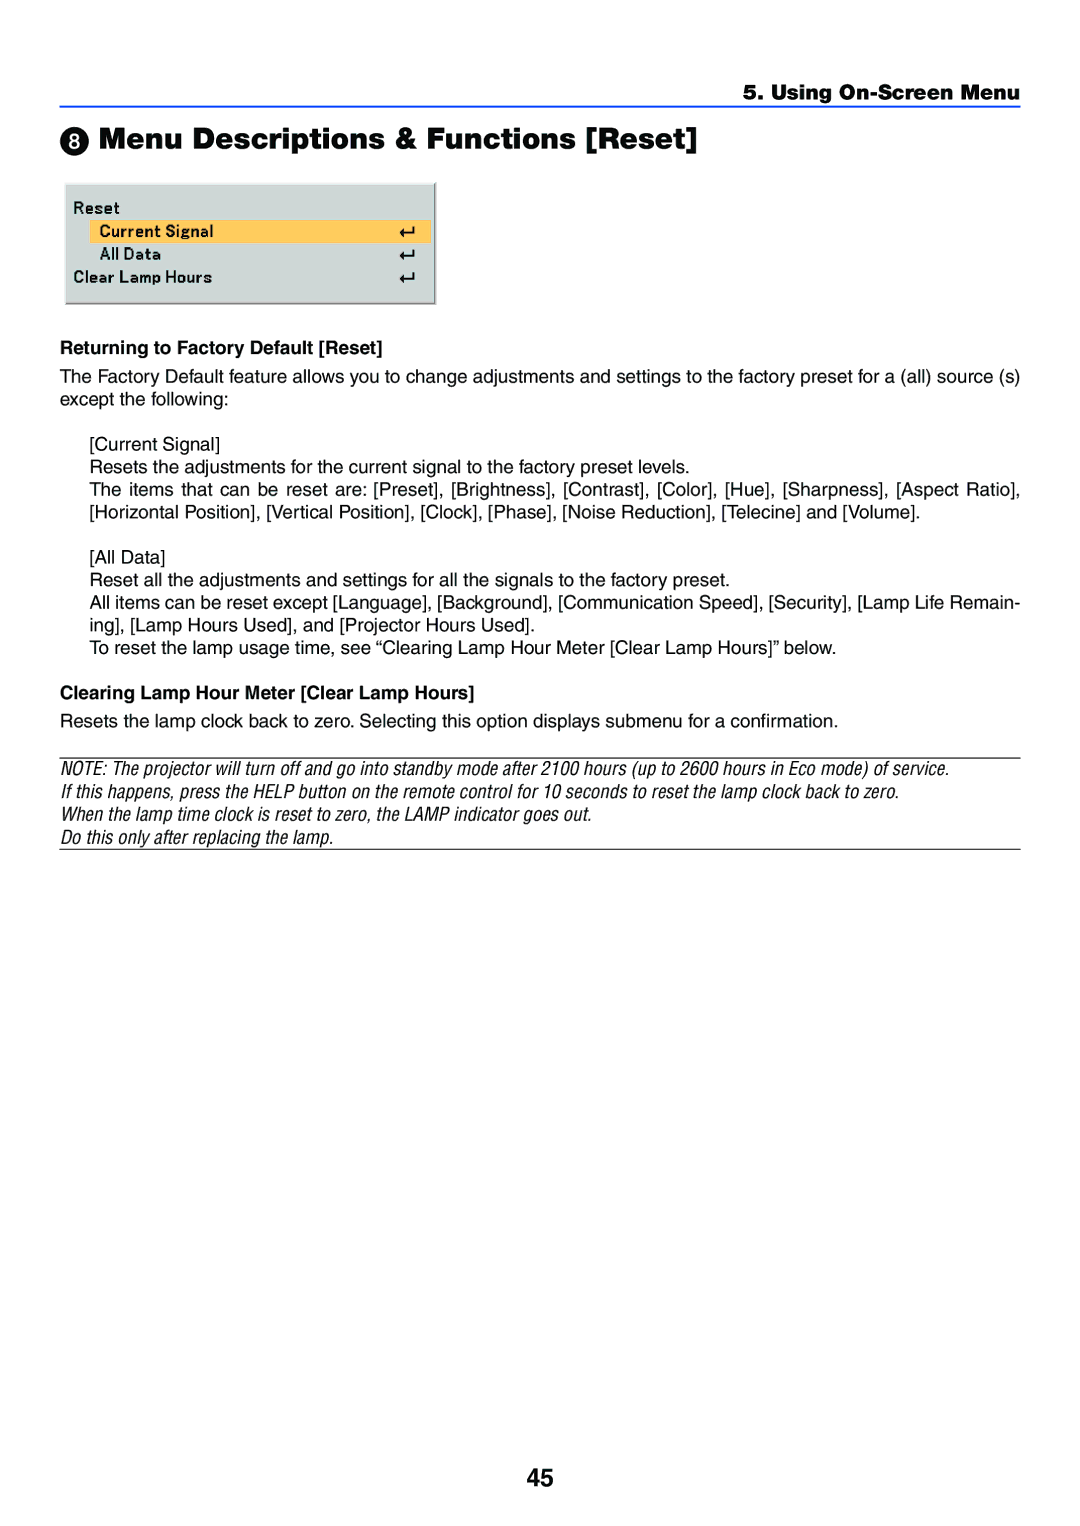
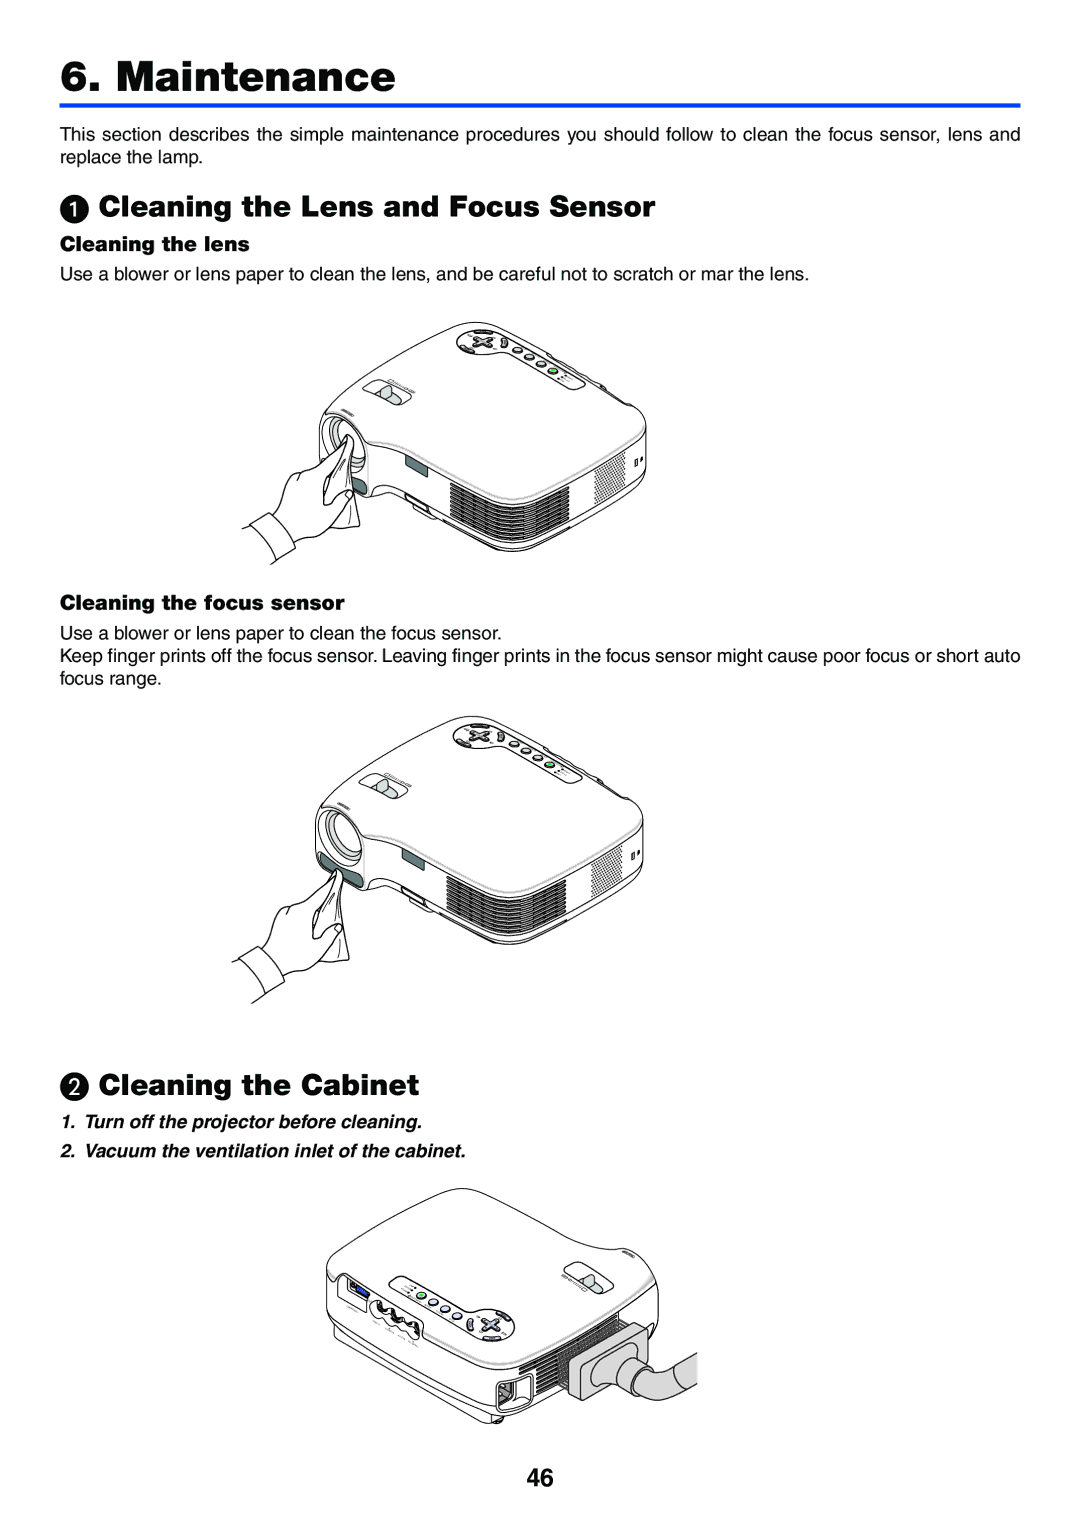
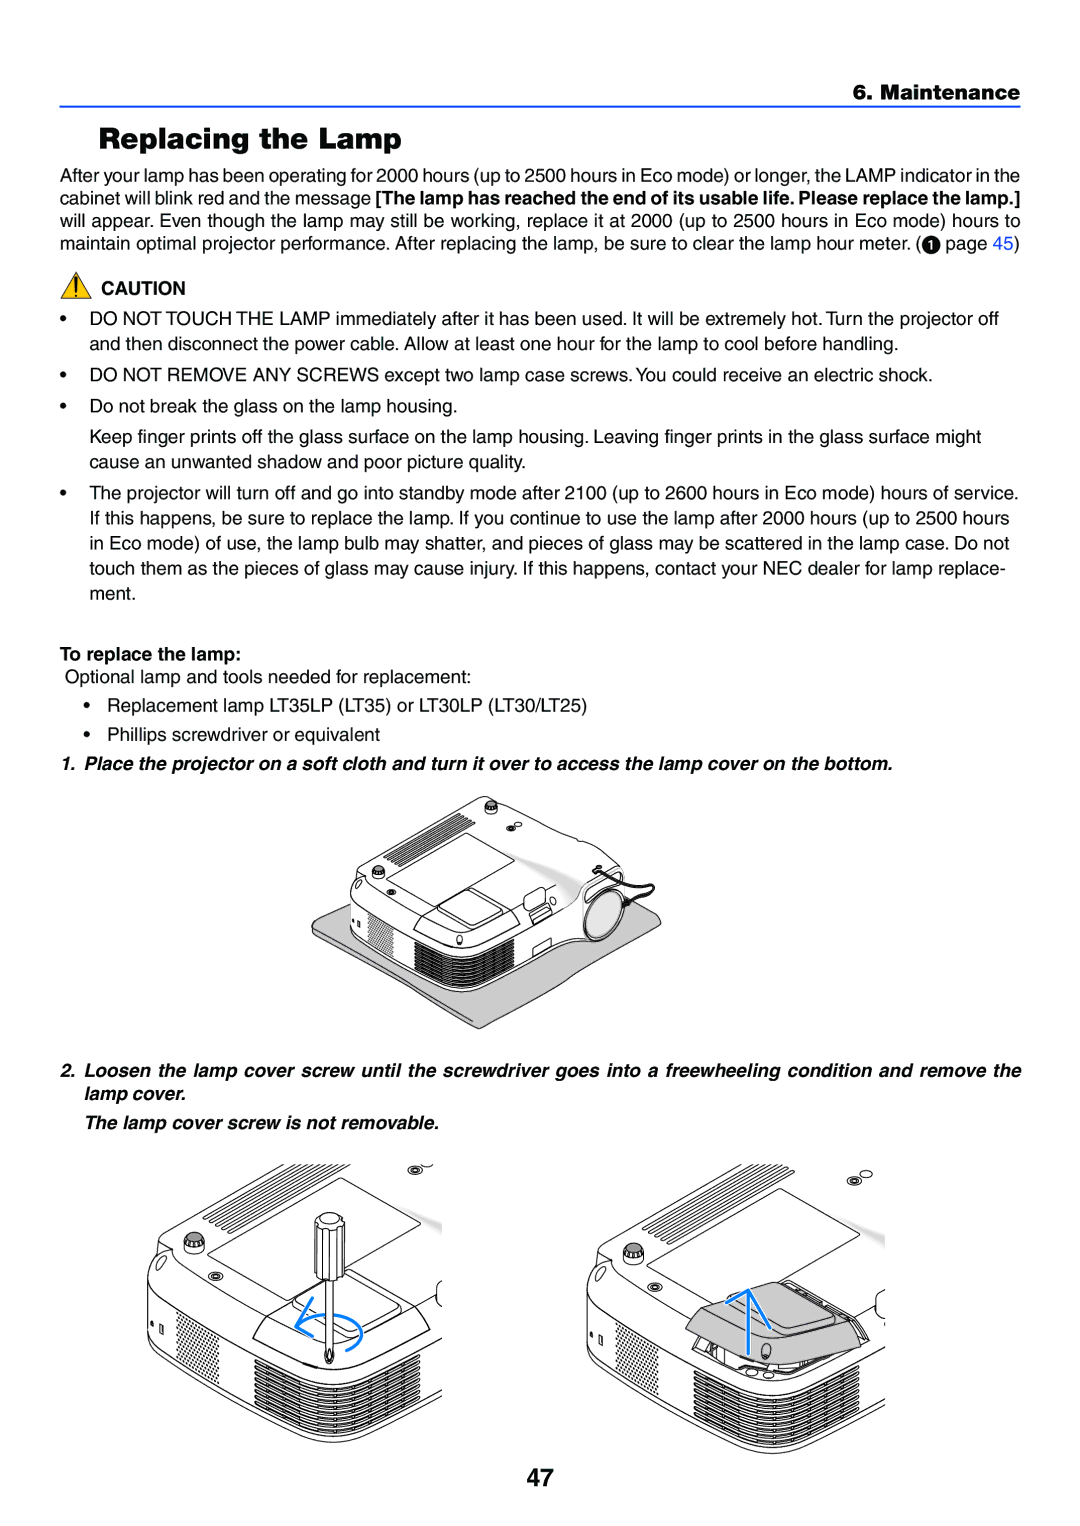
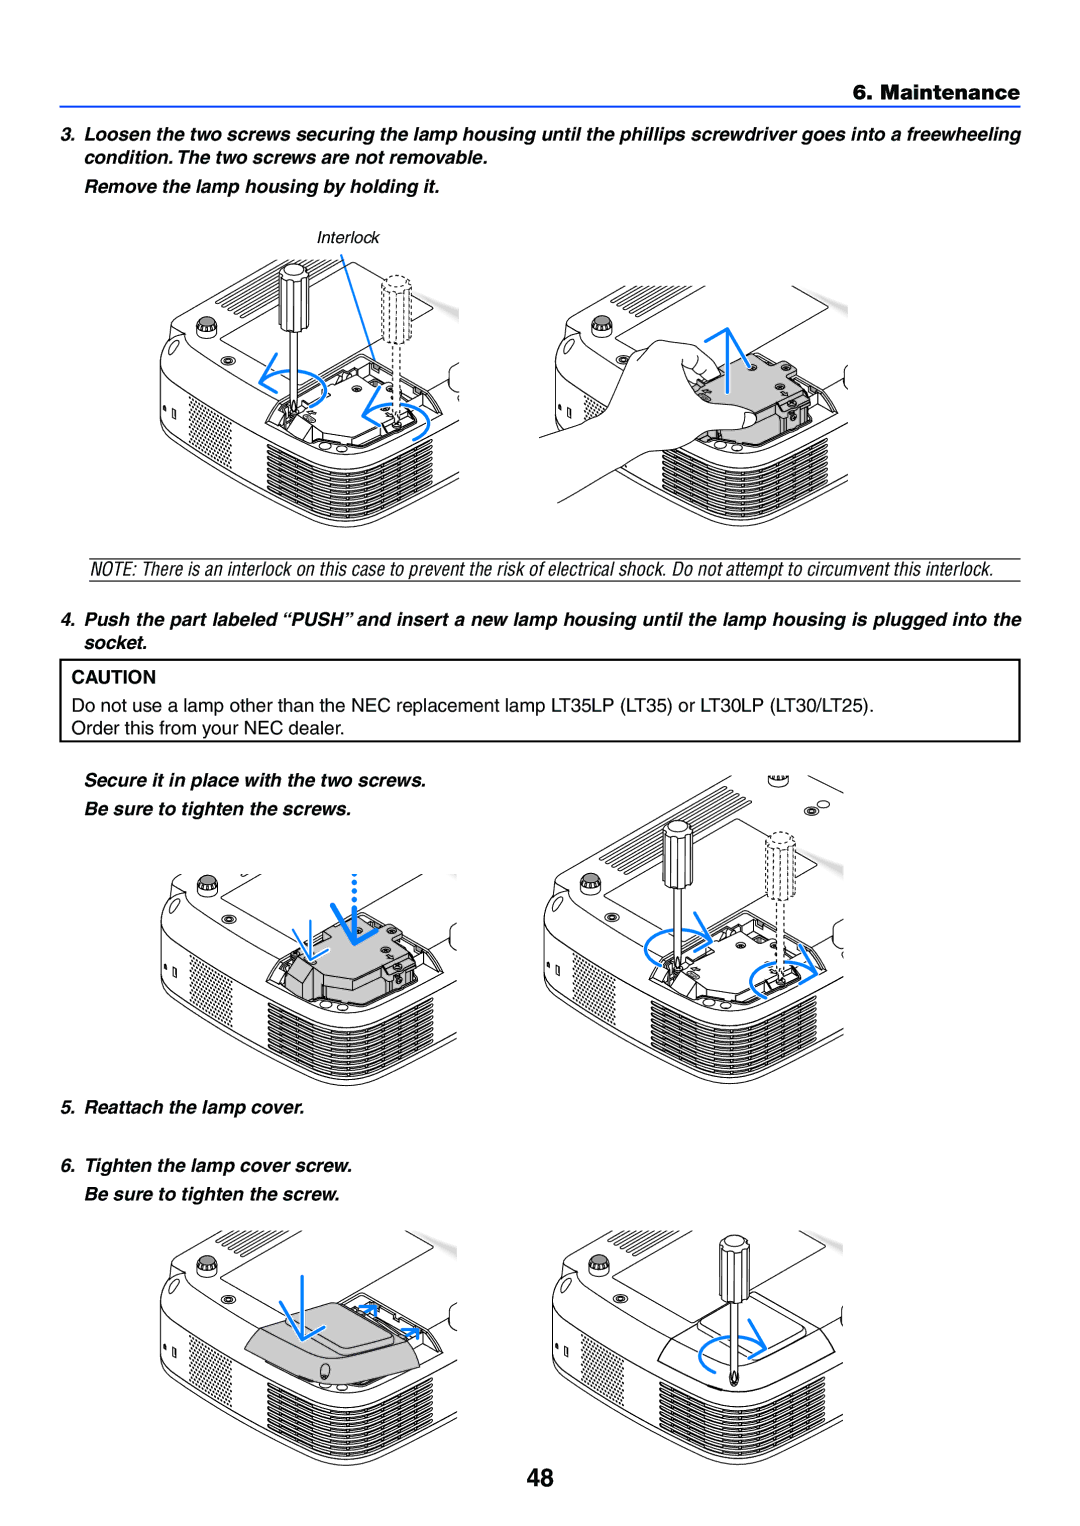
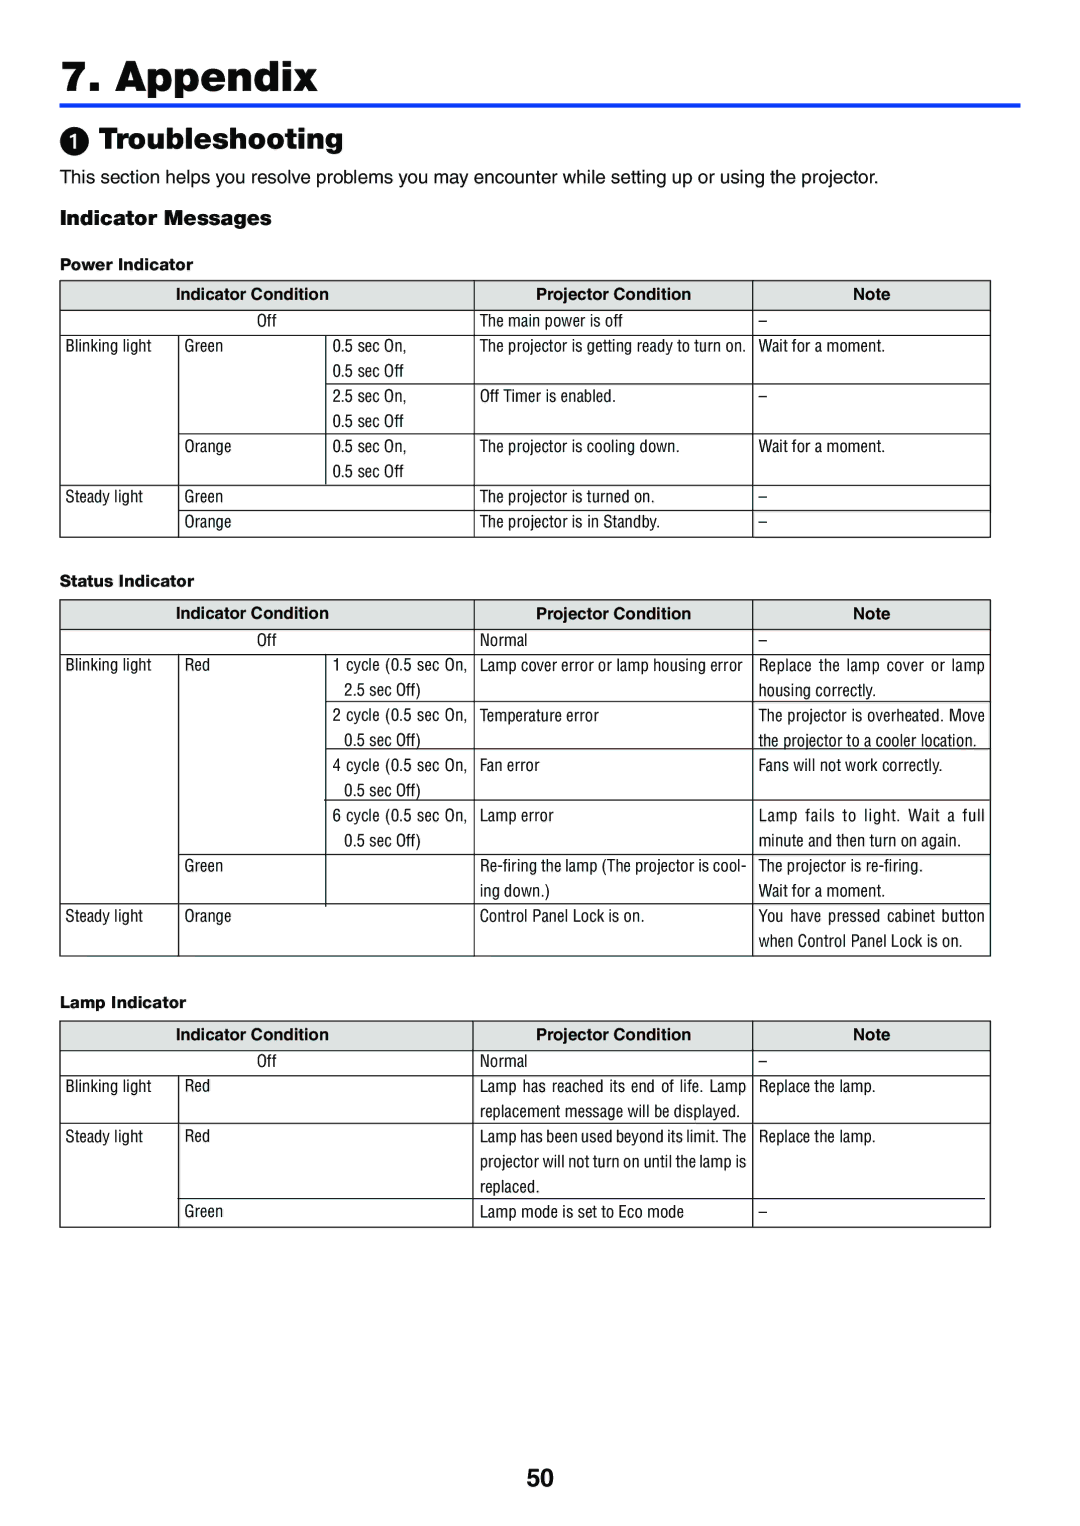
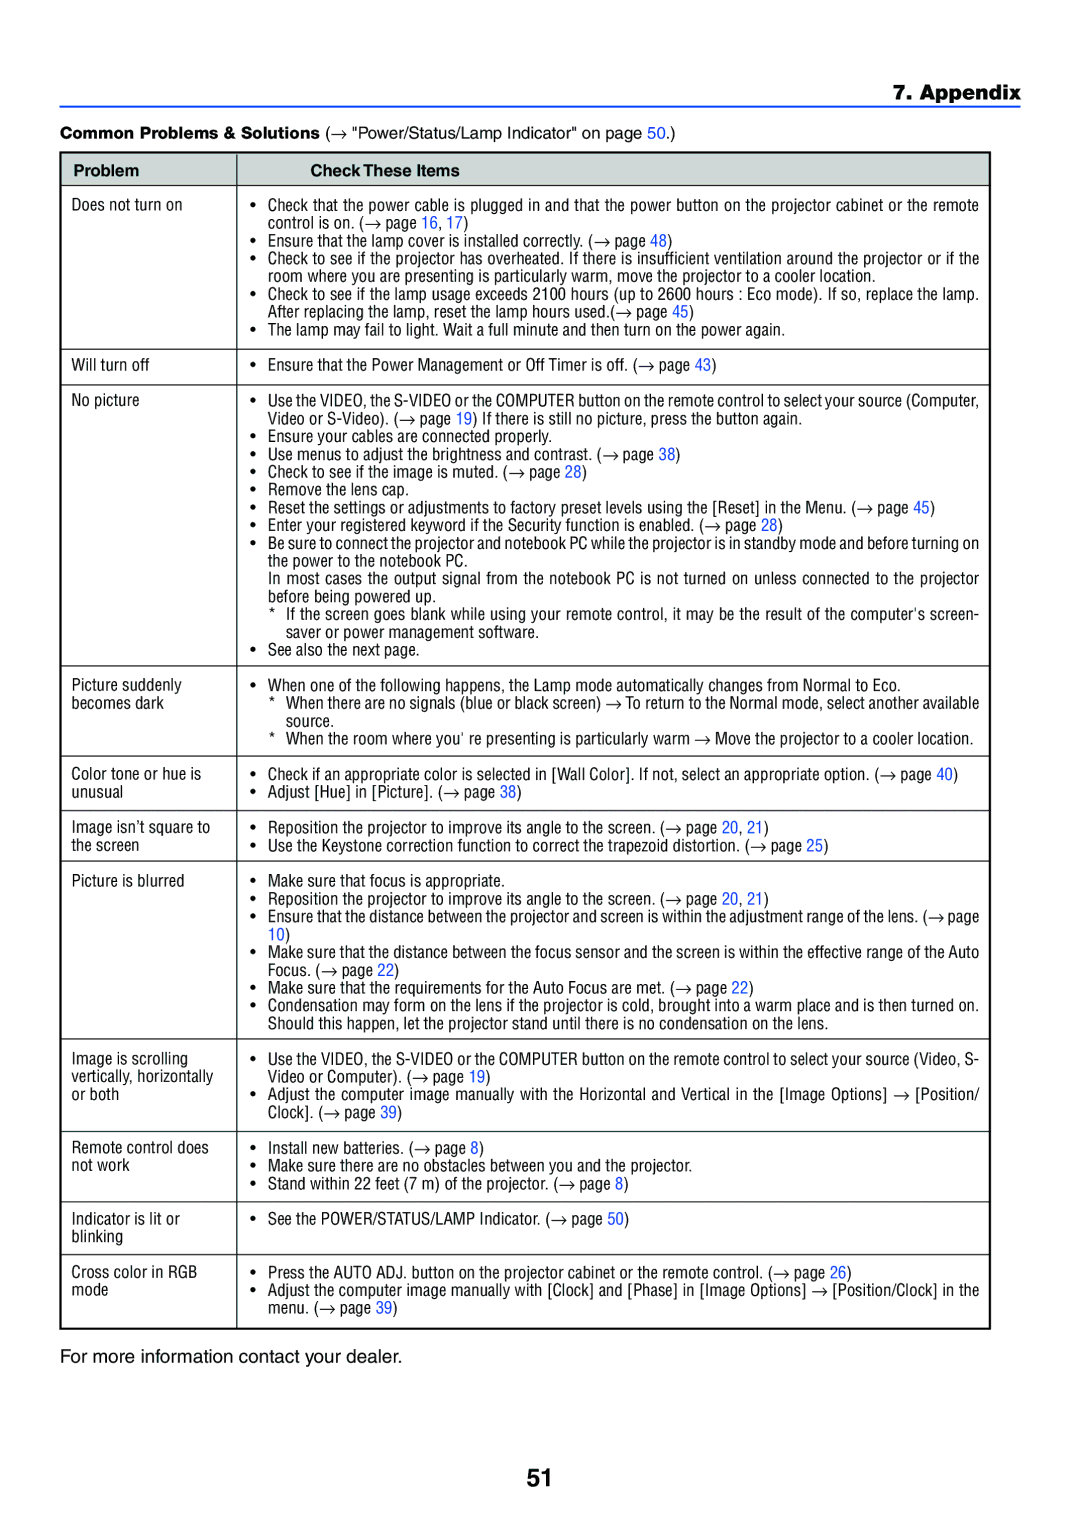
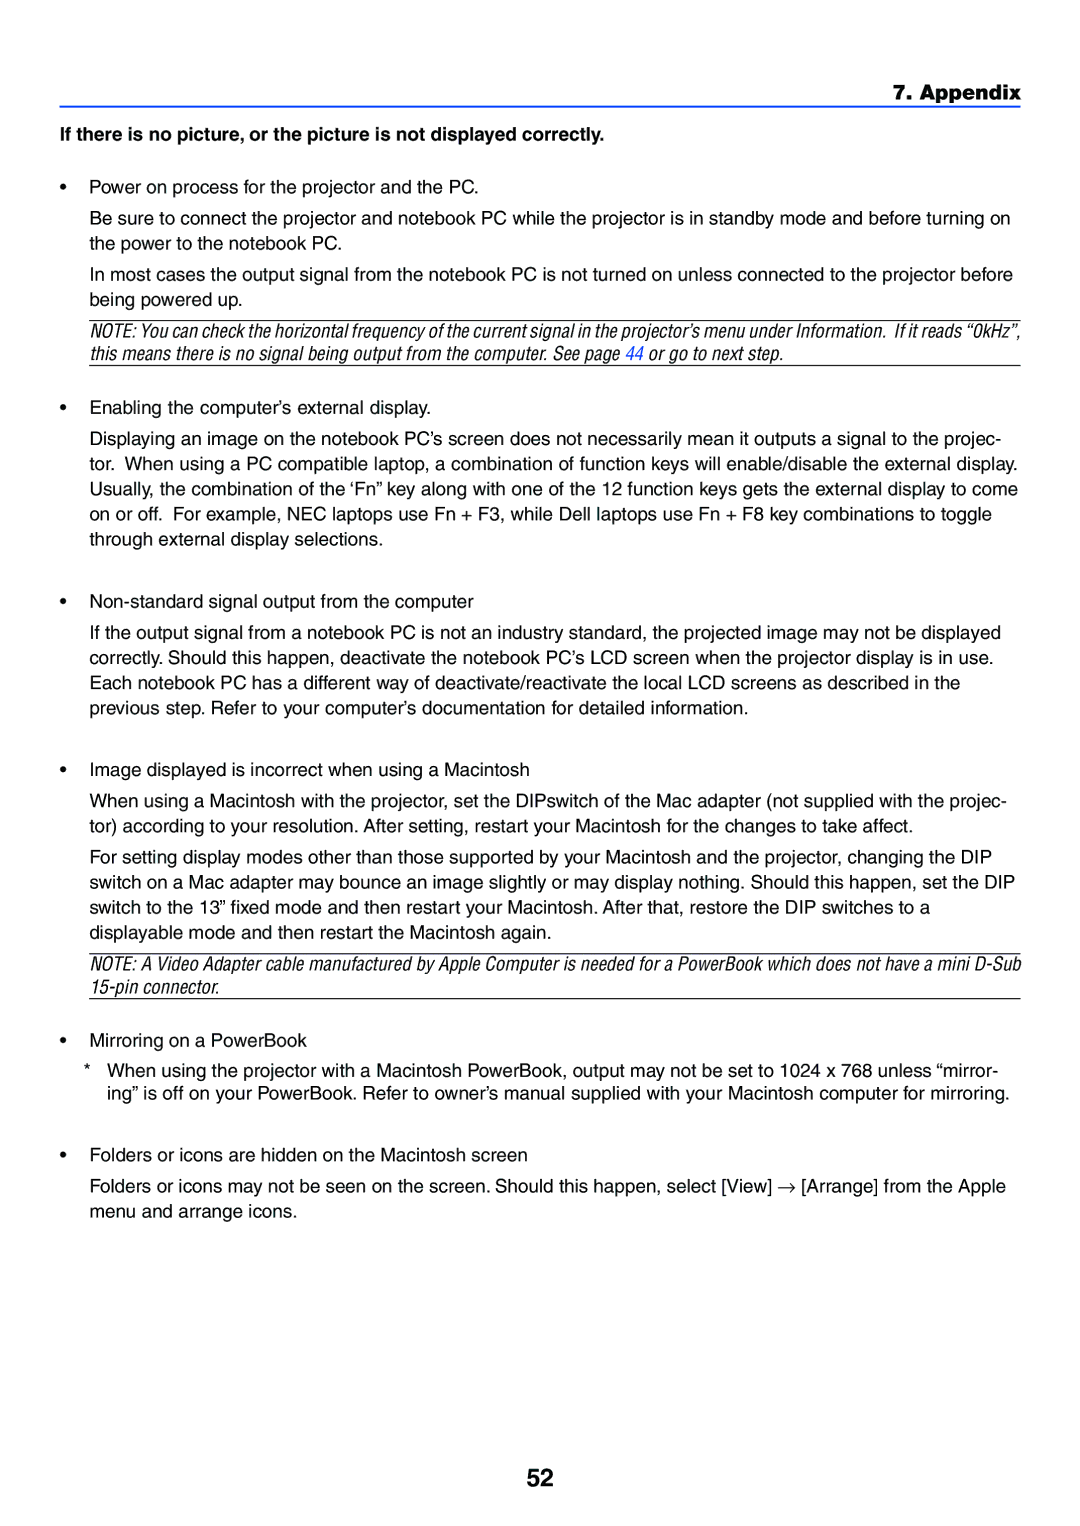
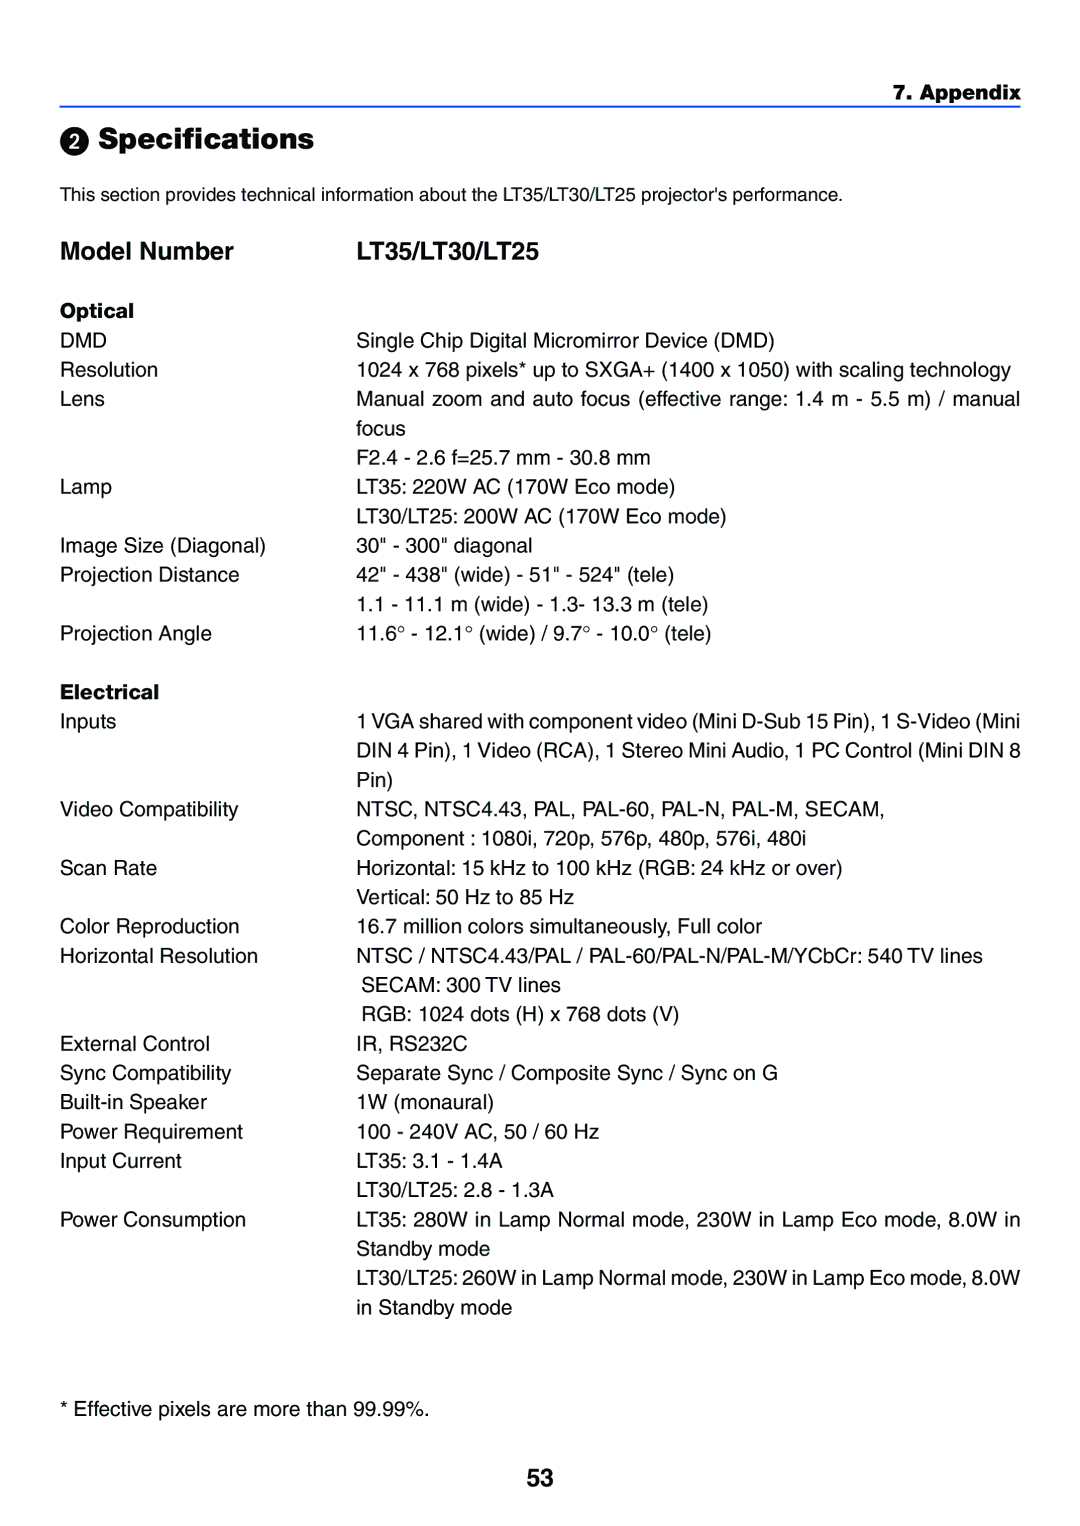
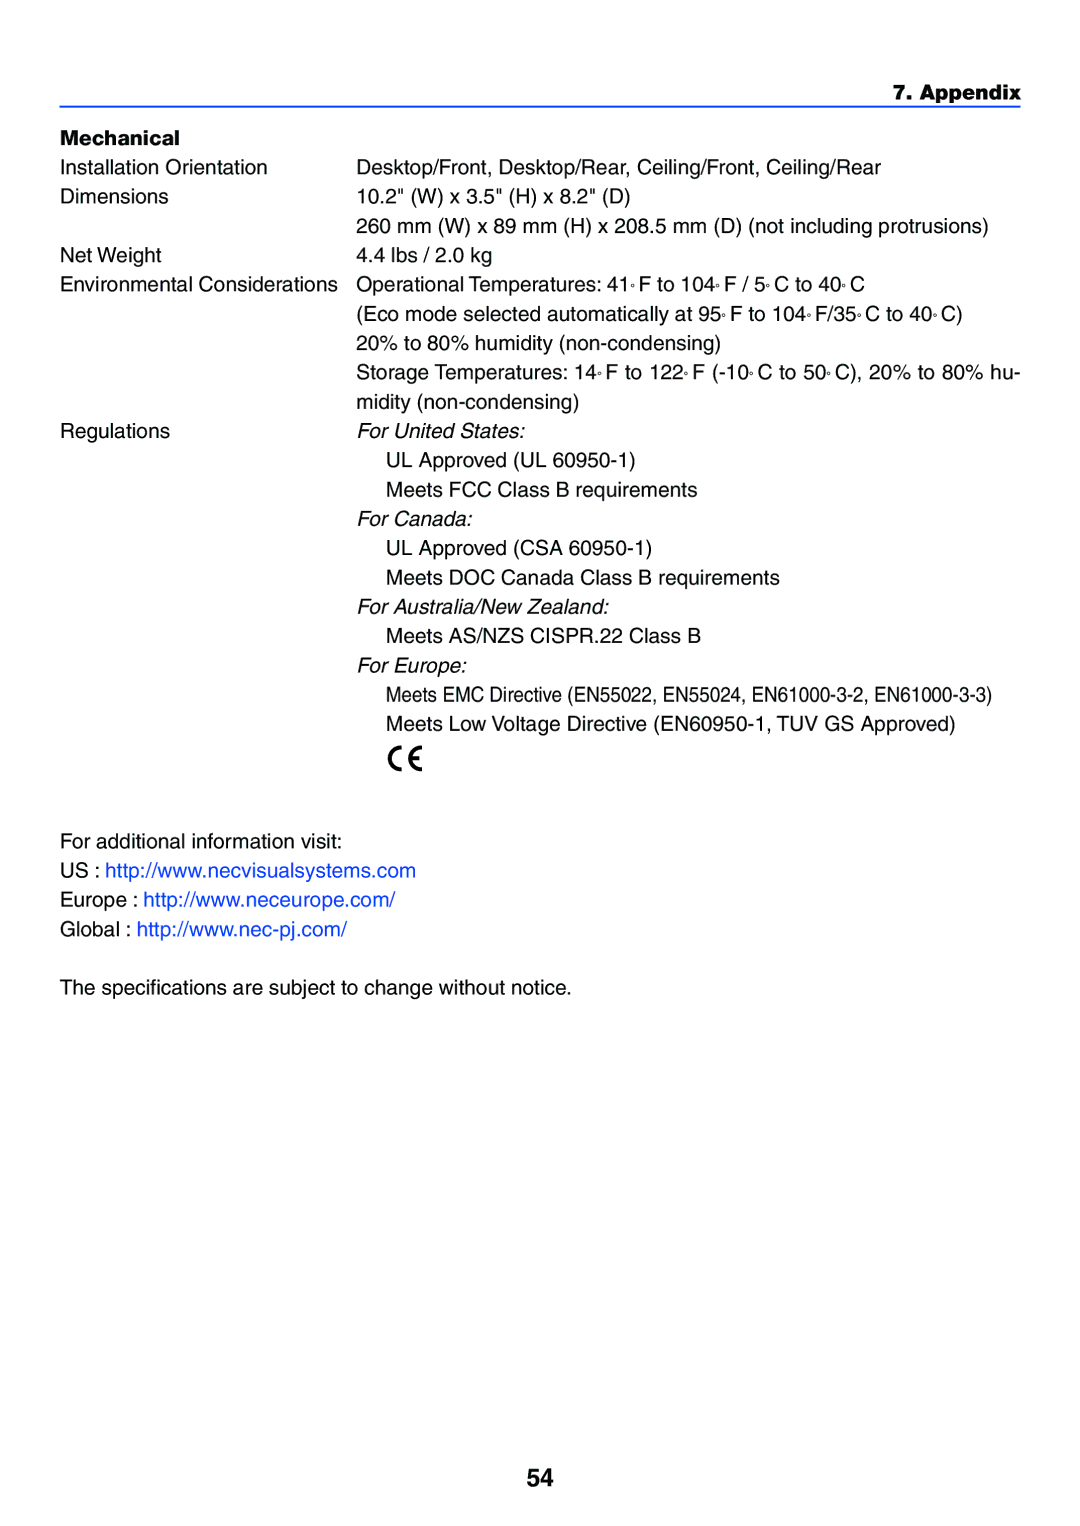
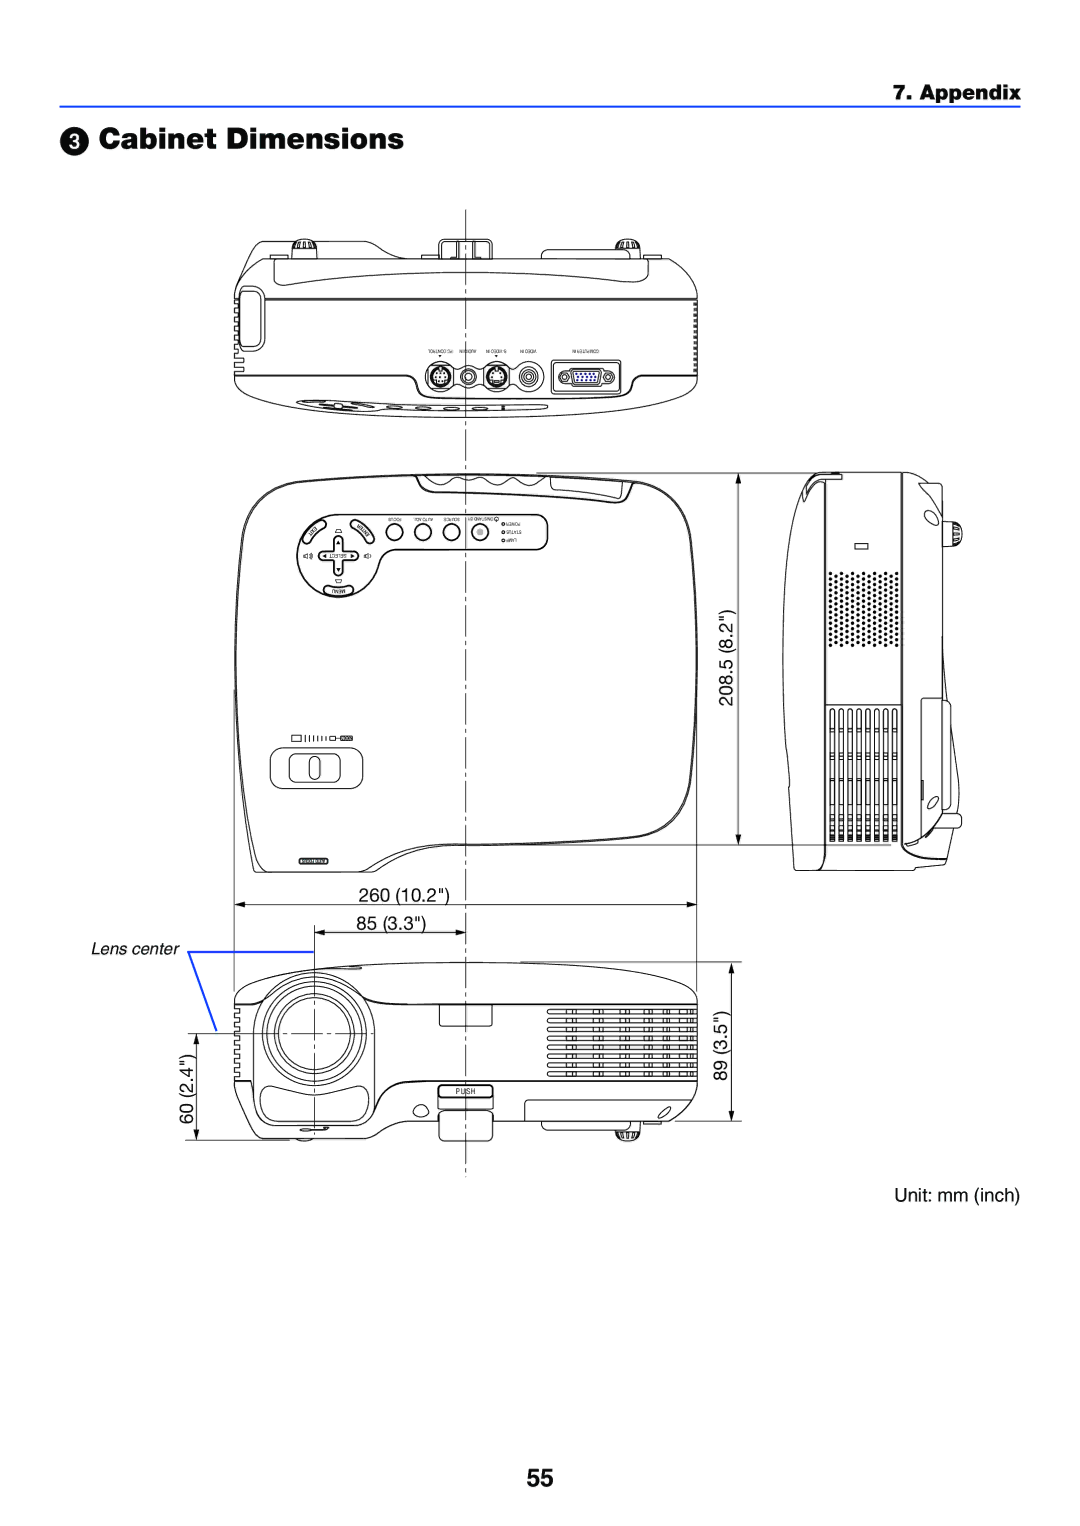
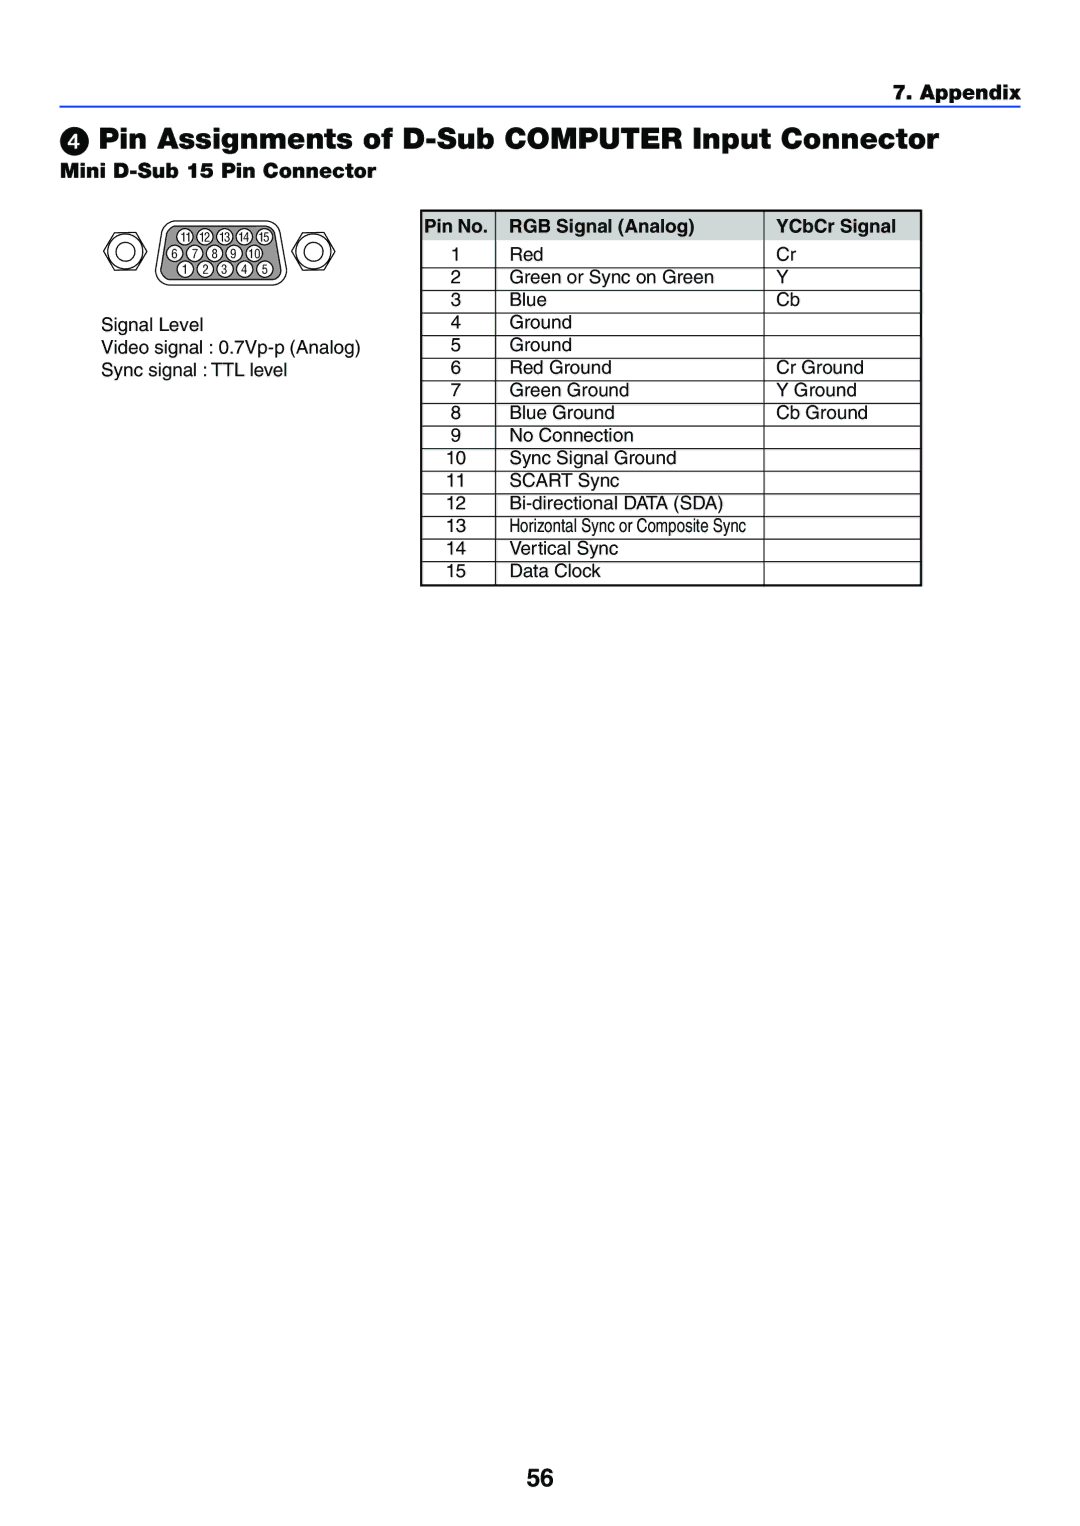
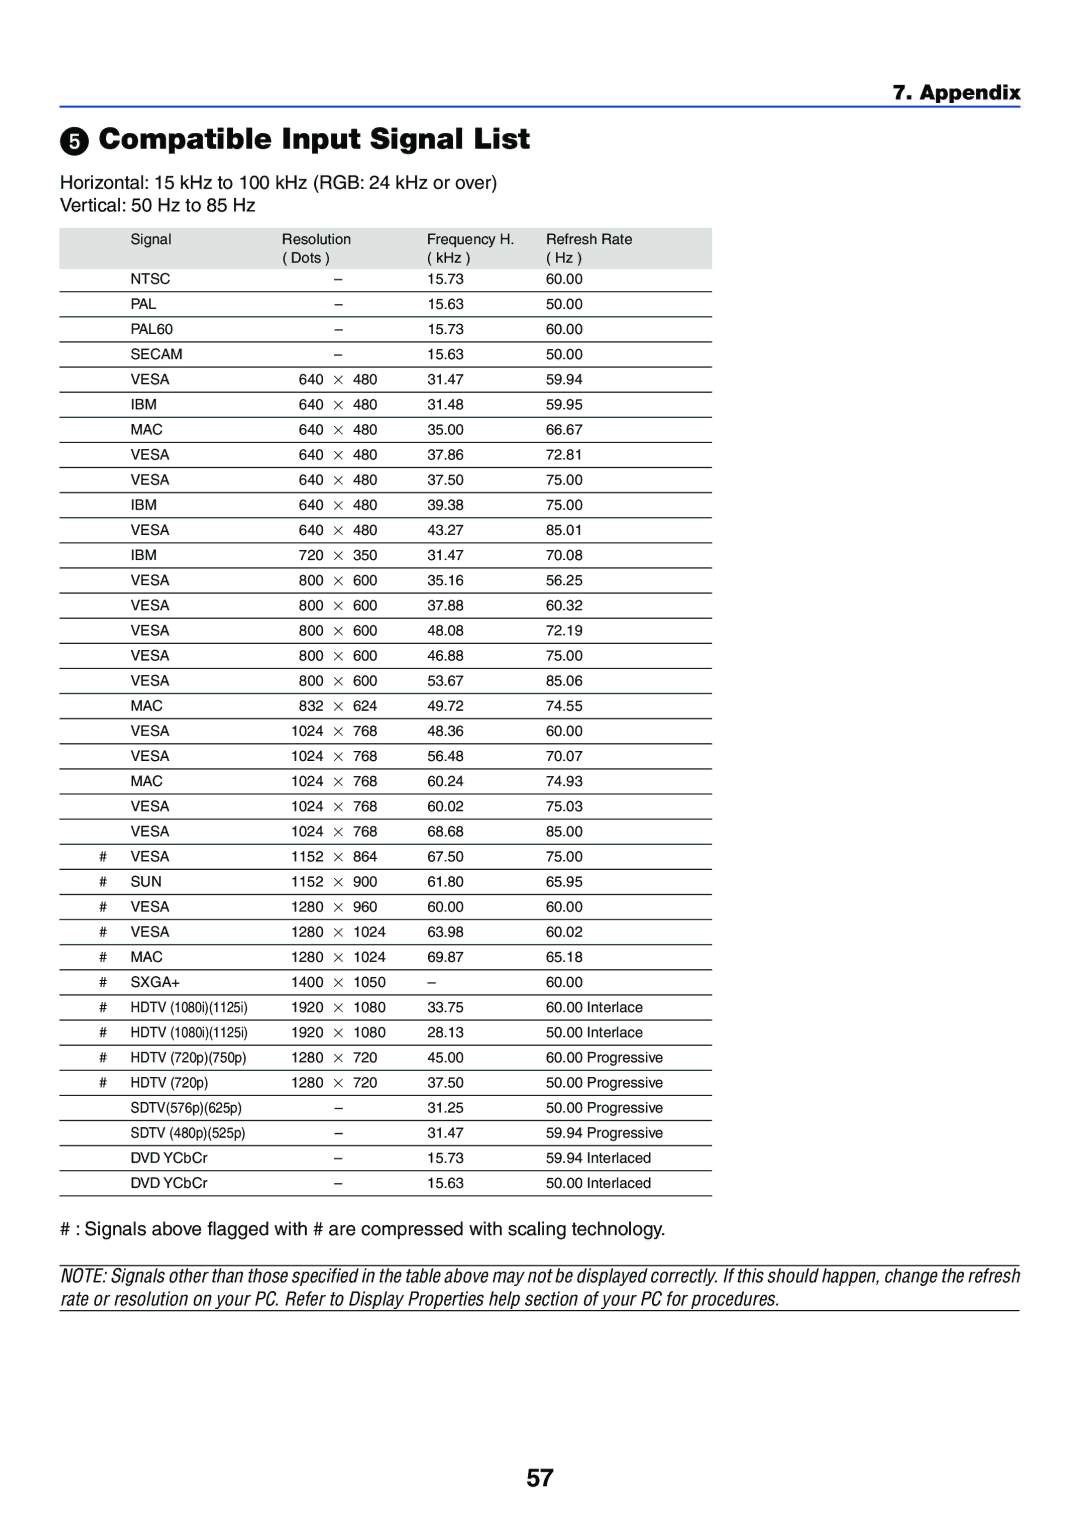
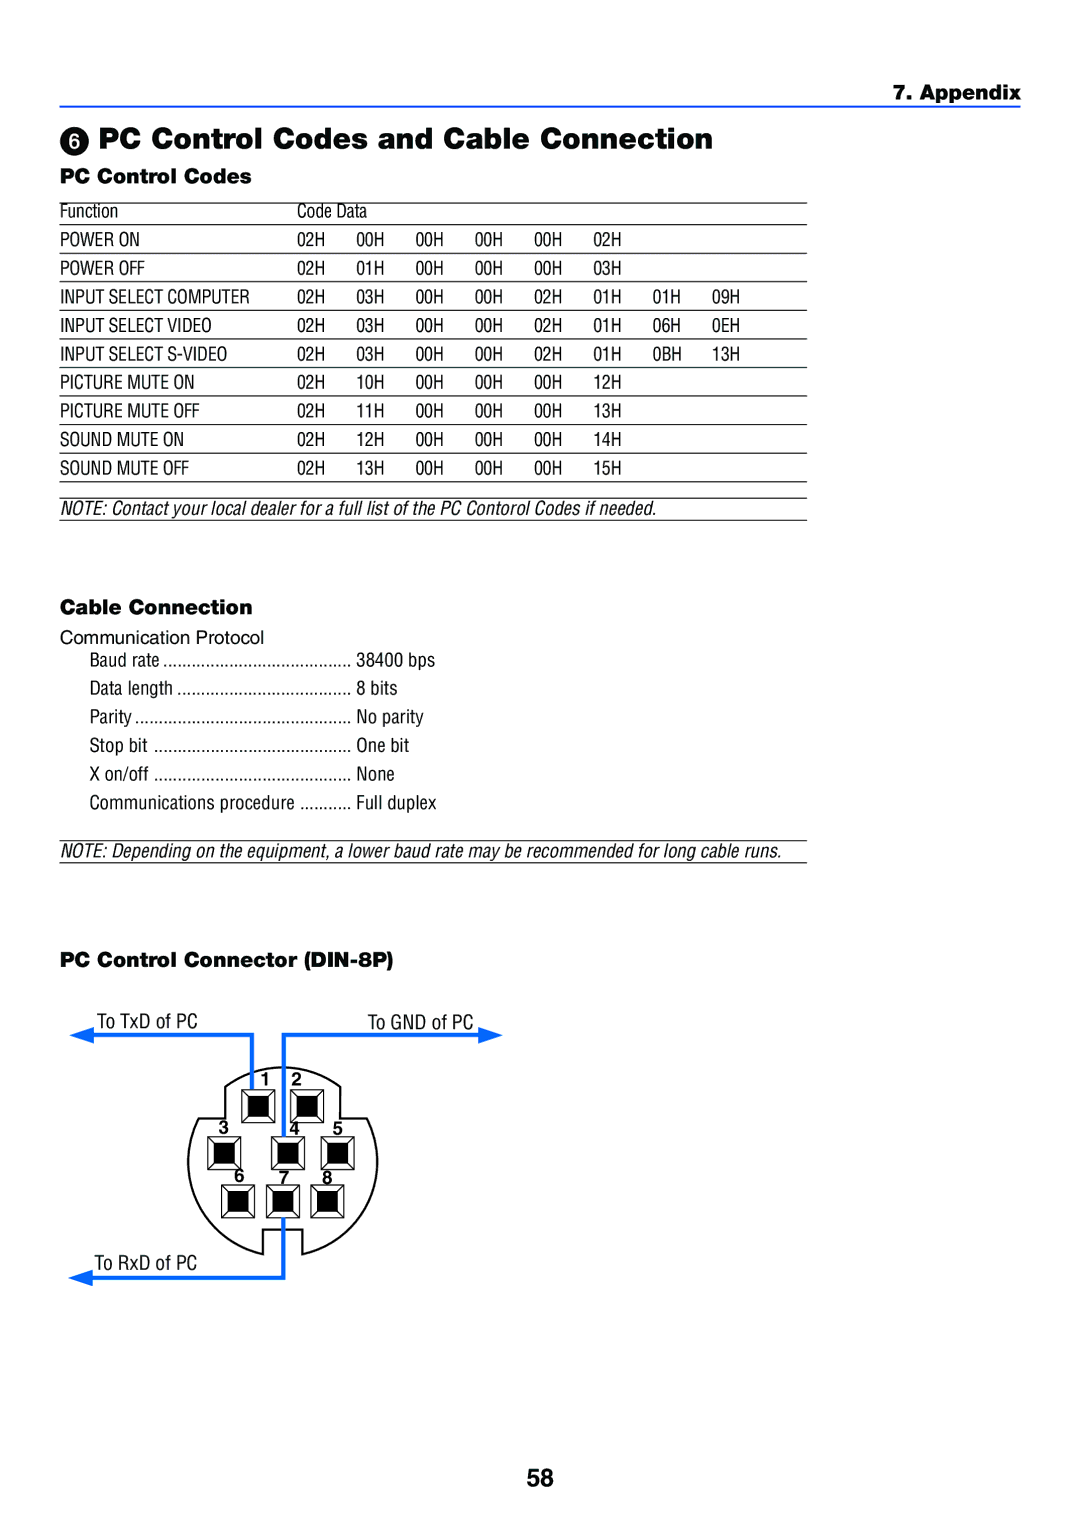
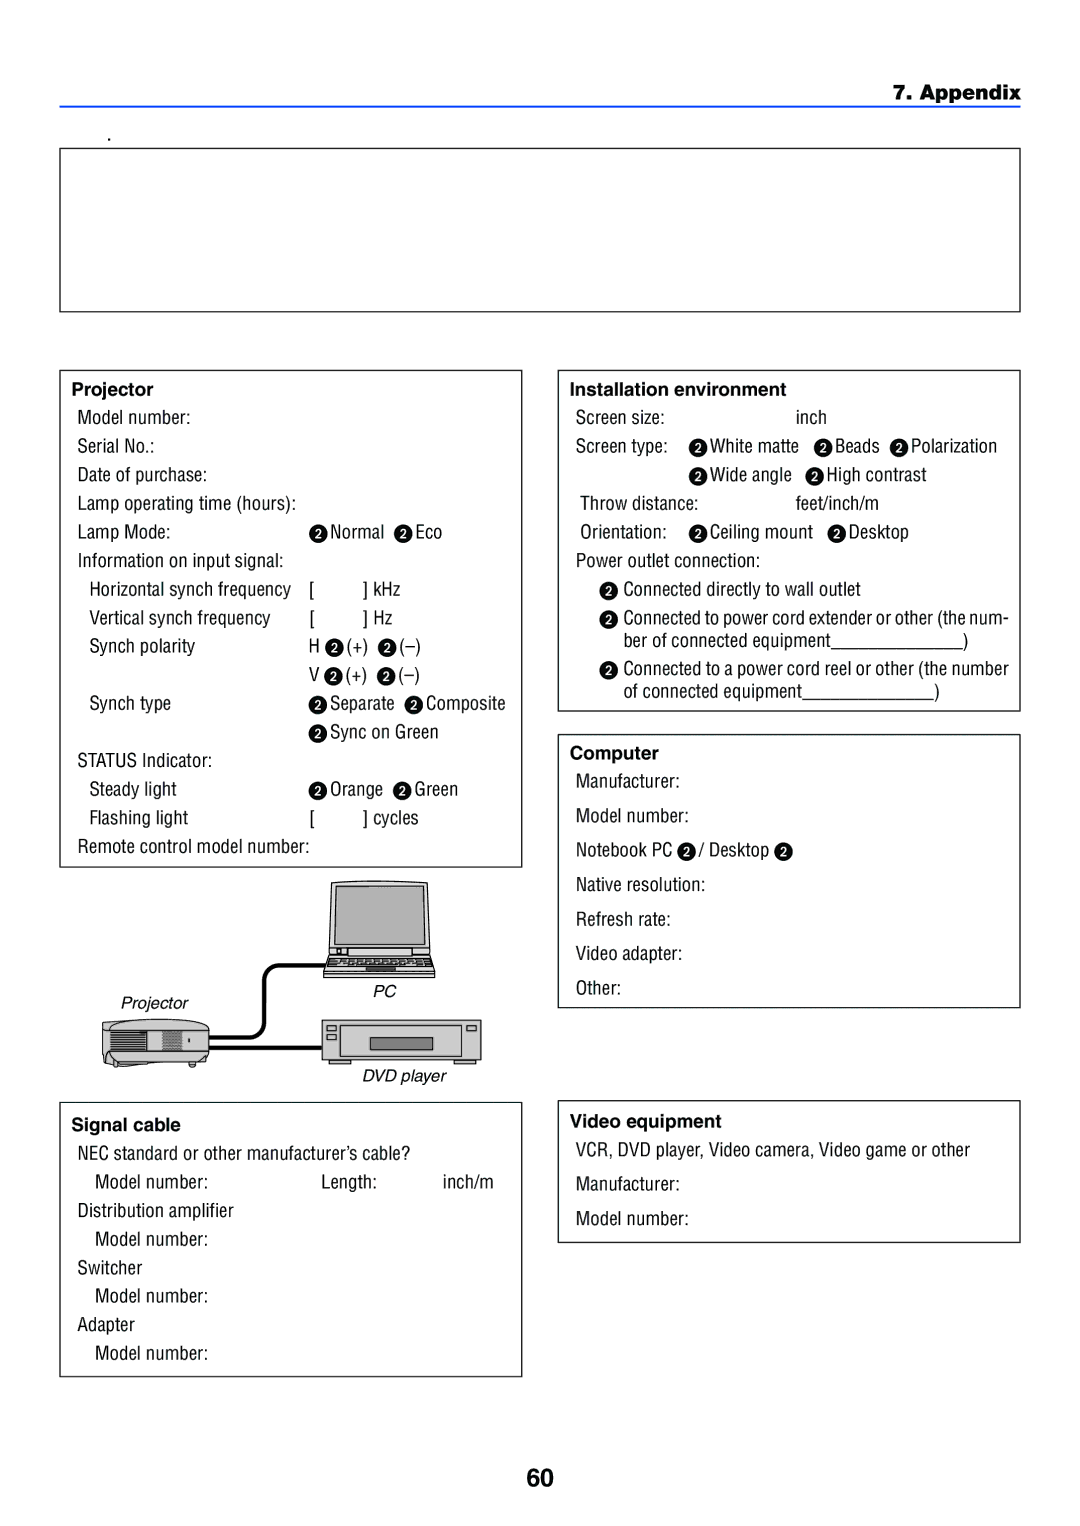
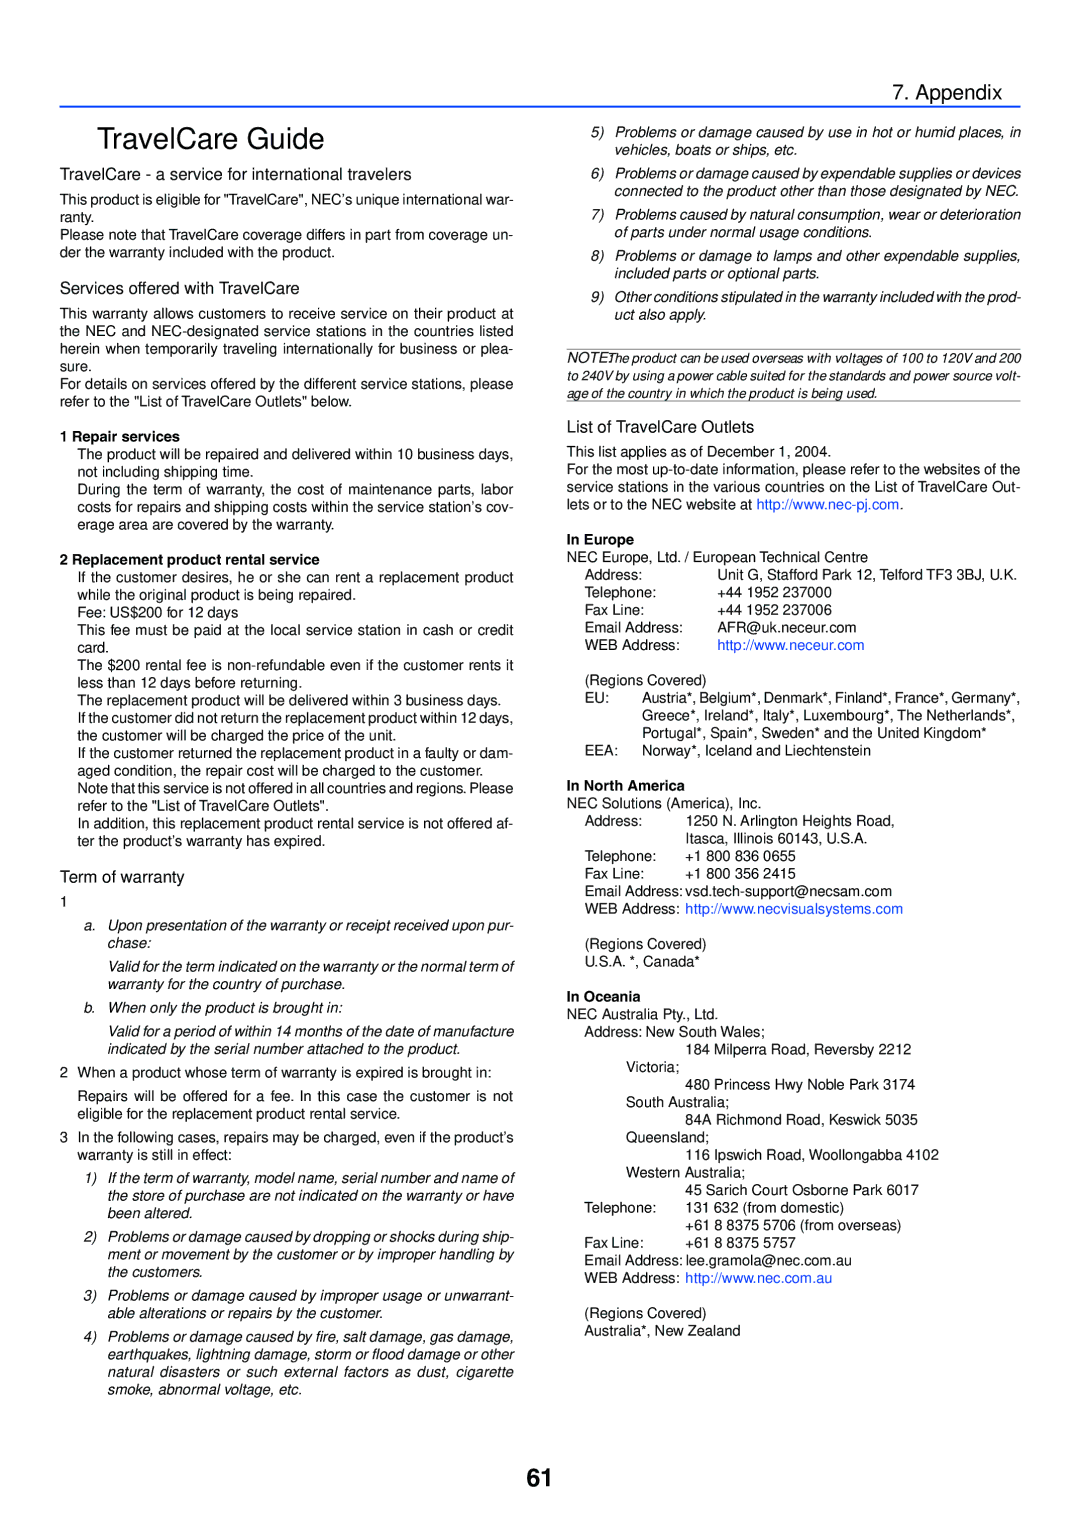
Contents LT35/LT30/LT25 Page DOC Compliance Notice for Canada only Safety CautionsPrecautions Important InformationPlace the projector in a horizontal position Important SafeguardsInstallation Important Information RF Interference for USA onlyIii Important Information Fire and Shock PrecautionsLamp Replacement Important Information Remote Control PrecautionsTable of Contents Table of Contents Whats in the Box? IntroductionCongratulations on Your Purchase of the Projector Features youll enjoyIntroduction to the Projector IntroductionIntroduction Rear Part Names of the ProjectorFront/Top Introduction Bottom Volume Keystone But Tons Enter Button Exit Button Introduction Top FeaturesTerminal Panel Features Power Part Names of the Remote ControlOperating Range for Wireless Remote Control Introduction Battery InstallationSelecting a Location Installation and ConnectionsSetting Up the Screen and the Projector Distance Chart Installation and Connections Throw Distance and Screen SizeReflecting the Image Installation and ConnectionsEnabling the computer’s external display Connecting Your PC or Macintosh ComputerMaking Connections Installation and Connections To connect Scart output RGB Audio Video Audio Lamp Status Power Turning on the Projector Projecting an Image Basic OperationTo select a menu language, follow these steps Projecting an Image Basic OperationSelecting a Source Detecting the Signal AutomaticallyAbout Auto Keystone Correction Adjusting the Picture Size and PositionAbout Auto Focus Lift the front edge of the projector Projecting an Image Basic Operation Adjust the Tilt FootEffective auto focus range for screen Projecting an Image Basic Operation ZoomAuto Focus Projecting an Image Basic Operation Auto Keystone Correction Adjusting with the remote control Adjusting Focus ManuallyAdjusting with buttons on the cabinet Correcting Keystone Distortion Manually Optimizing RGB Picture Automatically Adjusting Volume Up or DownAdjusting the Image Using Auto Adjust Preparation Make sure that the projector is turned off Turning off the ProjectorAfter Use Freezing a Picture Convenient FeaturesChanging Lamp Mode Turning off the Image and SoundConvenient Features Select Off and press the Enter button When connecting using the USB terminal Using the Optional Remote Mouse ReceiverConnecting the remote mouse receiver to your computer When operating a computer via the remote mouse receiverUsing the Menus Using On-Screen MenuFor Selecting items Solid triangle Using On-Screen MenuFor Adjusting items Slide bar For Selecting items Return key symbol, Radio buttonMenu Elements Indicates the Control Panel Lock is enabledPicture List of Menu ItemsReset Menu Descriptions & Functions Picture PresetDetail Settings Selecting Aspect Ratio Aspect Ratio ResetMenu Descriptions & Functions Image Options Turning on Noise Reduction Noise Reduction Setting Telecine Mode TelecineSetup General Menu Descriptions & Functions SetupDisabling the Cabinet Buttons Control Panel Lock Using On-Screen Menu Setup InstallationSelecting Projector Orientation Orientation Selecting Communication Speed Communication SpeedSelecting a Color for Background Background Enabling Security SecuritySelecting Menu Color Menu Color Select Selecting Menu Display Time Menu Display TimeUsing On-Screen Menu Setup Options Version Menu Descriptions & Functions InformationUsage Time SourceClearing Lamp Hour Meter Clear Lamp Hours Menu Descriptions & Functions ResetReturning to Factory Default Reset Cleaning the lens MaintenanceCleaning the Lens and Focus Sensor Cleaning the CabinetTo replace the lamp MaintenanceReplacing the Lamp Interlock Maintenance Appendix TroubleshootingIndicator Messages Appendix Problem Check These ItemsAppendix Electrical SpecificationsOptical For Europe Appendix MechanicalCabinet Dimensions Pin No RGB Signal Analog YCbCr Signal Pin Assignments of D-Sub Computer Input ConnectorMini D-Sub 15 Pin Connector SXGA+ Compatible Input Signal ListCable Connection PC Control Connector DIN-8PPC Control Codes and Cable Connection PC Control CodesOther Troubleshooting Check ListPower Video and AudioVideo equipment Installation environmentSignal cable ComputerTravelCare Guide TravelCare a service for international travelersAsia and Middle East Application Sheet for TravelCare Service Program Condition of your TravelCare Service Program

LT35, LT25, LT30 specifications

Acoustic Energy, a prominent name in the audio industry, has made a significant mark with its LT series of loudspeakers: the LT30, LT25, and LT35. These speakers are designed to deliver exceptional sound quality while catering to the needs of audiophiles and casual listeners alike.

The Acoustic Energy LT30 is a versatile floor-standing loudspeaker that offers remarkable performance across various audio genres. Featuring a 3-way driver configuration, the LT30 is equipped with a 1-inch silk dome tweeter for clear high frequencies, a 4-inch midrange driver for detailed vocal reproduction, and dual 6.5-inch woven composite woofers that provide deep, powerful bass response. One of the standout features of the LT30 is its unique cabinet design, which minimizes resonance and maximizes sound clarity, ensuring an immersive listening experience.

For those looking for a slightly smaller option, the LT25 serves as an excellent choice. This compact yet powerful speaker shares similar design elements to the LT30 but features a 2-way configuration. The LT25 utilizes a 1-inch tweeter and a 5-inch mid-bass driver, making it ideal for smaller rooms or as part of a surround sound setup. Its refined sound stage and balanced audio output make it a perfect fit for both music and movie enthusiasts.

The LT35, on the other hand, is designed for larger spaces and offers advanced audio technologies. This model incorporates Acoustic Energy's proprietary driver technology, which ensures accurate sound reproduction and improved efficiency. The 1-inch tweeter and dual 7-inch woofers work in harmony to deliver an expansive soundstage, making it suitable for high-fidelity audio systems and dedicated listening environments.

All three models feature smart design elements, including an integrated grille for aesthetic purposes and strategically placed ports for enhanced bass response. The LT series also focuses on user-friendly connectivity, with binding posts that accommodate a variety of speaker cables and connectors.

Furthermore, each model is crafted with premium materials to ensure longevity and performance, from durable finishes to high-quality drivers. Acoustic Energy's commitment to acoustic excellence is evident across the LT30, LT25, and LT35, making them a solid choice for anyone seeking superior sound quality and design in their audio setup.

These speakers not only stand out in terms of performance but also resonate with the aesthetic appeal, making them a remarkable investment for audio enthusiasts who appreciate quality sound and stylish design.