Acoustic Energy LT30, LT25, LT35 manual Part Names of the Remote Control, Power

Page 15

1. Introduction

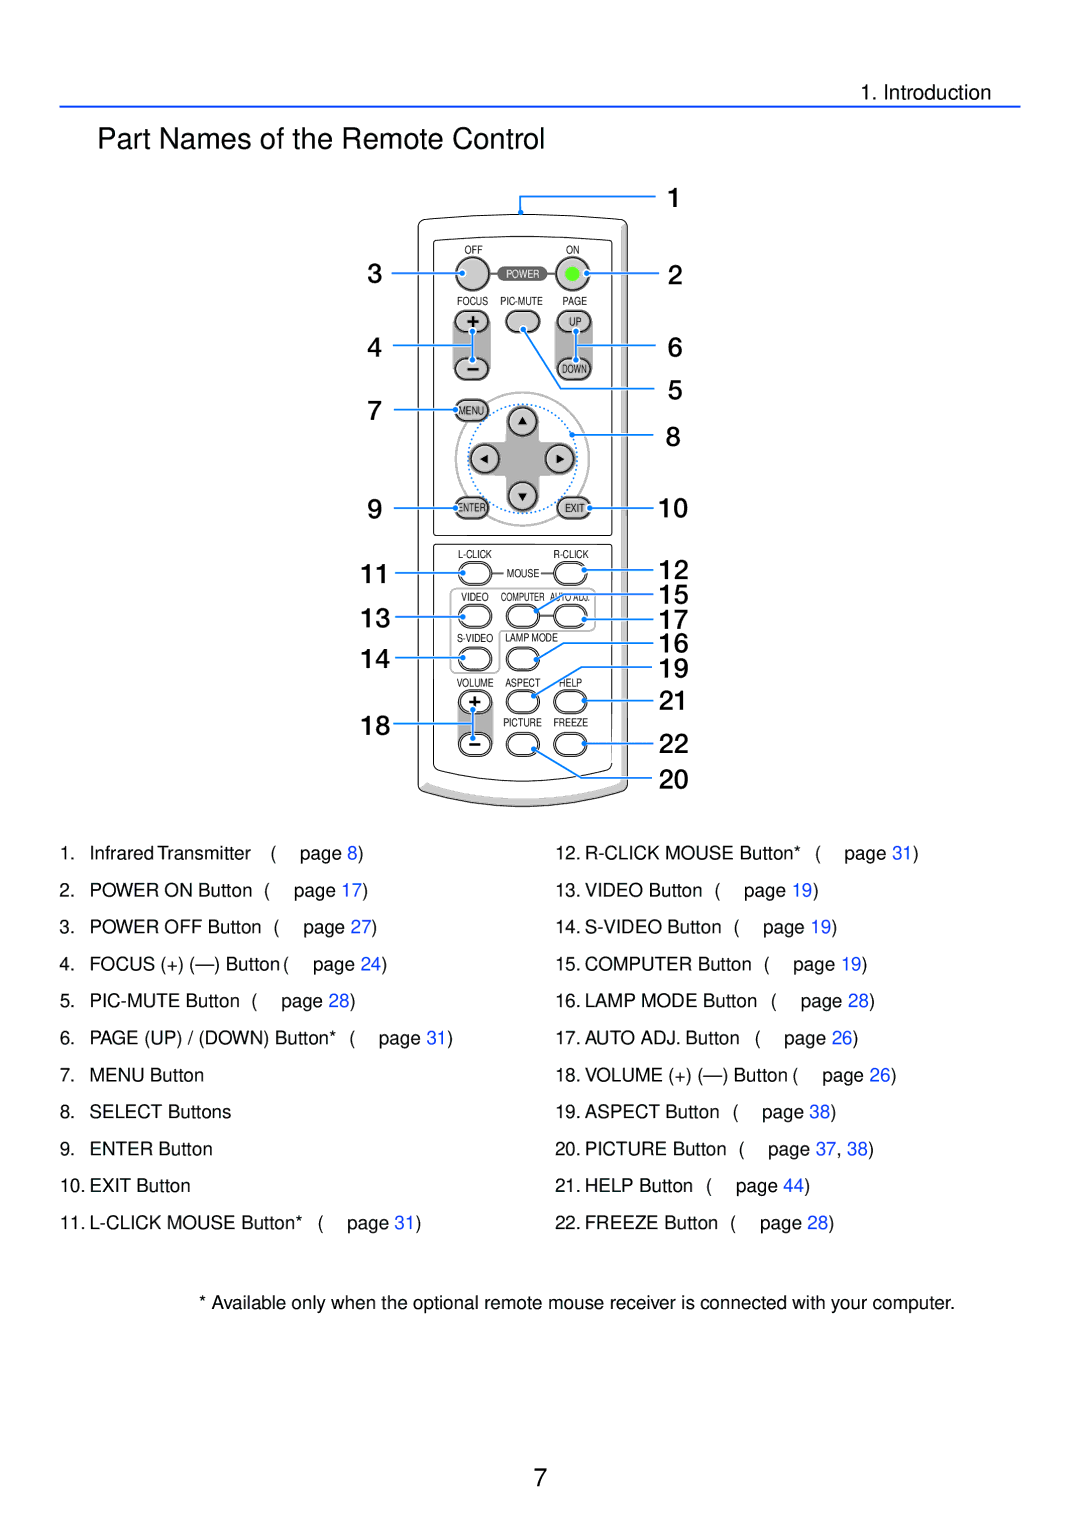
￿Part Names of the Remote Control

1

3

4

7

9

OFFON

POWER

FOCUS

PIC-MUTE

PAGE


UP

DOWN

MENU

ENTER EXIT

2

6

5

8

10

L-CLICK


R-CLICK

11

MOUSE


VIDEO

COMPUTER AUTO ADJ.

13

LAMP MODE

S-VIDEO

14


VOLUME

ASPECT

HELP

18

PICTURE

FREEZE

12

15

17

16

19

21

22

20

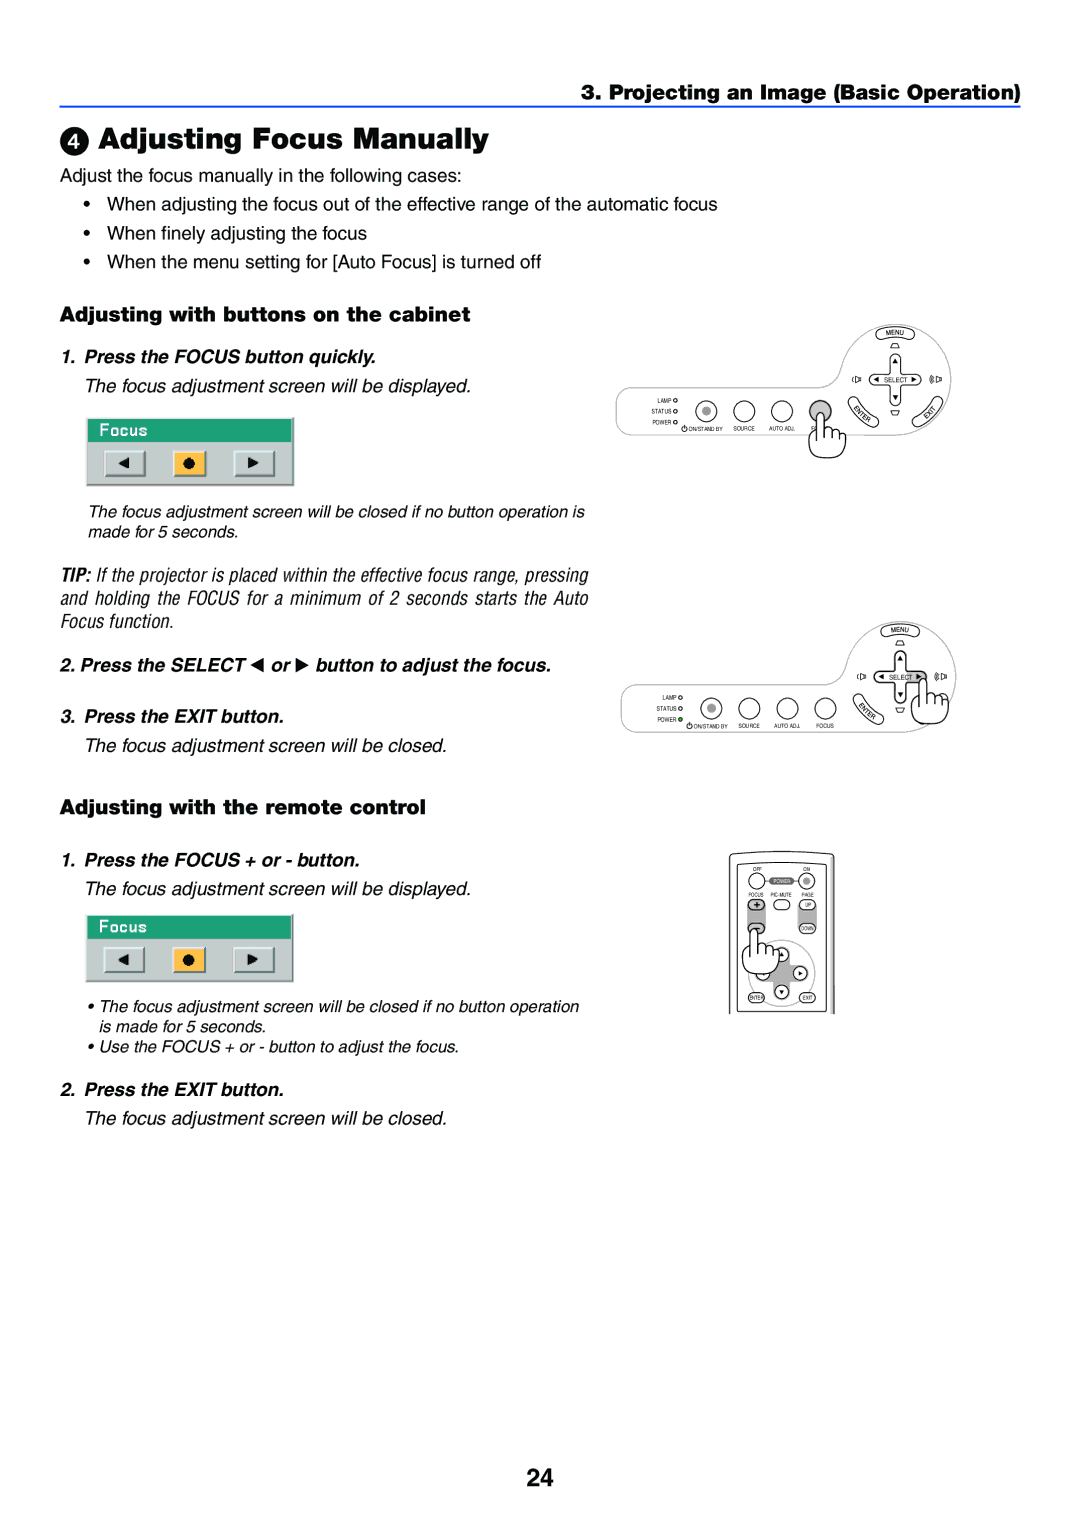
1.Infrared Transmitter (page 8)

2.POWER ON Button (page 17)

3.POWER OFF Button (page 27)

4.FOCUS (+) (–) Button (page 24)

5.PIC-MUTE Button (page 28)

6.PAGE (UP) / (DOWN) Button* (page 31)

7.MENU Button

8.SELECT Buttons

9.ENTER Button

10.EXIT Button

11.L-CLICK MOUSE Button* (page 31)

12.R-CLICK MOUSE Button* (page 31)

13.VIDEO Button (page 19)

14.S-VIDEO Button (page 19)

15.COMPUTER Button (page 19)

16.LAMP MODE Button (page 28)

17.AUTO ADJ. Button (page 26)

18.VOLUME (+) (–) Button (page 26)

19.ASPECT Button (page 38)

20.PICTURE Button (page 37, 38)

21.HELP Button (page 44)

22.FREEZE Button (page 28)

* Available only when the optional remote mouse receiver is connected with your computer.

7

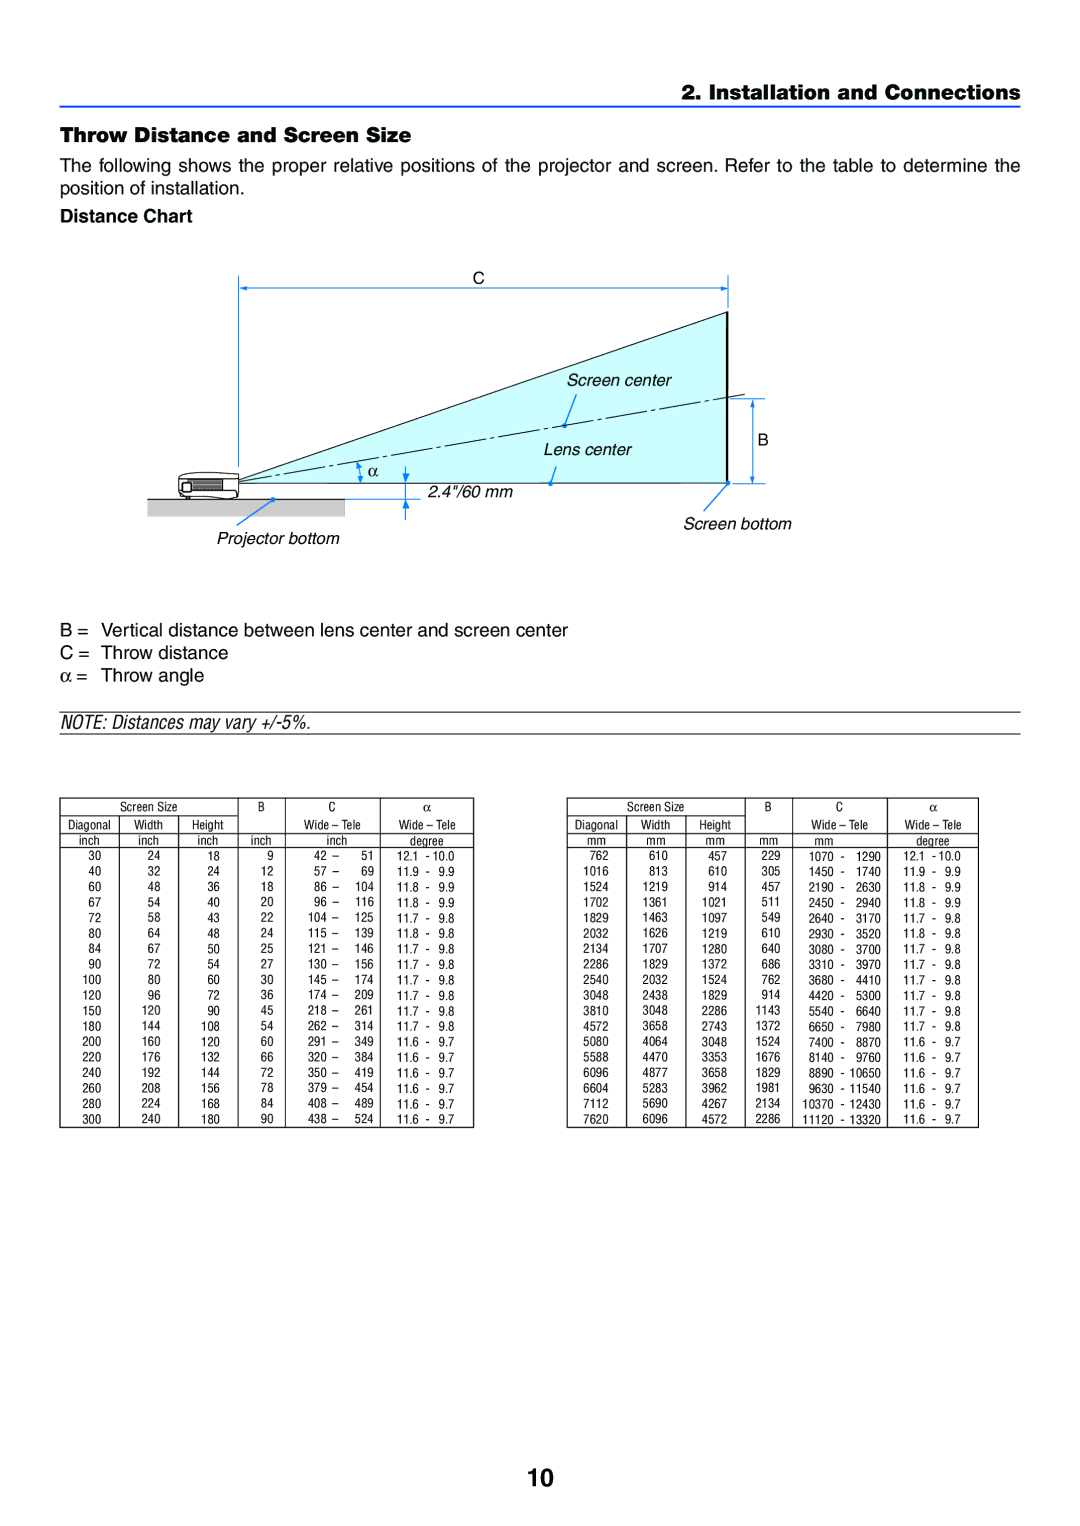
Image 15 Contents
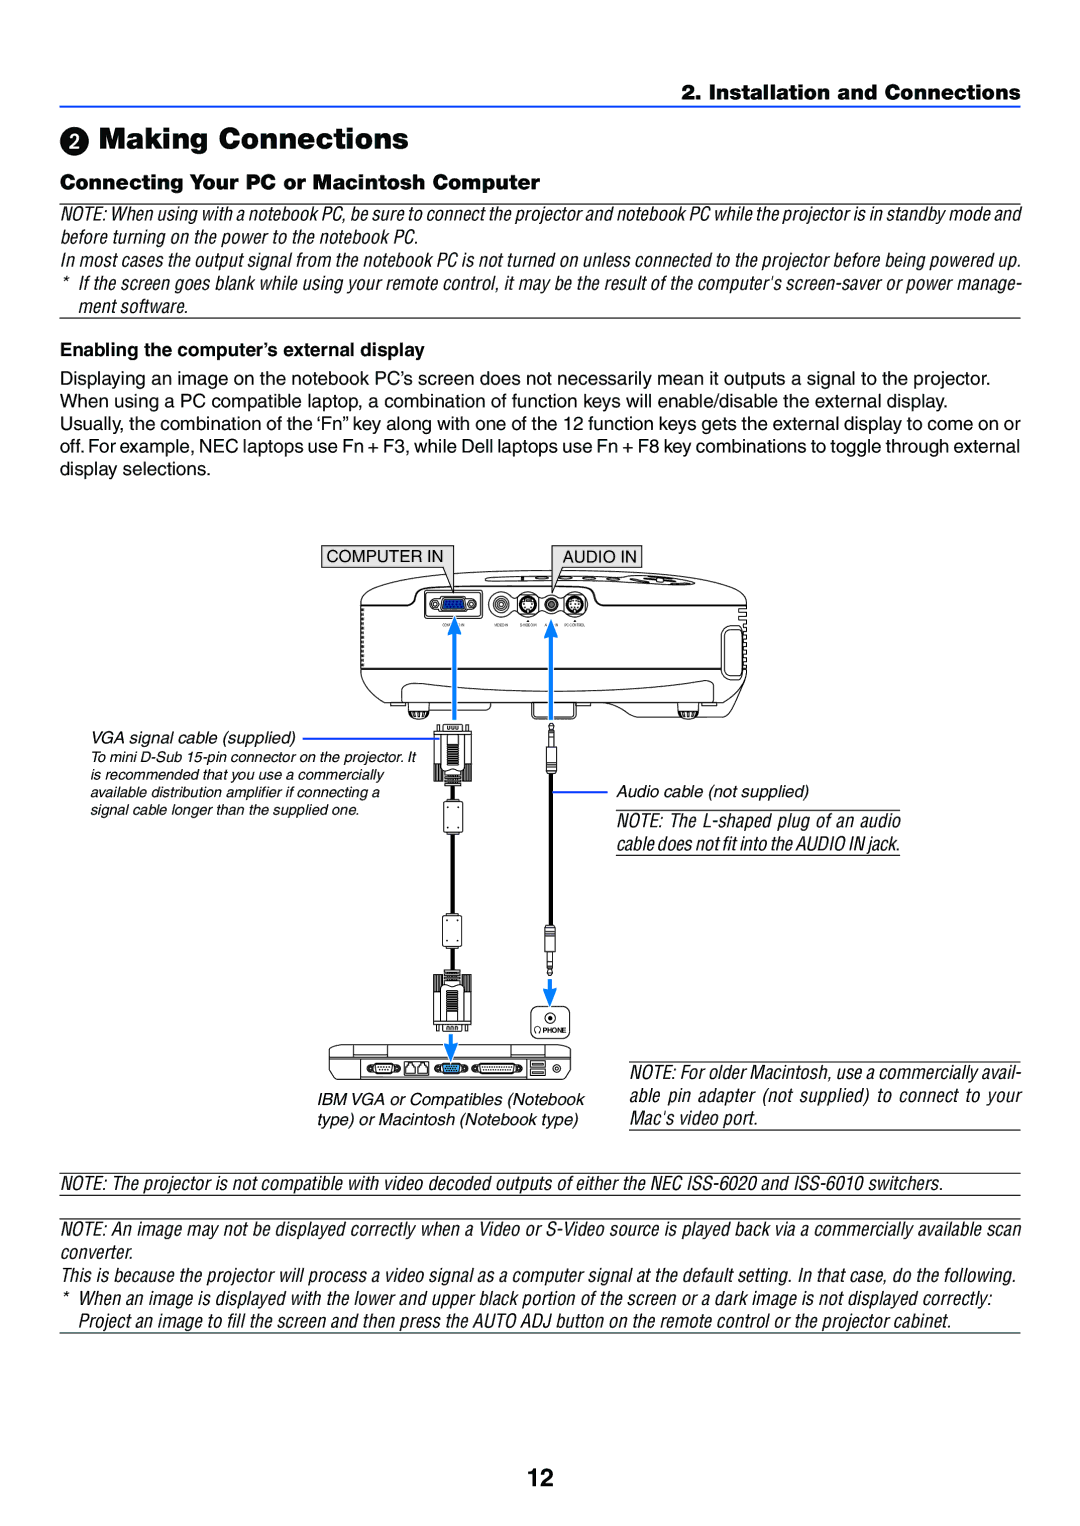
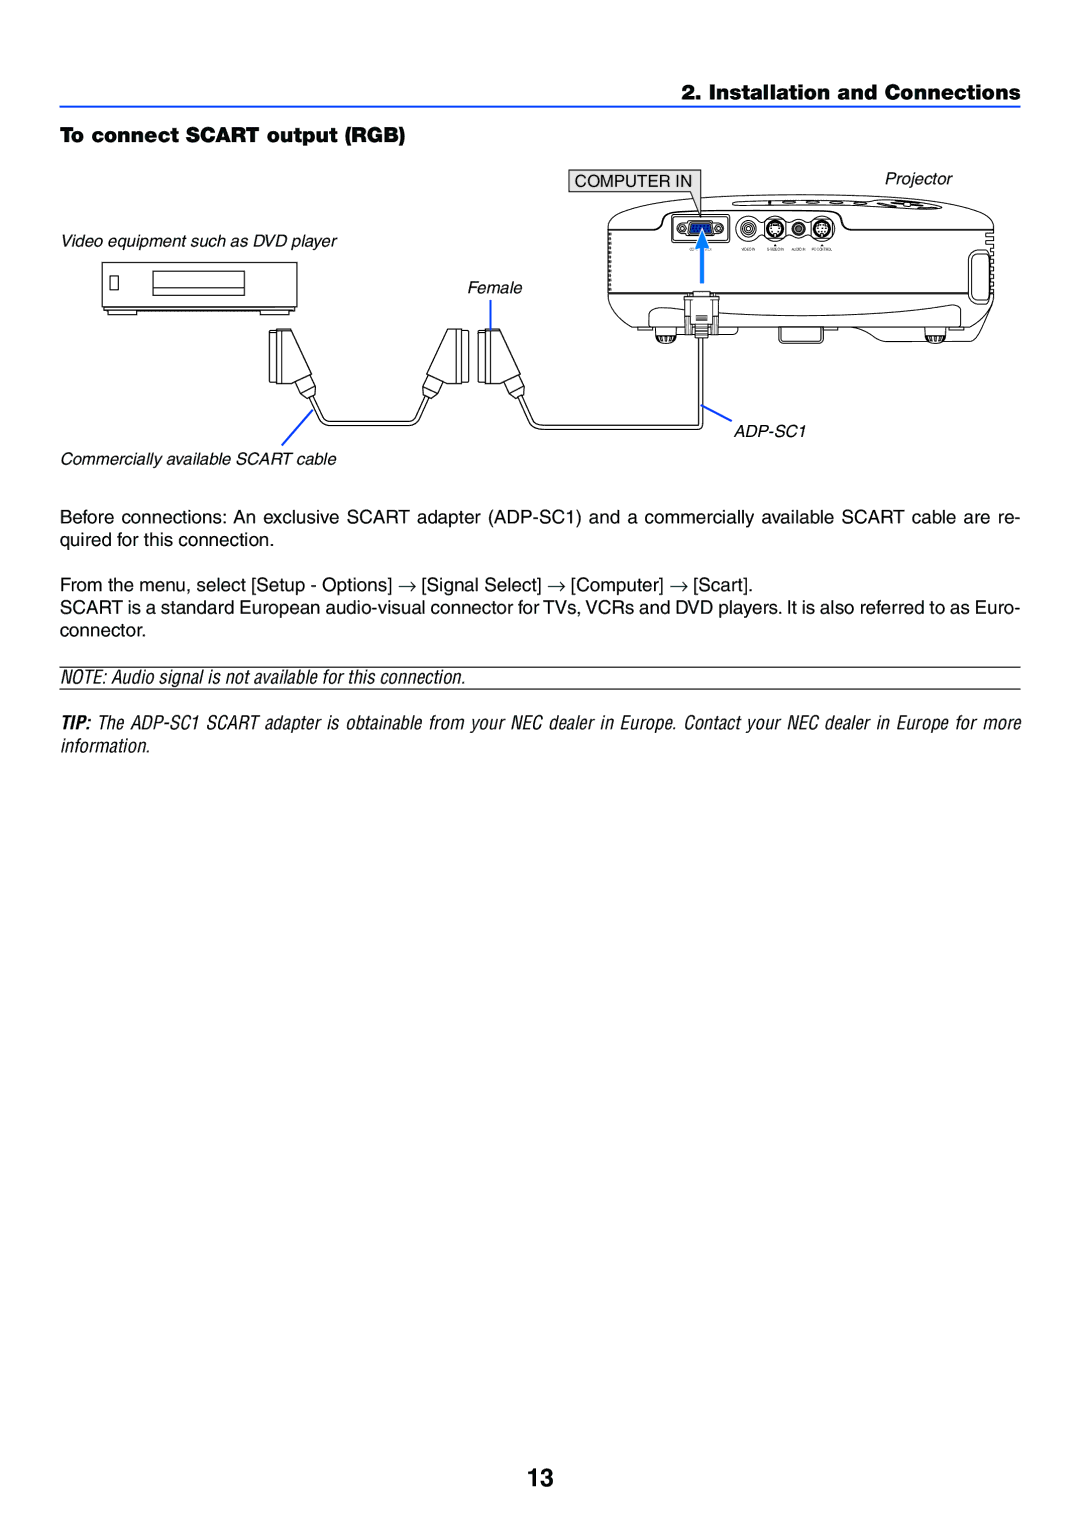
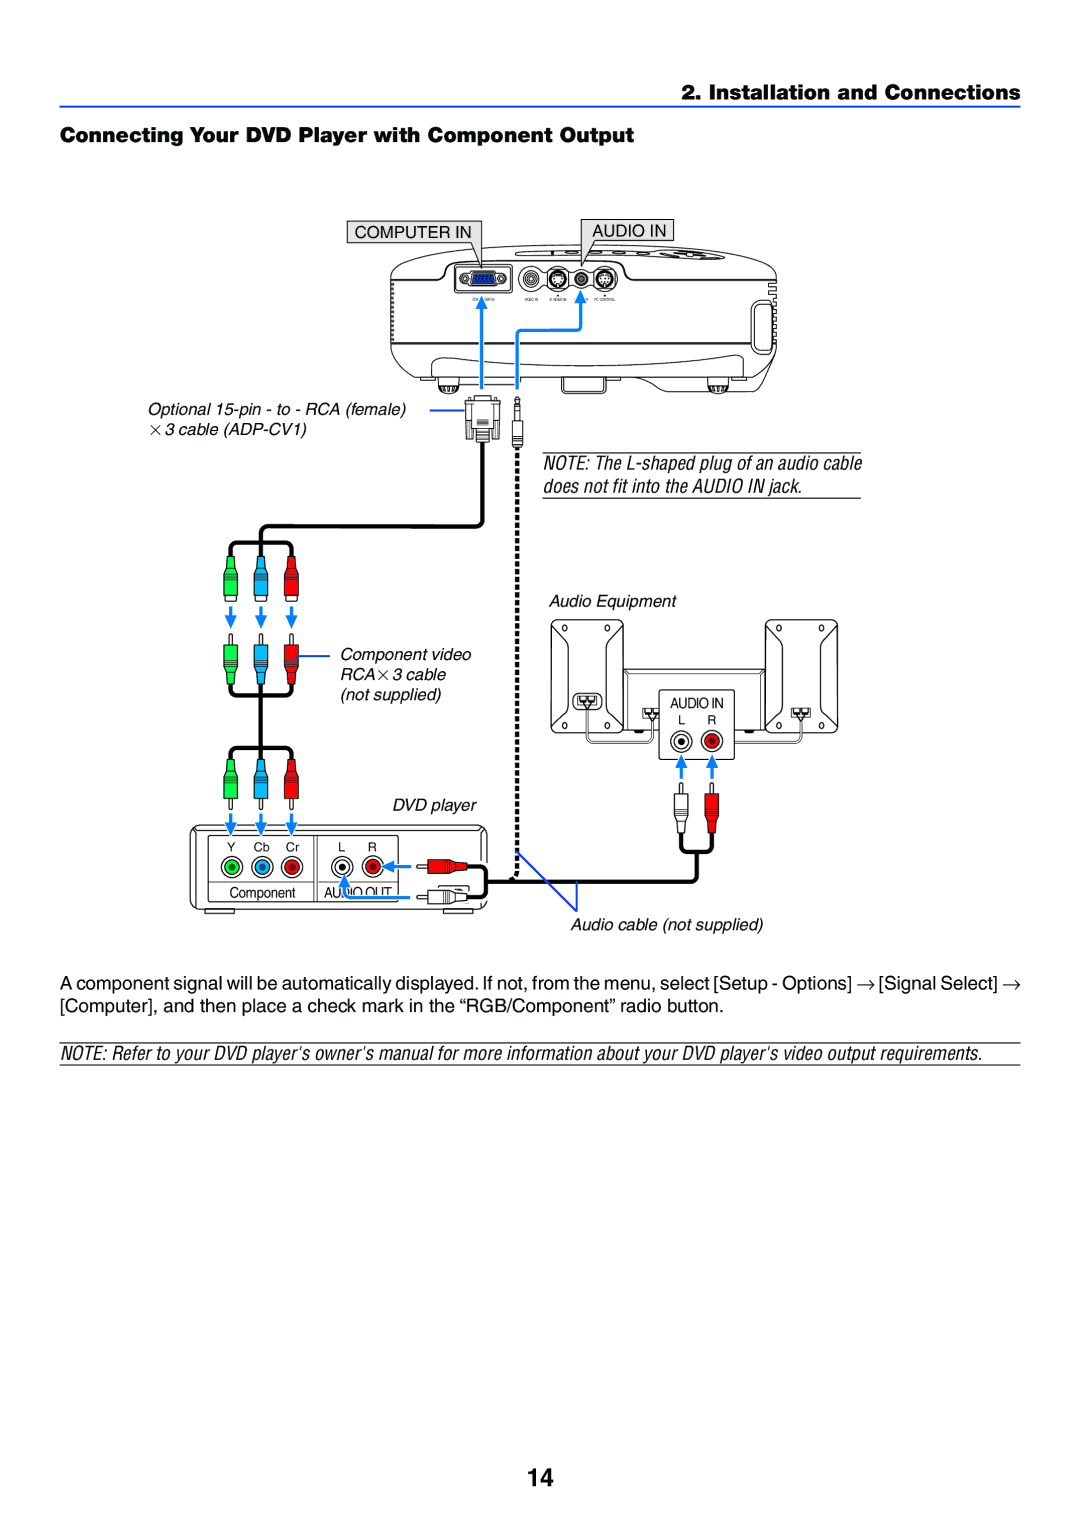
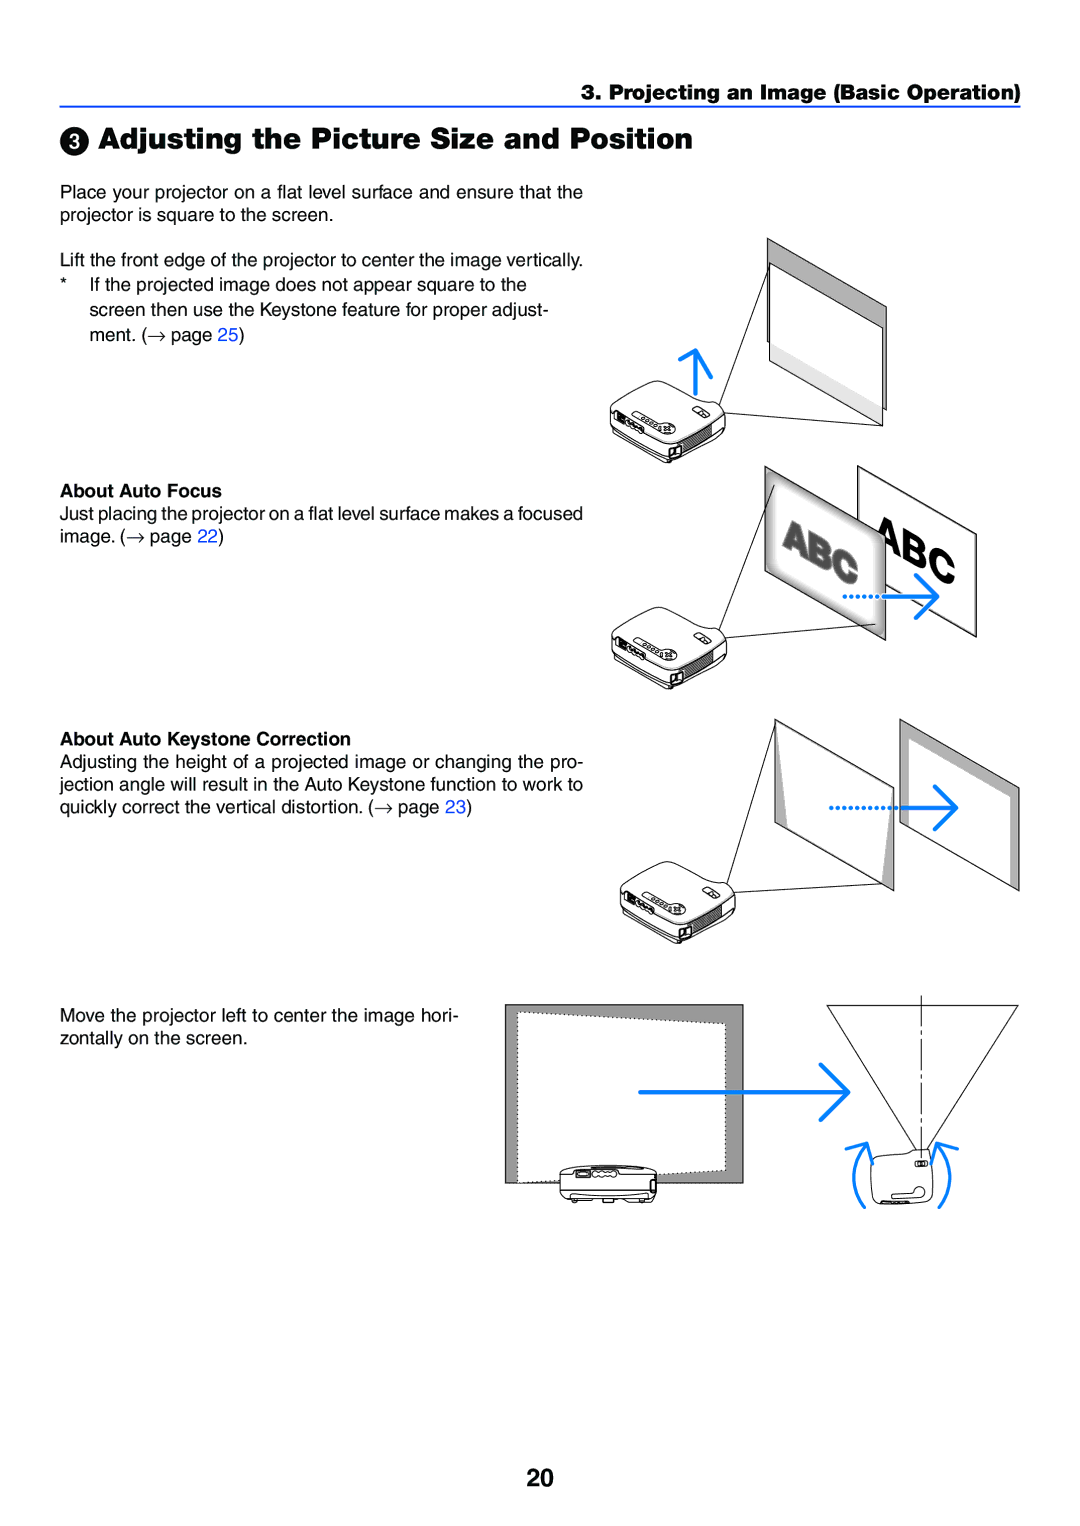
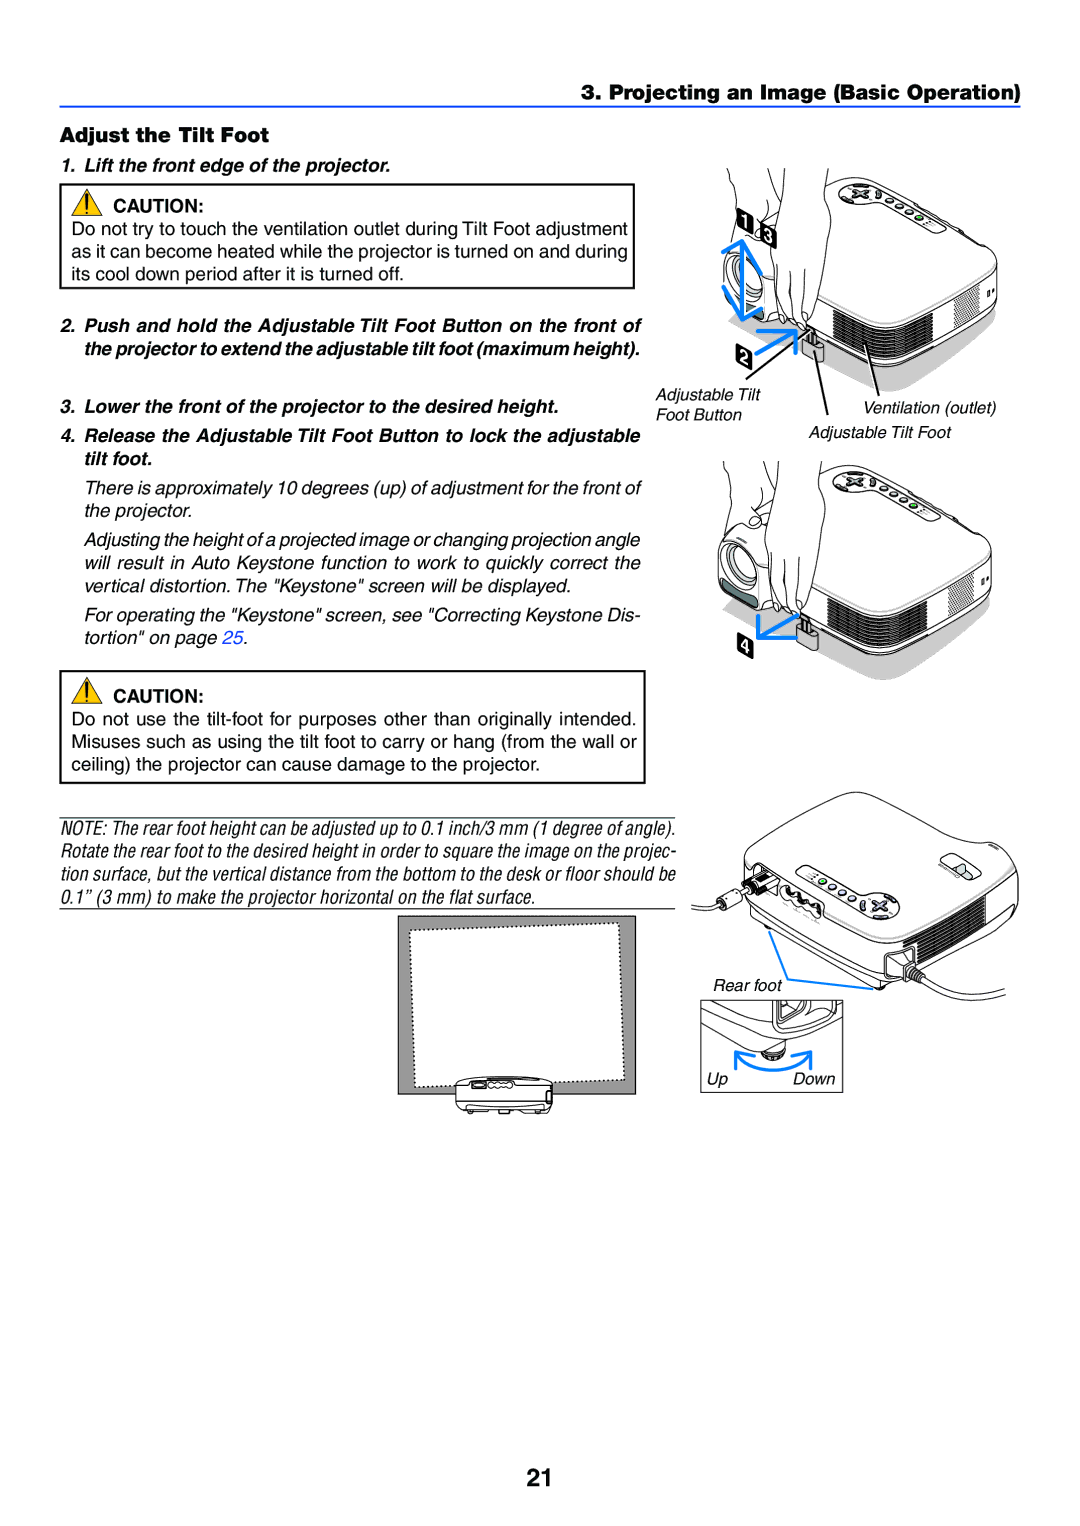
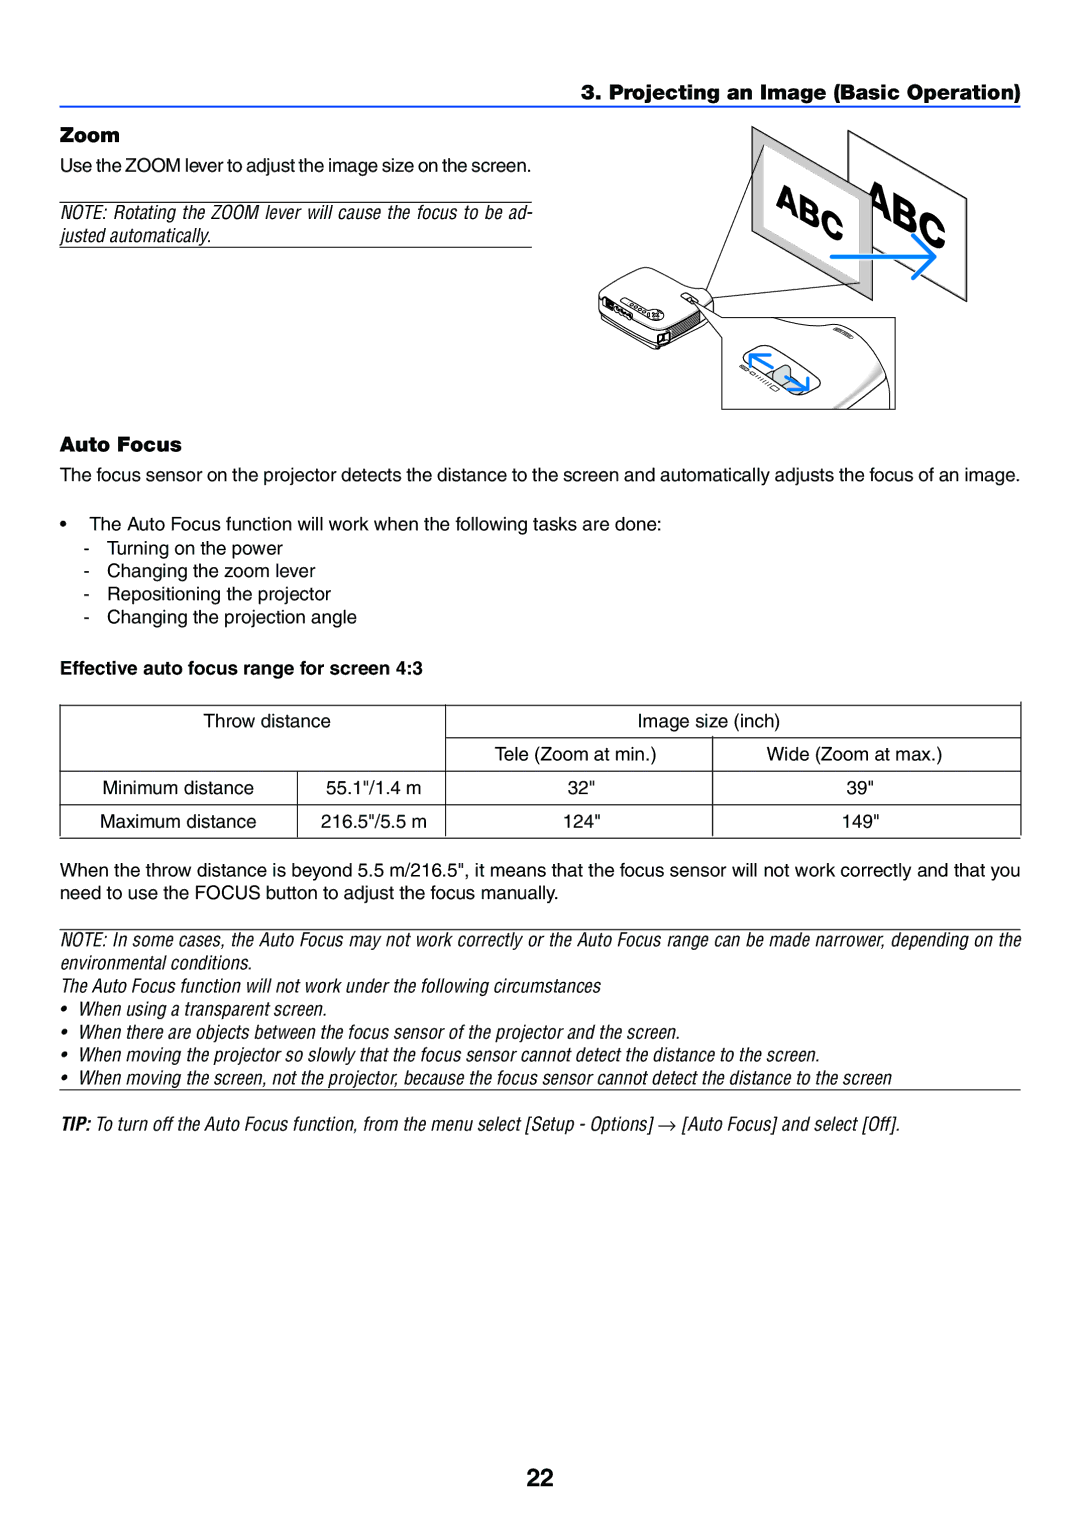
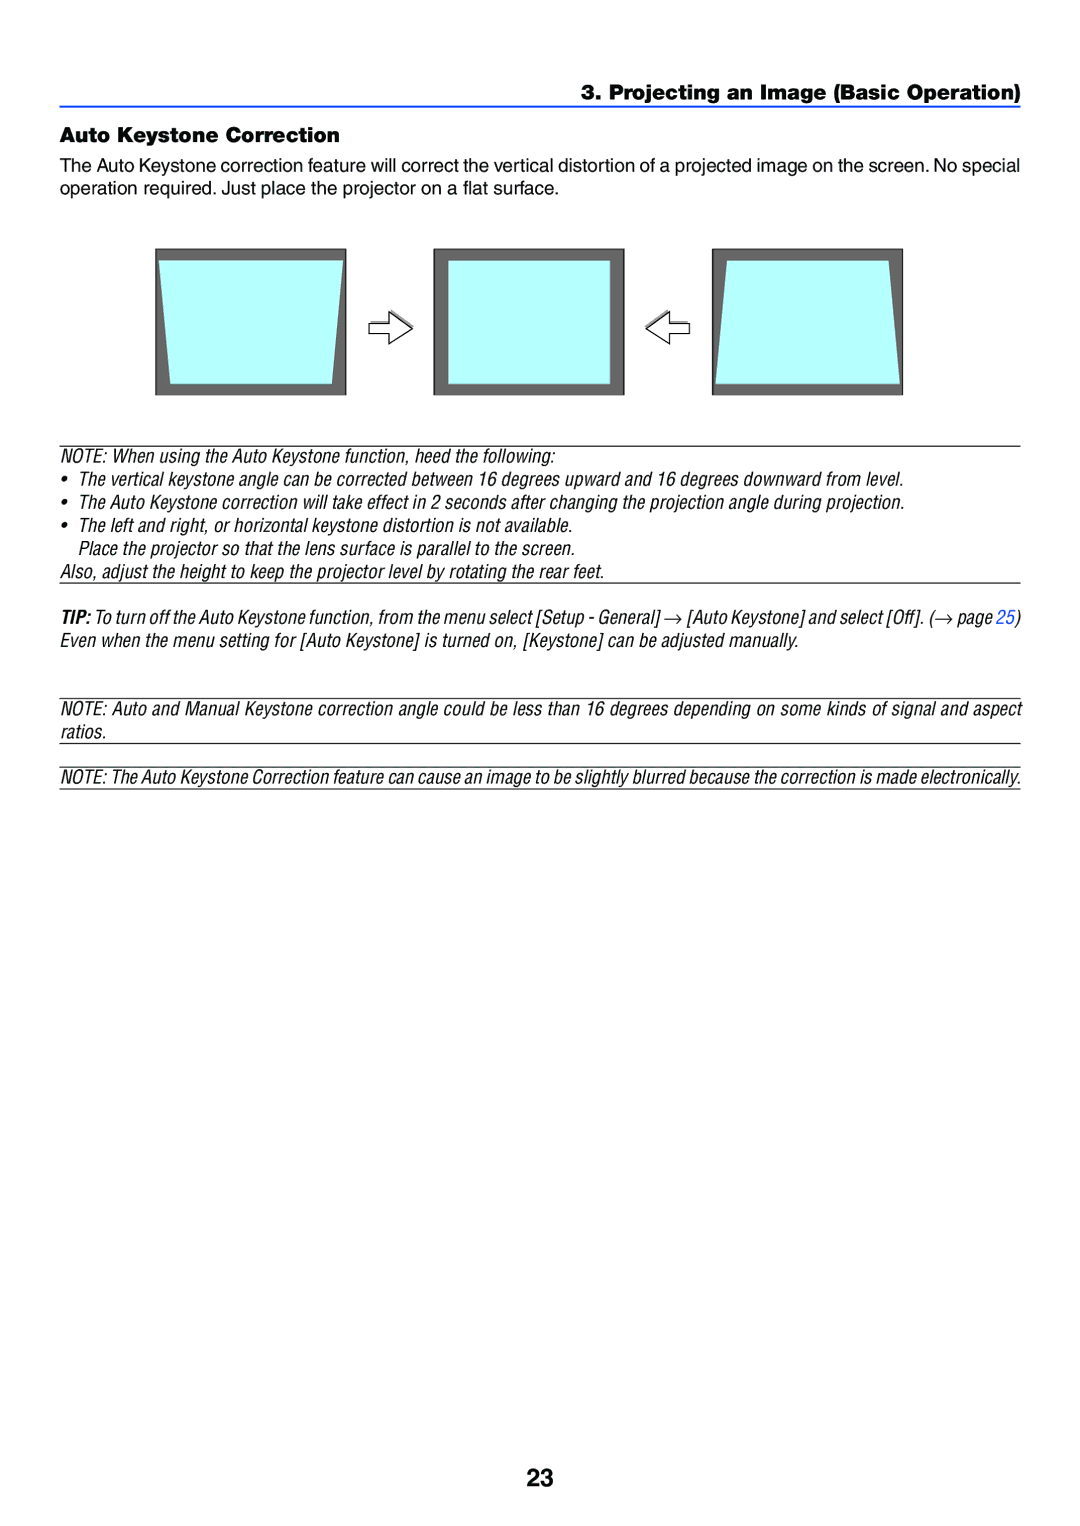
LT35/LT30/LT25 Page DOC Compliance Notice for Canada only Safety CautionsPrecautions Important InformationPlace the projector in a horizontal position Important SafeguardsInstallation Important Information RF Interference for USA onlyIii Important Information Fire and Shock PrecautionsLamp Replacement Important Information Remote Control PrecautionsTable of Contents Table of Contents Whats in the Box? IntroductionCongratulations on Your Purchase of the Projector Features youll enjoyIntroduction to the Projector Introduction Introduction Part Names of the Projector Front/TopRear Introduction Bottom Introduction Top Features Terminal Panel FeaturesVolume Keystone But Tons Enter Button Exit Button Power Part Names of the Remote ControlOperating Range for Wireless Remote Control Introduction Battery InstallationInstallation and Connections Setting Up the Screen and the ProjectorSelecting a Location Distance Chart Installation and Connections Throw Distance and Screen SizeReflecting the Image Installation and ConnectionsConnecting Your PC or Macintosh Computer Making ConnectionsEnabling the computer’s external display Installation and Connections To connect Scart output RGB Audio Video Audio Lamp Status Power Turning on the Projector Projecting an Image Basic OperationTo select a menu language, follow these steps Projecting an Image Basic OperationSelecting a Source Detecting the Signal AutomaticallyAdjusting the Picture Size and Position About Auto FocusAbout Auto Keystone Correction Lift the front edge of the projector Projecting an Image Basic Operation Adjust the Tilt FootProjecting an Image Basic Operation Zoom Auto FocusEffective auto focus range for screen Projecting an Image Basic Operation Auto Keystone Correction Adjusting Focus Manually Adjusting with buttons on the cabinetAdjusting with the remote control Correcting Keystone Distortion Manually Adjusting Volume Up or Down Adjusting the Image Using Auto AdjustOptimizing RGB Picture Automatically Turning off the Projector After UsePreparation Make sure that the projector is turned off Freezing a Picture Convenient FeaturesChanging Lamp Mode Turning off the Image and SoundConvenient Features Select Off and press the Enter button When connecting using the USB terminal Using the Optional Remote Mouse ReceiverConnecting the remote mouse receiver to your computer When operating a computer via the remote mouse receiverUsing the Menus Using On-Screen MenuFor Selecting items Solid triangle Using On-Screen MenuFor Adjusting items Slide bar For Selecting items Return key symbol, Radio buttonMenu Elements Indicates the Control Panel Lock is enabledPicture List of Menu ItemsReset Preset Detail SettingsMenu Descriptions & Functions Picture Reset Menu Descriptions & Functions Image OptionsSelecting Aspect Ratio Aspect Ratio Turning on Noise Reduction Noise Reduction Setting Telecine Mode TelecineSetup General Menu Descriptions & Functions SetupDisabling the Cabinet Buttons Control Panel Lock Using On-Screen Menu Setup InstallationSelecting Projector Orientation Orientation Selecting Communication Speed Communication SpeedSelecting a Color for Background Background Enabling Security SecuritySelecting Menu Color Menu Color Select Selecting Menu Display Time Menu Display TimeUsing On-Screen Menu Setup Options Version Menu Descriptions & Functions InformationUsage Time SourceMenu Descriptions & Functions Reset Returning to Factory Default ResetClearing Lamp Hour Meter Clear Lamp Hours Cleaning the lens MaintenanceCleaning the Lens and Focus Sensor Cleaning the CabinetMaintenance Replacing the LampTo replace the lamp Interlock Maintenance Troubleshooting Indicator MessagesAppendix Appendix Problem Check These ItemsAppendix Specifications OpticalElectrical For Europe Appendix MechanicalCabinet Dimensions Pin Assignments of D-Sub Computer Input Connector Mini D-Sub 15 Pin ConnectorPin No RGB Signal Analog YCbCr Signal SXGA+ Compatible Input Signal ListCable Connection PC Control Connector DIN-8PPC Control Codes and Cable Connection PC Control CodesOther Troubleshooting Check ListPower Video and AudioVideo equipment Installation environmentSignal cable ComputerTravelCare Guide TravelCare a service for international travelersAsia and Middle East Application Sheet for TravelCare Service Program Condition of your TravelCare Service Program