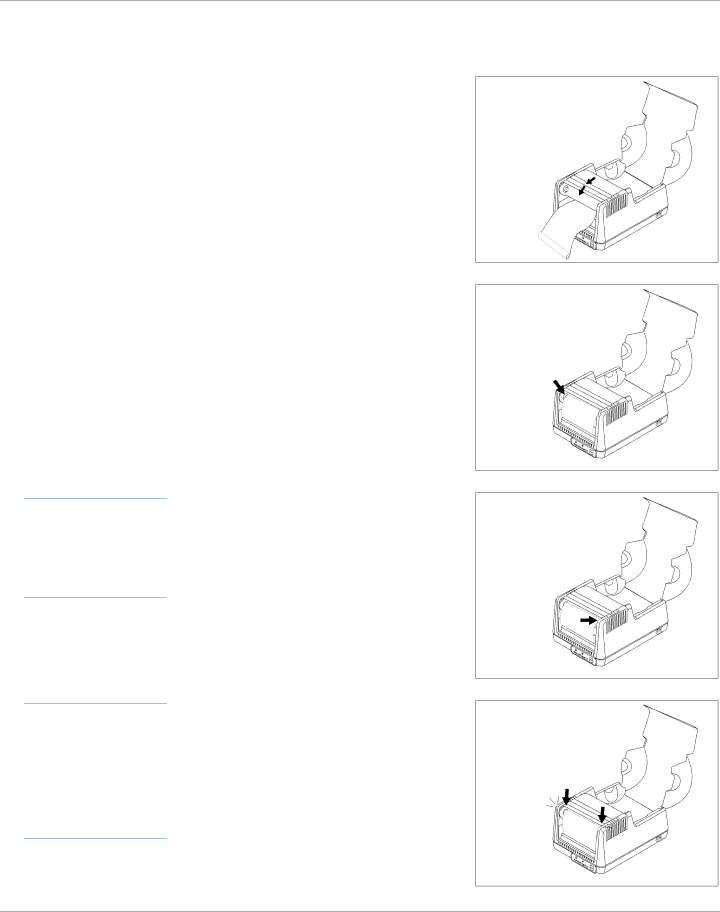
Cognitive Solutions LXG-UG00000 manual Click

Page 11

reminder: the text

on the ribbon

leader should be

facing out and

visible

helpful tip: if

power is already on, the Advantage LX will take up any excess ribbon upon latching the printhead

Loading Thermal Transfer Ribbon (Continued)

5.Gently lower the printhead but DO

NOT LATCH printhead at this time.

6.Align the notch on the left side of the ribbon take-up core with the left ribbon take-up driver.

7.Gently pull the right ribbon take- up mount and insert the right side of the ribbon take-up core.

8.Latch both sides of the printhead and turn the power on to take up the slack in the ribbon leader.

Click!

11

Image 11
Contents User Guide Copyright 2012, CognitiveTPG Table of Contents Operating Environment Package ContentsIntroduction WelcomeComponent Function Printer Feature OverviewFront/Rear View Inside View Advantage LX Communication Interfaces 2 and 4 Model DetailComponent DT & TT Models Connecting the Interface and Power Cables Printer InstallationSetting up the Advantage LX Printer Electrostatic Loading Thermal Transfer Ribbon Click Power OFF printer to end hexadecimal dump mode Self-TestingDownloading CognitiveTPG Printer Administrator Select Use Serial Connection radio dial CognitiveTPG Printer Administrator UtilityConnection Settings Click Connect Printer SettingsSelect the Use Network Connection radio dial Select the Use Parallel Connection radio dialValues Label Positioning Auto Recalibration Click the Delete Selected Objects button Profile Management Firmware Upgrade Sample Test Script in CPL Script EditorCleaning the Thermal Printhead and Platen Cleaning and MaintenanceCleaning the Printer Cleaning SuppliesSymptom Possible Cause Recommended Solution Troubleshooting & Default SettingsParameter Default Setting