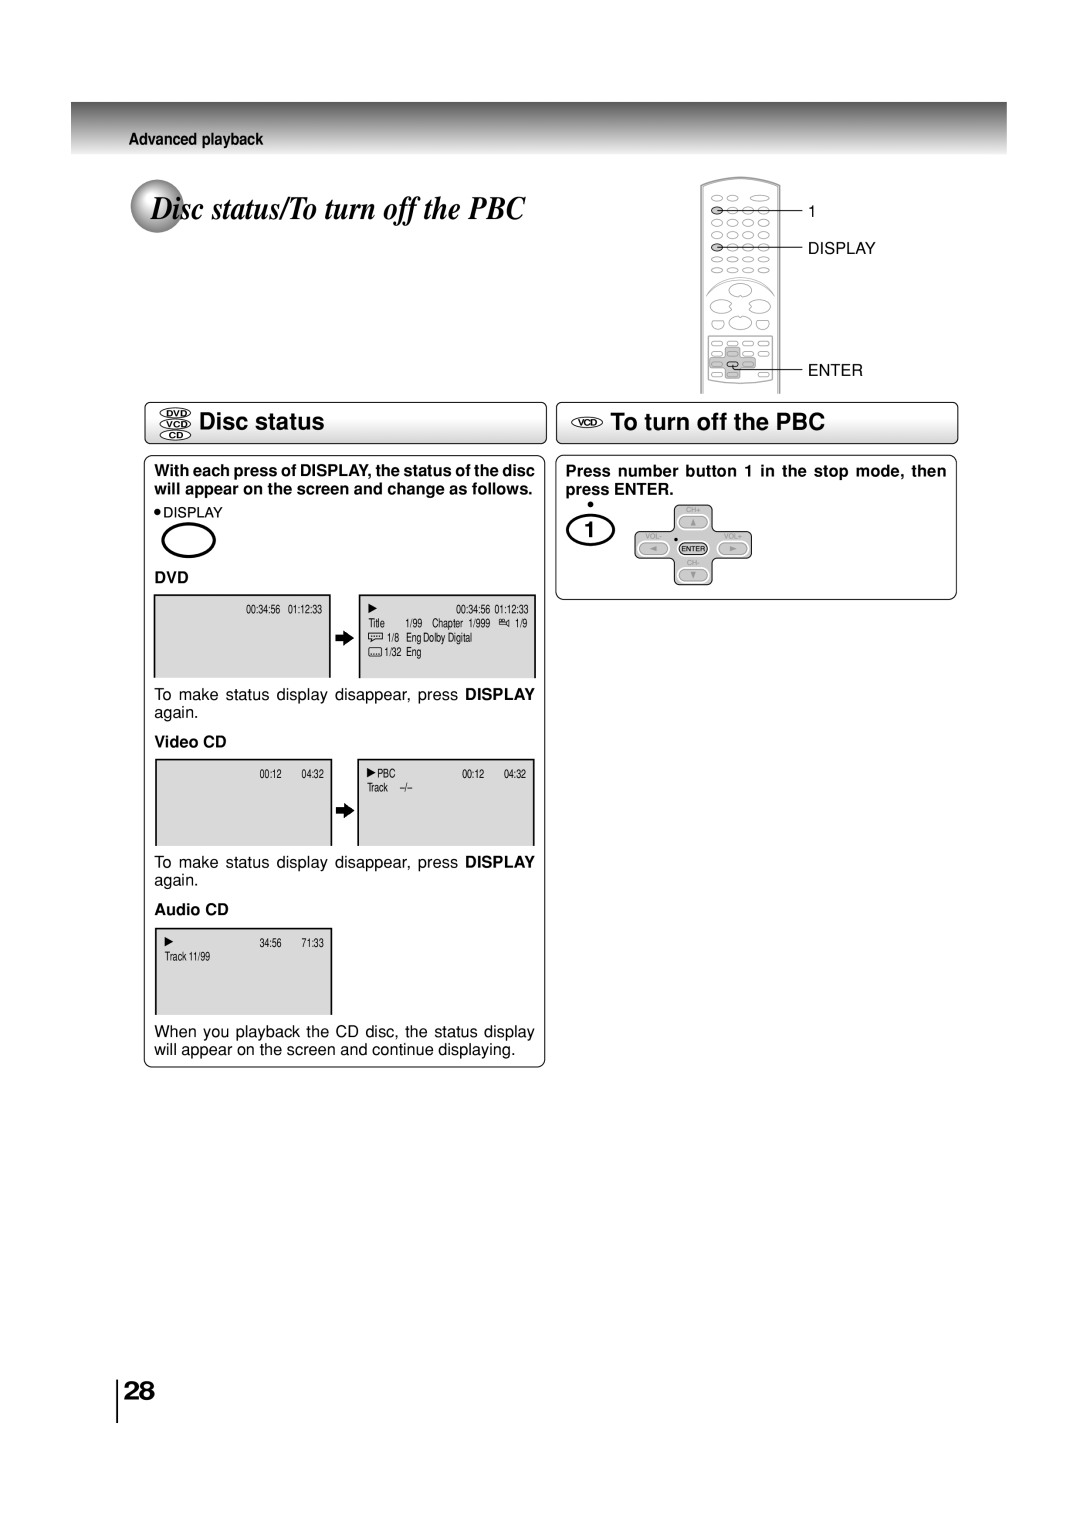
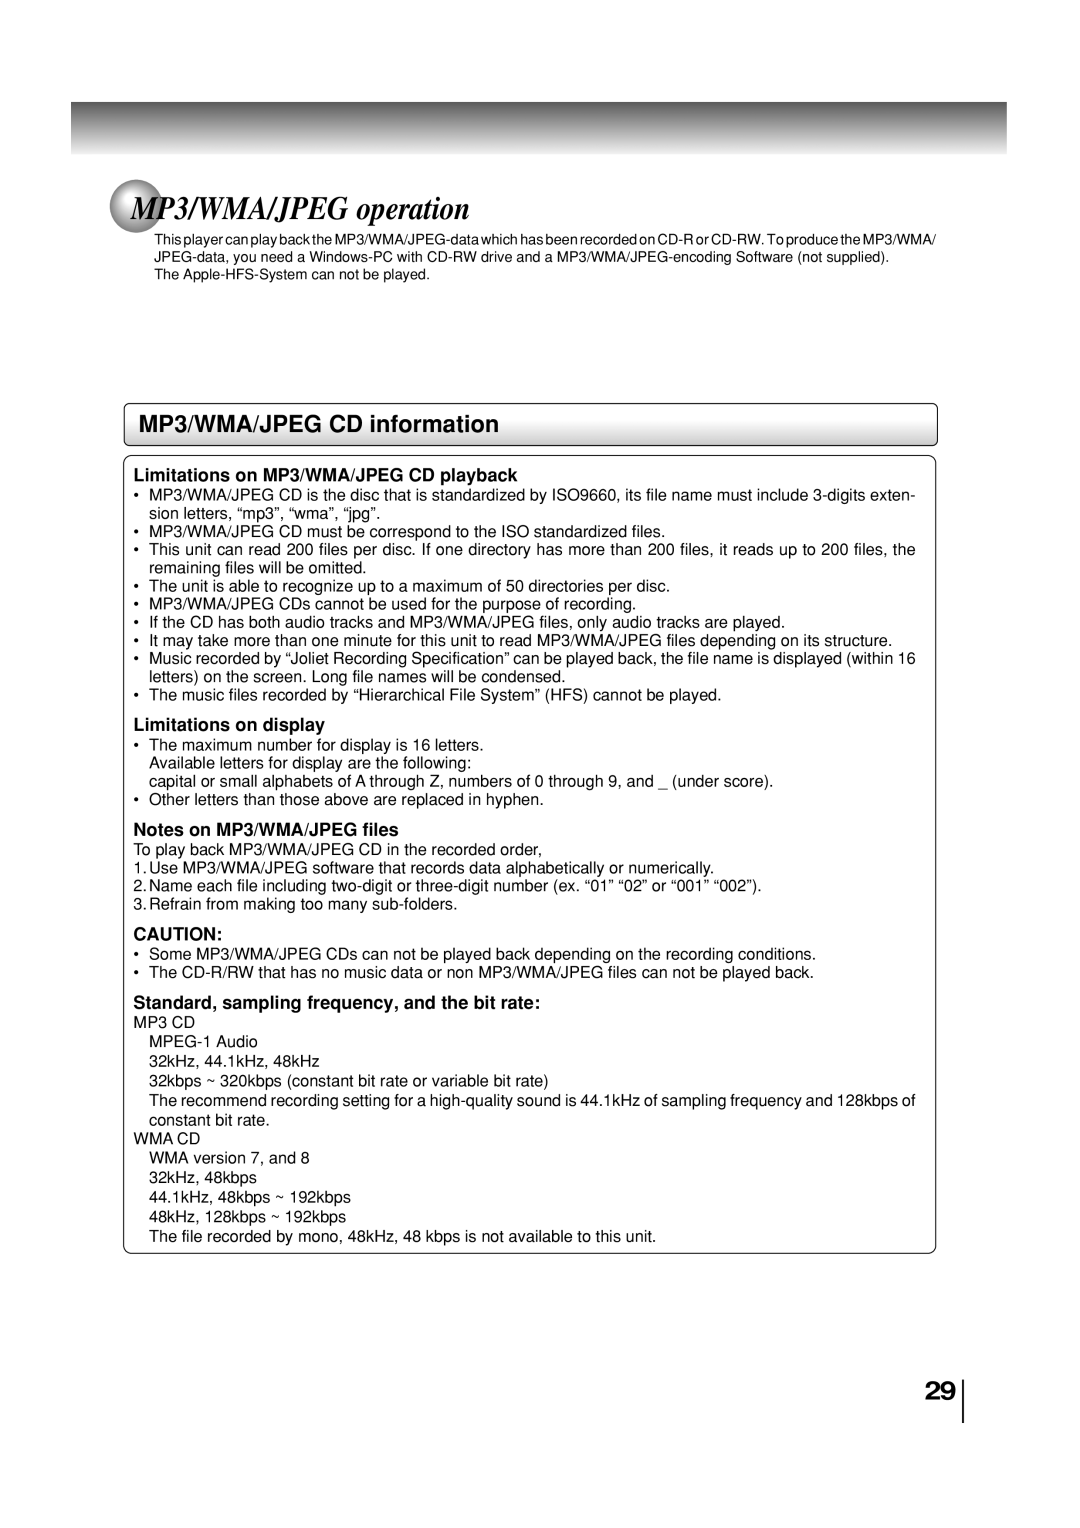
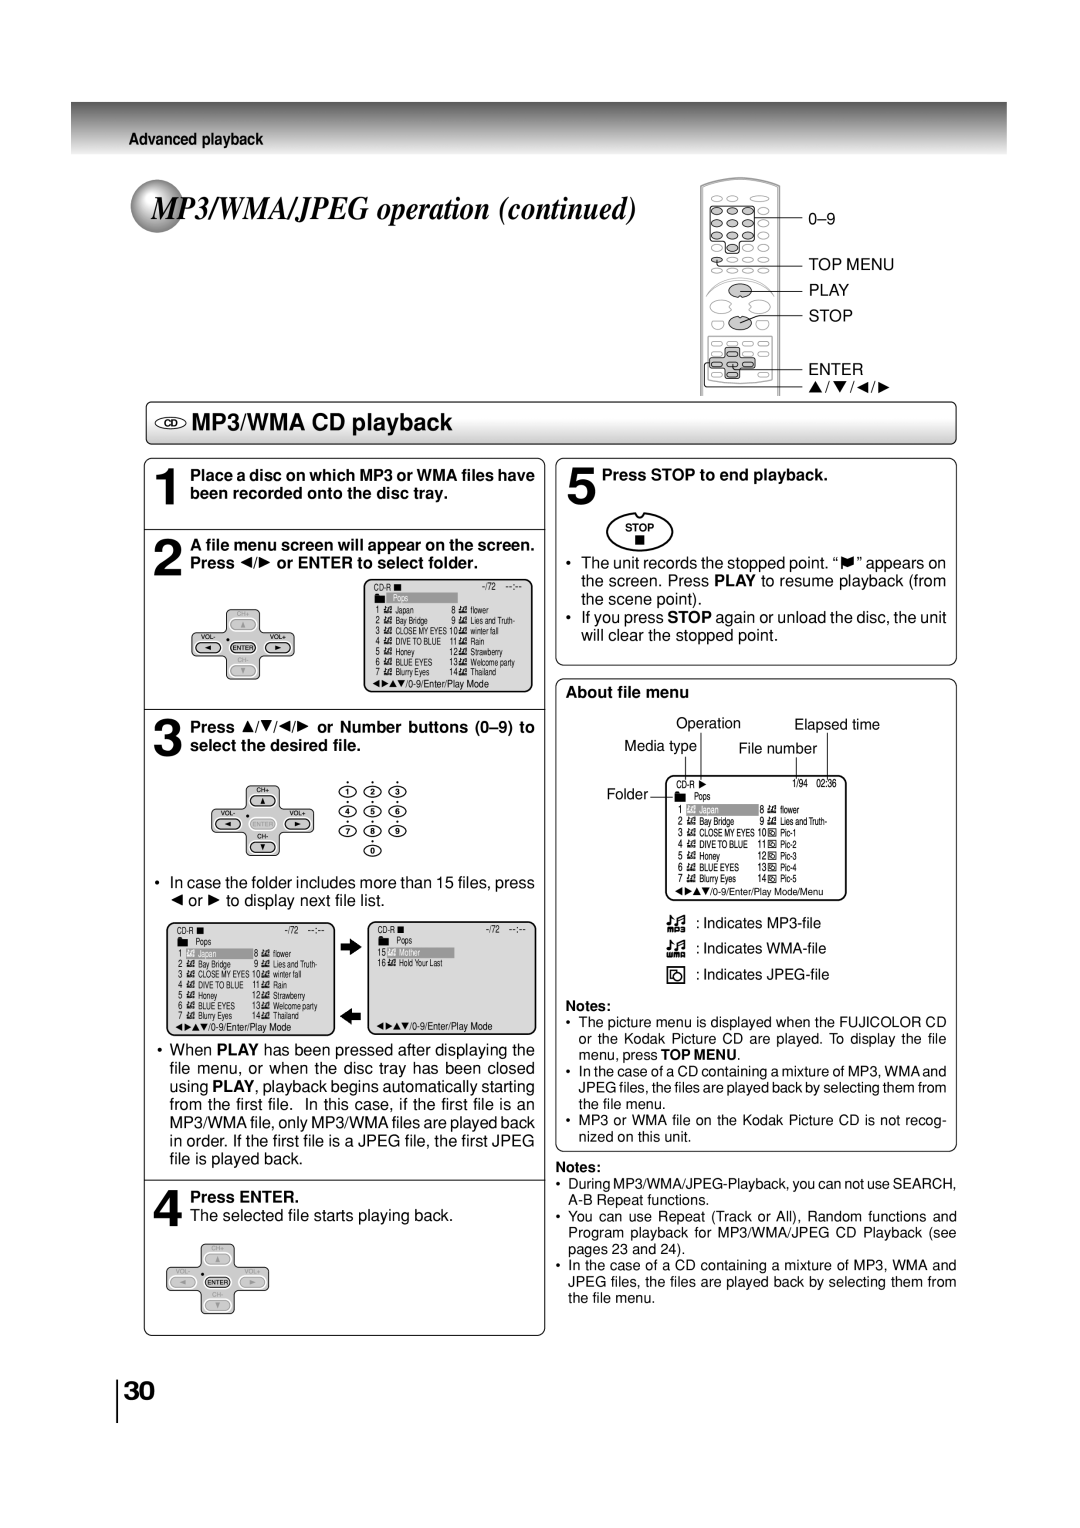
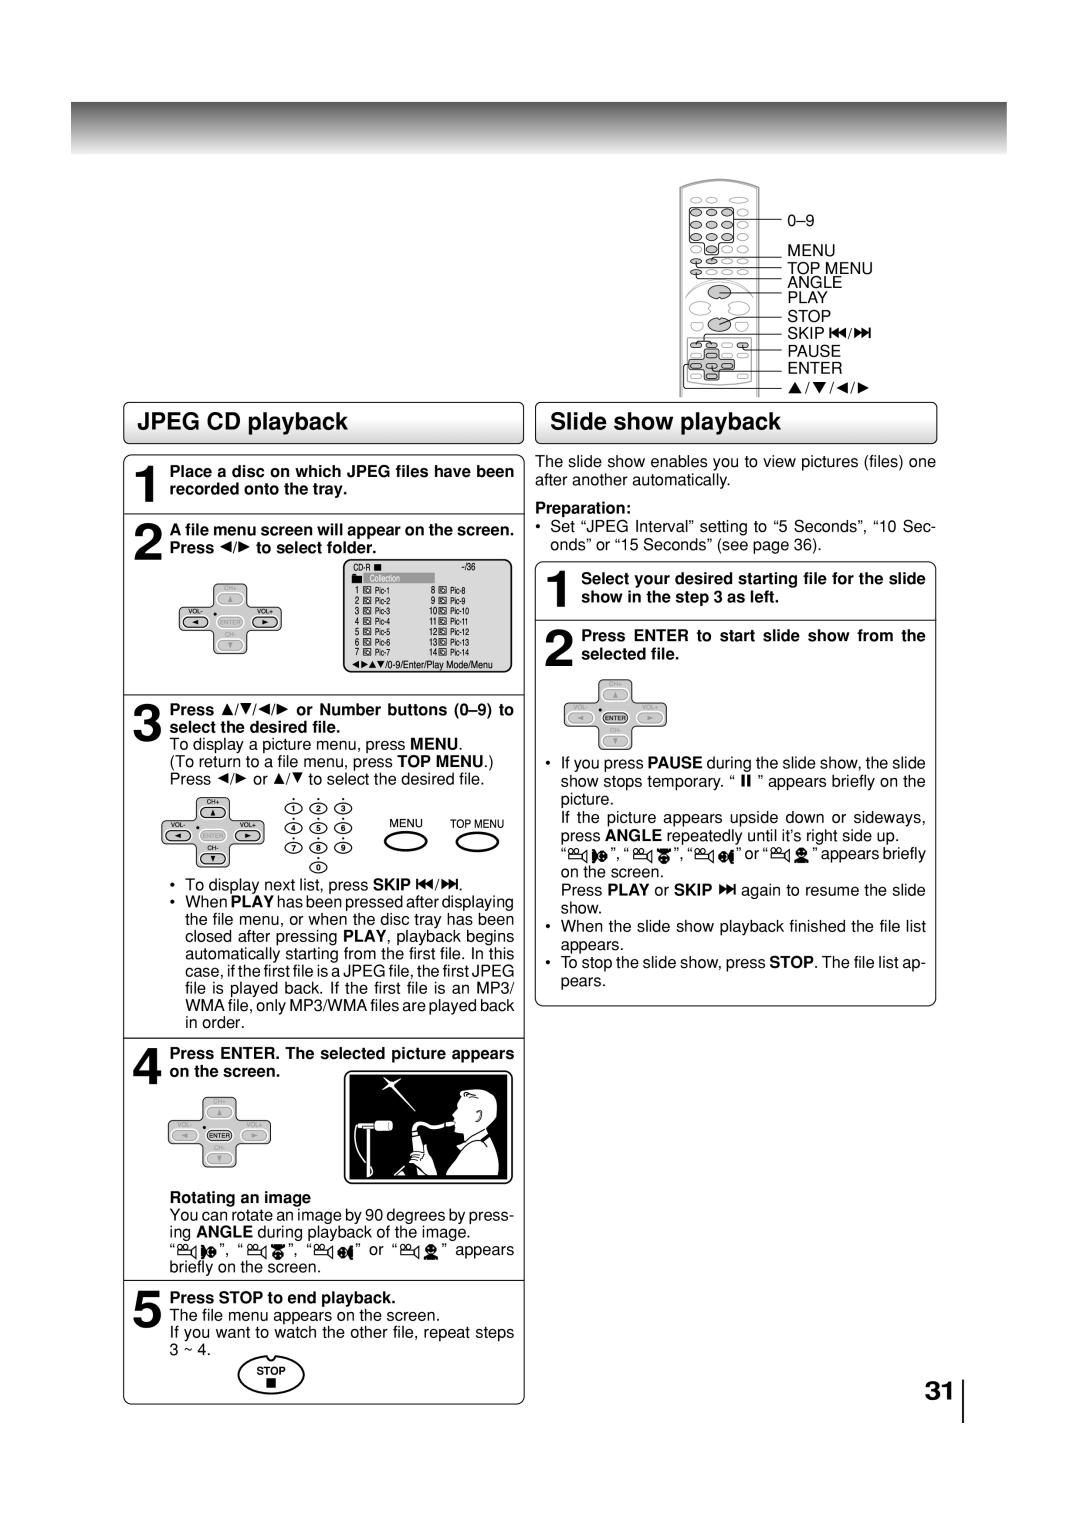
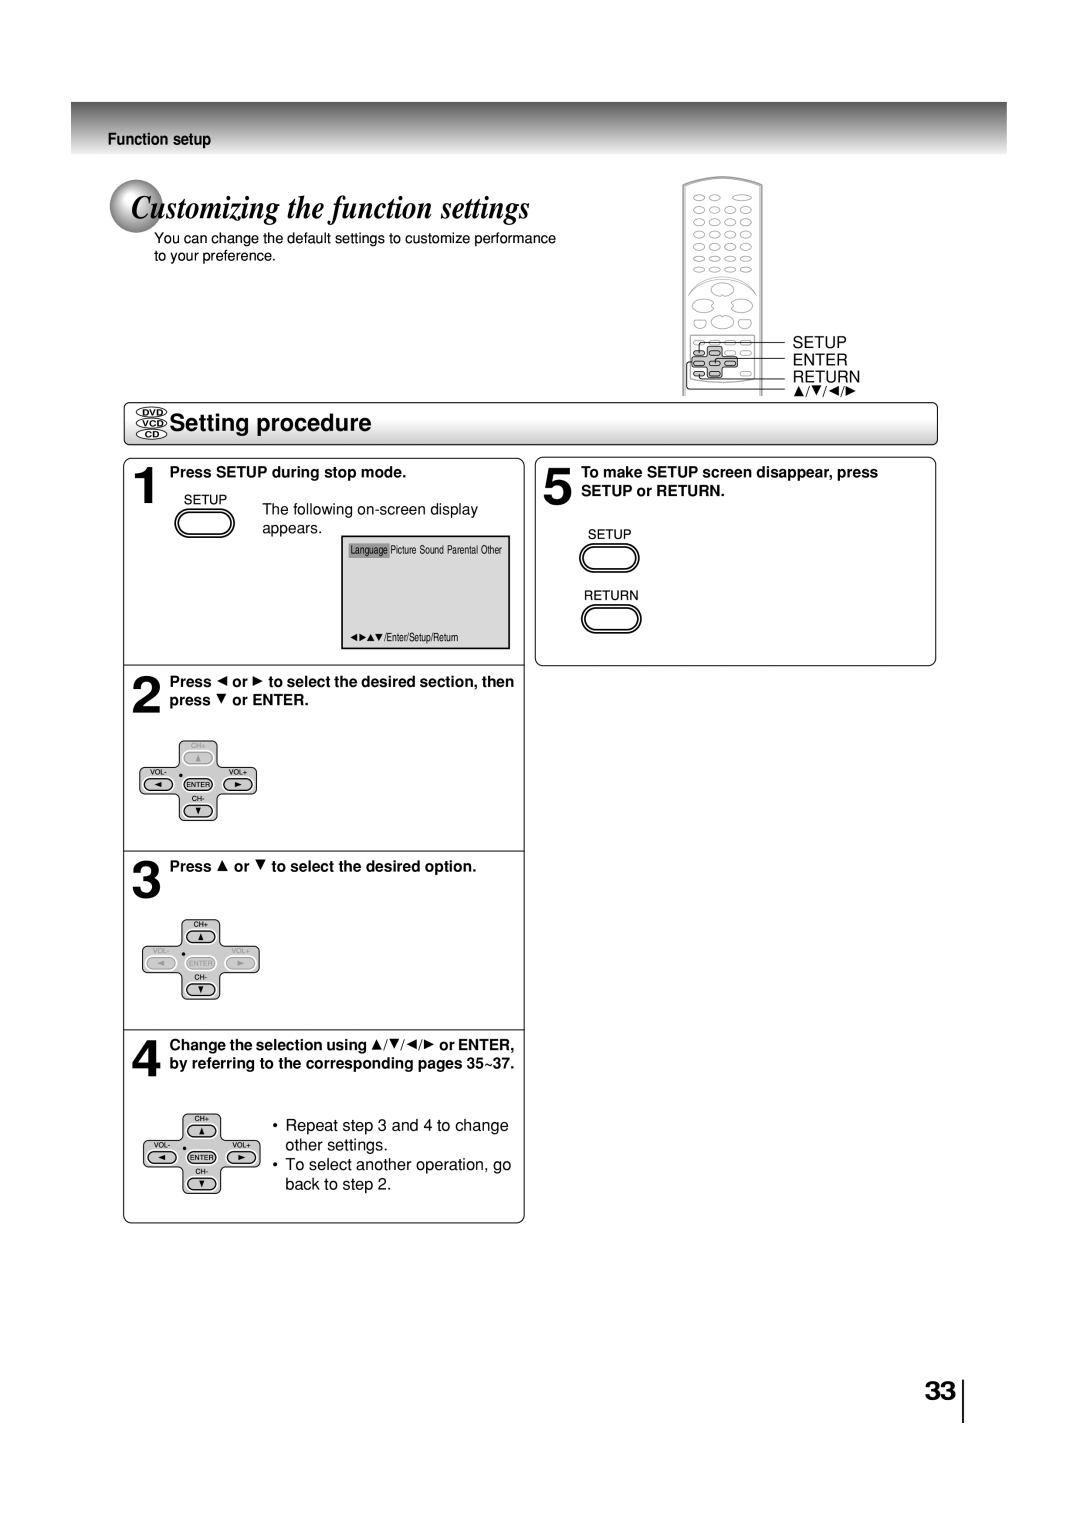
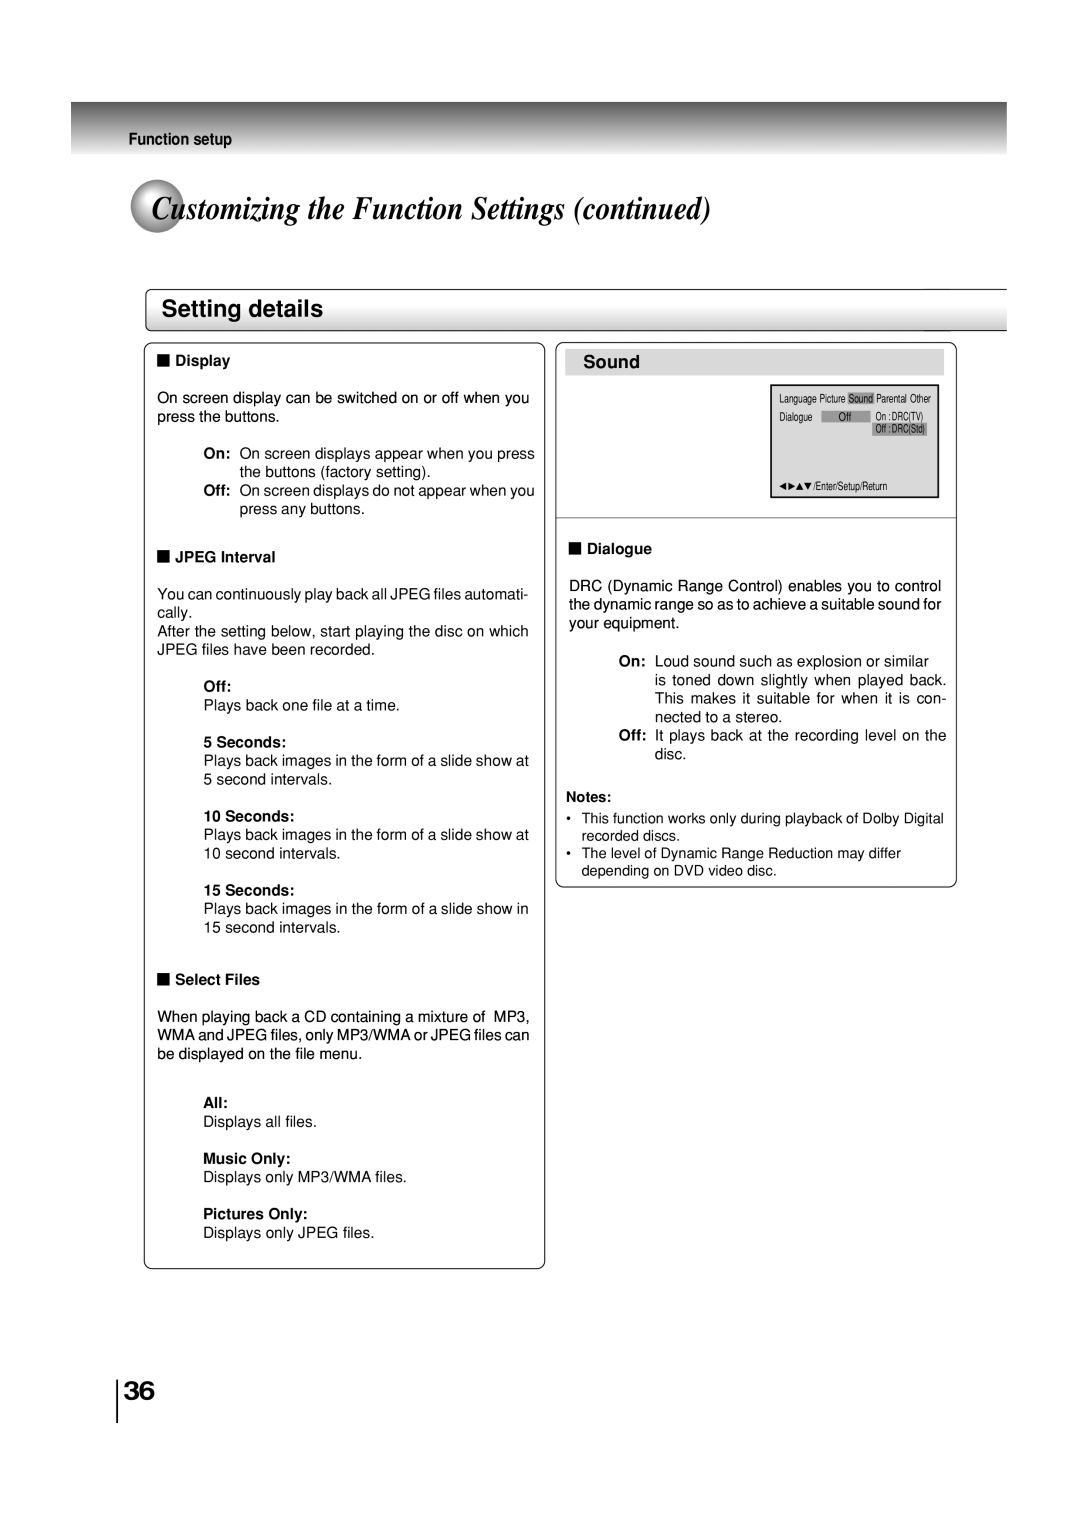
Toshiba SD-3860SC manual Loading batteries, Operating with the remote control

Page 13

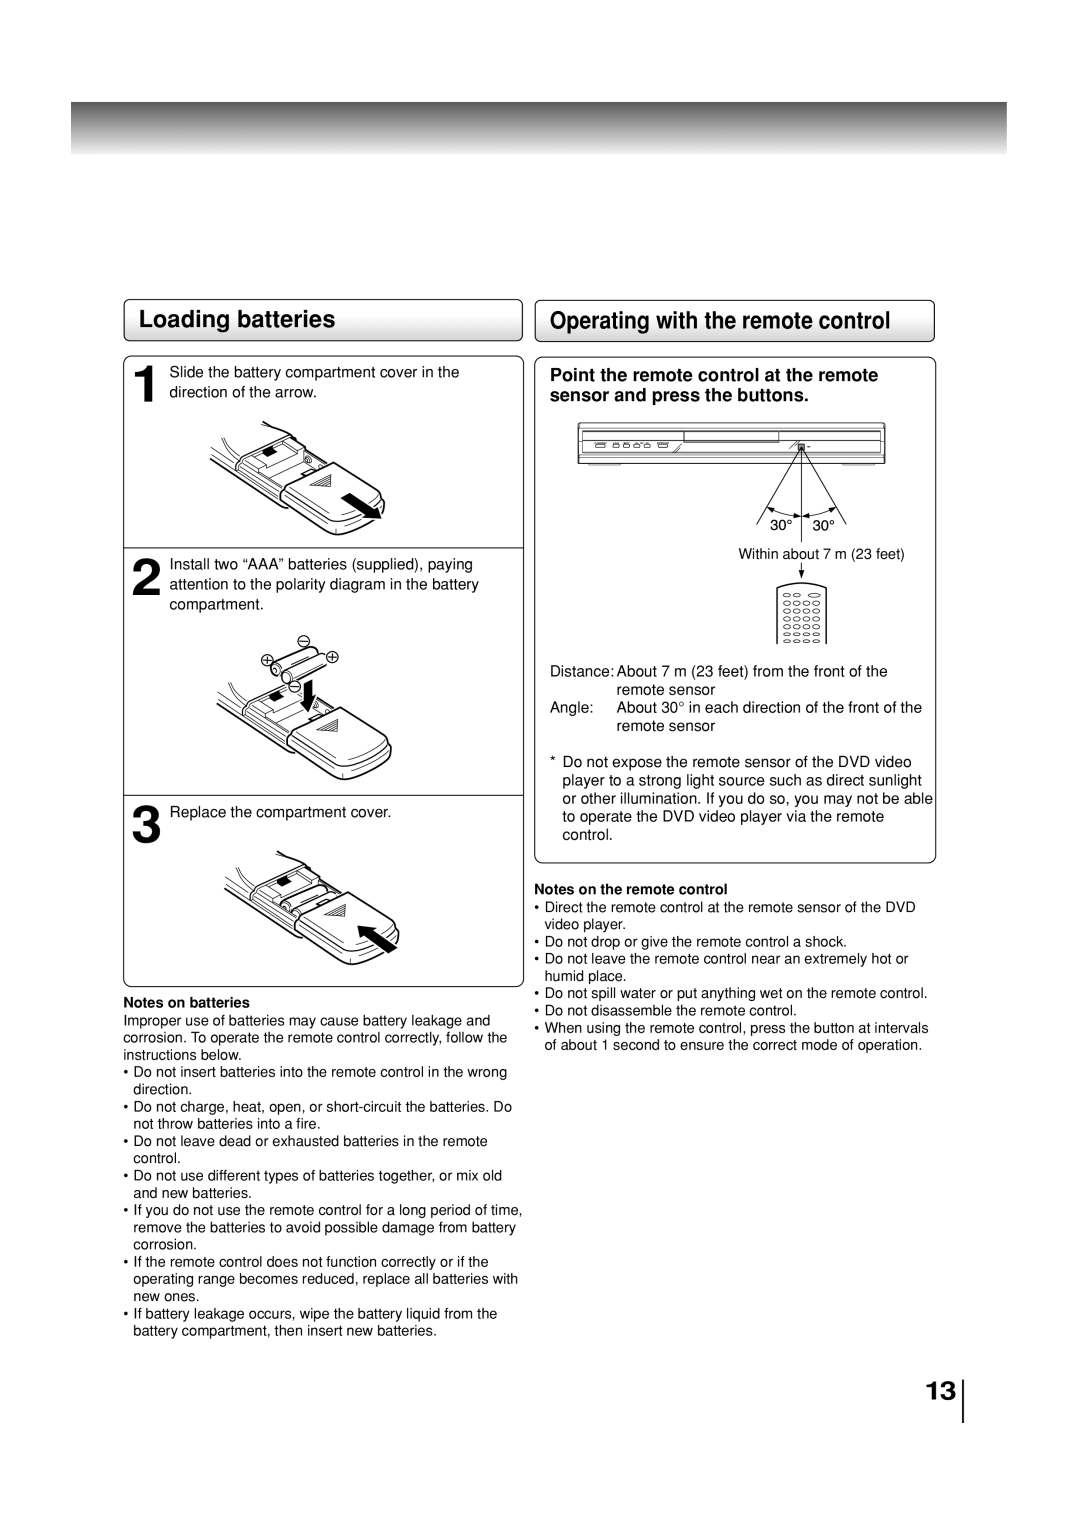
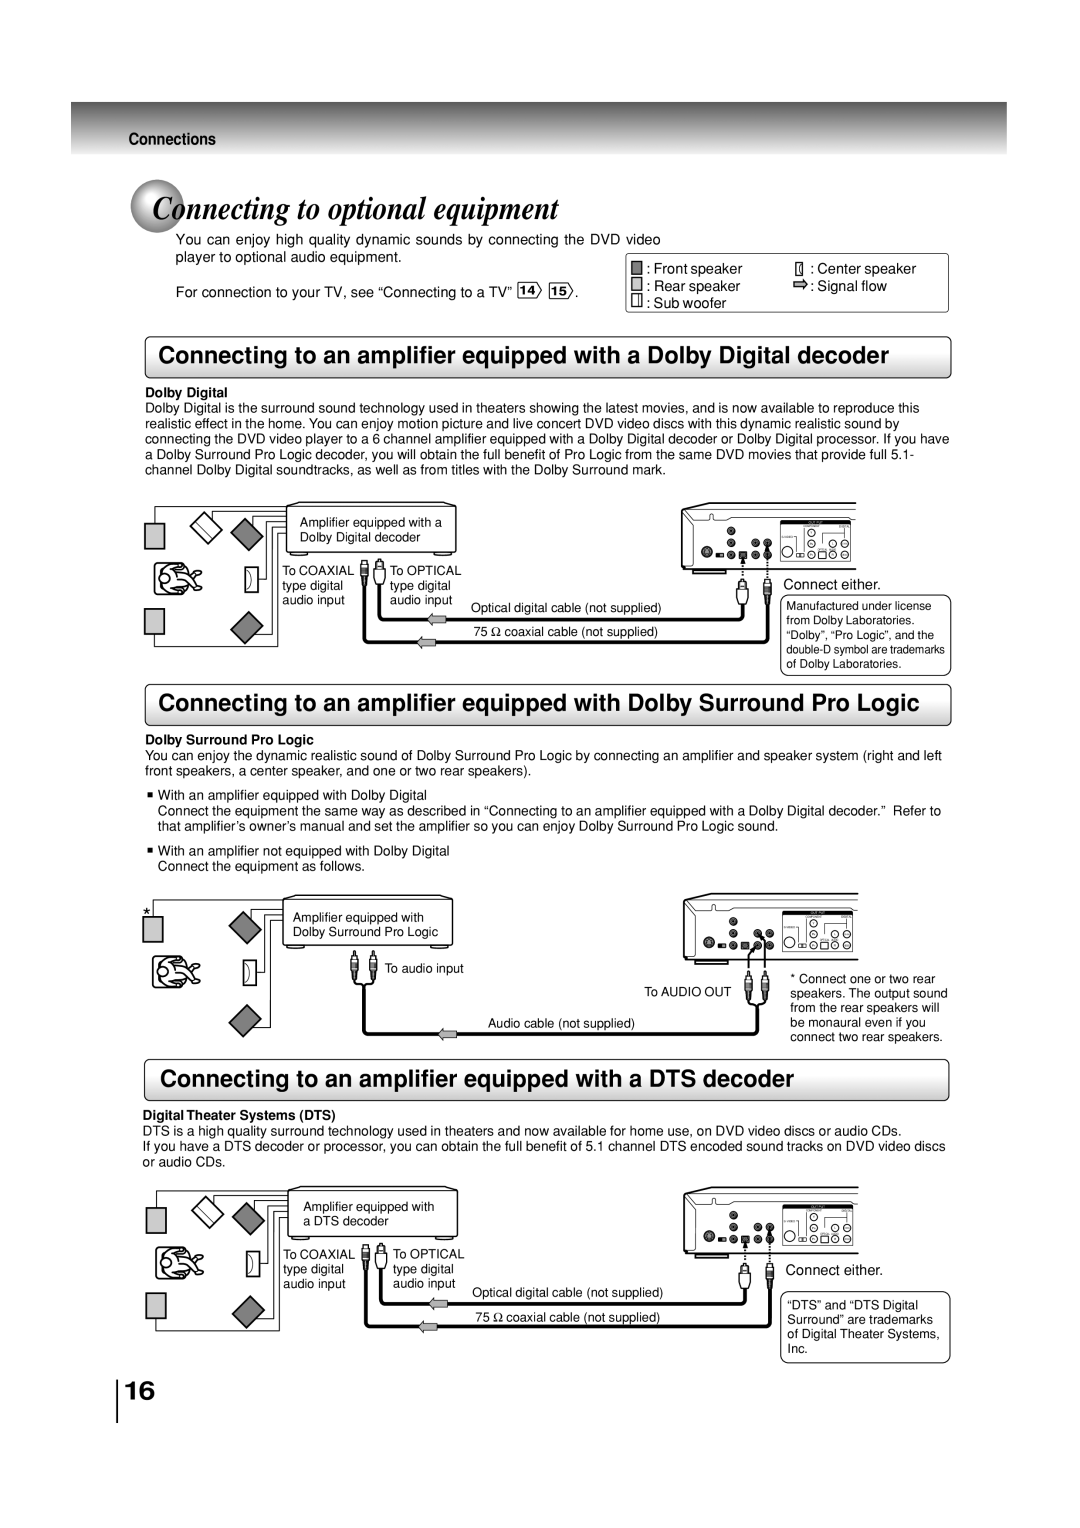
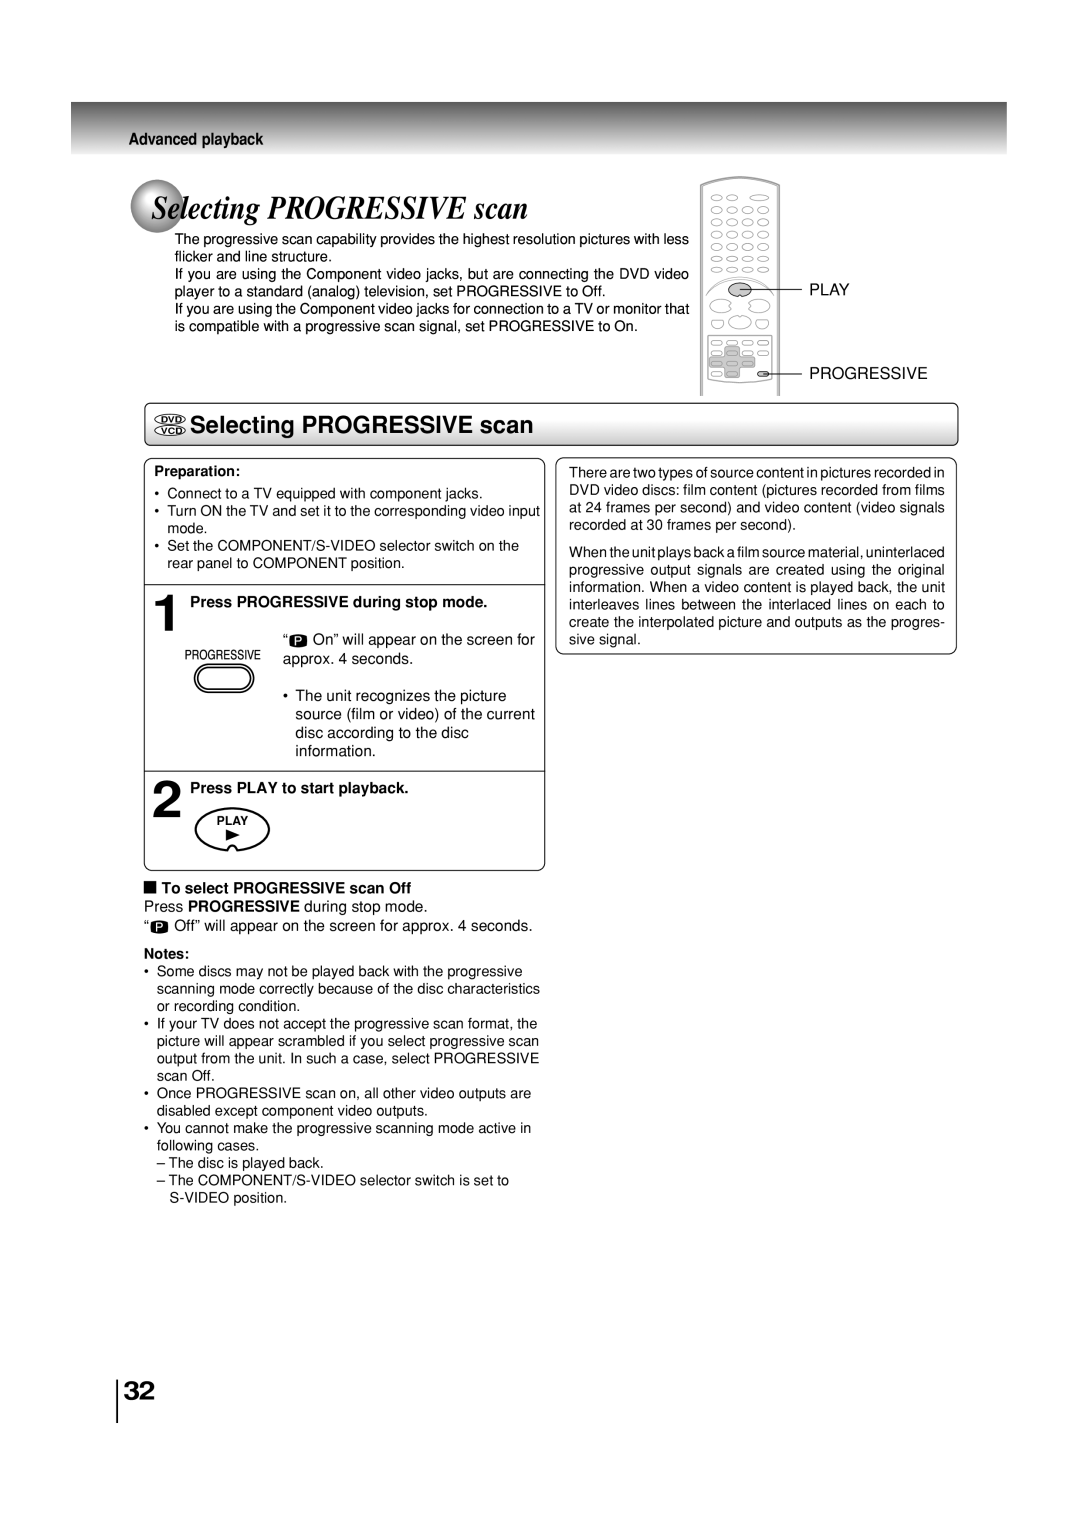
Loading batteries

1 Slide the battery compartment cover in the direction of the arrow.

Install two “AAA” batteries (supplied), paying

2 attention to the polarity diagram in the battery compartment.

3 Replace the compartment cover.

Notes on batteries

Improper use of batteries may cause battery leakage and corrosion. To operate the remote control correctly, follow the instructions below.

Do not insert batteries into the remote control in the wrong direction.

Do not charge, heat, open, or short-circuit the batteries. Do not throw batteries into a fire.

Do not leave dead or exhausted batteries in the remote control.

Do not use different types of batteries together, or mix old and new batteries.

If you do not use the remote control for a long period of time, remove the batteries to avoid possible damage from battery corrosion.

If the remote control does not function correctly or if the operating range becomes reduced, replace all batteries with new ones.

If battery leakage occurs, wipe the battery liquid from the battery compartment, then insert new batteries.

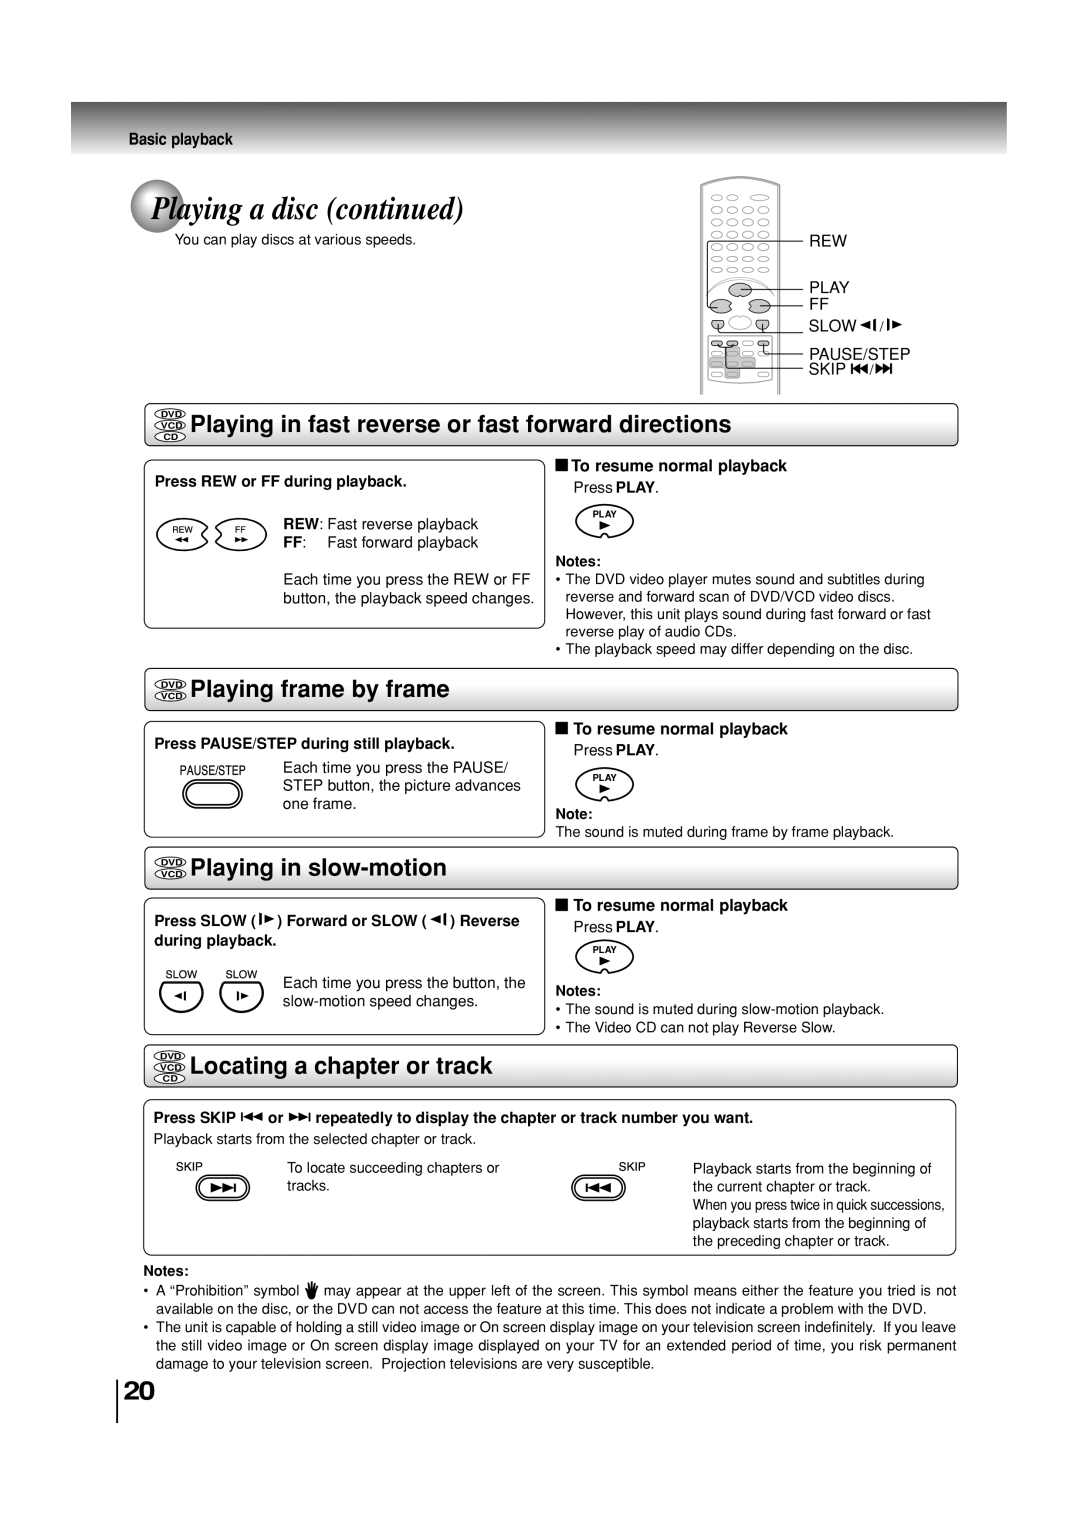
Operating with the remote control

Point the remote control at the remote sensor and press the buttons.

Within about 7 m (23 feet)

Distance: About 7 m (23 feet) from the front of the remote sensor

Angle: About 30° in each direction of the front of the remote sensor

*Do not expose the remote sensor of the DVD video player to a strong light source such as direct sunlight or other illumination. If you do so, you may not be able to operate the DVD video player via the remote control.

Notes on the remote control

Direct the remote control at the remote sensor of the DVD video player.

Do not drop or give the remote control a shock.

Do not leave the remote control near an extremely hot or humid place.

Do not spill water or put anything wet on the remote control.

Do not disassemble the remote control.

When using the remote control, press the button at intervals of about 1 second to ensure the correct mode of operation.

13
Image 13
Contents SD-3860SC This Digital Video Disc Player employs a Laser System ProcedureResult in hazardous radiation exposure Important Safeguards S3125A Page To obtain a clear picture PrecautionsIntroduction WaitStructure of disc contents On cleaning discsOn handling discs On storing discsPlayable discs On Video CDsTable of contents Front panel Identification of controlsRear panel ALL REPEAT, REPEAT, Repeat a B FL displayDimmer function Playing trackMenu button Remote controlTV control buttons Loading batteries Operating with the remote controlConnecting to a TV Connecting to a TVConnections Component video outputs/inputs Connecting to an amplifier equipped with a DTS decoder Connecting to optional equipmentMPEG2 sound Playing a disc To start playback in the stop modeVCD Basic playback Basic playbackTo pause playback still mode To remove the disc Power DVD OPEN/CLOSE Play Stop PAUSE/STEP EnterTo obtain a higher quality picture To stop playbackVcddvd Playing frame by frame VCD Playing in fast reverse or fast forward directionsVcddvd Playing in slow-motion VCD Locating a chapter or trackVcddvd Zooming Zooming/Locating desired sceneLocating desired scene Advanced playbackVcddvd Marking the scenes Marking desired scenesVcddvd Returning to the scenes Repeat playback/A-B Repeat playback Play Mode RPT EnterVCD Repeat playback VCD A-B Repeat playbackProgram playback/Random playback Play ModeVCD CD Program playback VCD Random playbackDVD Changing angles Changing angles/Title selection/DVD menuDVD Title selection DVD DVD menuVCD Setting surround sound Changing soundtrack language Setting surround soundChanging soundtrack language During disc playback press AudioSubtitles Subtitles/Karaoke playbackDVD Karaoke playback To turn off the subtitle, press Subtitle until Off appearsDisc status VCD To turn off the PBC Disc status/To turn off the PBCVideo CD Audio CDMP3/WMA/JPEG CD information MP3/WMA/JPEG operationWMA CD TOP Menu Play Stop Enter CD MP3/WMA CD playbackAbout file menu Place a disc on which Jpeg files have been Jpeg CD playback Slide show playbackFile menu screen will appear on the screen PreparationDvdvcd Selecting Progressive scan Selecting Progressive scanProgressive VCD Setting procedure Customizing the function settingsFunction setup SetupSetting details English, Francais, Espanol Menu, Subtitle, AudioOther Original AudioJpeg Interval DisplayOff SecondsIf you forget the password Parental control settingTo change the parental level OSD LanguageTemporary disabling of rating level by DVD disc If you wish to cancel the set rating level temporarOPEN/CLOSE Play Enter ReturnLanguage code list Setting TV control codes Table of TV brand codes Multi brand remote controlTV Power Input Select Display Program Enter CH+/-, VOL+ Brand name Brand Code Your TVOthers Troubleshooting guideSupplied Accessories SpecificationsDVD Video Player OutputsLimited One 1 Year Warranty Limited Ninety 90 Day WarrantyRental Units Commercial UnitsHow to Obtain Warranty Service Limited Warranty DVD Video Player