Installation
|
| ����� | ��������� | � | �� | �� | ������� | ����������������� | ��������� | ||
| ���������������� |
|
|
|
| ||||||
| ��������������������������������� |
| ����� | ��������������� | |||||||
|
| �������� |
|
|
|
|
|
|
| � | |
| ������ |
| �� | ������������������ |
|
|
|
| |||
| ������� |
|
|
|
|
|
| ������� | ���� |
|
|
|
|
| ���������������� ������ |
|
|
|
|
|
|
| � |
����������� |
|
| �� |
|
|
|
|
|
|
| |
������������ |
|
|
|
|
|
|
|
|
|
| |
���������������� |
|
|
|
|
|
| ������������� | � | � | ||
| �������� |
|
| ������������� |
|
| |||||
|
|
|
|
|
|
|
|
|
| ||
Positioning the unit
Place the DV135 on a level, firm surface and ensure that there is adequate ventilation for the unit.
Arcam recommend a minimum of 10cm (4”) free space above the unit.
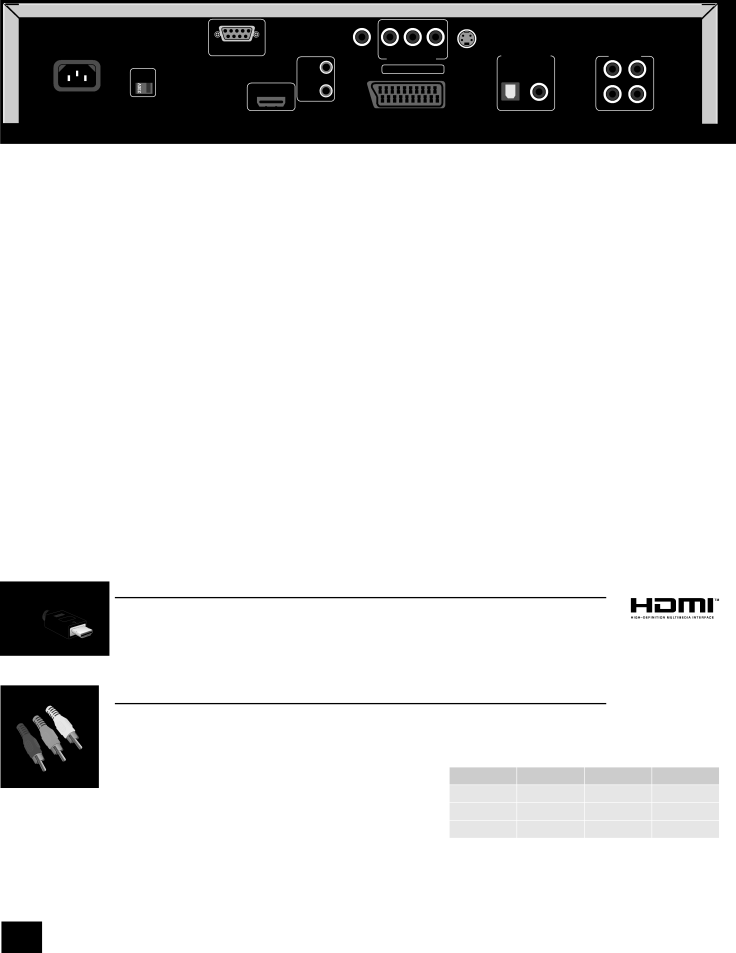
Making video connections
To view the pictures from the DVD player you need to connect one of its video outputs to your display device (TV, monitor, projector, etc.).
The DV135 has five video output options, described below. You need only use one type of video from the list; choose a type that your display device supports. If your display device does not support any of the above connection types then you will be unable to use it with the DV135; in this case, please contact your dealer for further assistance.
Note that you may connect equipment such as AV receivers in the signal path between the DVD player and the display device, so long that the connected equipment also supports the type of video signal you intend to use. For instructions on how to connect AV equipment, consult the manual for that equipment.
Using two video connections simultaneously
In some circumstances, it is possible to use two video connections simultaneously (routing one connection to a second room or display, for example). If you wish to do this, please read these notes:
<The Composite video and SCART outputs are only active if HDMI is not connected (or if ‘HDMI Resolution’ is set to ‘SD Progressive’ – see page 12). These two ouput types carry interlaced output at all times.
<The Component video output is only active if HDMI is not connected (or if ‘HDMI Resolution’ is set to ‘SD Progressive’ – see page 12). It can be set to carry either interlaced or progressive- scan output.
<The HDMI output is active only if a compatible display is detected by the DV135. It can be set to carry either interlaced,
<The
HDMI digital video
The HDMI connector offers uncompressed digital video and audio transmission between the DV135 and the display device, and provides the highest quality output. Generally, it is also the easiest connection type to configure.
To use this video connection, you will require a HDMI or HDMI/DVI cable between the DV135 and your display device or receiver. The DV135 supports HDMI version 1.0.
Component video
Use three 75Ω phono cables to connect the Component Y, Pb, Pr outputs of the DVD player to the Y, Pb, Pr inputs of the display device. Ensure that the cables are suitable for video use and that they are approximately the same length.
If your television is capable of accepting a progressively scanned
Some component video interfaces are labelled differently to the DV135; see the table if the component inputs of your display device are not labelled ‘Y, Pb, Pr’.
DV135 | alternative | alternative | alternative |
Y | Y | Y | Y |
Pb | Cb | U | |
Pr | Cr | V |
DV135