Samsung HG46NB678FFXZA Swivel, Assembling the swivel stand 32 inch TVs or larger

Page 6

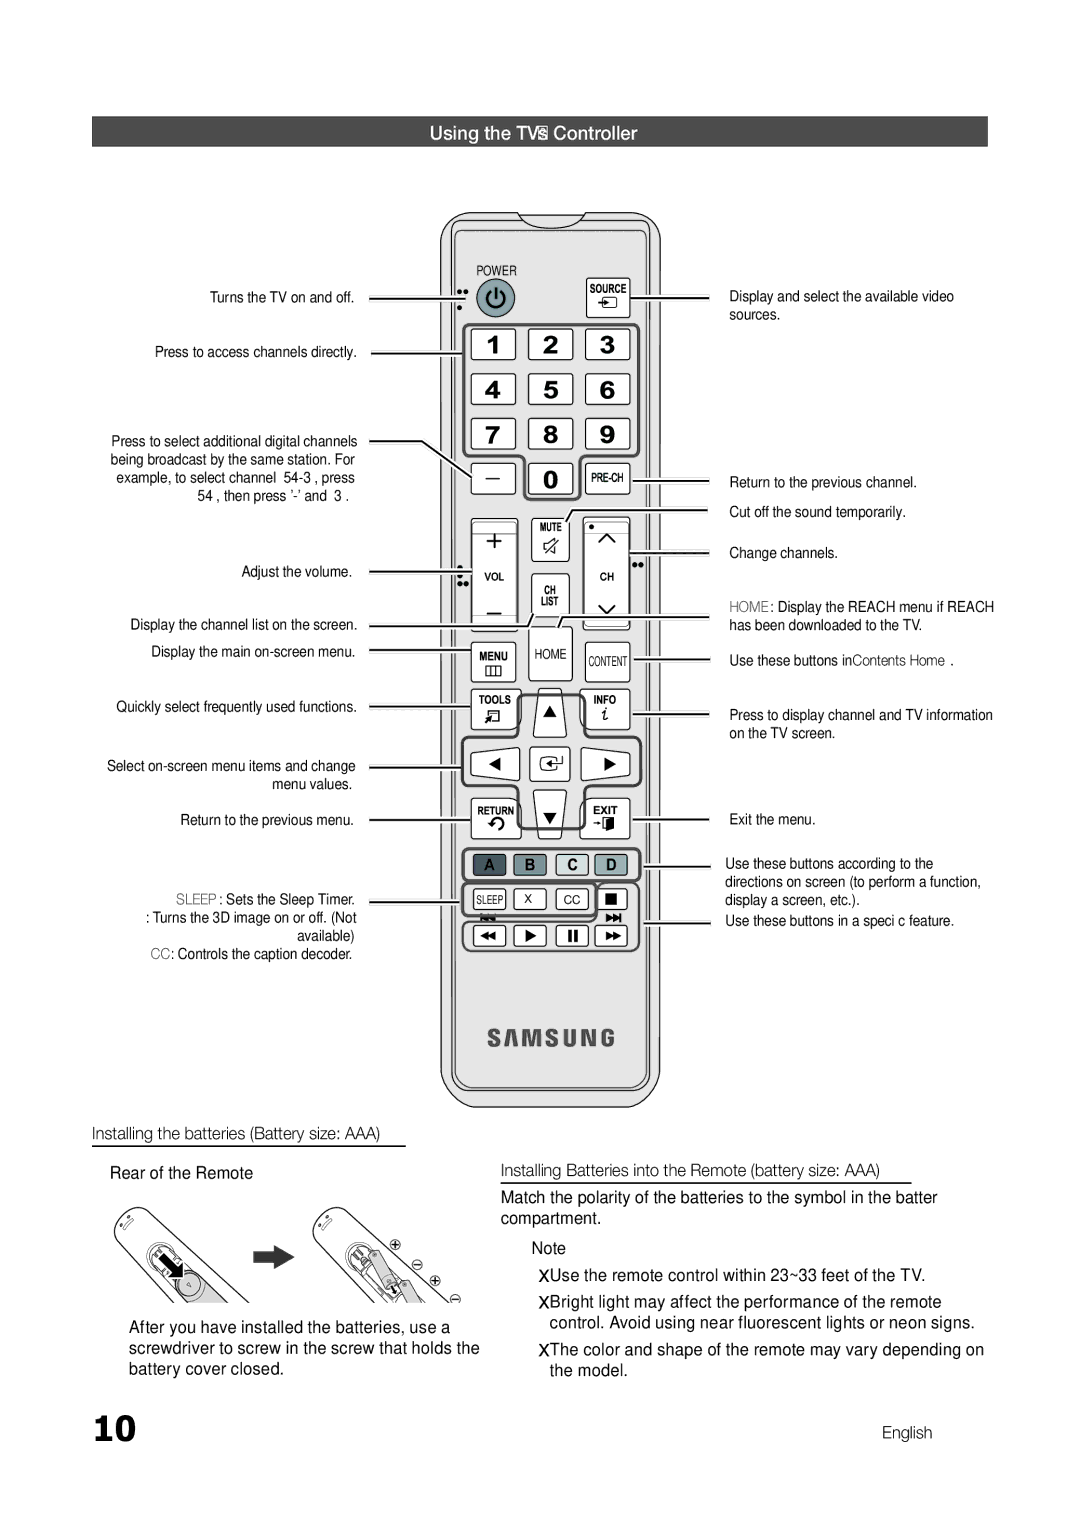
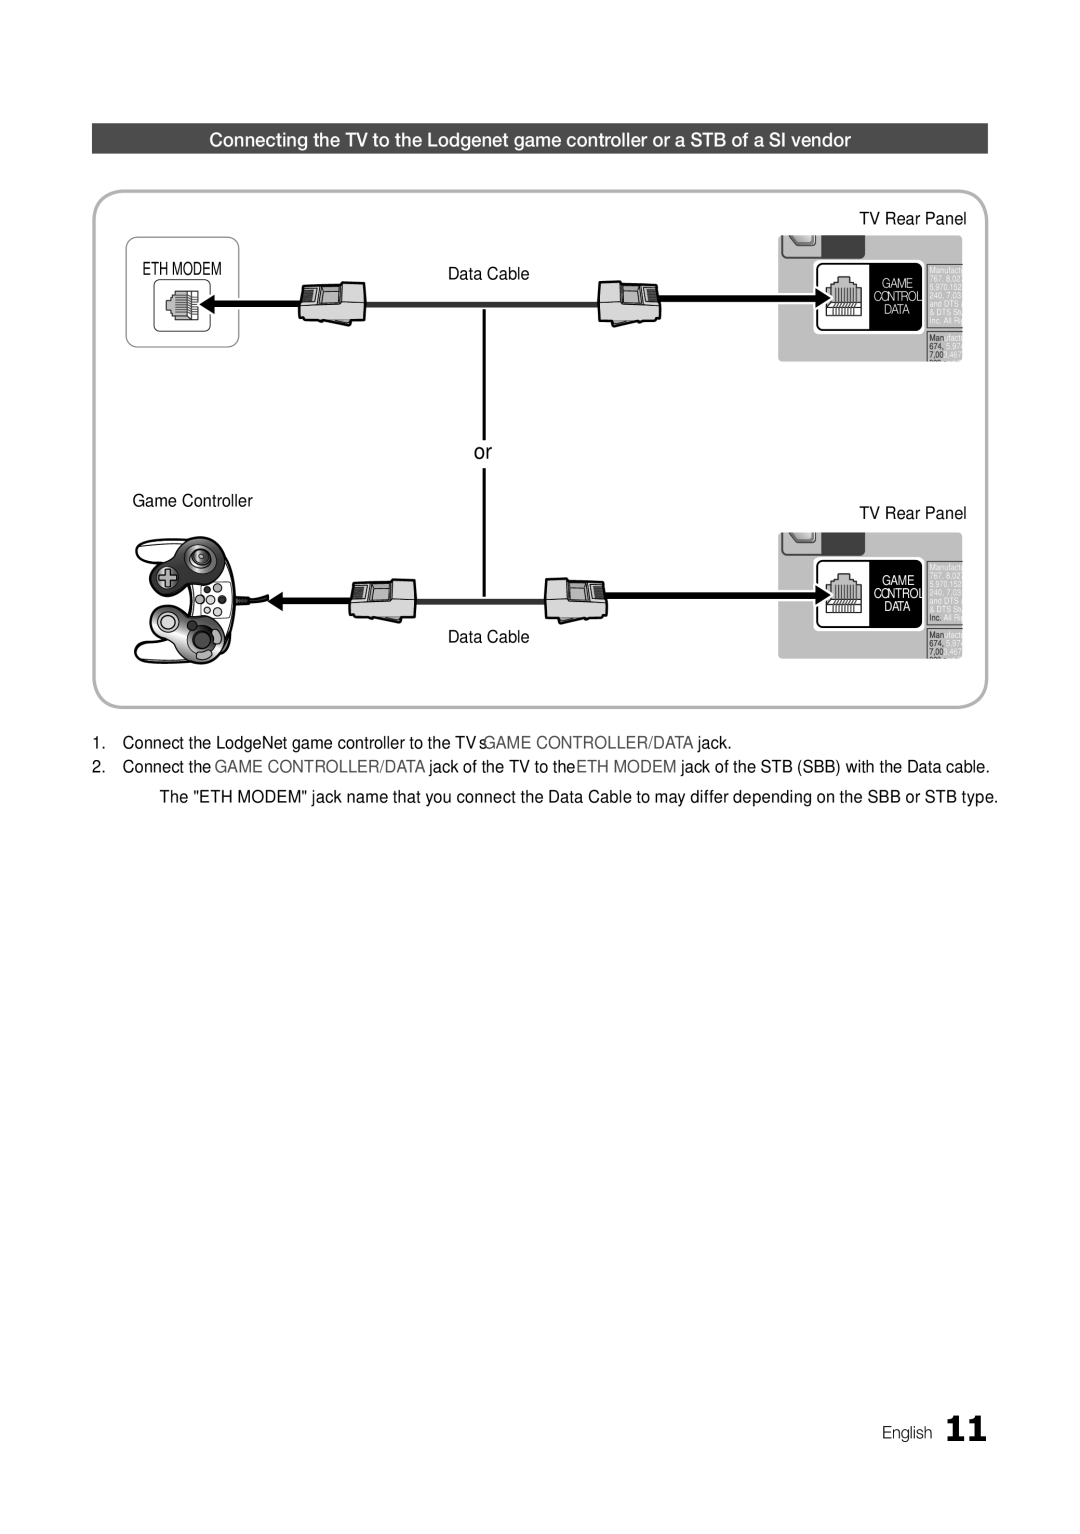
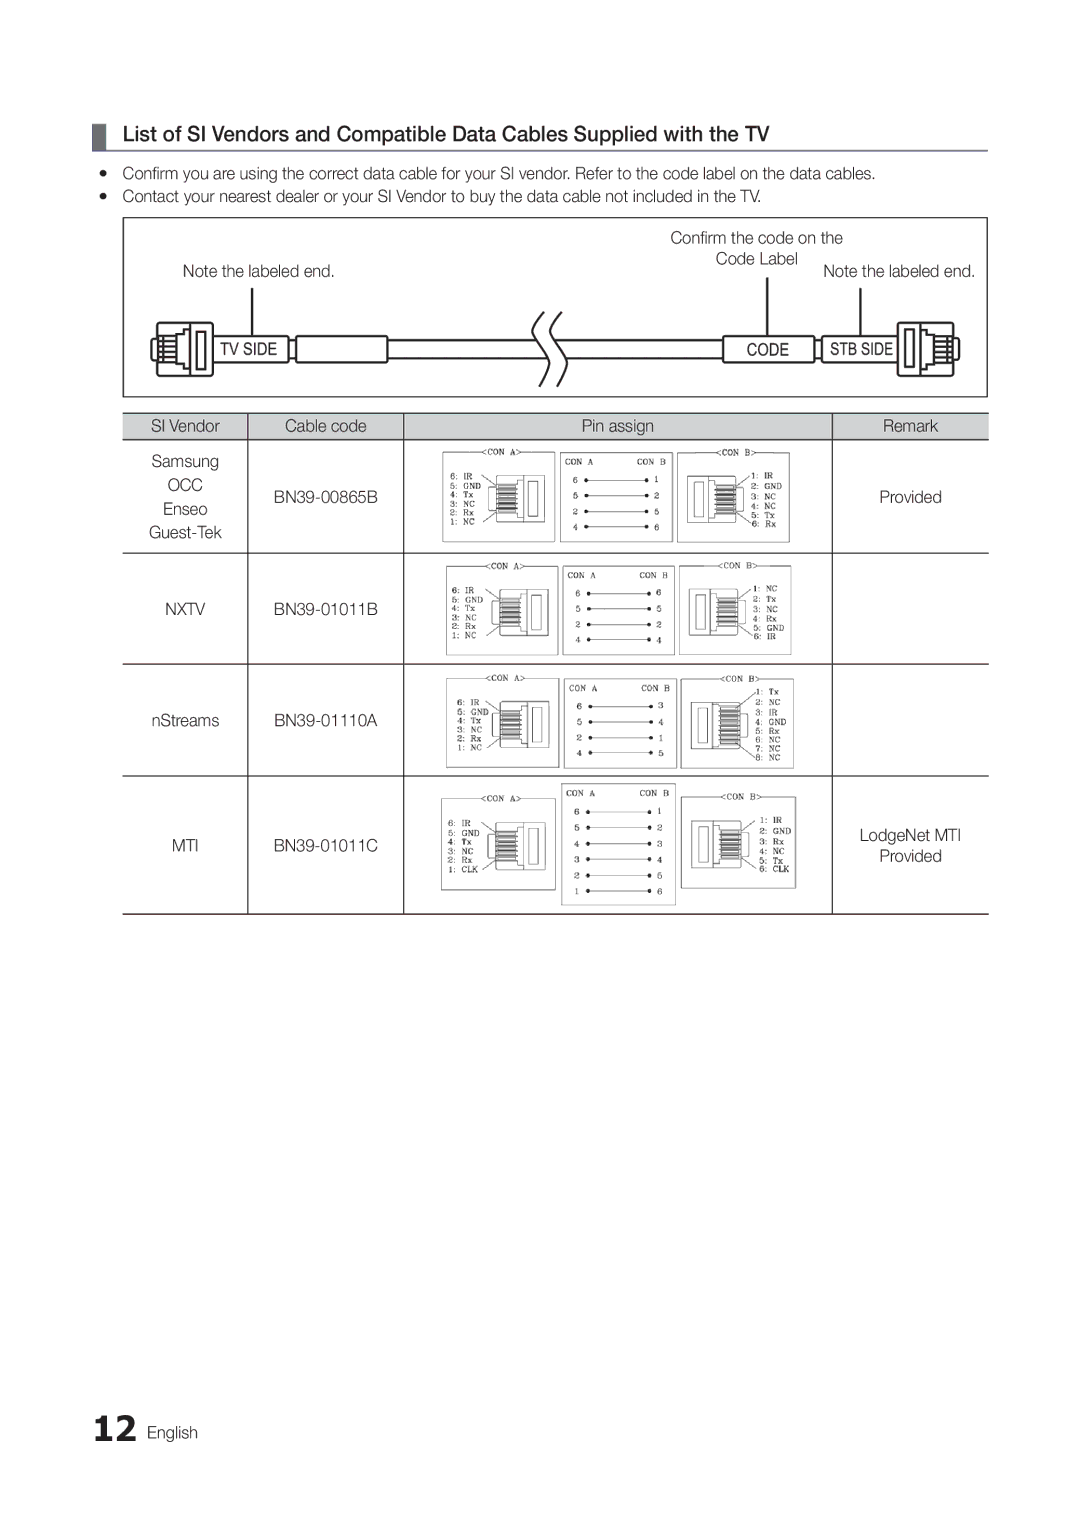
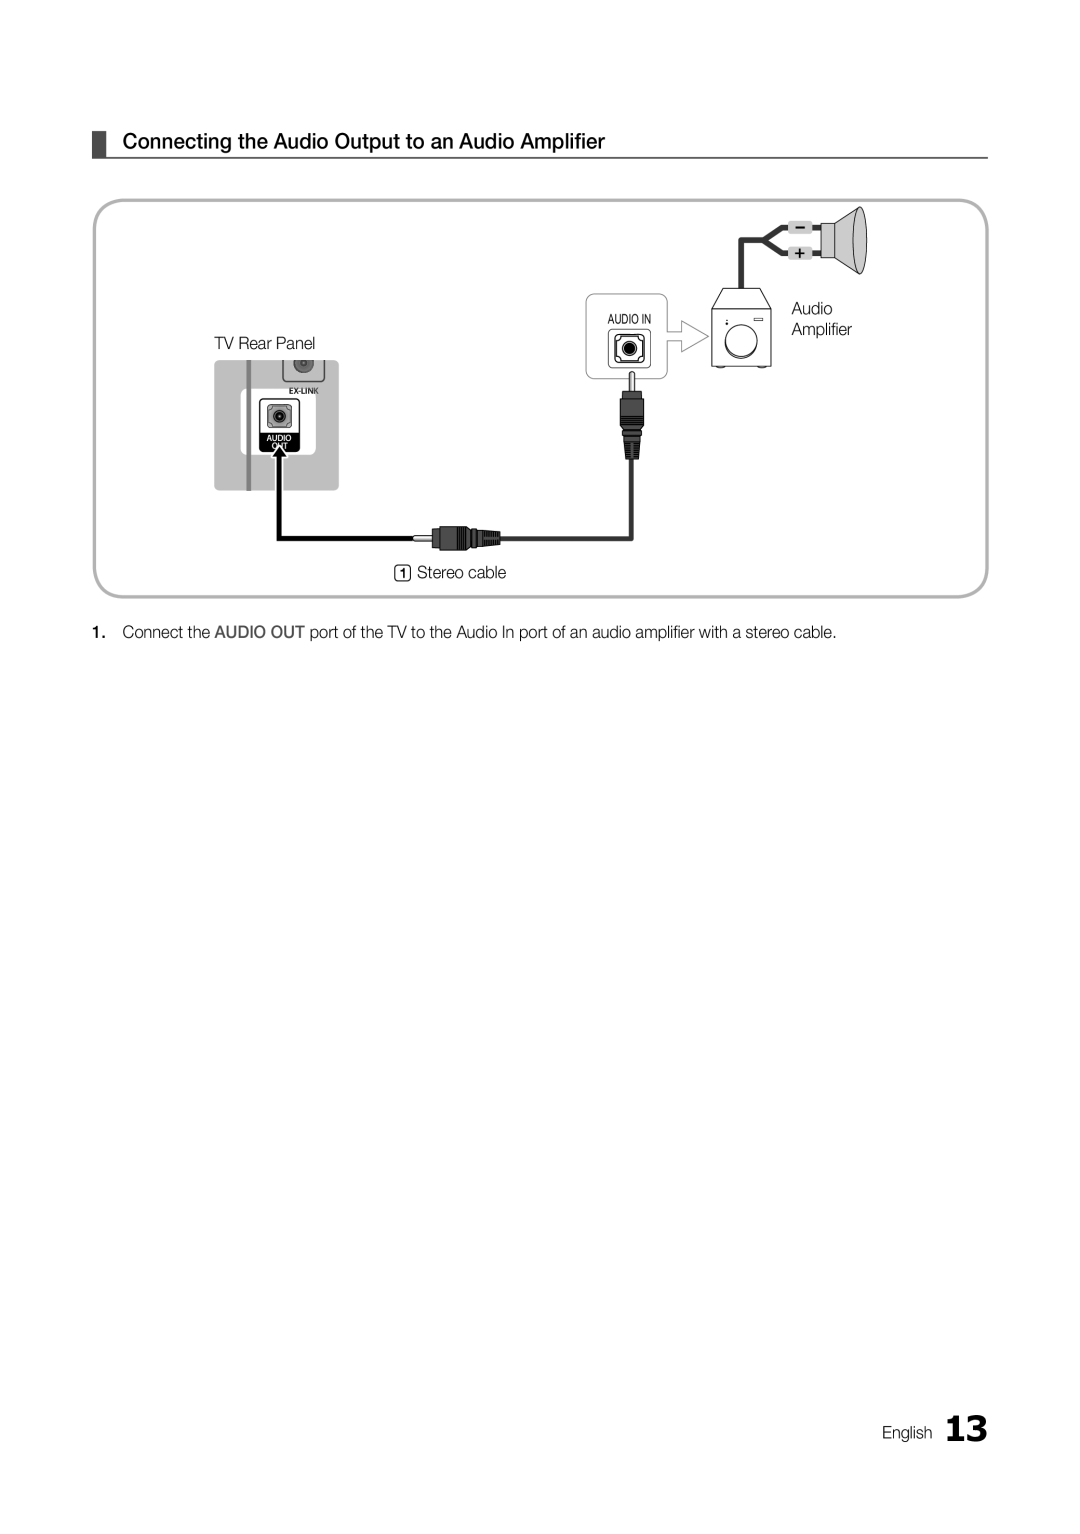
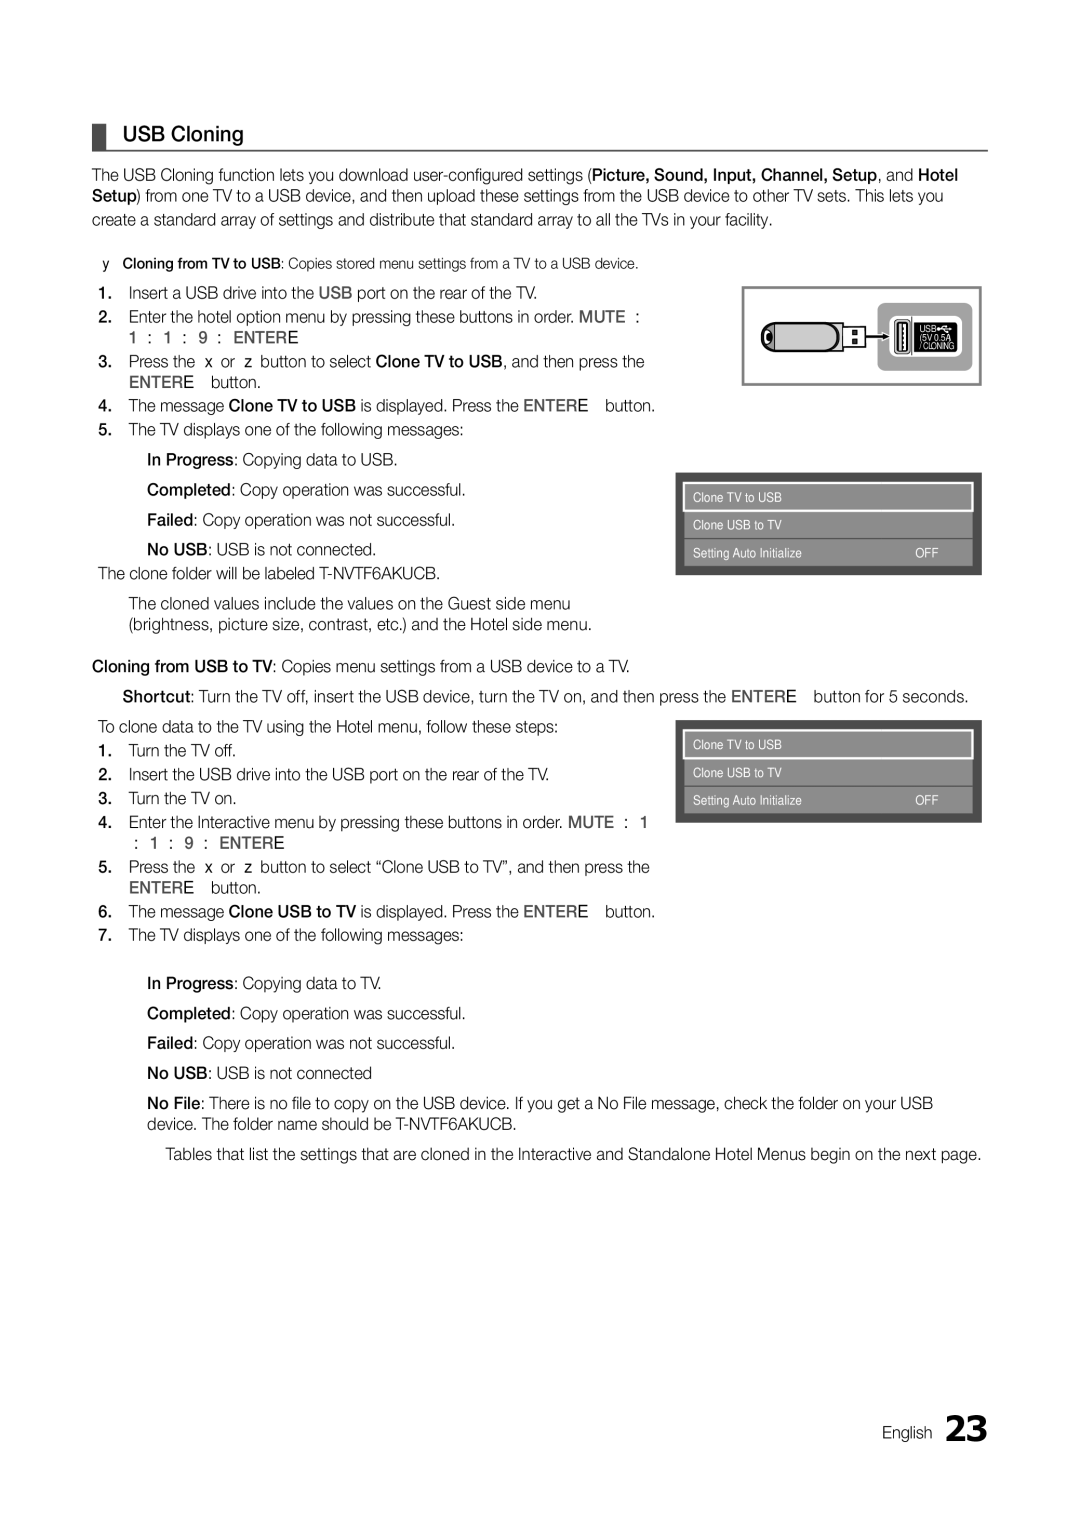
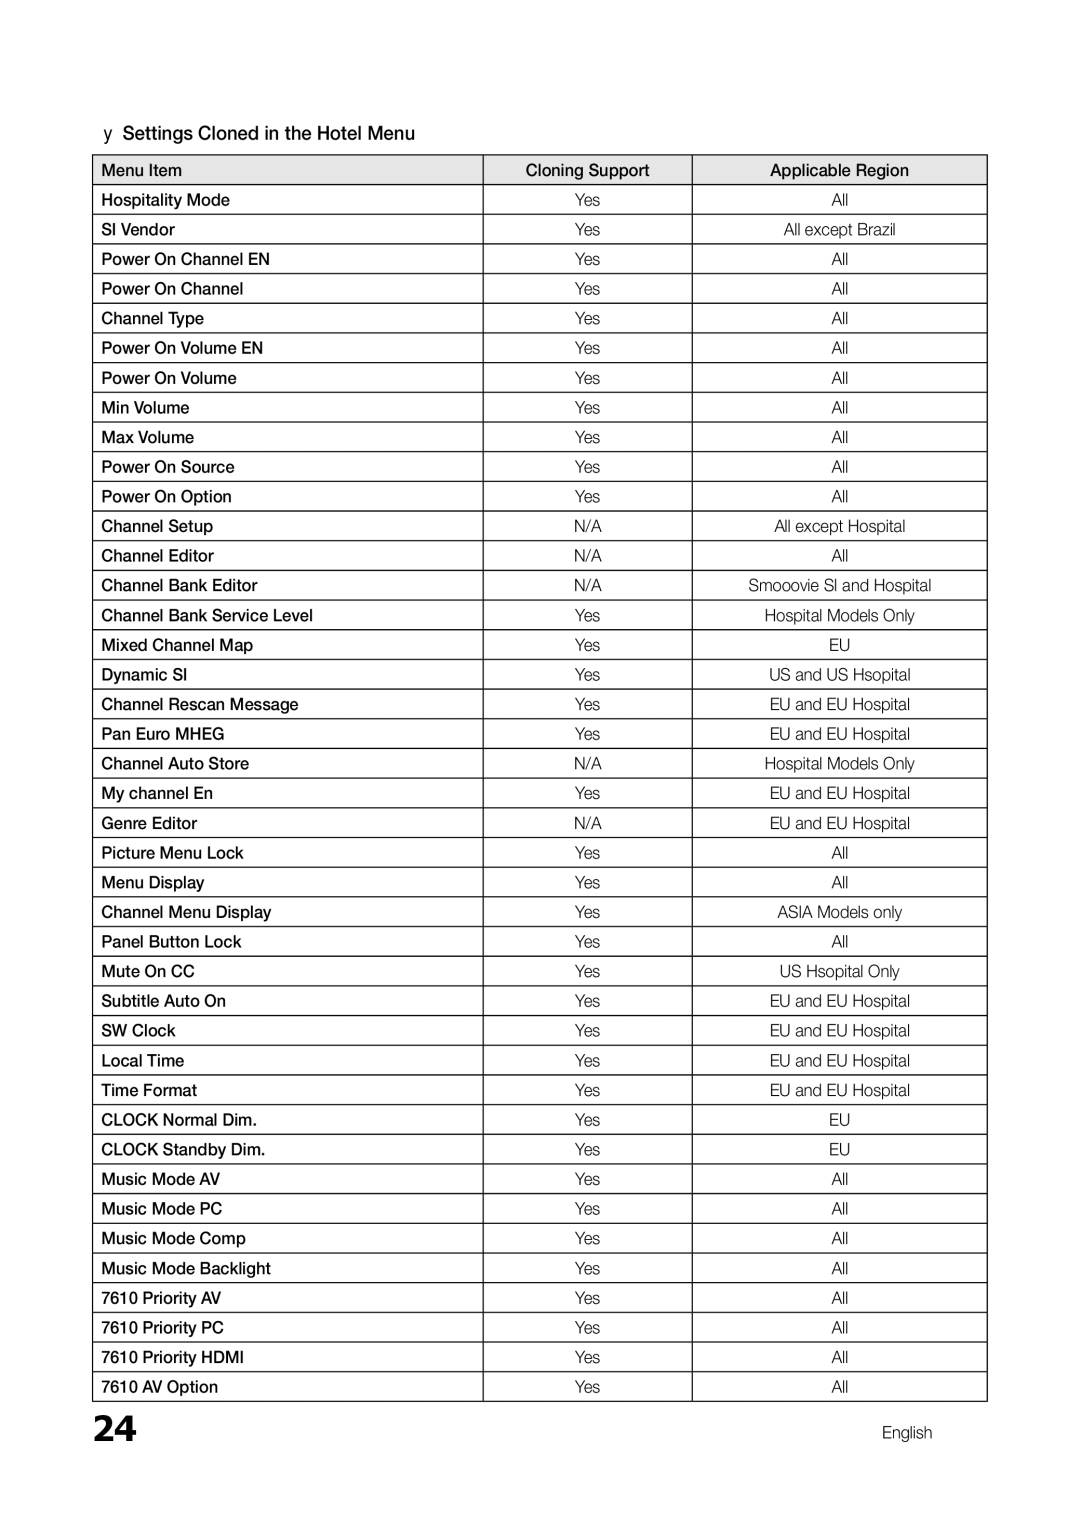
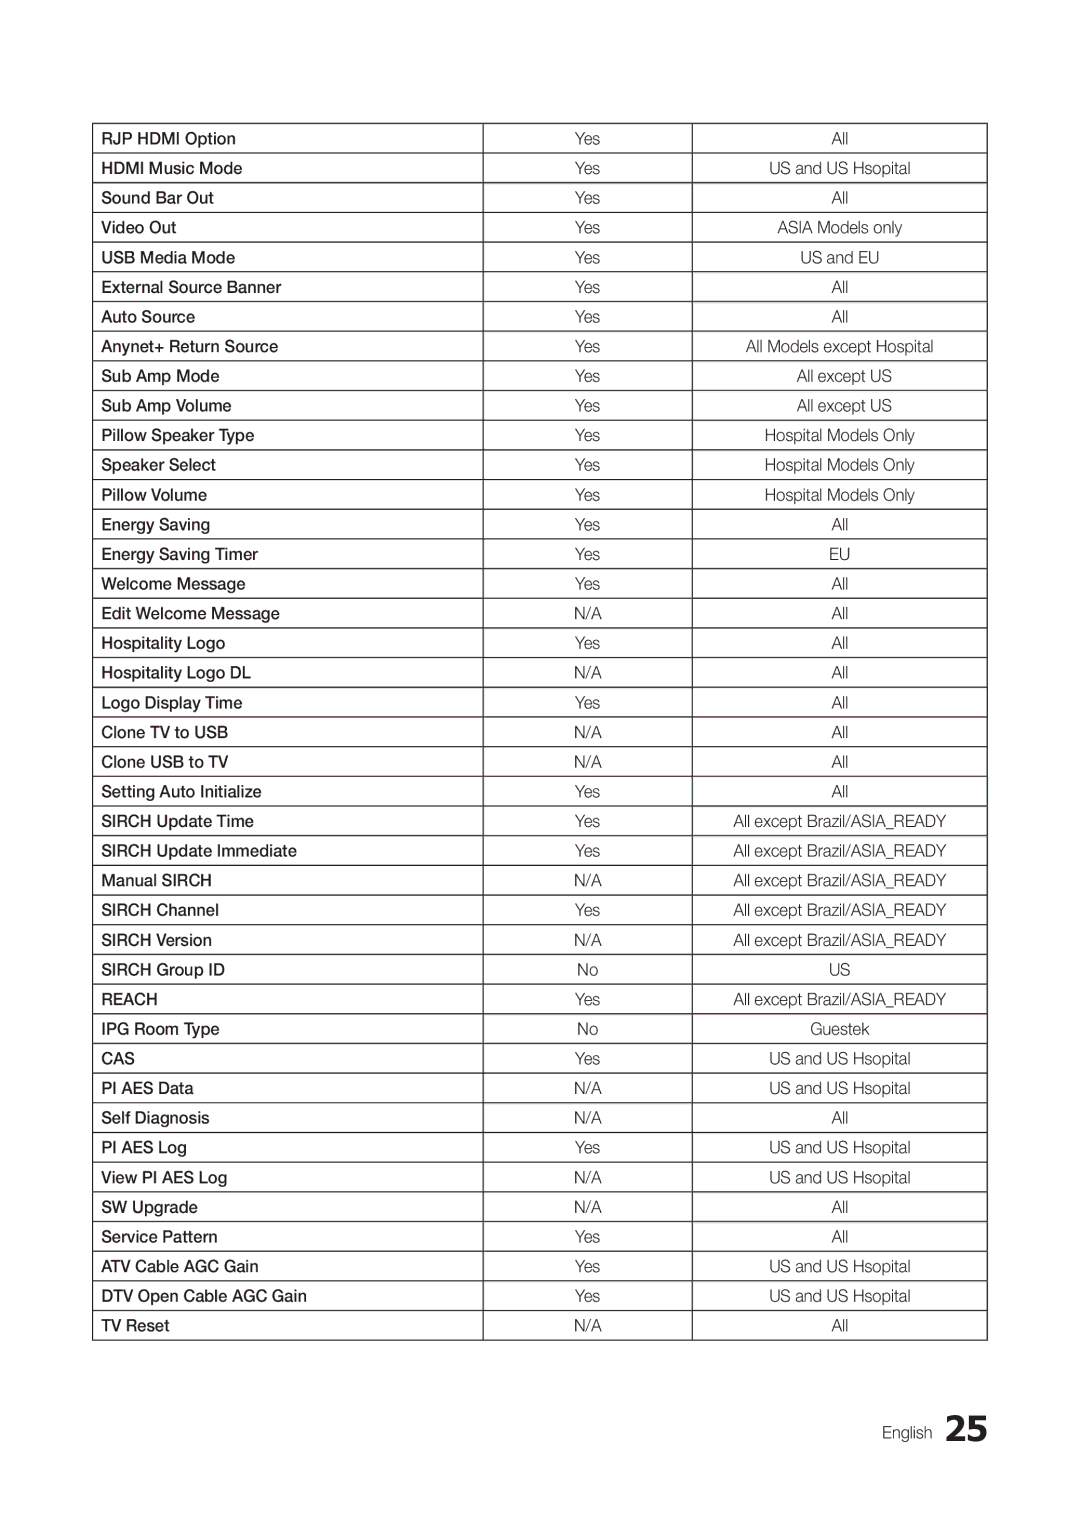
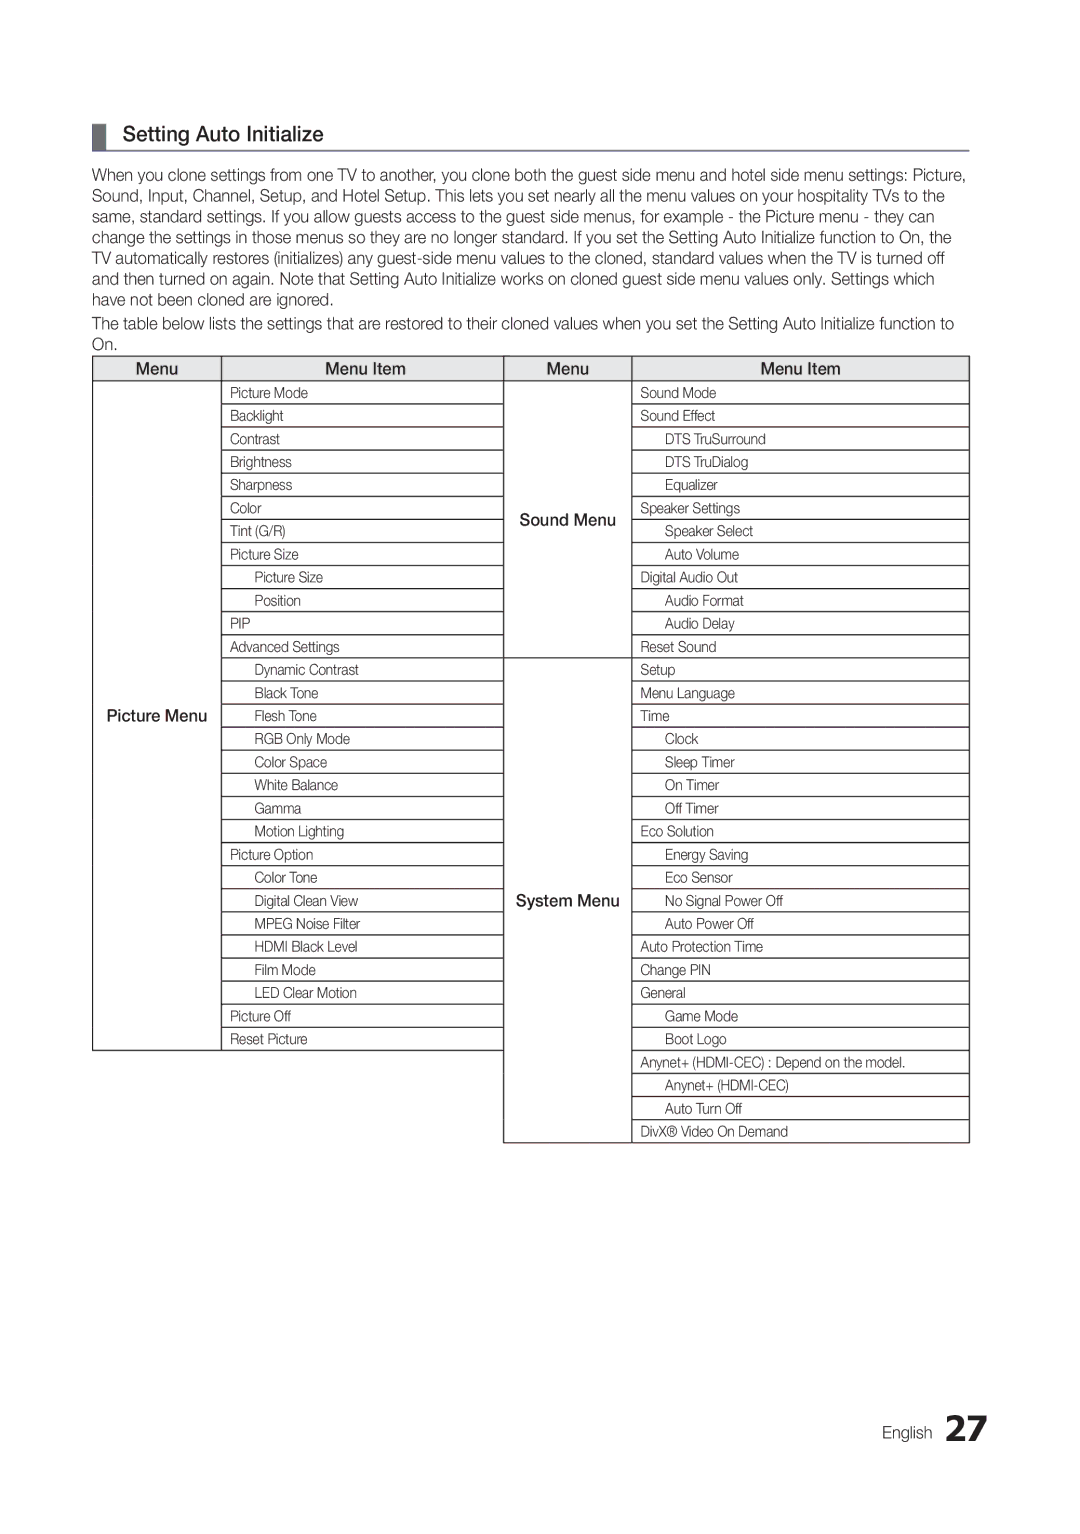
Assembling the swivel stand (32 inch TVs or larger)

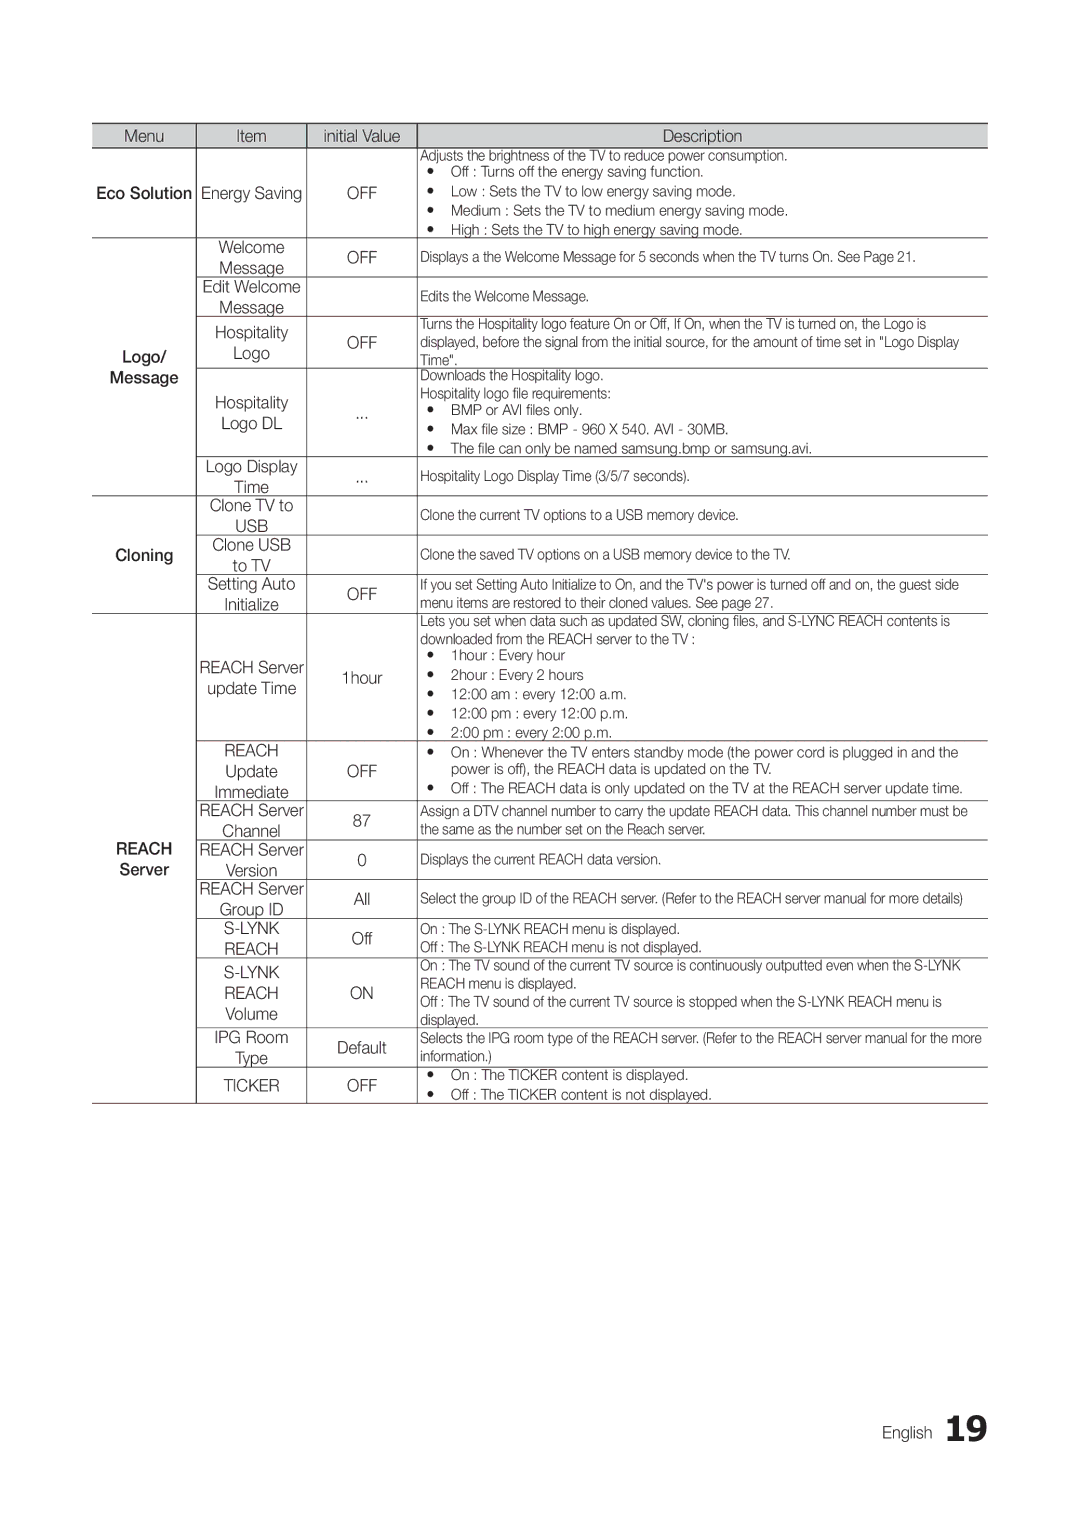
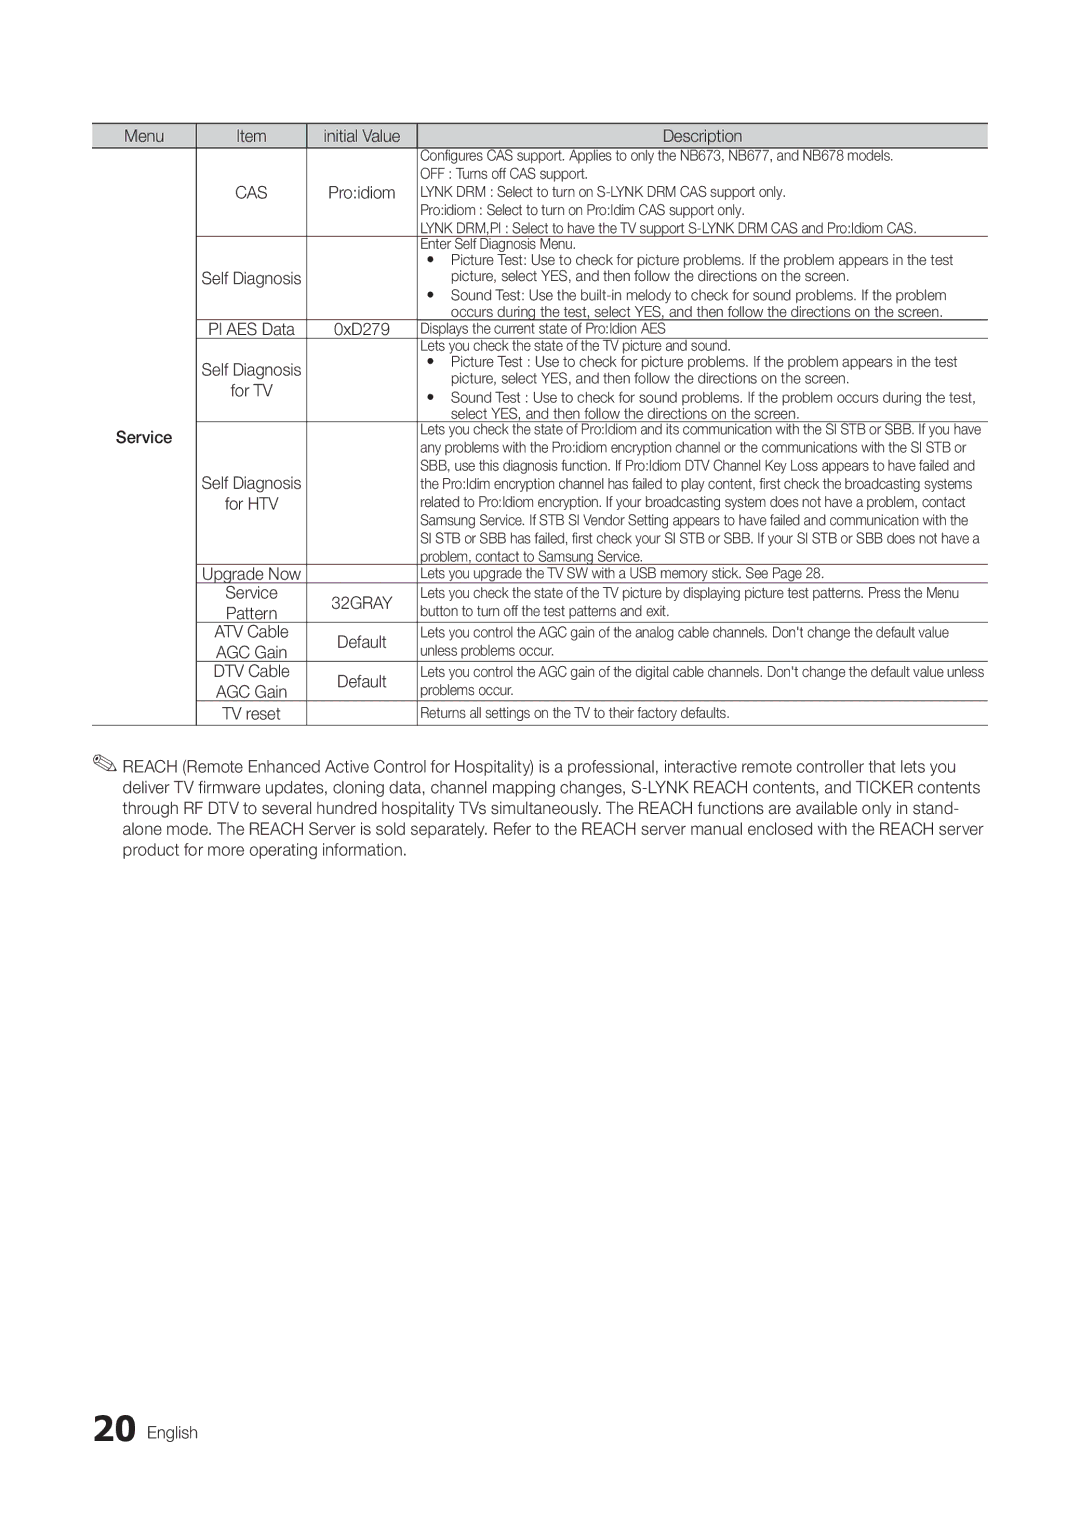
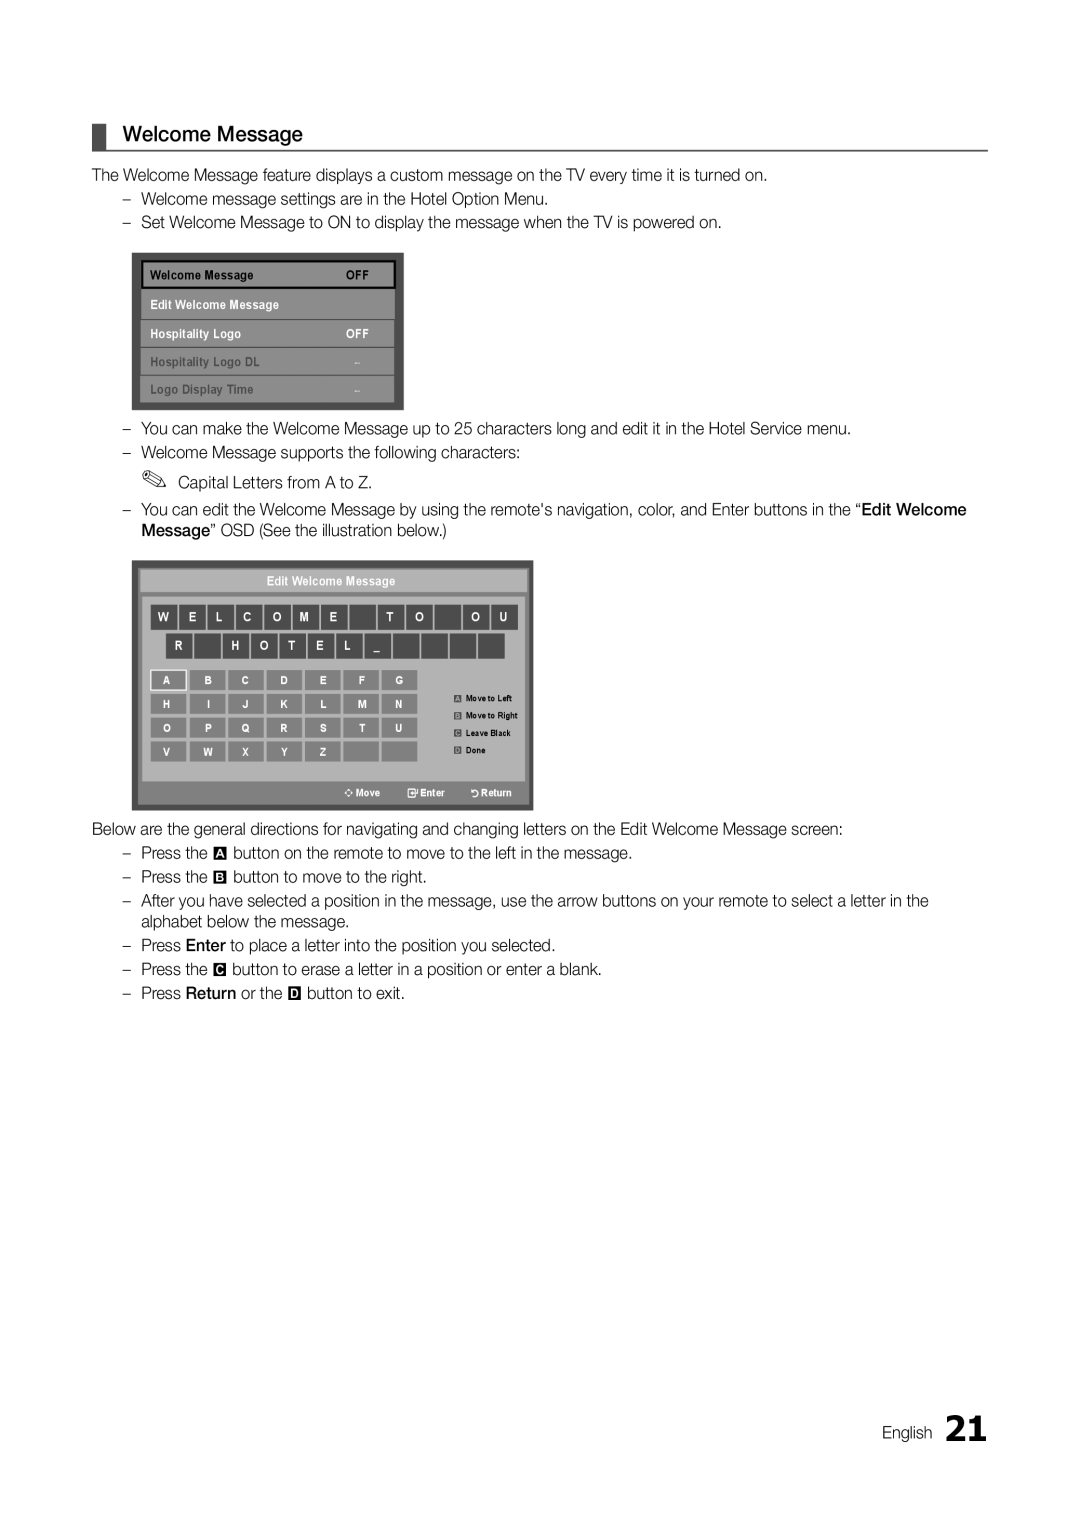
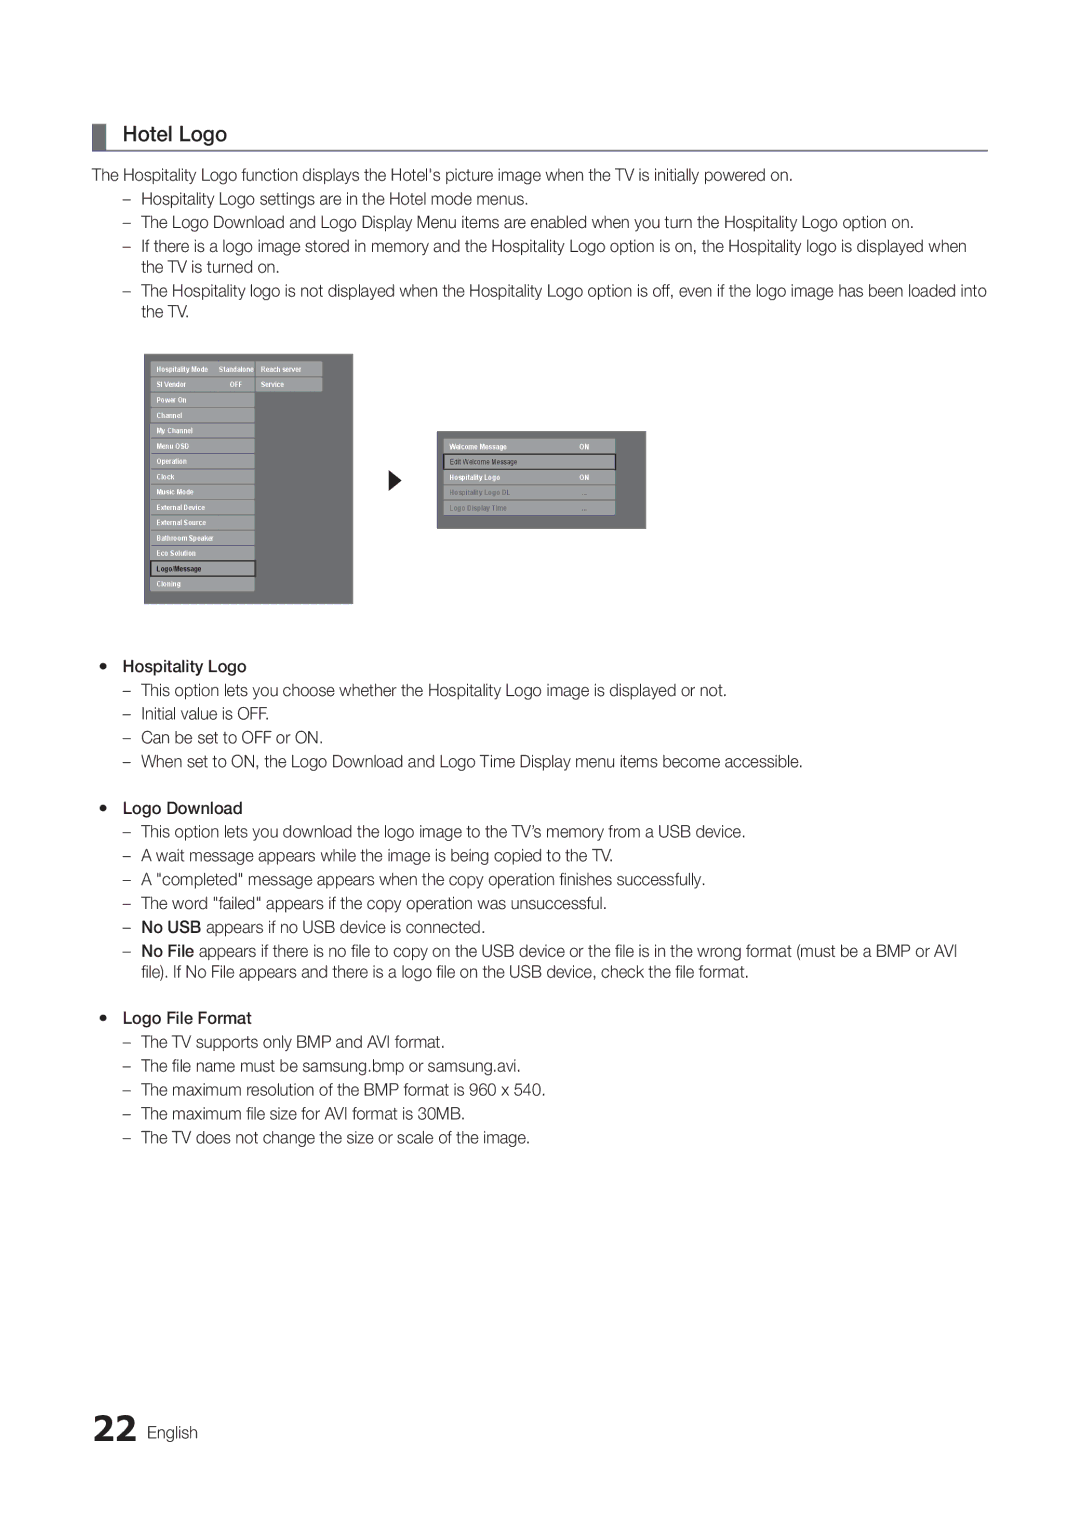
The 32” and larger LED TVs have swivel stands. You can configure these stands so that the TVs swivel 20 degrees left and right, 60 degrees left and right, or 90 degrees left and right using the BRACKET HOLDER SWIVEL.

¦¦ 20° swivel

To configure the TV so that it swivels 20° left and right, insert the prong on the bottom of the stand through the curved hole in the Bracket Holder Swivel marked 20°. Then, fix the Bracket Holder Swivel to the stand using the three supplied screws as shown to the left.

¦¦ 60° swivel

To configure the TV so that it swivels 60° left and right, insert the prong on the bottom of the stand through the curved hole in the Bracket Holder Swivel marked 60°. Then, fix the Bracket Holder Swivel to the stand using the three supplied screws as shown to the left.

¦¦ 90° swivel

To configure the TV so that it swivels 90° left and right, remove the Bracket Holder Swivel, and then screw the three supplied screws into the stand as shown to the left.

6 English
Image 6
Contents LED TV Serial NoStill image warning IntroductionOperational Modes Ensuring Proper Ventilation Contents Accessories Yy Guide Stand Yy Screws Installing the LED TV StandYy Stand differs depending On the modelSwivel Assembling the swivel stand 32 inch TVs or largerBolt + Nut Hotel Mount KitShort Bolt 2EA Long Bolt 2EA Nut 2EA Washer 2EA Top BottomUsing the TVs Controller Connection Panel Video / L-AUDIO-RPress to access channels directly Has been downloaded to the TVDisplay a screen, etc Data Cable TV Rear PanelETH Modem Game ControllerOCC NxtvMTI Connecting the Audio Output to an Audio Amplifier TV Rear PanelConnecting the RJP Remote Jack Pack Hdmi Source To Connect SecSource Disconnect To Connect Total Sec Setting the Hotel Option Data 100 Menu ItemsMode Menu OSDClock Music ModeMenu Initial Value Description RJP Hdmi HDMI1Reach Service PI AES Data 0xD279Welcome Message Hotel Logo USB Cloning Turn the TV onPower On Volume EN Power On Channel ENPower On Channel Power On VolumeCAS Multi Code Remocon Picture Menu Setting Auto InitializeSound Menu System MenuUSB Software Upgrade Method Sound BarModels supporting the ARC function are listed below Information About Smoovie Remote Controls Channel Bank Editor Smoovie TV OnlySmoovie Set Up Sequence Channel EditorPicture below shows a sample Channel Editor screen Channel AllYy Edit Channel Number Yy Rename ChannelYy Information After assigning channel number 997 to the AV source Installing the Wall Mount LED-TVSecuring the TV to the Wall To Avoid the TV from FallingUntie the string before moving the TV Anti-theft Kensington Lock OptionalSpecifications Dimensions HG40NB678 Front view / Side view Unit inchesJack panel detail / Rear view HG46NB678 Front view / Side view Unit inches 12.1 30.1 15.7Base Stand detail HG40NB678/HG46NB678 Unit inches EnglishSee the warranty card for more information on warranty terms Samsung Electronics America, IncLicense Page This page is intentionally Left blank