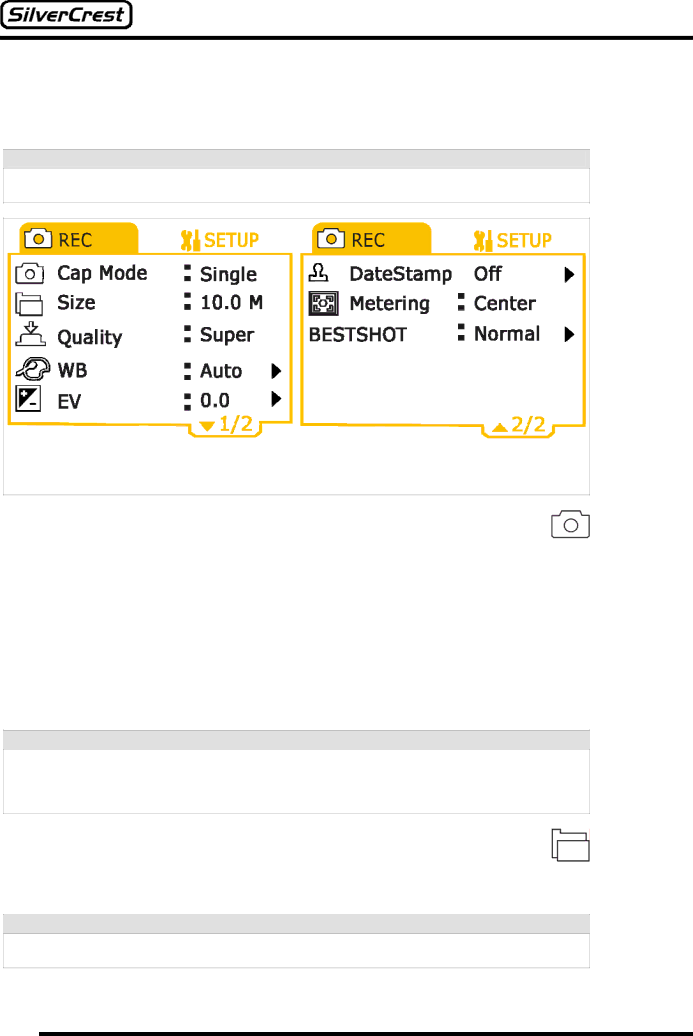
13.4 Capture Settings
To optimize your capture, the
Note:
If some settings are unclear or you are unfamiliar with them, please read the “Technical Help ” chapter on page 45.
To change settings, set your camera to Capture mode (see page 11) and activate the photo function (see page 11). Press the Menu button ![]() to go to the settings menu. You can now use the navigation key
to go to the settings menu. You can now use the navigation key ![]() (d and c) to select the following settings:
(d and c) to select the following settings:
Cap Mode
By using the Navigation button ![]() (e and f) you can choose between the different capture options. The following options are available:
(e and f) you can choose between the different capture options. The following options are available:
“Single“: The camera takes one photograph when you press the Capture button ![]() .
.
“SelfCap“: Selecting this mode activates the autotimer function. If you press the Capture button ![]() the camera emits a peep for a few seconds before the capture is triggered.
the camera emits a peep for a few seconds before the capture is triggered.
“Sequence“: When you press the Capture button ![]() , the camera takes a series of three photographs.
, the camera takes a series of three photographs.
“Panorama“: If you select this mode, you can merge two captures in one image. When you press the Capture button ![]() once, the camera saves the left half of the image. This is now displayed in a slightly transparent form on the left half of the display. You can now find another subject, whose right half is saved in the right half of the image when you press the Capture button
once, the camera saves the left half of the image. This is now displayed in a slightly transparent form on the left half of the display. You can now find another subject, whose right half is saved in the right half of the image when you press the Capture button ![]() again.
again.
Note:
The “Sequence” and “Panorama” modes only work if you have set a resolution smaller than 10M (0.3M, 1.3M, 3.0M or 5.0M) under the “Size” capture setting. If this is not the case, then the error messages “No sequence” or “Cannot photograph” are displayed. In the following section, “Size”, describes how to set the resolution.
Size
By using the Navigation button ![]() (e and f) you can set the resolution for your images.
(e and f) you can set the resolution for your images.
Here you can select between resolutions of 0.3, 1.3, 3.0, 5.0 and 10 mega pixels (MP) (symbol ![]() ). The higher the resolution, the more memory the images take up.
). The higher the resolution, the more memory the images take up.
Note:
When using a resolution of 10 mega pixels, the “Sequence” and “Panorama” capture modes are not available.
20