1 2, 3, 4
MF / JOG
W B / IRIS/
SHUTTER /
![]() PUSH
PUSH ![]()
MENU
5
1 | 1 | 2 | 3 |
![]()
![]() 3
3
4DPOF5SETTING6
![]() 2
2
PRESS STOP TO EXIT
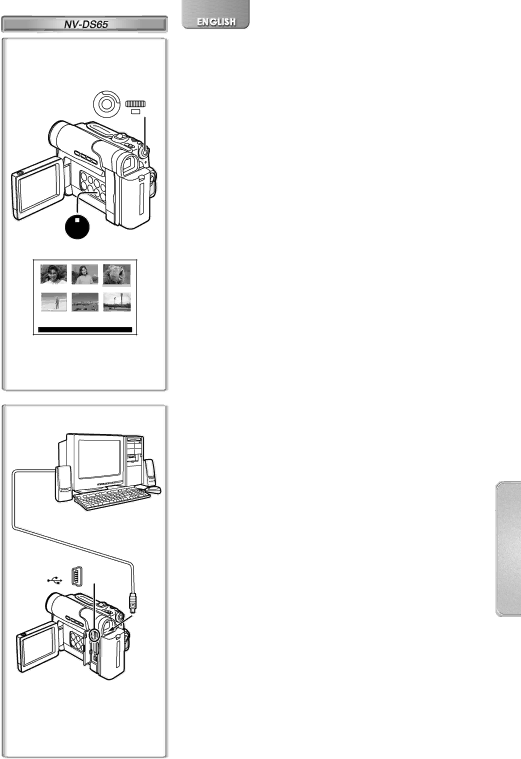
Writing Printing Data on a Card
(DPOF Setting)
DPOF Setting Printing data (DPOF Settings), such as the number of images to be printed, can be written to the Card. “DPOF” means Digital Print Order Format.
1Press the [MENU] Button in the card playback mode.
2Set [CARD SETUP] >> [DPOF] >> [ON] >> [VARIABLE] >> [ON].
≥Pictures recorded on the Card are displayed in
≥To print all pictures one at a time, select [ALL 1]. When all images are not printed, select [ALL 0].
3Select a desired picture.
≥The number of prints set by DPOF 2 is displayed.
4Turn the [PUSH] Dial and select the number of pictures to be printed, and press the [PUSH] Dial.
≥[µ] Indication 3 is displayed in the picture set.
5Repeat Step 3 and 4 and press the
≥For other notes concerning this item, see page 49.
~~~~~~~~~~~~~~~~~~~~~
Using the USB Connection Kit
1 |
Using the USB Connection Kit, you can import still pictures into your personal computer.
1 Install the supplied USB driver.
2 Select the desired mode of the Movie Camera.
3Connect the supplied USB Cable 1 to [USB]
1 Socket. 2
≥It enters PC connection mode.
|
| ≥The USB Connection Kit can be used with Windows98 Second | |
2 | 3 | Edition/Me/2000/XP. | |
≥Use the AC Adaptor as power source for the Movie Camera. | |||
|
| ||
|
| (The Card or its contents may be destroyed if battery power is | |
|
| lost while transmitting data.) | |
|
| ≥Mode cannot be changed in PC connection mode by setting | |
|
| the | |
|
| ≥For more details on the operating environment, installation, | |
|
| connections, and procedures, please refer to USB Connection | |
|
| Kit’s operating instructions. |
43