WARNING - FAILURE TO COMPLY WITH THESE INSTRUCTIONS COULD RESULT IN A FAILURE OF THE TERMINAL BLOCK AND CABLING.
5.WARNING - THIS APPLIANCE MUST BE EARTHED.
6.Ensure that the removable side section is fitted securely into the
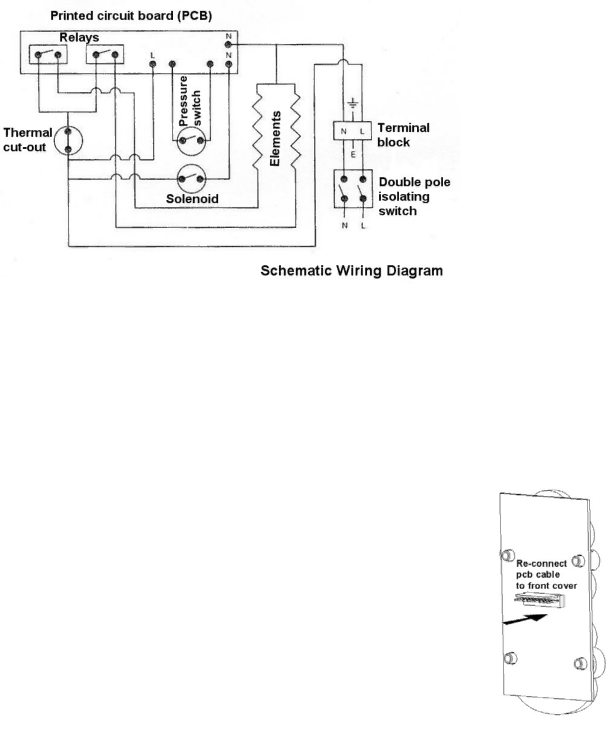
7.Re- connect cable to front cover PCB (one way fit) see diagram 11.
8.Fit the front cover back into position making sure the knob is aligned correctly with the flow valve (see diagram 12).
WARNING - TAKE CARE WHEN REPLACING THE FRONT COVER TO AVOID DAMAGING ANY COMPONENTS.
9.Operate the shower first without the handset to flush out particles, fit handset and then operate the shower as explained previously and check:
a)That the water gets to a satisfactory temperature.
b)Power selection does give a change in water temperature.
c)Check again for leaks.
d)That the holes in the spray plate are not blocked.
e)Water flow can be adjusted by knob E
Diagram 11
10.DEMONSTRATE OPERATION TO USER
11.LEAVE THESE INSTRUCTIONS WITH THE USER FOR FUTURE REFERENCE.
9