MAINTENANCE AND STORAGE
Inspect and tighten all parts of the exercise cycle reg- ularly. The exercise cycle can be cleaned with a soft, damp cloth. To prevent damage to the console, keep liquids away from the console and keep the console out of direct sunlight.
BATTERY REPLACEMENT
If the console does not function properly, the batteries should be replaced. See assembly step 4 on page 6.
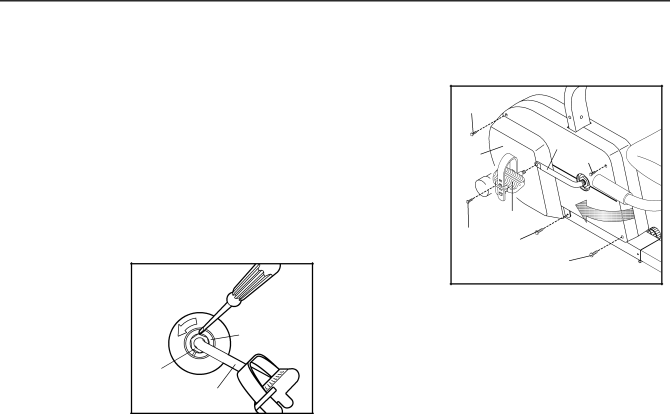
CRANK ADJUSTMENT
If the arms of the |
| |
Crank (8) |
| |
become loose, |
| |
they should be | Slotted | |
tightened in order | ||
Crank Nut | ||
to prevent exces- | ||
| ||
sive wear. | 14 | |
Loosen the Hex | ||
| ||
Crank Nuts (14) | 8 | |
on the left arm of |
| |
the Crank. Place |
|
the tip of a standard screwdriver in one of the slots in the slotted crank nut. Tap the screwdriver with a ham- mer to turn the slotted crank nut counterclockwise until the arms are no longer loose. Do not overtight- en the slotted crank nut. When the slotted crank nut is properly tightened, tighten the Hex Crank Nuts.
HOW TO REMOVE THE LEFT SIDE SHIELD
To remove |
|
| |
the Left Side | 13 |
| |
Shield (20), |
|
| |
first turn the |
| 8 | |
Left Pedal |
| ||
20 | 13 | ||
(39) clock- |
|
| |
wise using an |
|
| |
adjustable |
|
| |
wrench, and |
| 39 | |
remove it. | 5 | 18 | |
Next, remove | |||
| |||
| 13 | ||
the indicated |
| ||
M4 x 12mm |
|
| |
Screw (5), the |
|
|
M4 x 38mm
TIGHTENING THE PEDALS
After using the exercise cycle for one week, retighten the pedals. For best performance, the pedals must be kept properly tightened. Check pedal tightness on a weekly basis.
11