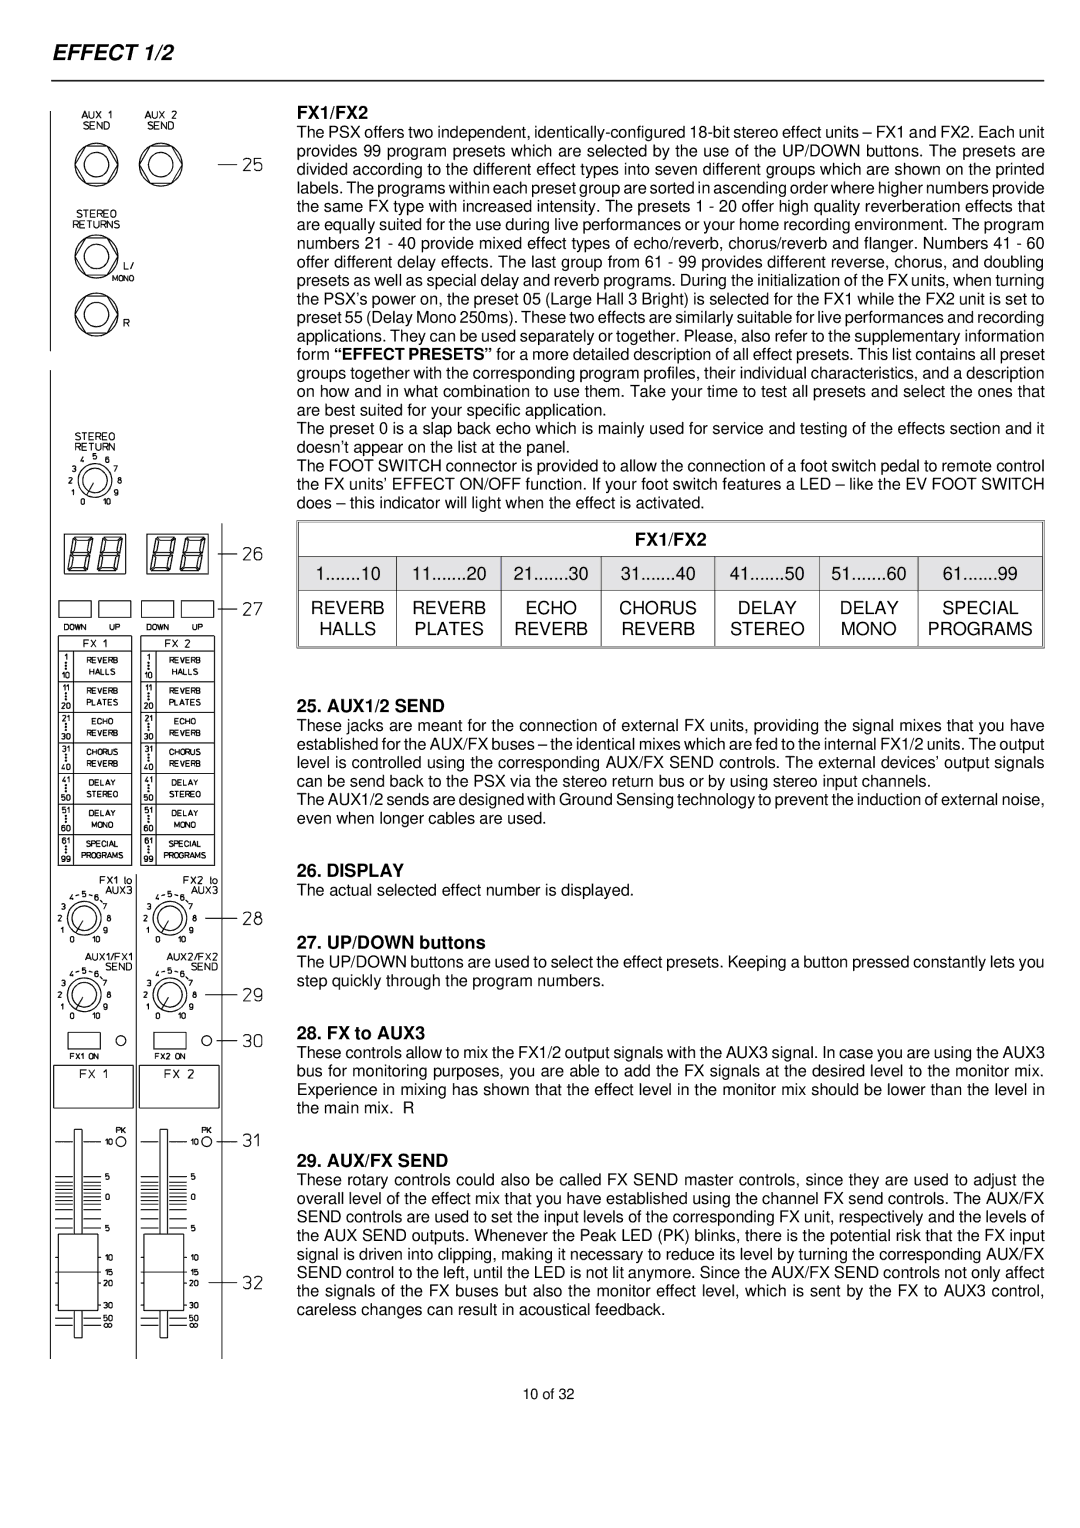
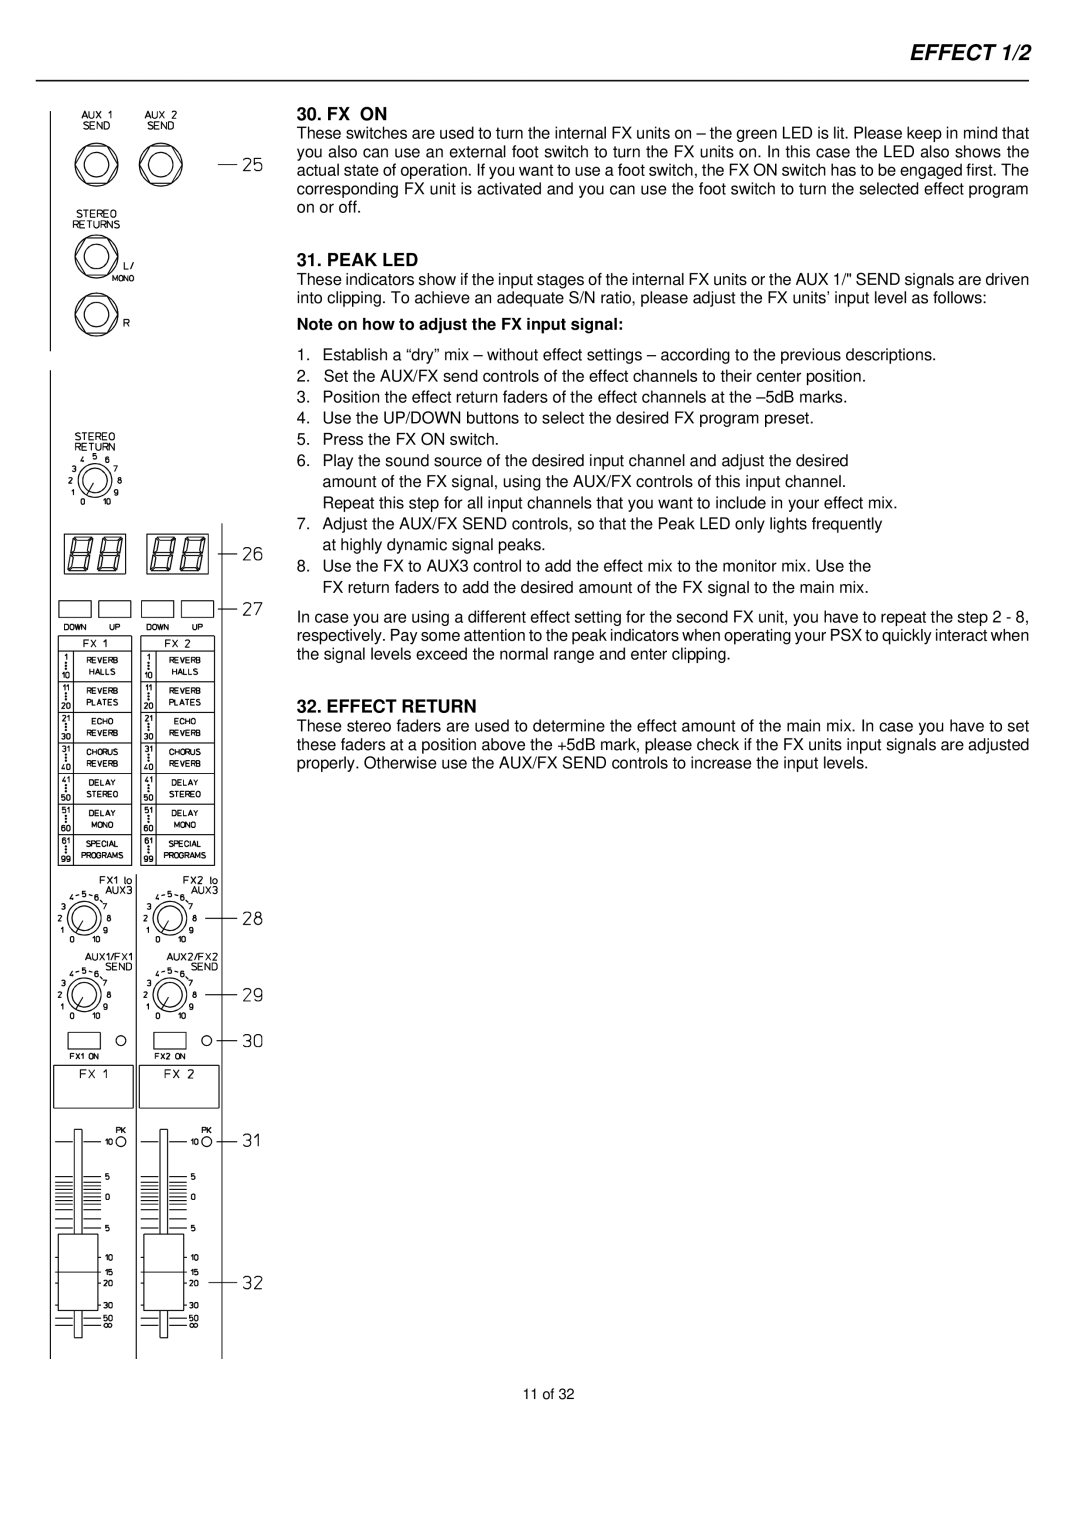
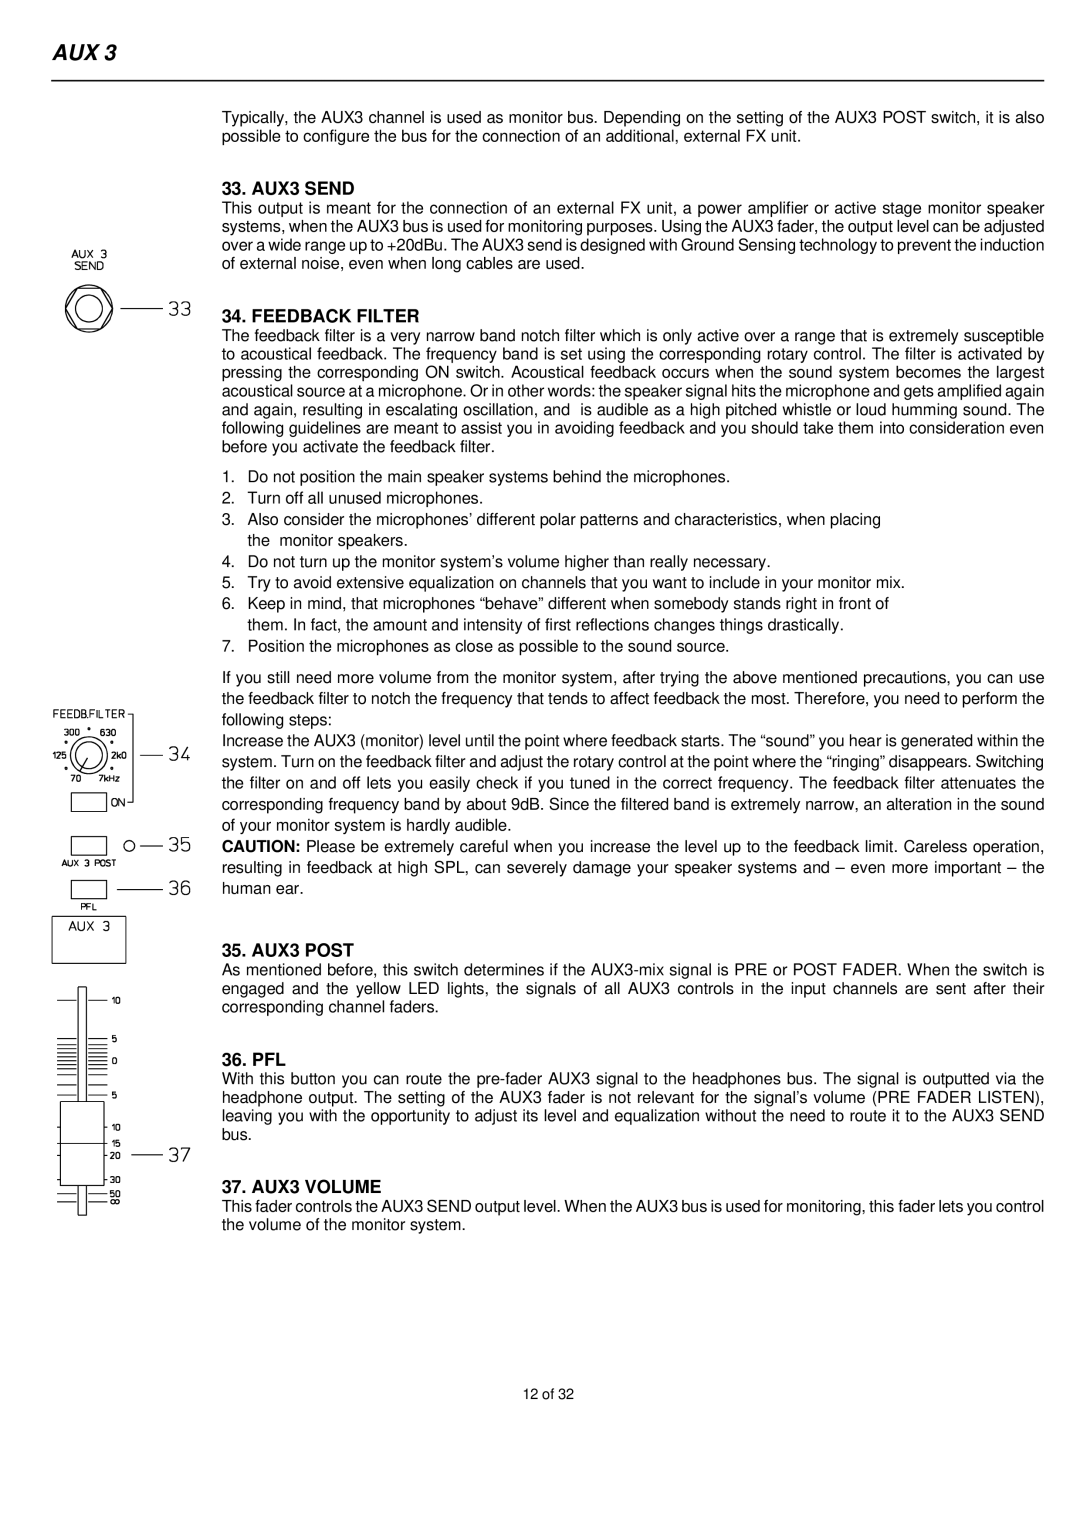
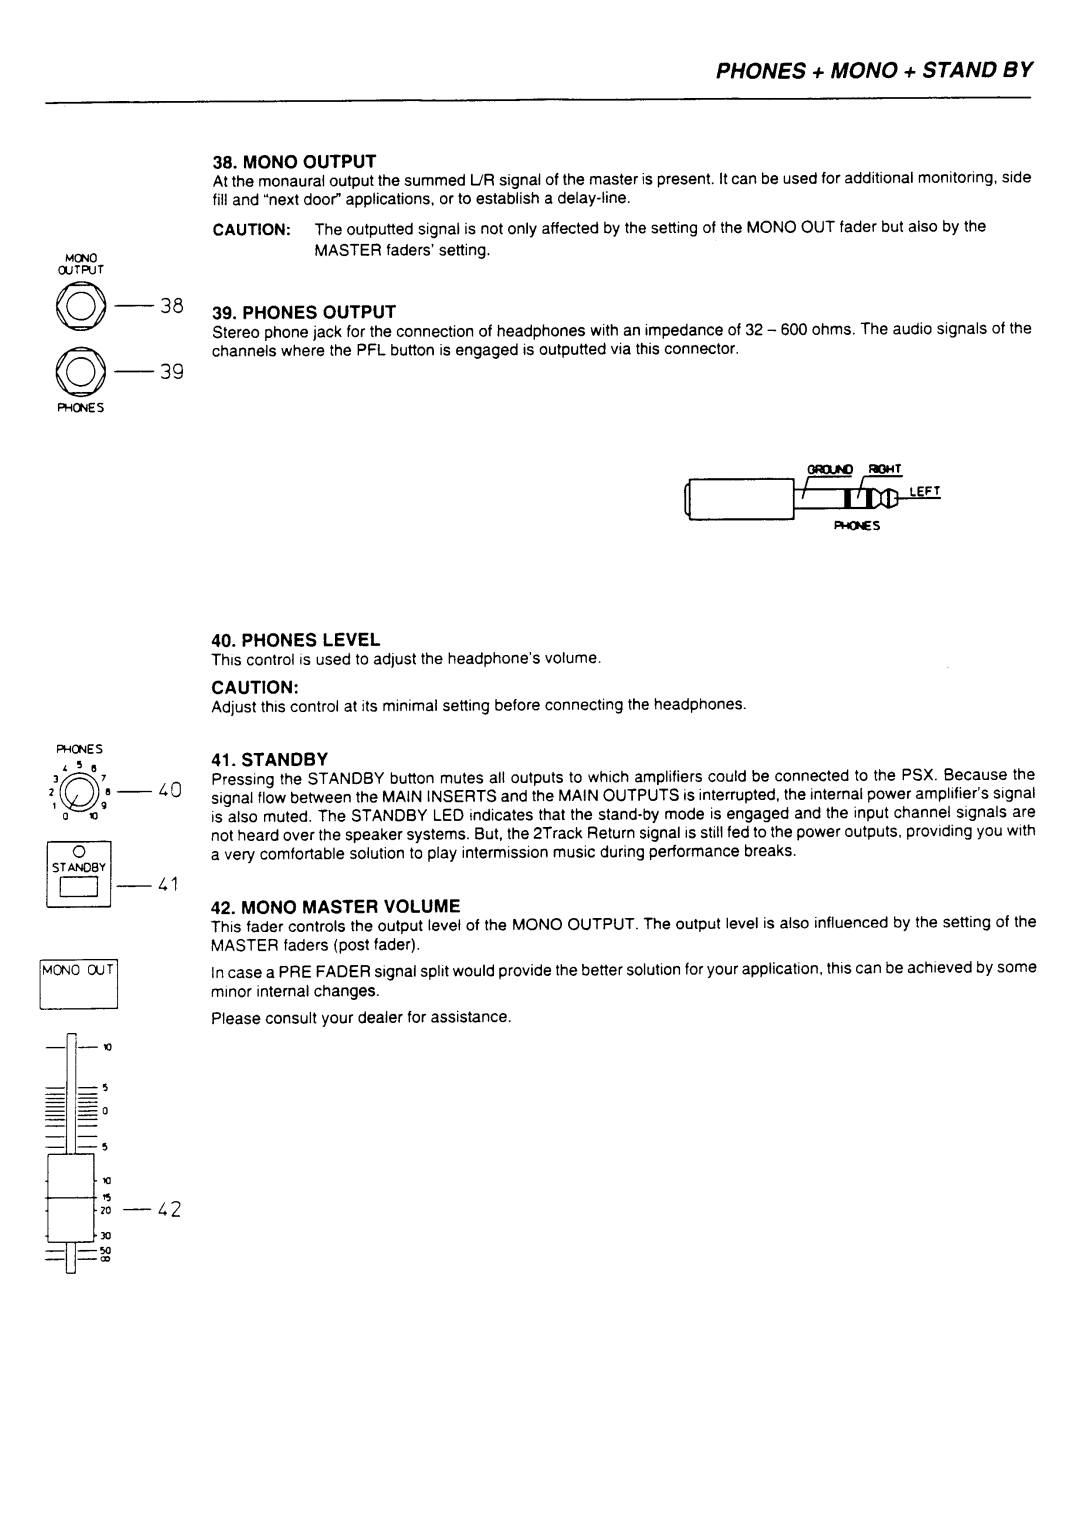
Electro-Voice PSX2200, PSX1000, PSX1600 Aux, Pan, Pfl, Signal present / Peak indicator, Volume

Page 7

INPUT/MONO

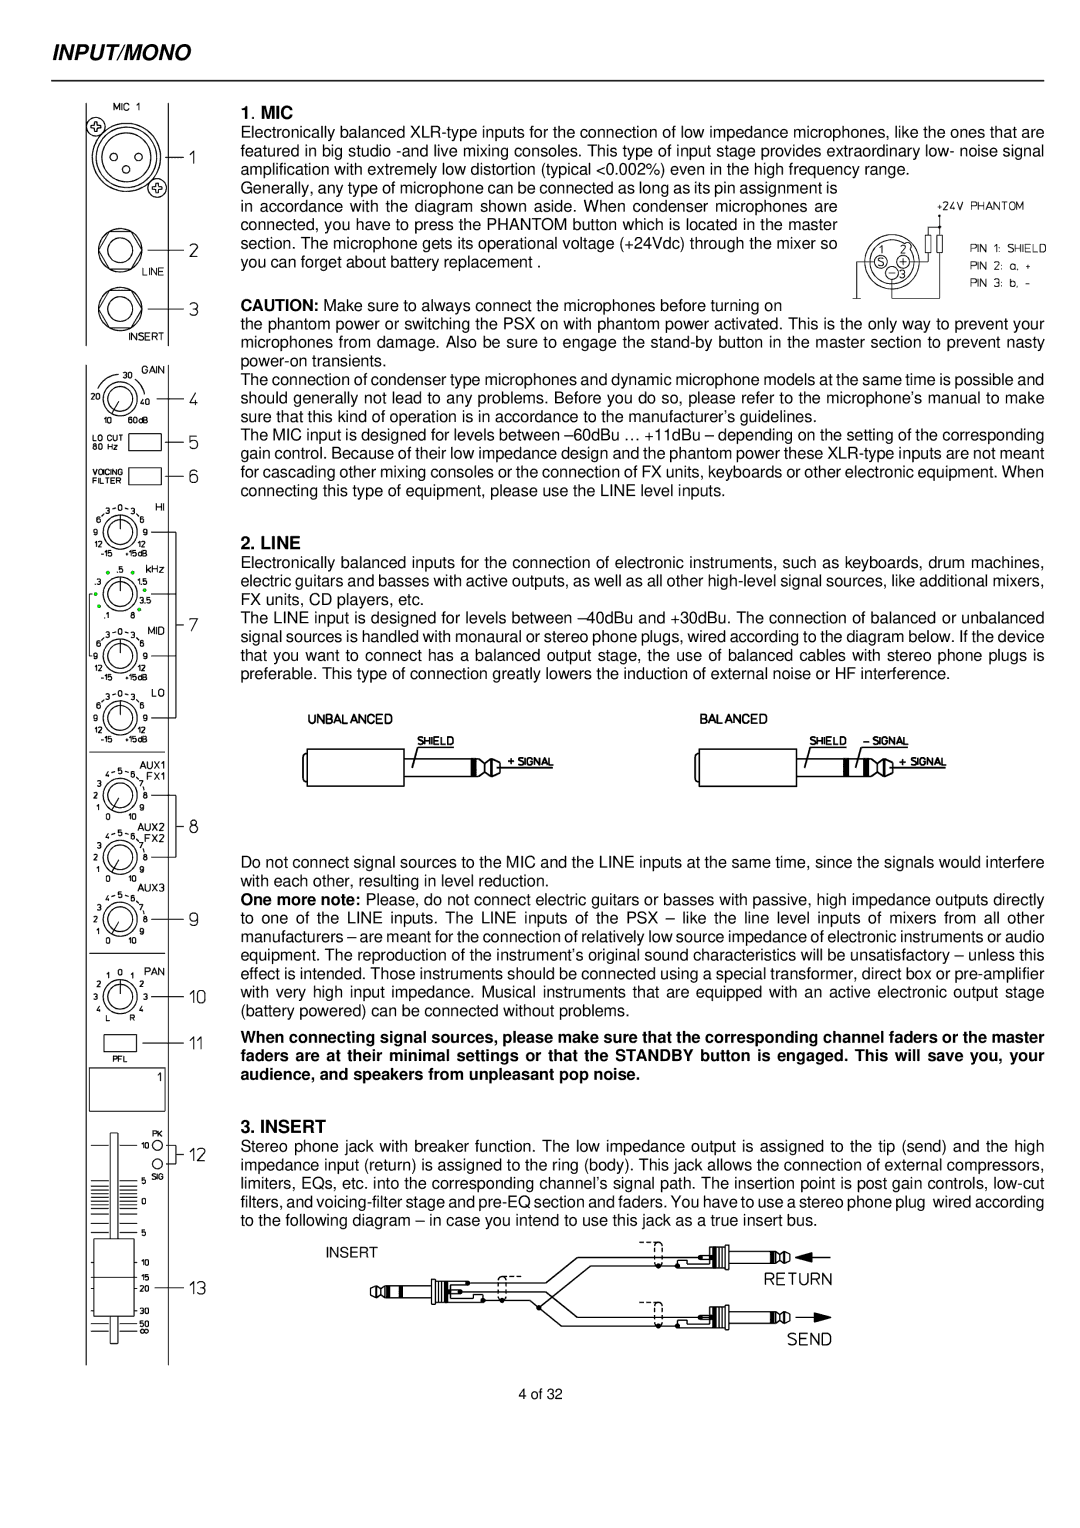
9. AUX 3

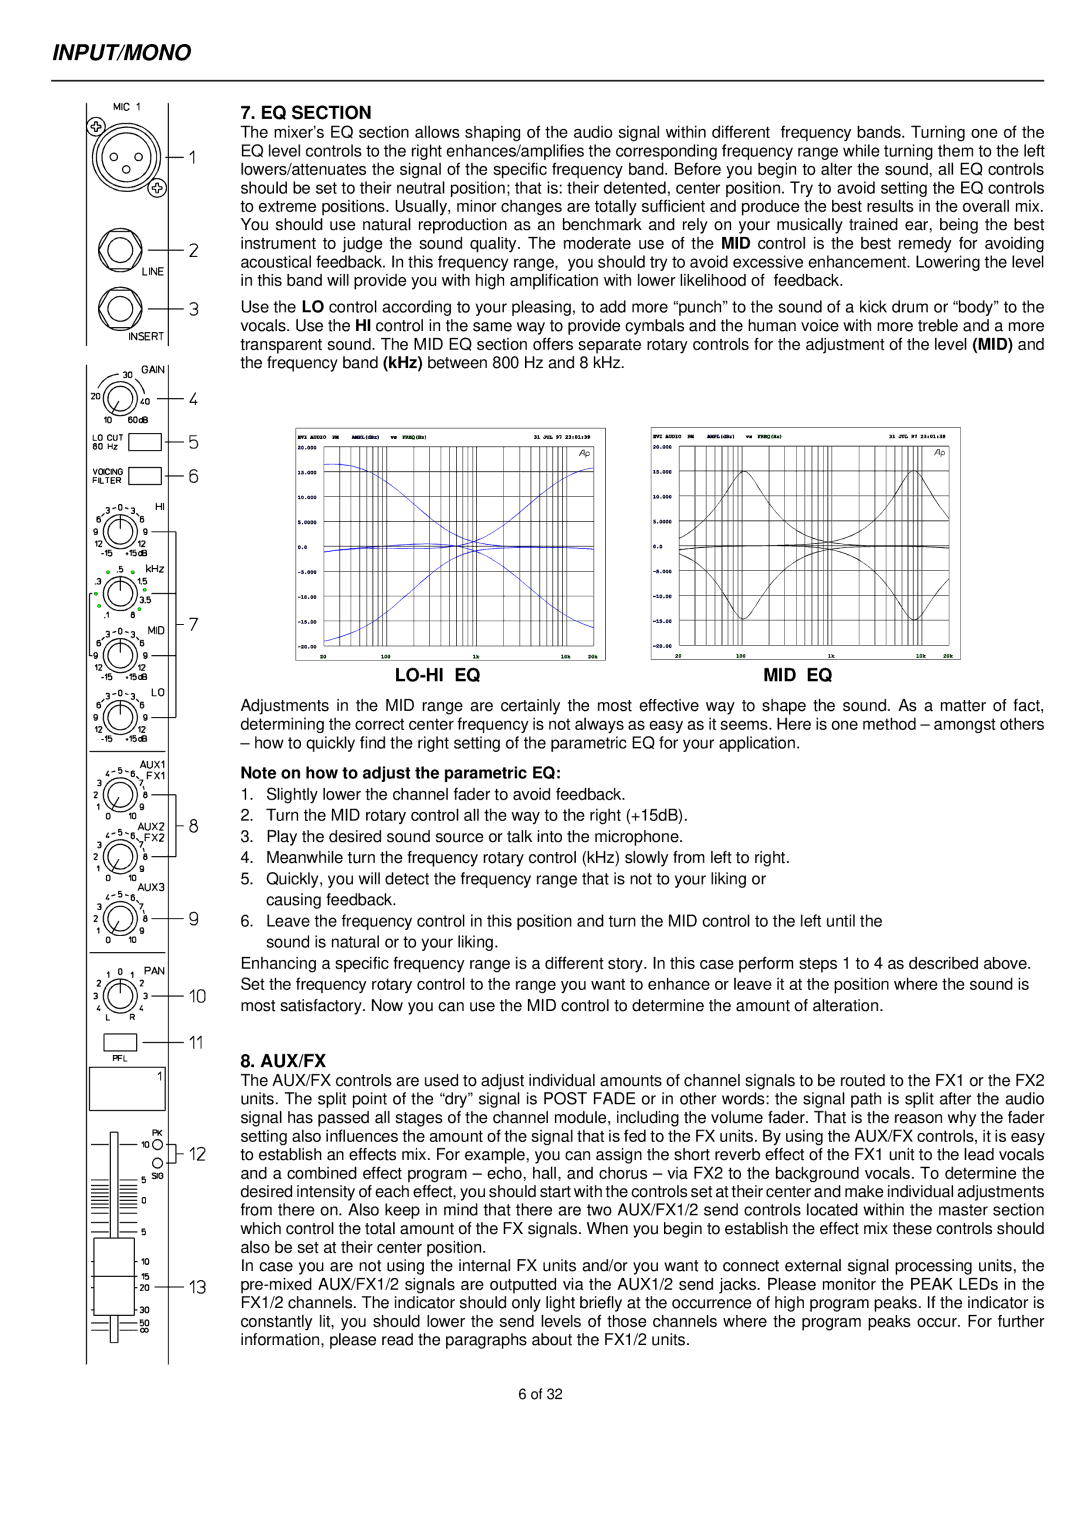
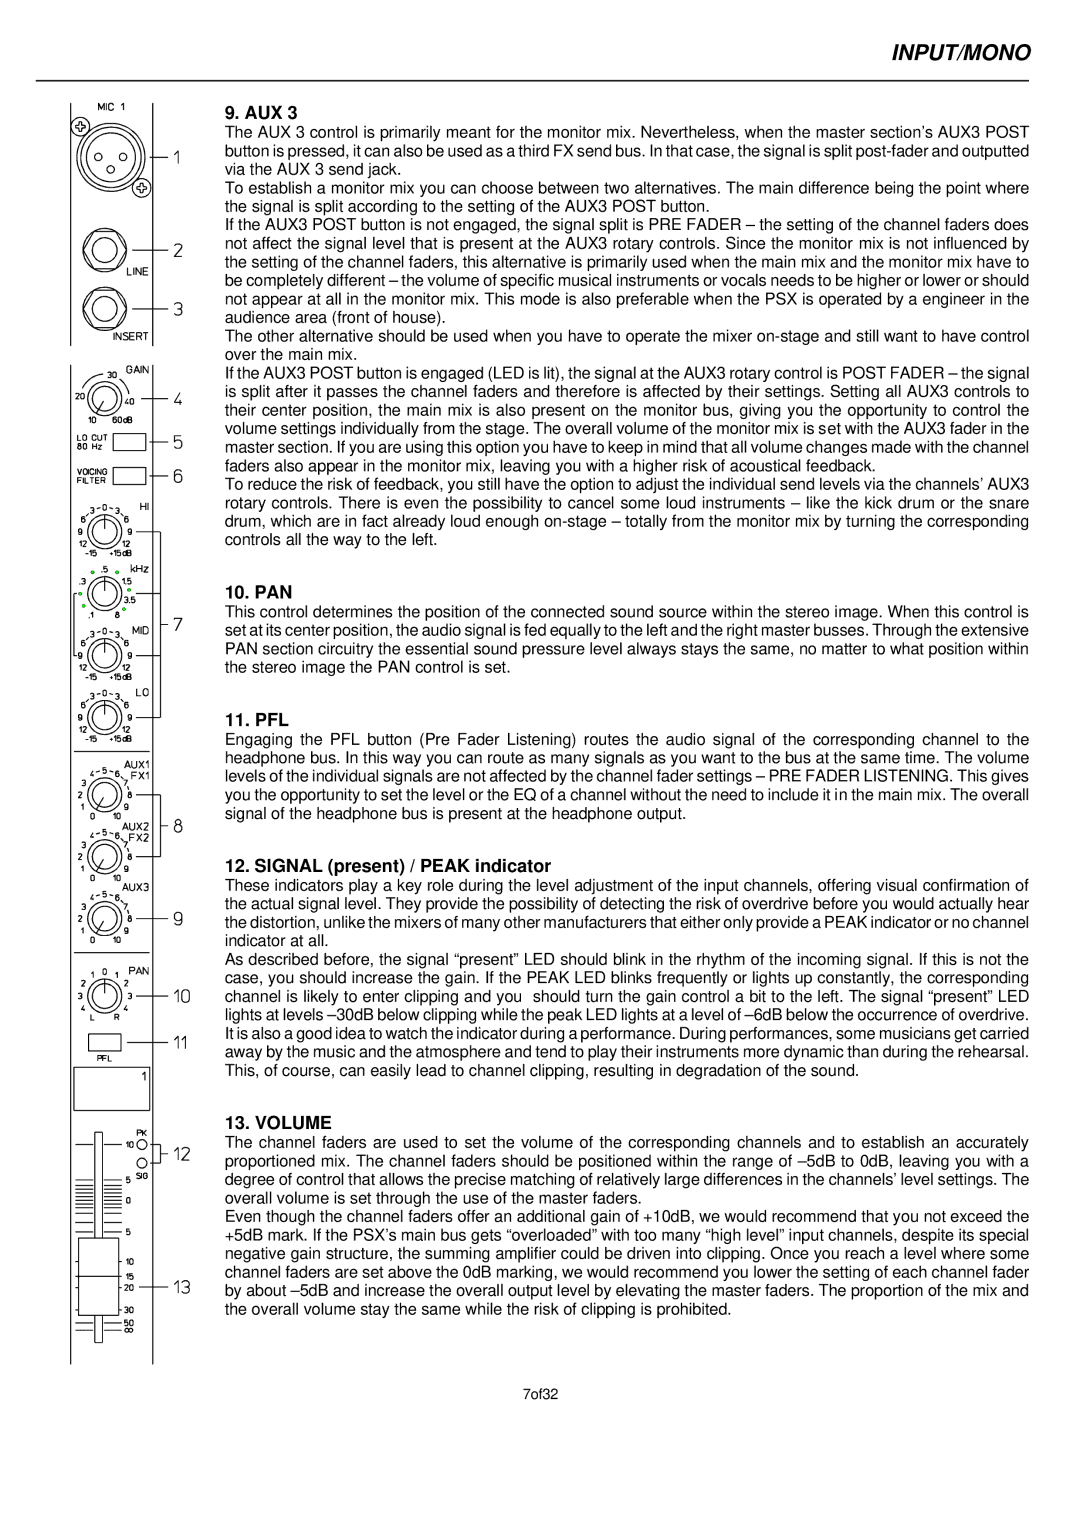
The AUX 3 control is primarily meant for the monitor mix. Nevertheless, when the master section’s AUX3 POST button is pressed, it can also be used as a third FX send bus. In that case, the signal is split post-fader and outputted via the AUX 3 send jack.

To establish a monitor mix you can choose between two alternatives. The main difference being the point where the signal is split according to the setting of the AUX3 POST button.

If the AUX3 POST button is not engaged, the signal split is PRE FADER – the setting of the channel faders does not affect the signal level that is present at the AUX3 rotary controls. Since the monitor mix is not influenced by the setting of the channel faders, this alternative is primarily used when the main mix and the monitor mix have to be completely different – the volume of specific musical instruments or vocals needs to be higher or lower or should not appear at all in the monitor mix. This mode is also preferable when the PSX is operated by a engineer in the audience area (front of house).

The other alternative should be used when you have to operate the mixer on-stage and still want to have control over the main mix.

If the AUX3 POST button is engaged (LED is lit), the signal at the AUX3 rotary control is POST FADER – the signal is split after it passes the channel faders and therefore is affected by their settings. Setting all AUX3 controls to their center position, the main mix is also present on the monitor bus, giving you the opportunity to control the volume settings individually from the stage. The overall volume of the monitor mix is set with the AUX3 fader in the master section. If you are using this option you have to keep in mind that all volume changes made with the channel faders also appear in the monitor mix, leaving you with a higher risk of acoustical feedback.

To reduce the risk of feedback, you still have the option to adjust the individual send levels via the channels’ AUX3 rotary controls. There is even the possibility to cancel some loud instruments – like the kick drum or the snare drum, which are in fact already loud enough on-stage – totally from the monitor mix by turning the corresponding controls all the way to the left.

10. PAN

This control determines the position of the connected sound source within the stereo image. When this control is set at its center position, the audio signal is fed equally to the left and the right master busses. Through the extensive PAN section circuitry the essential sound pressure level always stays the same, no matter to what position within the stereo image the PAN control is set.

11. PFL

Engaging the PFL button (Pre Fader Listening) routes the audio signal of the corresponding channel to the headphone bus. In this way you can route as many signals as you want to the bus at the same time. The volume levels of the individual signals are not affected by the channel fader settings – PRE FADER LISTENING. This gives you the opportunity to set the level or the EQ of a channel without the need to include it in the main mix. The overall signal of the headphone bus is present at the headphone output.

12. SIGNAL (present) / PEAK indicator

These indicators play a key role during the level adjustment of the input channels, offering visual confirmation of the actual signal level. They provide the possibility of detecting the risk of overdrive before you would actually hear the distortion, unlike the mixers of many other manufacturers that either only provide a PEAK indicator or no channel indicator at all.

As described before, the signal “present” LED should blink in the rhythm of the incoming signal. If this is not the case, you should increase the gain. If the PEAK LED blinks frequently or lights up constantly, the corresponding channel is likely to enter clipping and you should turn the gain control a bit to the left. The signal “present” LED lights at levels –30dB below clipping while the peak LED lights at a level of –6dB below the occurrence of overdrive. It is also a good idea to watch the indicator during a performance. During performances, some musicians get carried away by the music and the atmosphere and tend to play their instruments more dynamic than during the rehearsal. This, of course, can easily lead to channel clipping, resulting in degradation of the sound.

13. VOLUME

The channel faders are used to set the volume of the corresponding channels and to establish an accurately proportioned mix. The channel faders should be positioned within the range of –5dB to 0dB, leaving you with a degree of control that allows the precise matching of relatively large differences in the channels’ level settings. The overall volume is set through the use of the master faders.

Even though the channel faders offer an additional gain of +10dB, we would recommend that you not exceed the +5dB mark. If the PSX’s main bus gets “overloaded” with too many “high level” input channels, despite its special negative gain structure, the summing amplifier could be driven into clipping. Once you reach a level where some channel faders are set above the 0dB marking, we would recommend you lower the setting of each channel fader by about –5dB and increase the overall output level by elevating the master faders. The proportion of the mix and the overall volume stay the same while the risk of clipping is prohibited.

7of32

Image 7
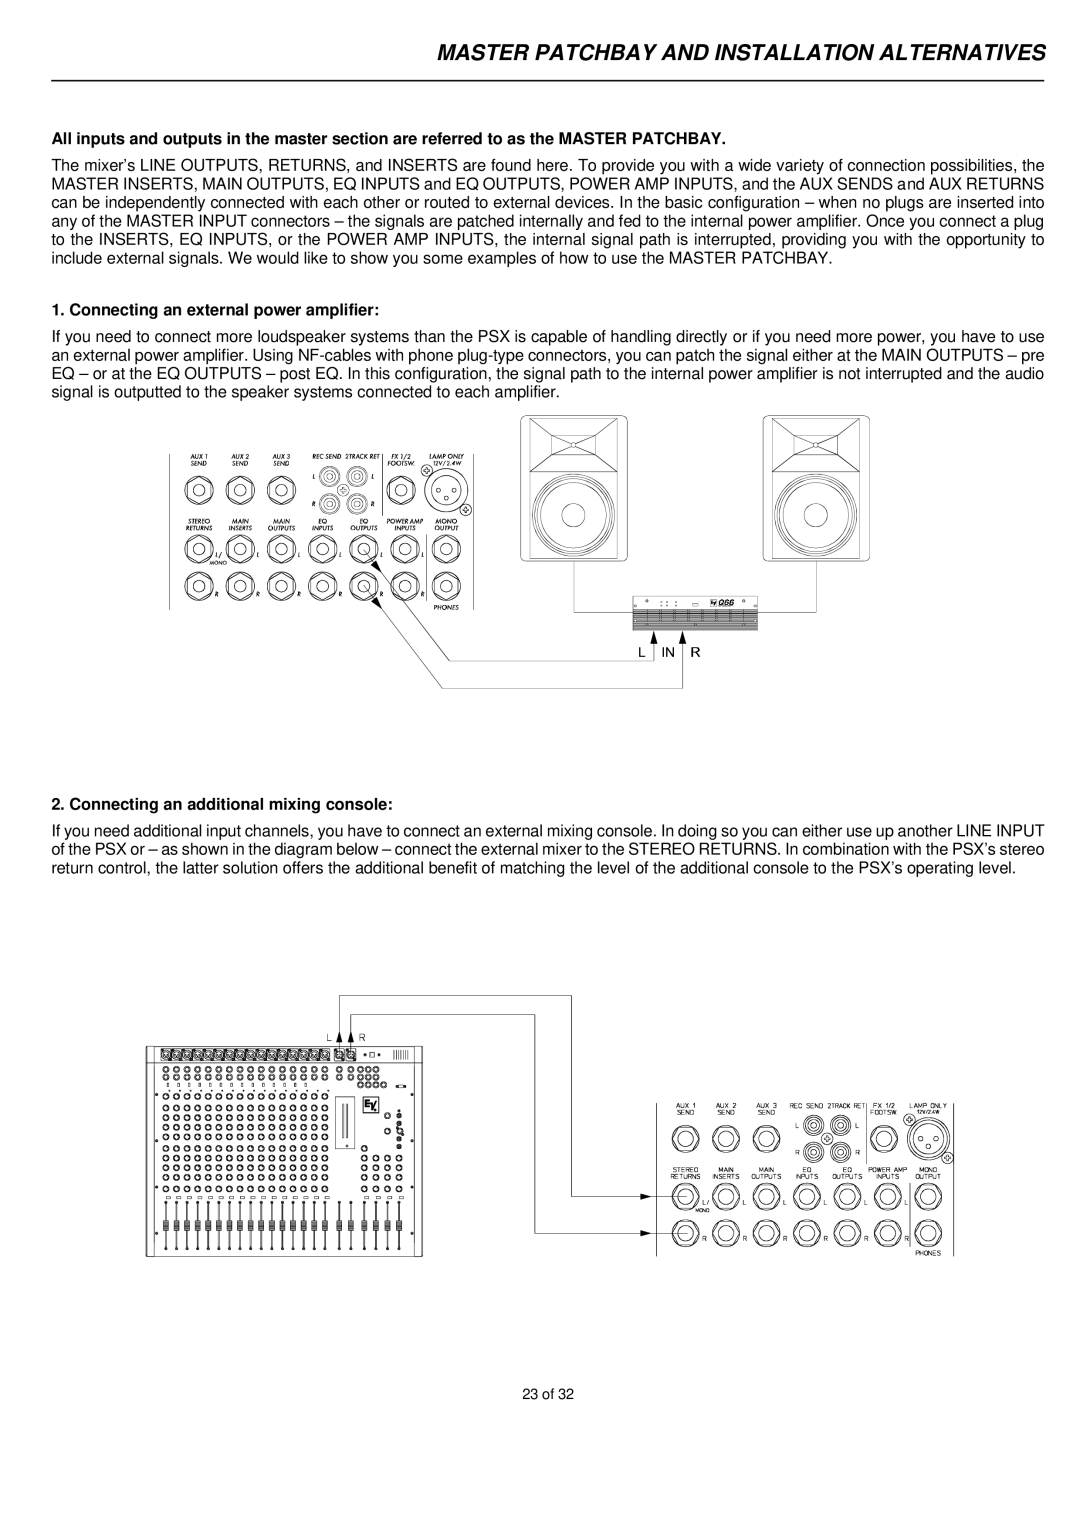
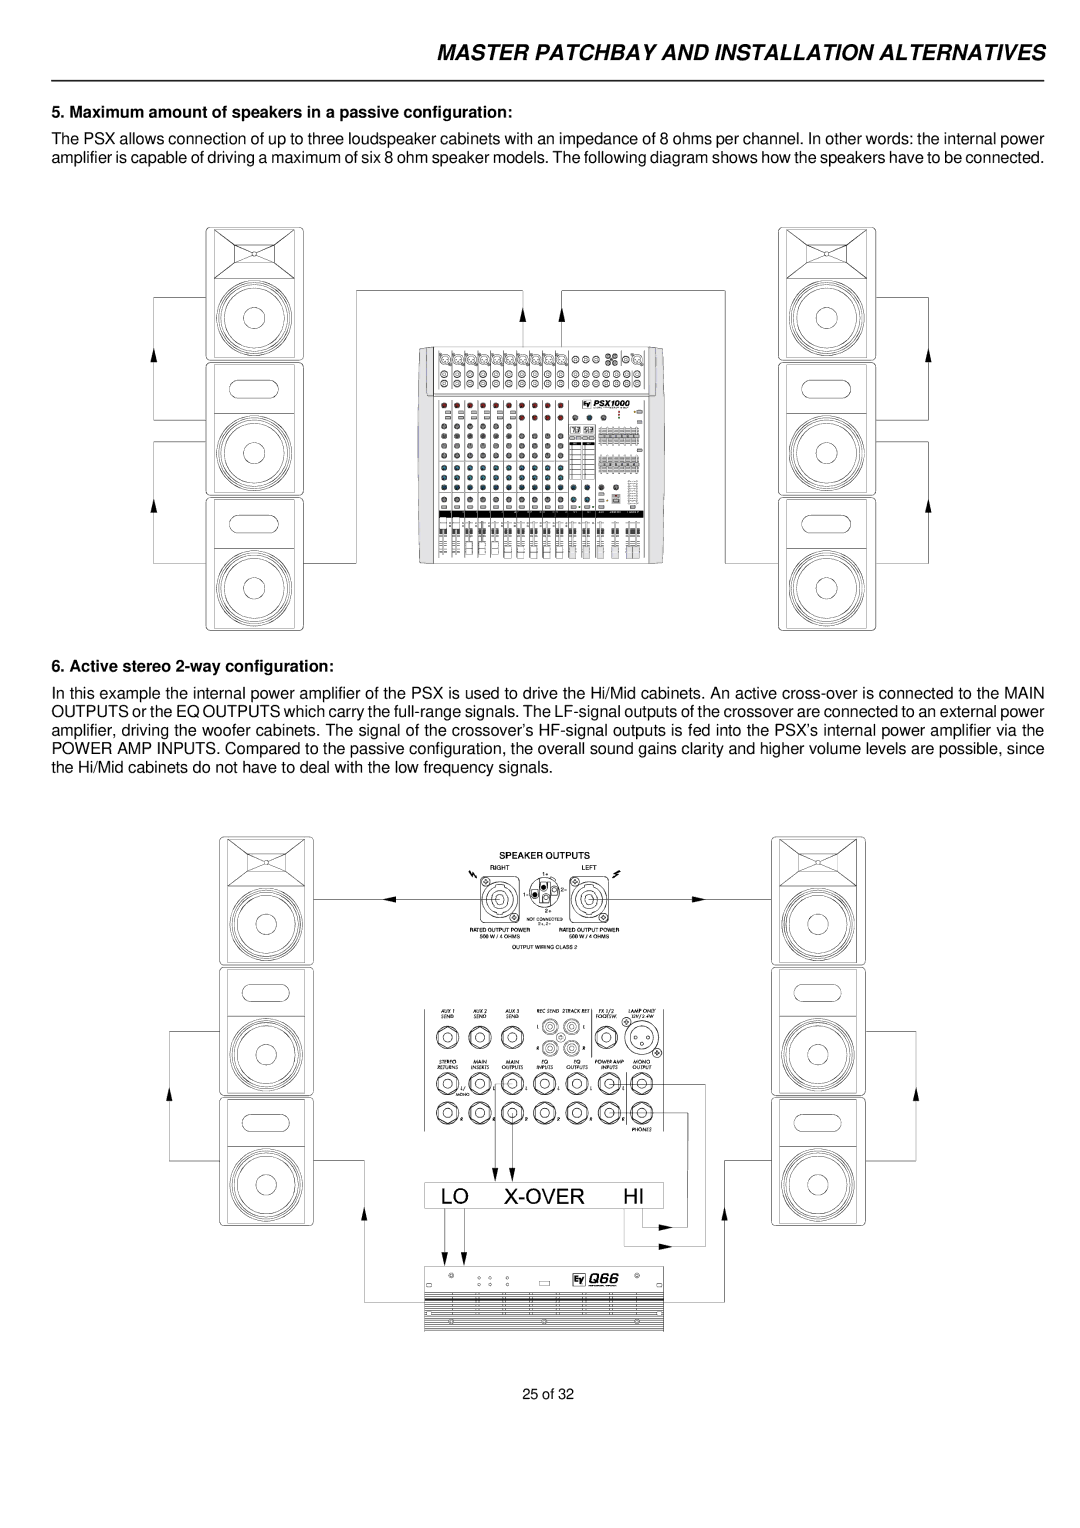
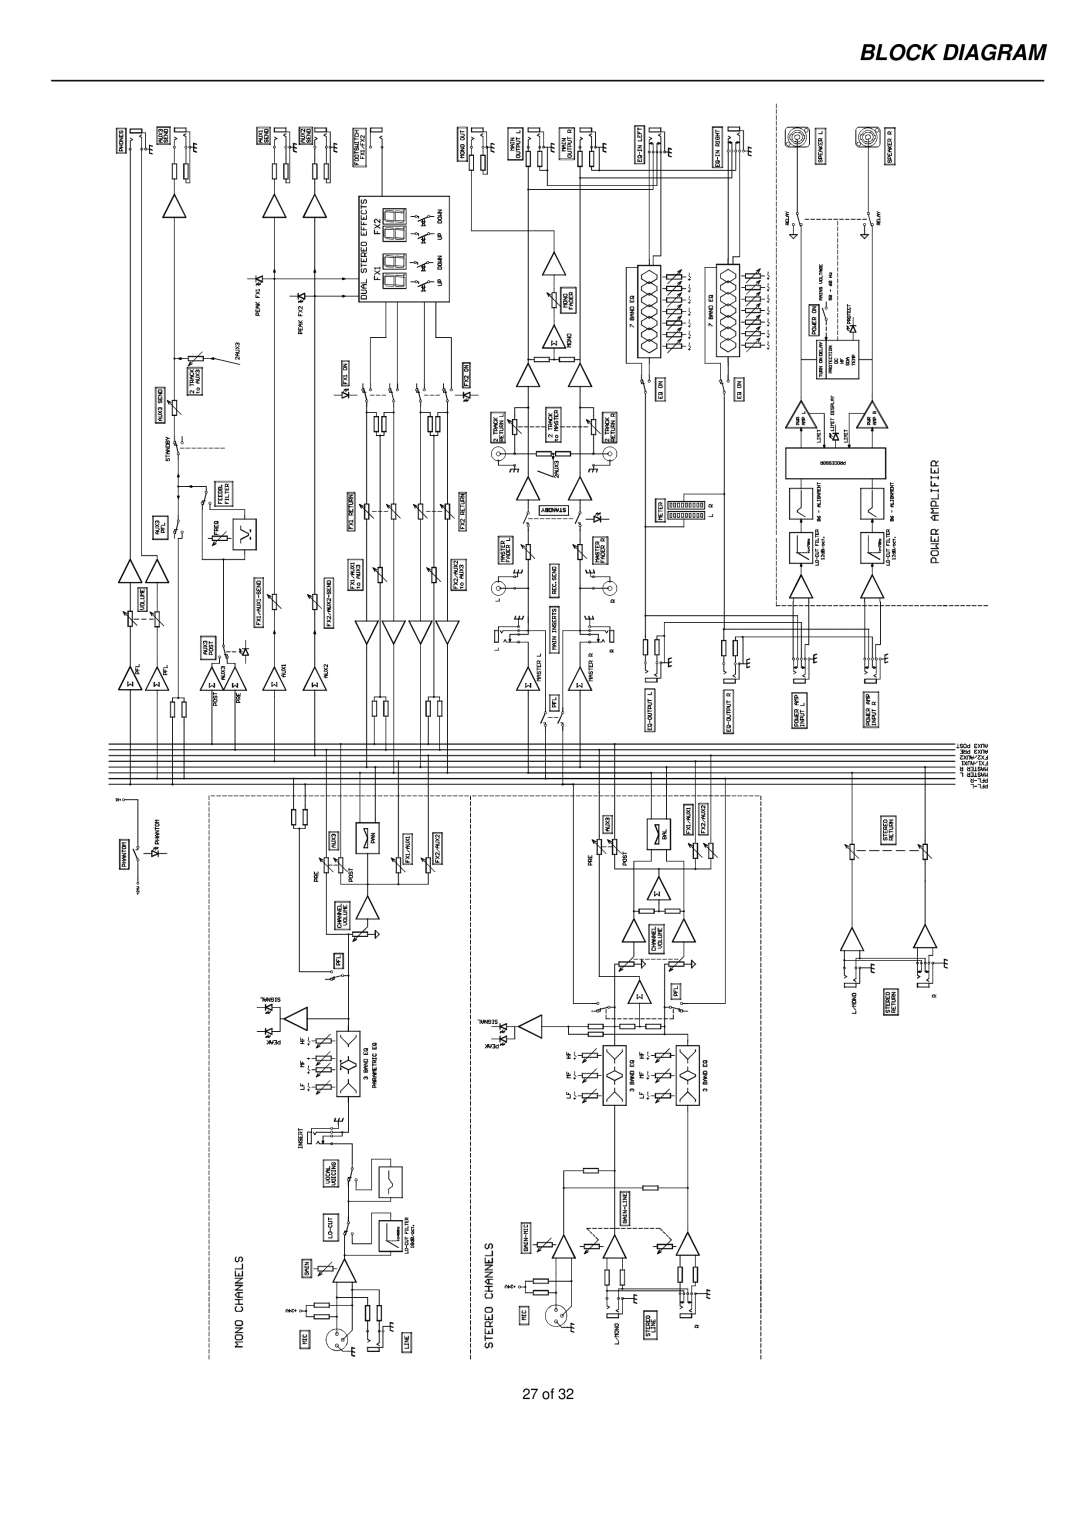
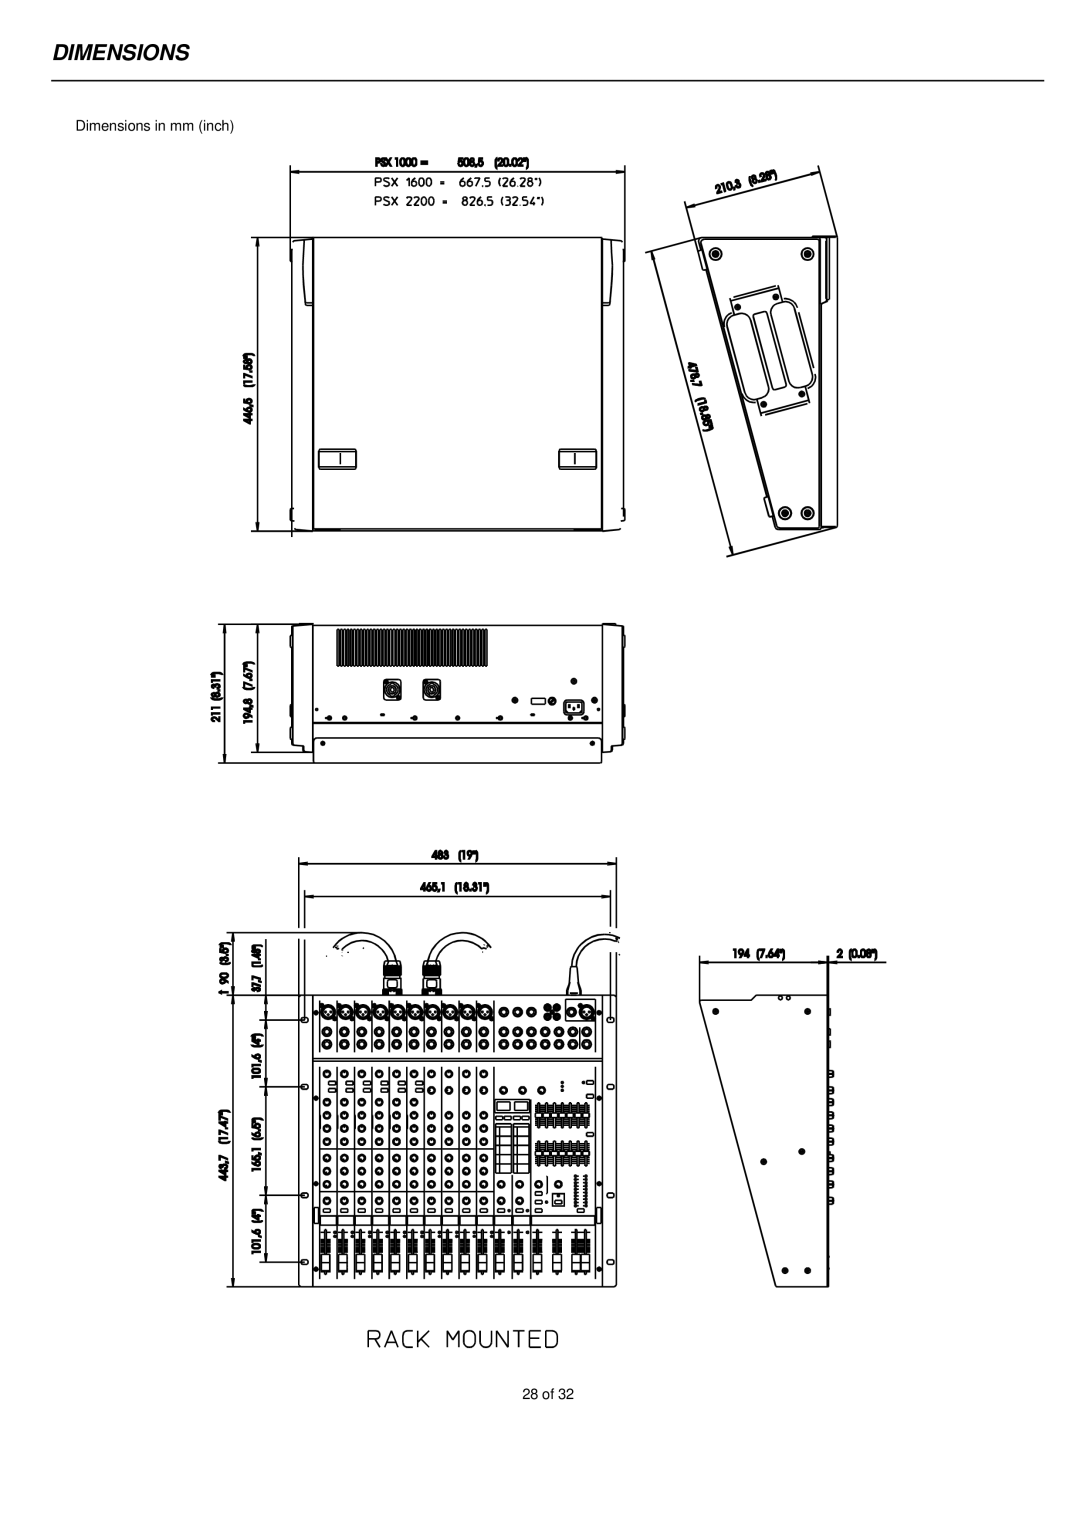
Contents Stereo Powered Mixer Important Safety Instructions Introduction Unpacking and Warranty Installation and ConnectionsInsert INPUT/MONOMIC LineLO CUT 80 Hz GainVoicing Filter LO-HI EQ MID EQ EQ SectionAUX/FX PAN Signal present / Peak indicatorVolume AUXLine Trim INPUT/STEREOStereo Input L/MONO R Gain MICAUX/FX AUX3 SIGNAL/PEAKBAL AUX/FX Send Effect 1/2FX1/FX2 DisplayPeak LED FX onEffect Return Feedback Filter AUX3 VolumeAUX AUX3 SendPage Page Main Outputs Power AMP InputsMaster Main InsertsPhantom Power Power AMP Status indicatorsBand Equalizer Master L + R Power AmplifierMaster LED-DISPLAY PFL MasterPage LF-CABLES Balanced or UNBALANCED? Standard InstallationCabling Speaker CablesPSX Setting upSound Check Main MIX Connecting an external power amplifier Master Patchbay and Installation AlternativesConnecting an additional mixing console Monaural sound reinforcement with monitoring Active stereo 2-way configuration Maximum amount of speakers in a passive configurationSpecifications Block Diagram Dimensions Warranty Limited

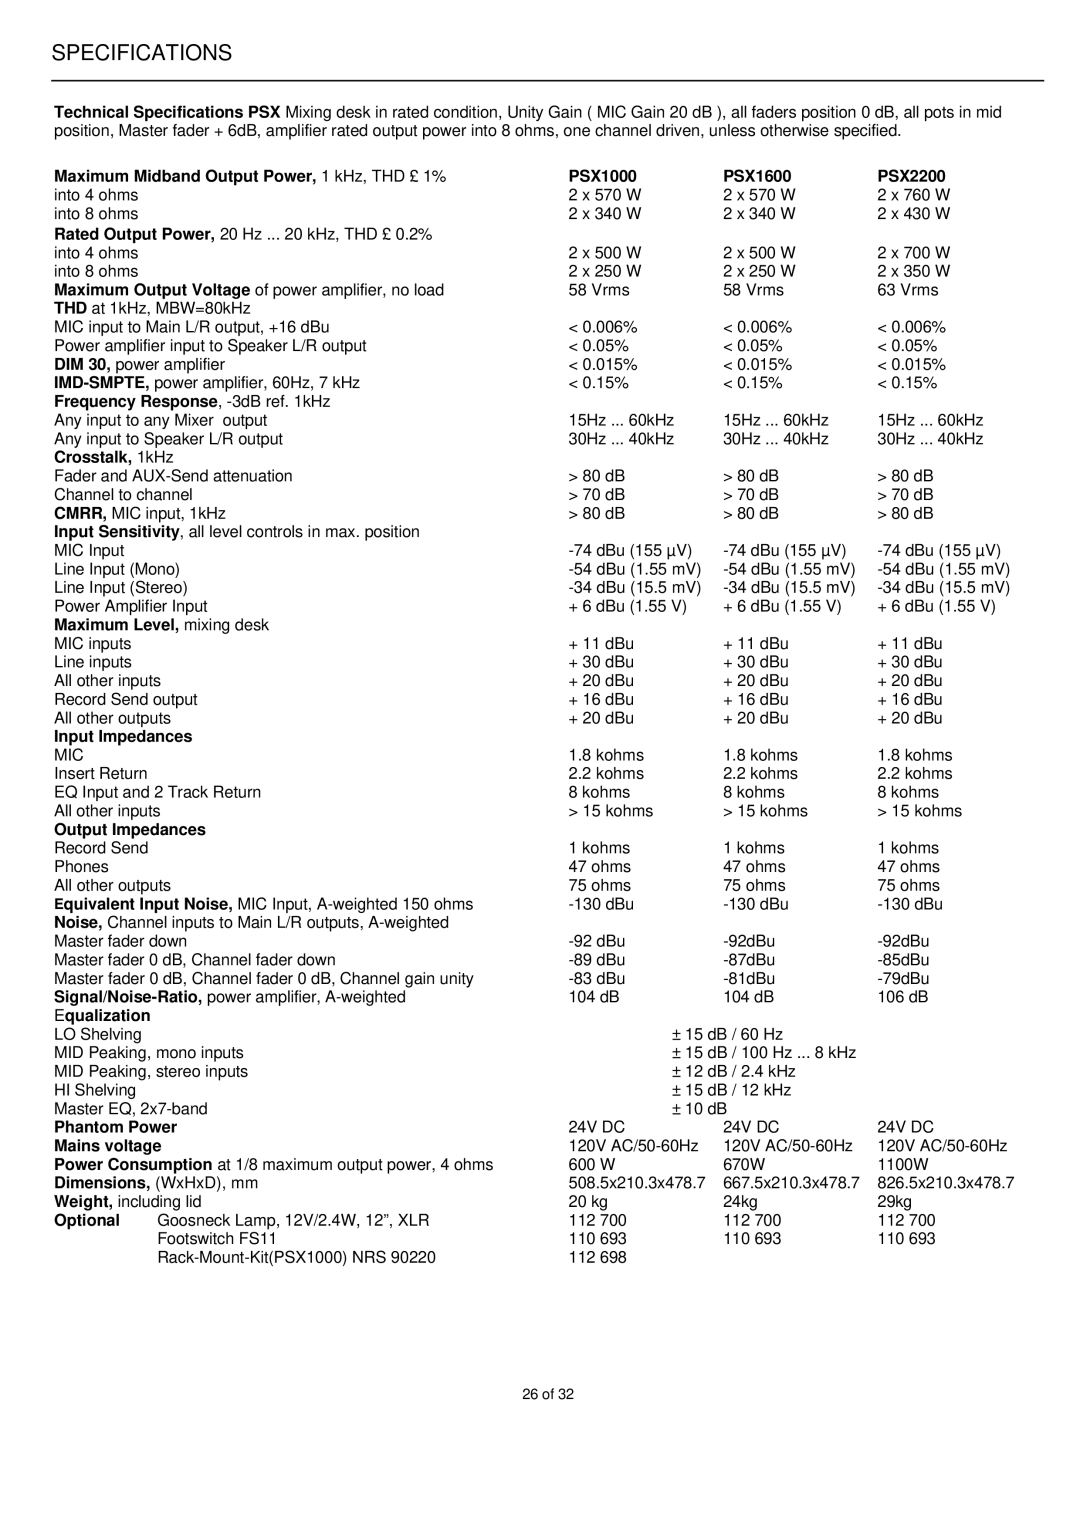
PSX1600, PSX1000, PSX2200 specifications

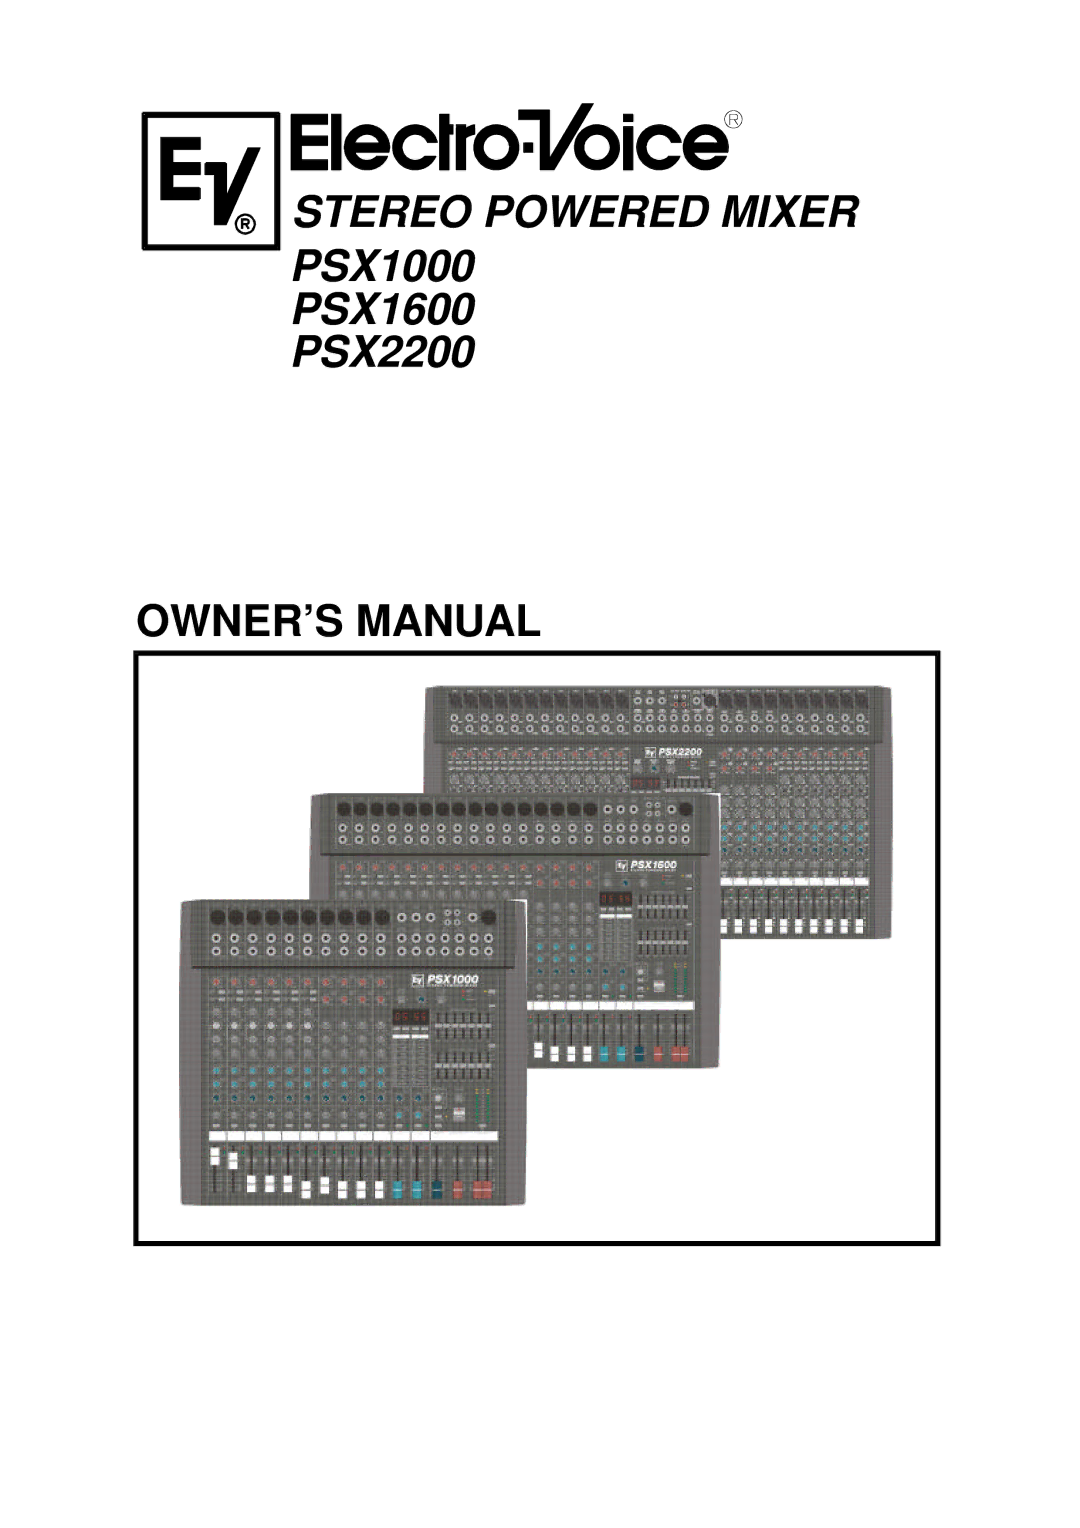
Electro-Voice, a prominent name in professional audio equipment, has developed a series of high-performance power amplifiers known as the PSX series, which includes the PSX2200, PSX1000, and PSX1600 models. These amplifiers are engineered to deliver exceptional power, clarity, and reliability, making them suitable for a variety of applications such as live sound, installations, and portable use.

The PSX2200 is the most powerful model in the PSX lineup, offering a robust output of 2,200 watts at 4 ohms. This amplifier is designed to handle demanding audio environments, providing headroom and performance necessary for large audiences. One of its key features is the Peak х-Over Limiting technology, which ensures that the amplifier delivers maximum power without distortion during peak performance. Additionally, the PSX2200 is equipped with built-in high-pass and low-pass filters, allowing users to tailor the sound to their specific needs.

The PSX1000 represents a mid-range option that still packs a punch, delivering 1,000 watts at 4 ohms. It is designed for versatility, making it ideal for a range of sound reinforcement applications. One standout feature of the PSX1000 is its Intelligent Clip Limiting system, which automatically adjusts the input signal to prevent clipping and maintain audio clarity. Moreover, the amplifier features a rugged chassis and intuitive interface, which enhances both durability and ease of use in various settings.

The PSX1600 serves as a bridge between the PSX1000 and PSX2200, offering 1,600 watts at 4 ohms. It incorporates advanced thermal management technology, ensuring stable performance even under demanding conditions. The PSX1600 is engineered for reliability, featuring extensive protection circuitry that safeguards against issues like over-temperature, short circuits, and signal overloads. This amplifier is particularly favored for its ability to maintain sound quality during prolonged use.

All three models in the PSX series share common characteristics such as a lightweight design, durable construction, and efficient power supply systems, making them highly portable and easy to integrate into existing sound systems. The PSX amplifiers are also equipped with comprehensive monitoring capabilities, including LED indicators that provide visual feedback on power and operational status.

In summary, the Electro-Voice PSX2200, PSX1000, and PSX1600 represent a powerful trio of amplifiers that offer versatility and reliability for professional audio applications. With their advanced technologies, user-friendly features, and impressive performance specifications, these amplifiers are well-suited to meet the demands of sound engineers and audio professionals alike.