
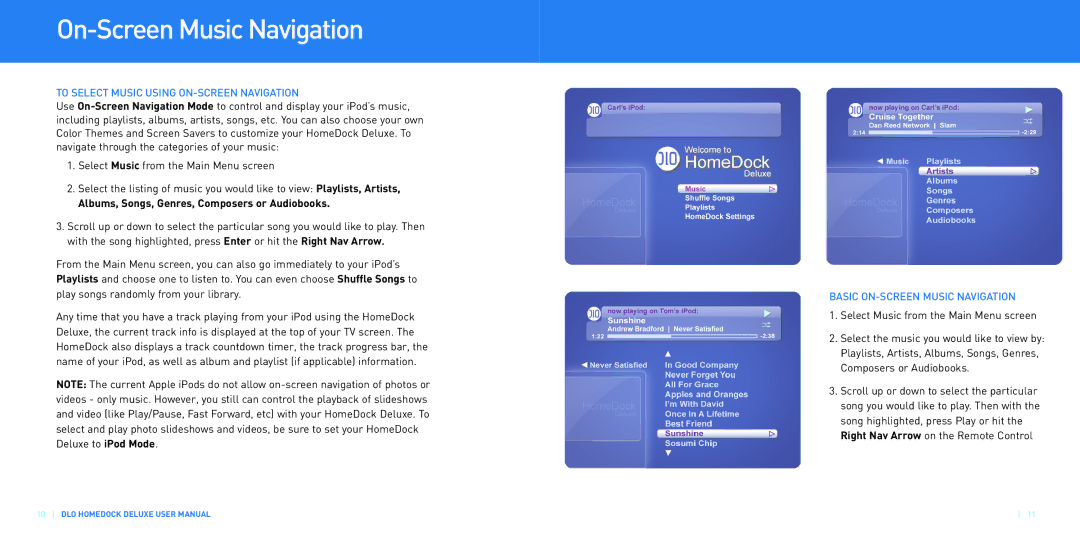


Setting Up HomeDock Deluxe
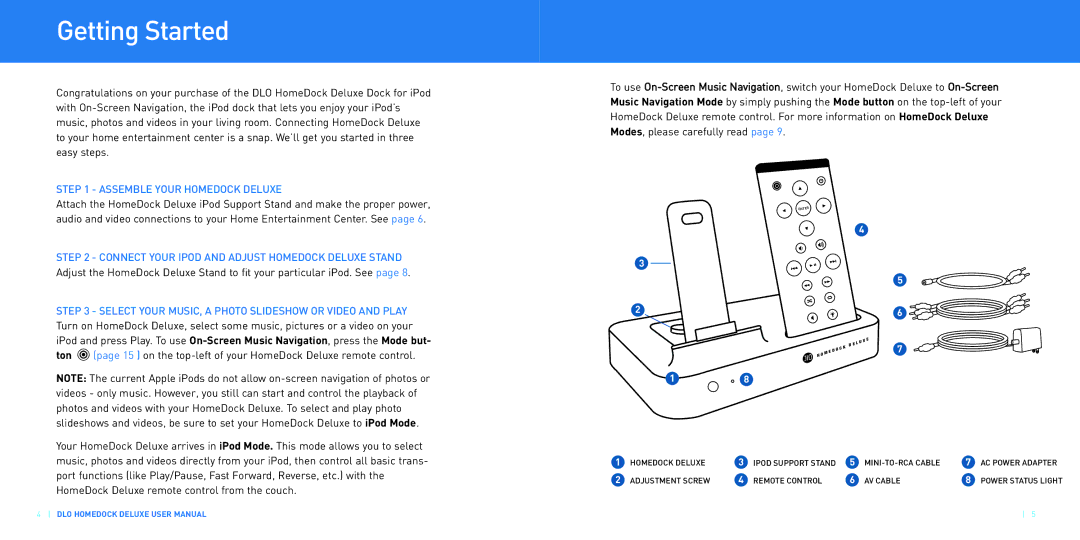
ASSEMBLING YOUR DLO HOMEDOCK DELUXE
1.Remove the adjustment screw on top of the Dock
2.Fit the iPod Support Stand into the cavity on top of the HomeDock Deluxe. NOTE: Be sure to line up the Support Stand’s cutout slot with the adjust- ment screw on the Dock.
3.Tighten the Support Stand’s adjustment screw to secure the Stand in place. Do not
CONNECTING HOMEDOCK DELUXE
There are several different ways you can connect HomeDock Deluxe to your existing Home Entertainment Center. Generally we recommend you connect the L and R Audio Out to your stereo directly, and Video Out directly to your TV. But it’s perfectly fine to connect Audio and Video to your TV. HomeDock Deluxe works great connected solely to your home stereo, although you wouldn’t be able to use
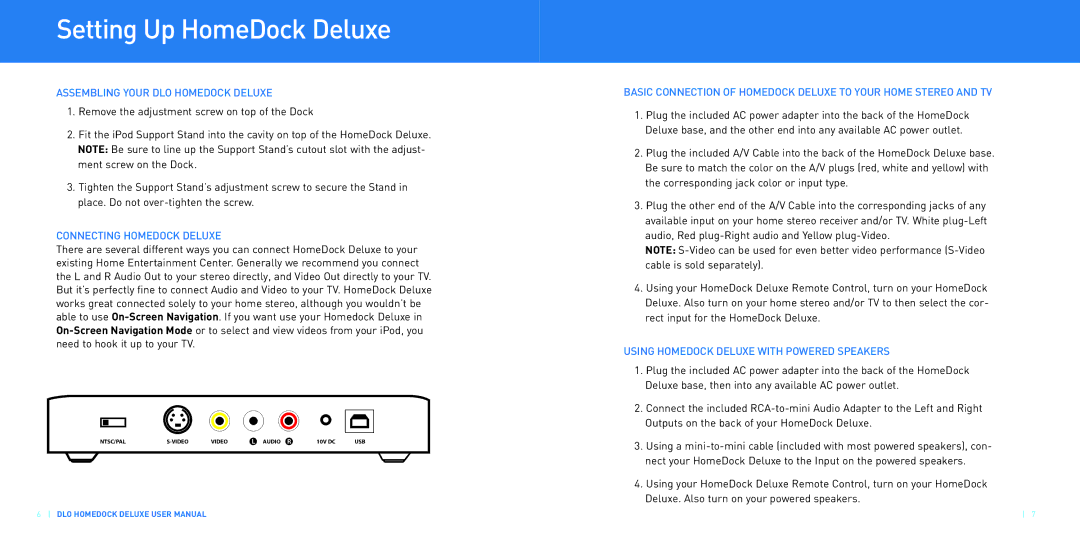
TSC/PALN | S | VIDEO | AUDIO | 10V DC | USB |
6DLO HOMEDOCK DELUXE USER MANUAL
BASIC CONNECTION OF HOMEDOCK DELUXE TO YOUR HOME STEREO AND TV
1.Plug the included AC power adapter into the back of the HomeDock Deluxe base, and the other end into any available AC power outlet.
2.Plug the included A/V Cable into the back of the HomeDock Deluxe base. Be sure to match the color on the A/V plugs (red, white and yellow) with the corresponding jack color or input type.
3.Plug the other end of the A/V Cable into the corresponding jacks of any available input on your home stereo receiver and/or TV. White
NOTE:
4.Using your HomeDock Deluxe Remote Control, turn on your HomeDock Deluxe. Also turn on your home stereo and/or TV to then select the cor- rect input for the HomeDock Deluxe.
USING HOMEDOCK DELUXE WITH POWERED SPEAKERS
1.Plug the included AC power adapter into the back of the HomeDock Deluxe base, then into any available AC power outlet.
2.Connect the included
3.Using a
4.Using your HomeDock Deluxe Remote Control, turn on your HomeDock Deluxe. Also turn on your powered speakers.
7