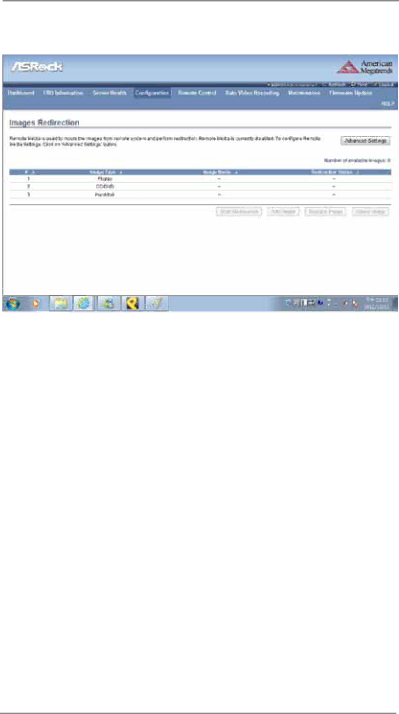
ASRock E3C224 manual Images Redirection, Start/Stop Redirection, Add Image, Replace Image

Page 16

2.5.4 Images Redirection

The displayed table shows configured images on BMC. You can add or replace the images from here to the remote media. Only one image can be configured for each image type. To configure the image, You need to enable Remote Media support using ‘Advanced Settings’. To add or replace an image, you must have Administrator Privileges.

NOTE: Free slots are denoted by “~”.

Start/Stop Redirection

Select a configured slot and click ‘Start Redirection’ to start the remote media redirection. It is a toggle button, if the image is successfully redirected, then click the ‘Stop Redirection’ button to stop the remote media redirection.

Add Image

Select a free slot and click ‘Add Image’ to configure a new image to the device. Alternatively, double click on a free slot to add an image.

Replace Image

Select a configured slot and click ‘Replace Image’ to replace the existing image. Alternatively, double click on the configured slot.

16

Image 16
Contents Ipmi Configuration Guide Introduction of Megarac SP Login Megarac SP GUI OverviewDashboard Event Logs Field Replaceable Unit FRU Basic InformationChassis Information Board InformationProduct Information Server Health Sensor ReadingsLive Widget View this Event LogEvent Log BMC TimezoneClient Timezone UTC OffsetSystem Log System and Audit LogAudit Log Configuration Active Directory SettingsAdvanced Settings Add Role GroupDelete Role Group DNS Server Settings Host configuration Host SettingsDomain Name Configuration Domain Settings Host NameDomain Name Server Configuration DNS Server Settings ResetDomain Name IP PrioritySystem Event Log Current Event Log PolicyLinear Event Log Policy Circular Event Log PolicyImages Redirection Start/Stop RedirectionAdd Image Replace ImageDelete Image LDAP/E-Directory Settings Delete Role Group Mouse Mode Settings Relative Mouse modeAbsolute Mouse mode Other Mouse modeClick ‘Save’ to save any changes made Network Settings LAN SettingsIPv4 Configuration IPv4 Address, Subnet Mask, Default GatewayIPv6 Configuration IPv6 SettingsDefault Gateway Vlan ConfigurationReset Network Bonding Configuration Default InterfacesAuto Configuration Network BondingClick Save to save the current changes Network Link Configuration Duplex ModeAuto Negotiation Link SpeedClick ‘Save’ to save the settings NTP Settings DateTime NTP ServerAutomatically synchronize RefreshPAM Ordering PAM ModuleMove Up Move DownReset PEF Management Event FilterAlert Policy LAN DestinationSend Test Alert AddModify DeleteRadius Settings Radius AuthenticationPort Time OutSecret Configure Remote Session Virtual Media Attach ModeServices Smtp Settings LAN Channel NumberSender Address Machine NameSmtp Server requires Authentication PasswordUsername Secondary Smtp ServerClick ‘Save’ to save the new Smtp server configuration SSL Certificate Configuration Current CertificateNew Certificate Current Privacy KeyPage System and Audit Log Settings Log TypeFile Size Rotate CountCheck the option Enable to enable audit log User Management Add UserModify User Delete UserVirtual Media Devices Floppy devicesCD/DVD devices Hard disk devicesConsole Redirection Remote ControlJava Console Power Control and Status Reset ServerPower Off Server Immediate Power Off Server Orderly ShutdownJava SOL Auto Video Recording Triggers ConfigurationEvent List Play Video Video RecordingDownload Maintenance Preserve ConfigurationConfiguration list Check AllRestore Factory Defaults System Administrator User AccessChange Password Password, Confirm PasswordReset Firmware Update Firmware UpdateEnter Preserve Configuration Enter Update ModeImage Transfer Protocol Protocol TypeSource Path Retry CountReset
Related manuals
Manual 87 pages 40.28 Kb