wtitandv~ehble Ihwwx’s {on modelsso t.?quipped)
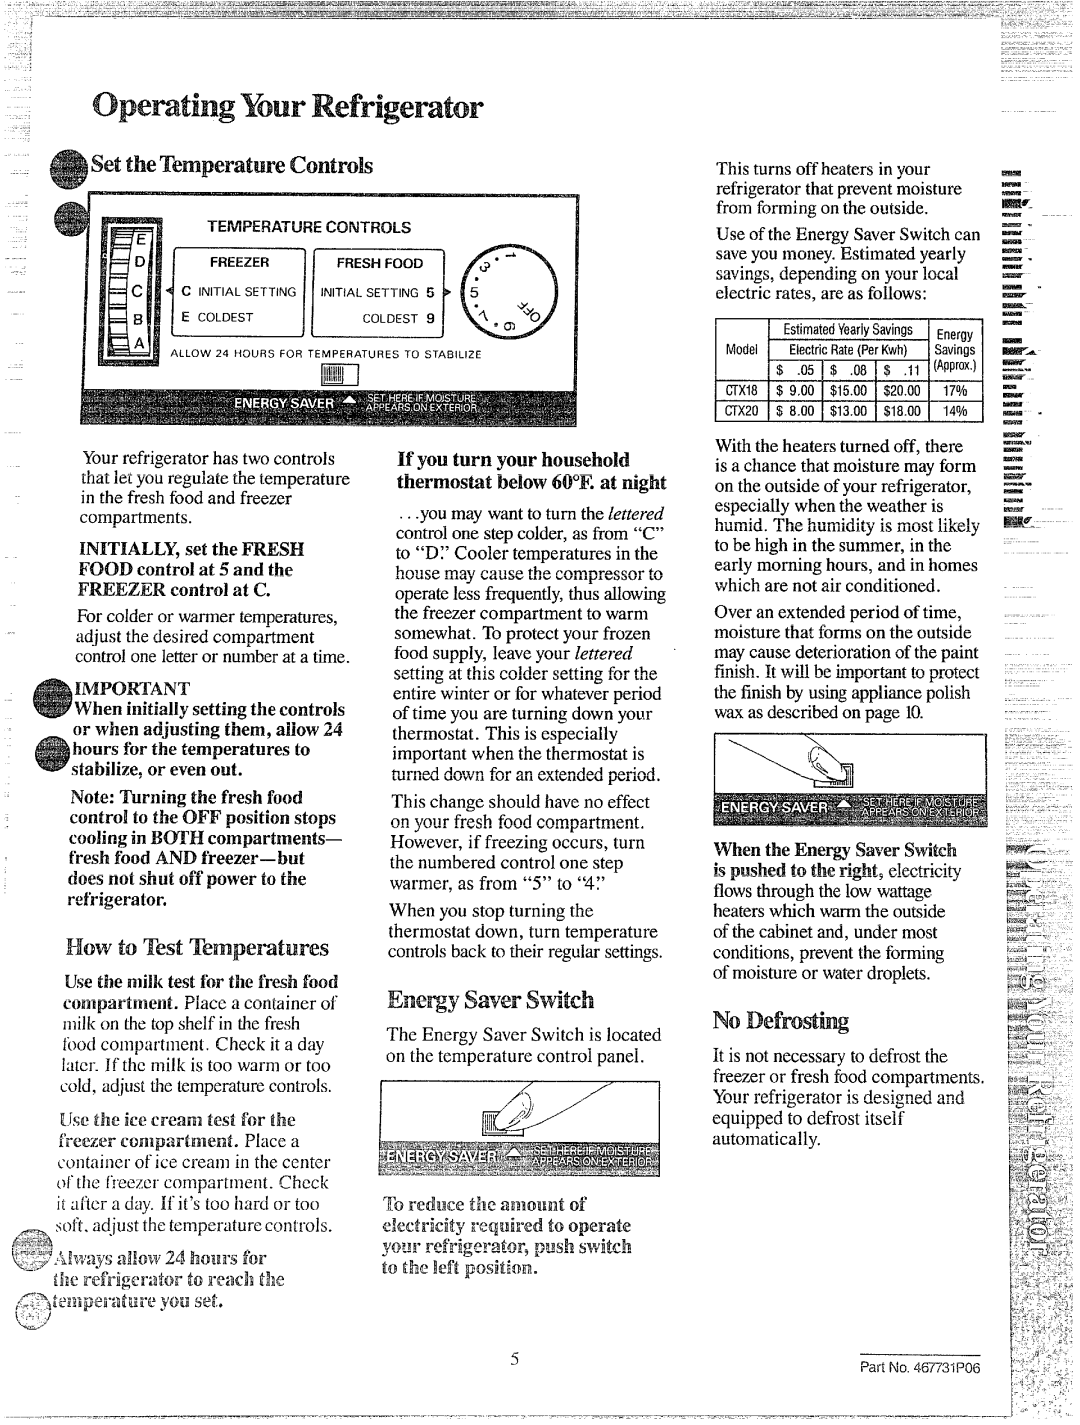
Drawersat the bottom of the fresh foodcompartmenthavebeen speciallydesigned to preserve the naturalmoisture and freshnessof produce.
Seakd and Fresh Drawer
(ODmodelsso equipped)
This refrigerateddrawer is designed to keep unwrapped foods fresh by retainingthe natural moisture content of foods such as:
@Artichokes | ~ Cherries | ~ Plums |
~Asparagus | ~Corn | 0 Radishes |
*Beets,topped ISCurrants C+Rhubarb ~ Blueberries s Greens,leafy o Spinach
~ Carrots | ~ Lettuce | ~ Tomatoes, |
~ Celery | e Parsley | ripe |
| e Peas,green |
|
As in any refrigerated storage area, it is rWWnr?WMkdthat odorous foods be stored
~Broccoli e Cabbage e Parsnips
~ Brussels ~ Cauliflower @Turnips
Sprouts * GreenOnions
Storage time will depend upon the type of food and its condition when placed in the drawer.
Excesswater which may accumulate in the bottom of the Sealed and Fresh Drawer should be poured out and the drawer wiped dry.
The Sealed and Fresh Drawer is pnrtially sealed by gaskets attached to the cover tit the front and back edges. A!ways replace the drawer in this cover and pLd [he drawer
all h \v17J~iil .
DmwerRemoval
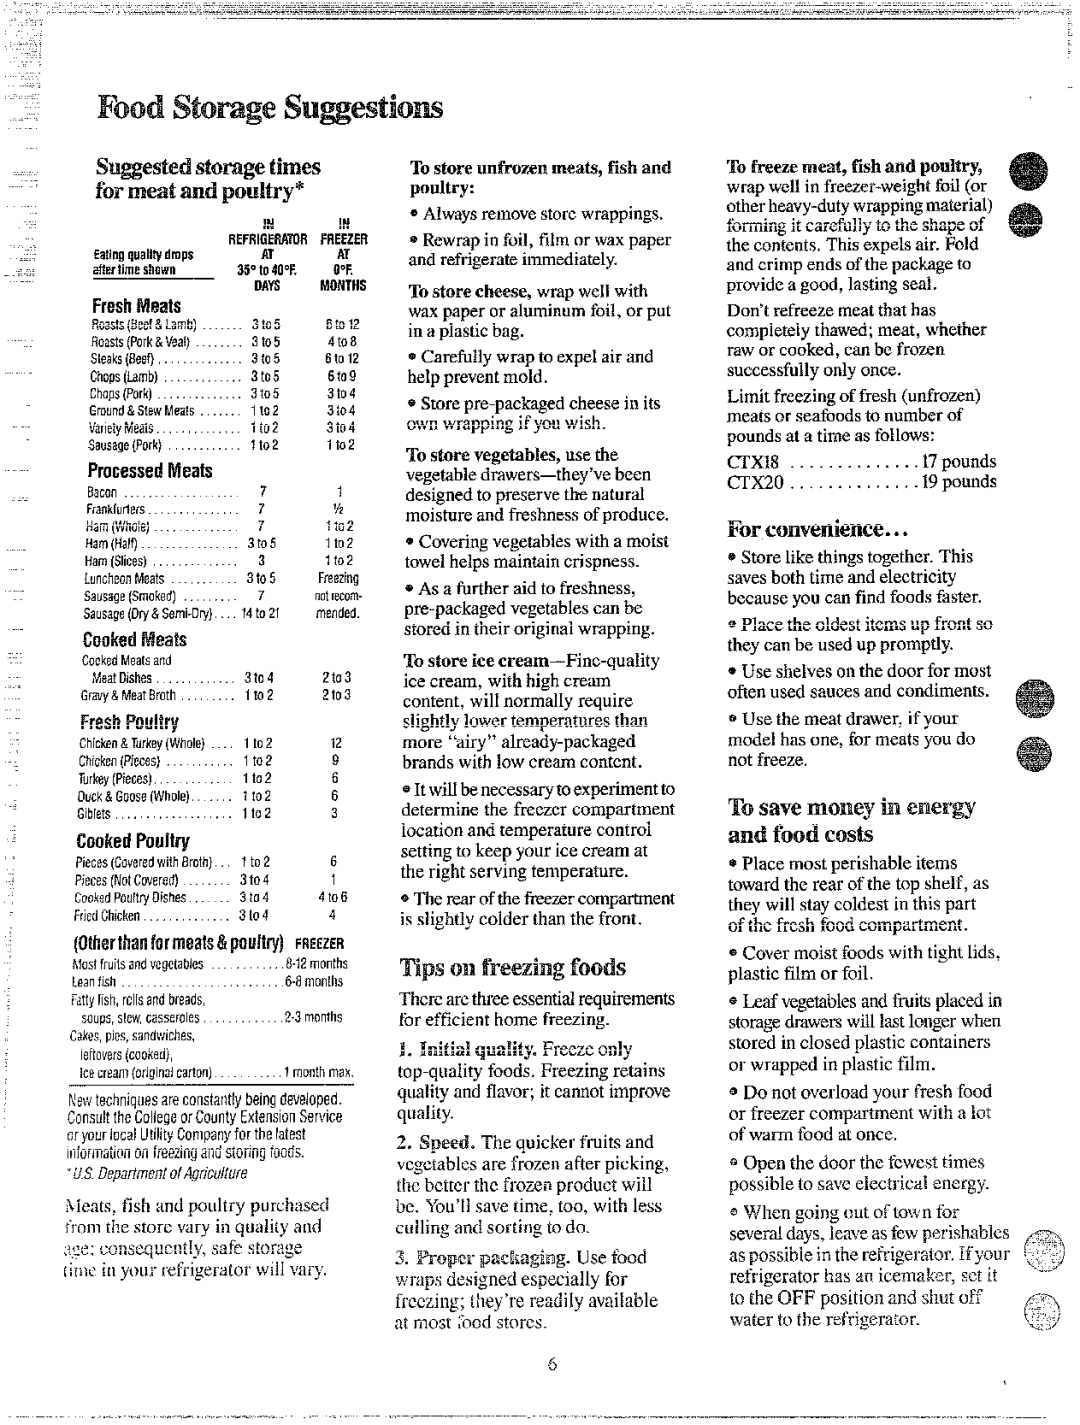
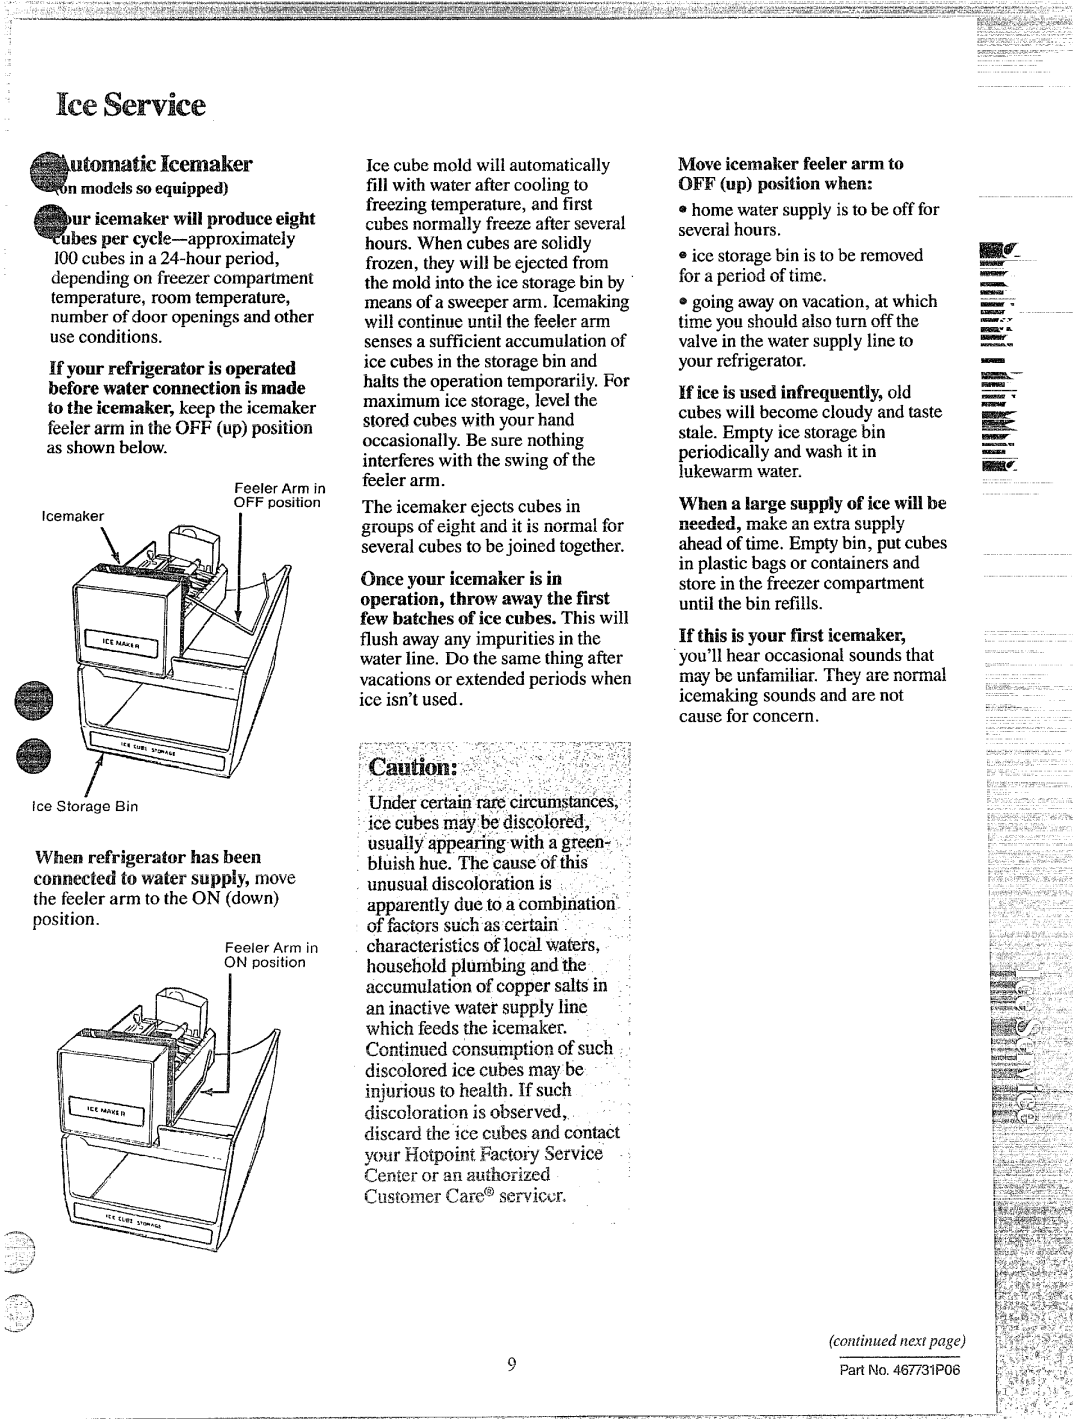
Drawers will stopbefore comingall the wayout of refrigeratorto help preventcontentsfrom spillingonto floor. Drawers can easily be removedby tilting up slightlyand pulling past “stop” location.
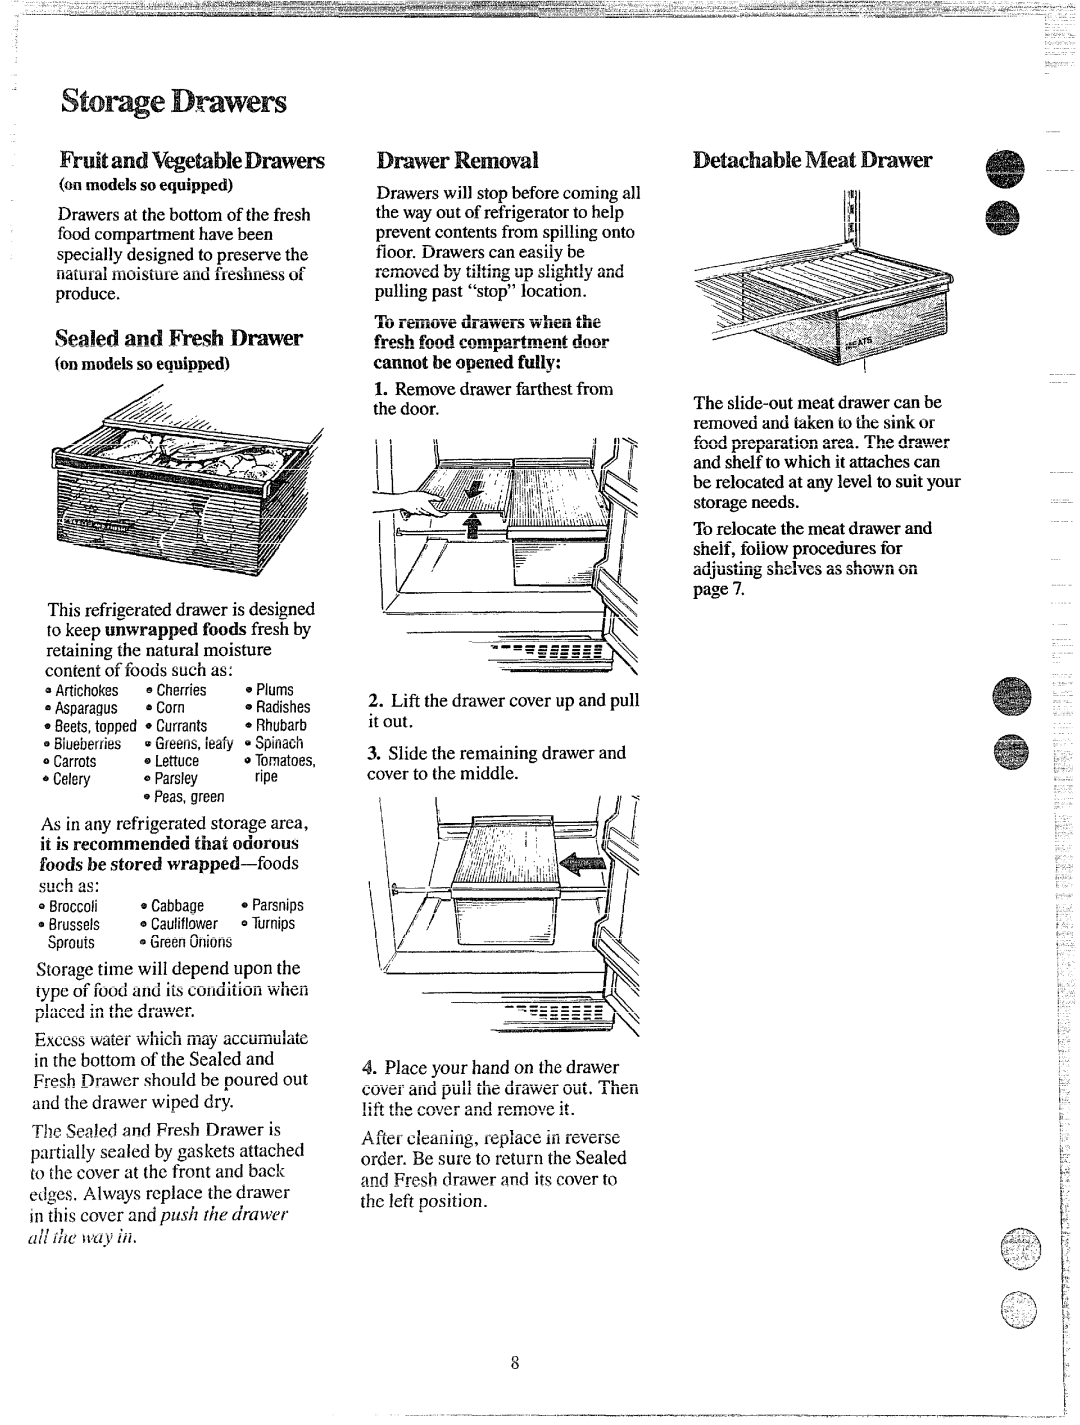
‘lb r’emlovedrawers when the fresh food compartmentdoor cannot be qwned fuliy:
LRemovedrawer farthest from the door.
2.Lift the drawer cover up and pull it out.
3.Slide the remaining drawer and cover to the middle.
4.Place your hand on the drawer cover and pull the drawer out. Then lift the cover and remove it.
After cleaning, replace in reverse order. Be sure to return the Sealed and Fresh drawer and its cover to the left position.
8
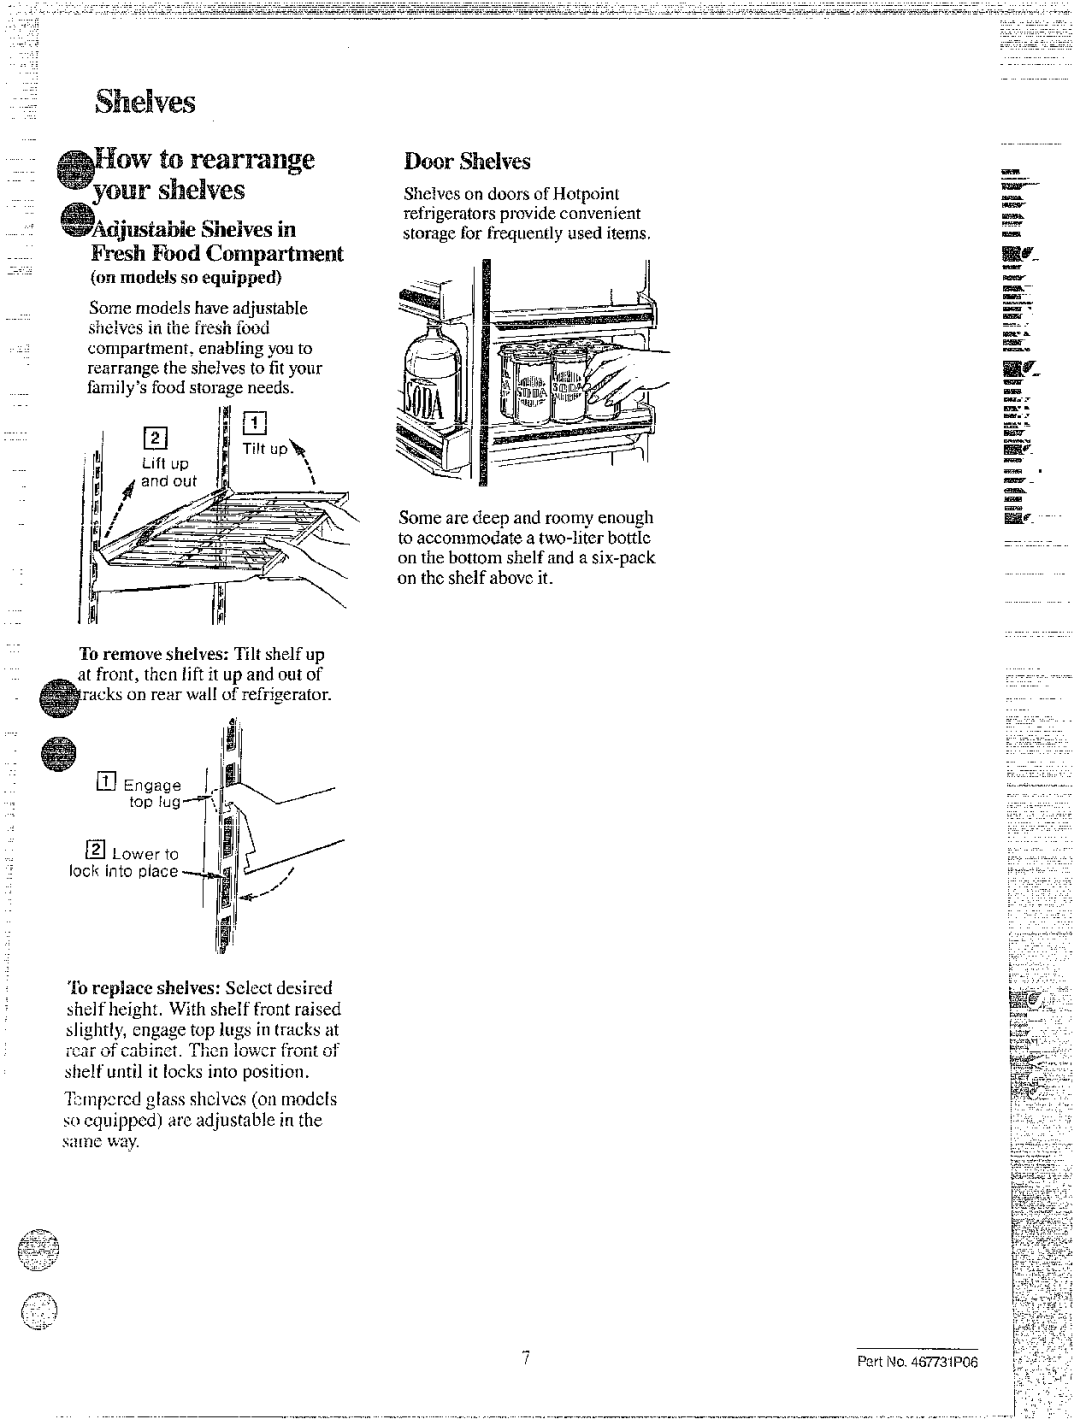
De@chableMeatJIh’’’awer
The
To relocate the meat drawer and shelf, followprocedures for adjusting shelvesas shownon page 7.
|
|
|
| } |
|
|
|
| k |
— |
