Vulcan-Hart GRD65F ML-126738, GRD85F ML-126741, GRD45F ML-126735 Fryer BOIL-OUT Instructions

Page 11

FRYER BOIL-OUT INSTRUCTIONS

CAUTION: Do not run water or boil-out solution through the filter motor or pump. Do not use the filter during boil-out or cleaning of the fryer.

Before cleaning the fryer, read the entire cleaning instructions provided by the cleaning product's manufacturer. Some cleaners will require a boil-out procedure at boiling temperature, and some will not. If your cleaning product company calls for a boil-out procedure, follow their procedures after performing steps 1 through 5. If boil-out is required, but no procedures are stated, follow steps 1 through 23.

1.Turn off the fryer that is to be boiled out.

2.Remove and set aside the filter drawer assembly.

3.Drain all shortening from the fryer to be boiled out. Drain old shortening into a suitable disposal container and discard.

4.Remove the filter screen assembly from the filter drawer vessel and separate the screen into two parts (see page 10).

5.Place the two separated parts of the screen assembly into the fryer tank that is to be boiled out.

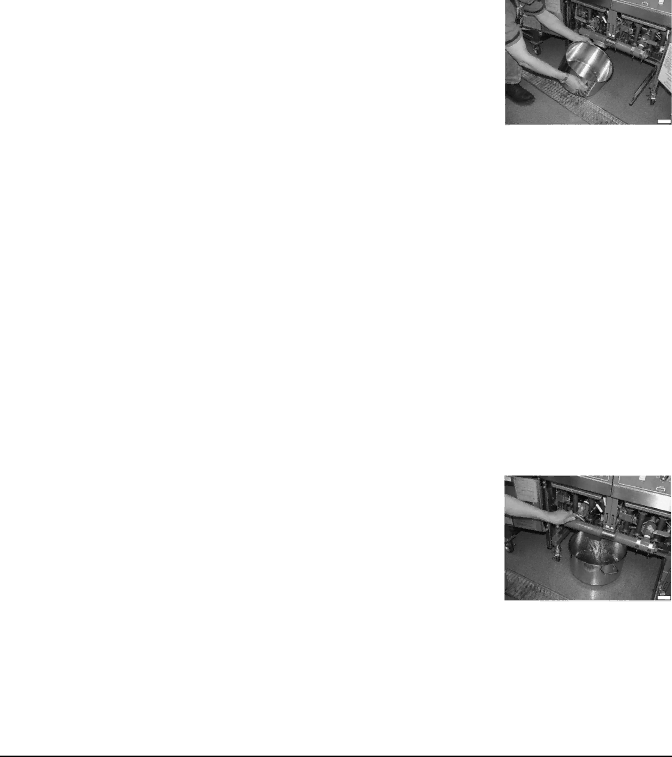
PL-41623

Fig. 20

6.Following the cleaning instructions on page 10, clean the remaining drawer assembly parts.

7.Place a stock pot under the drain manifold opening (Fig. 20).

8.Close the drain valve and fill the fryer tank with hot water to the - Max - fill line.

9.Set the fryer thermostat to 210°F to 225°F (99°C to 107°C) and turn the fryer on.

10.Allow water to simmer.

11.Add boil-out solution and mix thoroughly. Do not boil solution. This may cause the fryer to boil over. Simmer water to dissolve solution completely and achieve the maximum cleaning benefit.

12.Allow the fryer to simmer for 10 to 15 minutes. Watch the fryer to make sure it does not boil over. During the boil-out process, scrub the tank using the cleaning brush provided with the fryer. To avoid damage to the tank finish, do not use a metal brush or scouring pad.

13.Turn the fryer off and allow the boil-out solution to remain in the fry tank for another 10 to 15 minutes. The hot boil-out solution will continue to break down oil residue at water temperatures as low as 180°F (82°C).

14.Open the drain valve.

15.Drain the boil-out compound into the stock pot below the drain manifold opening (Fig. 21). Monitor the contents of the stock pot. The full content of the fryer tank may not fit into the stock pot. If not, close the drain valve when the stock pot is almost full and discard the boil-out solution.

16.Replace the emptied stock pot below the drain manifold opening, and repeat steps 14 and 15 as many times as needed.

PL-41625

Fig. 21

17.Close the drain valve and fill the tank with clean, hot water to the - Max - fill line; drain and discard as in steps 14 and 15.

– 11 –

Image 11
Contents Kleenscreen Filtration System Table of Contents General AssemblyControls and Component Locations Gas Fryers Controls and Component Locations Electric Fryers Operation Filtering Procedure When Using Liquid ShorteningFiltering Procedure When Using Solid Shortening Flush and Discard Filtering TipsPeriodically Remove Excess Debris from the Filter Turn the filter power switch on Fig Cleaning the Filter Drawer MaintenanceFryer BOIL-OUT Instructions Service Troubleshooting